
 Member
Got my new top on today. Word of caution about the tops from Diamondmall. They're really great tops, but there are two versions. There is a version with the plastic retainers built in. There is also a version with no plastic retainers. That version is about $50 cheaper. According to Diamondmall, it's the preferred version because the plastic won't break. That sounds reasonable, but I'm here to tell you that it's probably harder to install the one without the plastic built in. I had to contact cement a reveal flap and use an awl to punch through the fabric. Plus it took a while to get things lined up.
Looking back I'd rather have the one with the plastic sewn in, but this one was manageable. The top went on great with little trouble. However, there is some finesse to this whole process. All in all I think it took about 5 hours total to remove the old one and get this one on.
If anyone in the Fredericksburg, VA area want to change theirs, I'll host a wrenching party as I've got some experience with it now.
Member
You are right, the plastic retainers help tremendously. If anyone is interested, I have a set of original BMW tension straps in the box never installed. PM me if interested.
Member
Hey Fly, just wanted to say thanks for the guide, with it I was able to replace my own and I now have a new top, clear window, and the full power top functions perfectly!
Member
Good point on the two different tops. I almost bought the one without the plastic pieces until I read through the ad a bit more. I just replaced the top on my M3 last weekend. Now that I've done one I could have done it in a single day. Now that I've done 2 I'm sure I could do it in about 8 hours or less. That includes doing my special $5.00 bungee cord fix on the tension straps.Originally Posted by Copenhagen944

I bought the top from diamondmall again this time. Just an FYI about their eBay ad. It says the rear window has a slight green tint like the cars original window. That's not exactly true. It's a clear window but the plastic material appears to have a slight greenish tint if you look at an angle. I specifically wanted a clear window so I'm good with it. The original rear window that came with the car was actually green tint.
Bleed your cooling system http://forums.bimmerforums.com/forum....php?t=1709482The ULTIMATE OEM Alarm/Keyless thread http://forums.bimmerforums.com/forum....php?t=1792200
Member
I'm about to take this on. I removed the headliner a few days ago and realized the the top is glued on and my install came to a halt. Thanks for doing this write up man I'm gonna be getting this finished up this weekend I hope. I too am unsure of why this is so damned intimidating but it really is.
Member
One more note about the top I used both times. It clearly states in the title that it includes the plastic retainers. One thing I learned a long time ago. When you're buying on eBay don't assume anything. If it doesn't say it in the title or description then email the seller. If you aren't 100% sure of the answer then don't buy it. Here's a pic of the ad for the one I bought.
Bleed your cooling system http://forums.bimmerforums.com/forum....php?t=1709482The ULTIMATE OEM Alarm/Keyless thread http://forums.bimmerforums.com/forum....php?t=1792200
Got s38? No turbo needed
I've read multitudes of info on different bungee fixes. Would you mind giving a quick run down on your "special" $5.00 fix. It would be greatly appreciated. I have a brand new set of tension straps that I bought locally second hand but I'm hesitant to remove the top to install them.
Thank you for this thread and your willingness to share your wisdom.
Current Garage:
91 e34 M5 - spoiled & demanding 27 y/o -glanzshwarz
91 850i/6 -another spoiled & demanding 27 y/o- schwarz-gone but never forgotten
06 325i - undeserving, spoiled & demanding 27 y/o daughter's DD-hellrot
03 MINI Cooper S JCW -spoiled & demanding, yet deserving wife's DD - Chili/Panther
05 X3 3.0i -family workhorse - diamond schwarz
12 X5 3.5d - torque monster - space gray metallic
86 GMC Cabellero - Old Faithful 32 y/o DD BMW Support Vehicle
08 Cub Cadet 19HP 46" hydrostatic- yard vehicle
88 Schwinn Sierra - 1WD Off Road Vehicle
e31 & OHC BMW CCA #385540
Member
Ok let's define what we are working with. Bow 6 is the tension bow that rests on the car. Bow 5 is at the top of the window. Bow4 is a short bow that's actually attached to bow 3. The tension straps serve 3 purposes. They keep all the bows the correct distance apart and they have stretchy parts that assist bows 4and 5 to fold forward. If they don't fold forward then the canvas top bunches up and prevents the tension bow from going 100% vertical. If that tension bow only goes 75% vertical then the storage cover will hit the canvas top when it tries to open. This can lead to all kinds of issues from blown fuses to burned out control modules to bent rods. Not good. The stretchy parts also let the tension bow drop gently instead of crashing down onto the storage cover or into the storage compartment.
Follow me so far? Lower your top and stop it just as the storage cover starts to open.if your tension straps are worn out you'll see exactly what I'm talking about. You'll be able to fold 4,5 and the tension bow forward so the cover won't hit. Now look at your new tension straps. You'll see 2 small stretchy sections between the end and the part that attaches to bow 5. You'll see a stretchy part between bow 5 and bow 3. You'll see a small stretchy section between bow 3 and bow 4. Have someone hold the strap right where it attaches to bow 3. Now grab the very end and pull. You'll see it operates like a giant rubber band.
Let's be clear about one thing. The top motor does all the work of lifting the tension bow vertical. The tension straps only purpose is to pull the bows forward as the tension bow raises AND to act as a shock absorber as the tension bow drops. Look at those stretchy parts again. You'll see there isn't much strength there. Certainly not enough to pull up that heavy tension bow. Think about how much work it is if you have to raise it manually with the motors disengaged. Now you'll see they're just not meant for that purpose.
Now for my fix. http://forums.bimmerforums.com/forum...when-it-closes
I've made some changes since I originally posted that but the basic fix remains the same. I've made some improvements to the bungee fix part of that thread.
Last edited by flyfishvt; 09-19-2014 at 07:44 PM.
Bleed your cooling system http://forums.bimmerforums.com/forum....php?t=1709482The ULTIMATE OEM Alarm/Keyless thread http://forums.bimmerforums.com/forum....php?t=1792200
Member
Take another look at your new tension straps and the stretchy parts. On older 15 year old straps like mine those stretchy parts have list all of there elasticity. They are just flat pieces of cloth. All of the bungee fixes or inner tube fixes or stretch Velcro fixes involve wrapping around the bows and tying knots that cause the canvas top to bulge. Mine takes more time but it looks much better. The fix is invisible behind the headliner. First get a 48" flat bungee cord. The ones with the big plastic hooks attached. Round bungee cords don't lay flat enough for this project. If you can find black bungee cords that's even better. I found a pair of cords at Walmart 2 weeks ago for $4.99.
What you will be doing is replacing the stretchy parts with pieces of flat bungee cord. I originally cut out the old parts but I dont do that anymore. Just leave the straps the way they are. The tricky part is determining how long each section of bungee cord should be. I have some guidelines but it's a bit of trial and error. First piece to replace is between tension bow and bow 5. You only need to replace one side. The bungee cord is a lot stronger than the original straps so one side is all you need. Then you'll replace the part between bow 3 and 5 then the part between bow 3 and 4. It's important to replace all 3 pieces. If bow 4 doesn't gold forward then bow 5 can't fold forward and tension bow can't go vertical. Each piece has a specific job to do.
Step 1. OPEN THE TRUNK!!!!! Now use a screw driver to manually close the latch. This will trick the system into thinking the trunk is closed and it will allow you to get into the trunk if the motors don't disengage correctly or completely. Now lower the trunk lid and raise the front of the canvas top. Now disengage the motors and raise the tension bow to vertical. I use a short price of wood to keep it there. Make sure bow 4and 5 are folded forward. Now pull back the headliner so you can see the tension strap between bow 5 and tension bow. Cut the hooks off your bungee cord. Place one end of the cord on the bottom end of the strap next to the tension bow and UNDER the strap. Poke a hole through the strap and the cord and feed a black zip tie up through the cord and through the strap. Feed about half of the zip tie. Do this on one side of the cord. You'll be adding a second zip tie next to it. Now poke another hole like the first one and feed the zip tie down through the strap then the cord. If you did it correctly the square part of the zip tie will be UNDER the strap. If you did it wrong the square part of the zip tie will be on TOP of the strap and it will be trying to poke through the canvas. This creates a bug ugly bump or bulge. Repeat this for a second zip tie. You now have the bottom secured. Now move up to the top of the strap at bow 5. This needs to be attached to the tension bow side of bow 5. With the tension bow vertical take your bungee cord and pull it until it just barely starts to stretch. DO NOT cut it. Repeat the zip tie procedure but only do 1 zip tie to begin with. Now lower the tension bow and make sure there is enough stretch in the bungee cord to allow it to rest about 3" above the tonneau cover. Without pushing on it. If that checks out then install the second zip tie and cut off the extra bungee cord. If you need a little extra length then cut the zip tie and adjust the length a little and reinstall the zip ties.
Last edited by flyfishvt; 09-19-2014 at 07:53 PM.
Bleed your cooling system http://forums.bimmerforums.com/forum....php?t=1709482The ULTIMATE OEM Alarm/Keyless thread http://forums.bimmerforums.com/forum....php?t=1792200
Member
Now we move on to the piece between bow 3 and 5. Once again we will be installing the bungee cord UNDER the existing tension strap the same way we did the other one. Go to where the strap attaches to bow 5 on the side closest to bow 3 and attach the end of the bungee cord to the under side of the tension strap. Just like before so the square part of the zip tie is under not on top. Once again use 2 zip ties side by side. Once again with the tension bow vertical and bow 4 and 5 folded forward bring the bungee cord up to where the strap meets bow 3. VERY IMPORTANT.....run the cord UNDER bow 4. Now pull the bungee cord kind of tight. The trick I used was to pull it so there was still about 3" of stretch left before the cord was stretched to its max. Now attach the cord and use only 1 zip tie. Test it out. If it looks good then add a second zip tie and cut off the extra cord. If everything went according to plan you should have a nice piece left over for the last part.
Let's take a break.
Now for the last step. The cord from bow 3 to 4. It's a short piece. It will be installed under the existing tension strap. You should be pretty good at attaching the cords by now so the only thing left is to determine the length of this piece. Attach the cord to the strap near bow 3. Bow 4 is probably folded right under bow 3. Move bow 4 away to its normal position as if the top is up. Now move it about halfway back towards bow 3. Stretch the bungee cord so it stretches the cord about 1-2". Cut and attach it like before.
Now go to the other side and install the piece between bow 3 and 5 and between bow 3 and 4. If you have extra you can install a piece between tension bow and bow 5 but you probably don't need it.
Test the top when you're done. You should see all the bows pull forward and the tension bow should easily go 100% vertical. When the tension bow lowers, it should gently lower itself instead of crashing down.
Last edited by flyfishvt; 09-19-2014 at 07:58 PM.
Bleed your cooling system http://forums.bimmerforums.com/forum....php?t=1709482The ULTIMATE OEM Alarm/Keyless thread http://forums.bimmerforums.com/forum....php?t=1792200
Got s38? No turbo needed
Thanks Flyfish, your instructions are very clear and understandable. Now I just have to get daughter to the house for a few hours, (she lives about 35 miles away), in order to give this a shot.
One more quick question regarding the tension straps in my possession. The thread with tension strap installation instructions has invalid links and has no useful tension strap info. Does the top canvas have to come off to install the straps, or can it be done by dropping the headliiner?
Current Garage:
91 e34 M5 - spoiled & demanding 27 y/o -glanzshwarz
91 850i/6 -another spoiled & demanding 27 y/o- schwarz-gone but never forgotten
06 325i - undeserving, spoiled & demanding 27 y/o daughter's DD-hellrot
03 MINI Cooper S JCW -spoiled & demanding, yet deserving wife's DD - Chili/Panther
05 X3 3.0i -family workhorse - diamond schwarz
12 X5 3.5d - torque monster - space gray metallic
86 GMC Cabellero - Old Faithful 32 y/o DD BMW Support Vehicle
08 Cub Cadet 19HP 46" hydrostatic- yard vehicle
88 Schwinn Sierra - 1WD Off Road Vehicle
e31 & OHC BMW CCA #385540
Member
Someone else will have to answer that. I've never replaced the tension straps
Bleed your cooling system http://forums.bimmerforums.com/forum....php?t=1709482The ULTIMATE OEM Alarm/Keyless thread http://forums.bimmerforums.com/forum....php?t=1792200
Got s38? No turbo needed
If I ever get around to it, I'll document the tension strap installation for posterity.
Current Garage:
91 e34 M5 - spoiled & demanding 27 y/o -glanzshwarz
91 850i/6 -another spoiled & demanding 27 y/o- schwarz-gone but never forgotten
06 325i - undeserving, spoiled & demanding 27 y/o daughter's DD-hellrot
03 MINI Cooper S JCW -spoiled & demanding, yet deserving wife's DD - Chili/Panther
05 X3 3.0i -family workhorse - diamond schwarz
12 X5 3.5d - torque monster - space gray metallic
86 GMC Cabellero - Old Faithful 32 y/o DD BMW Support Vehicle
08 Cub Cadet 19HP 46" hydrostatic- yard vehicle
88 Schwinn Sierra - 1WD Off Road Vehicle
e31 & OHC BMW CCA #385540
Member
My guess is that the edges of the canvas top can be folded back enough to swap those straps. I was hoping someone would chime in. The straps are attached to each bow with small screws. You'll need a short stubby Phillips. I can't remember how they are attached to the header but I have to believe it's the same.
Bleed your cooling system http://forums.bimmerforums.com/forum....php?t=1709482The ULTIMATE OEM Alarm/Keyless thread http://forums.bimmerforums.com/forum....php?t=1792200
Member
It's certainly possible, but it's a big pain without the top off. I didn't have to contemplate it with the top on because I was replacing both at the same time, but I'll take a look when I put my top up in the morning and post back.
Member
It can be done, but is as painful as removing the whole top. You have to release the sides of the top from front to back. The straps are secure to the header by a couple of metal pins that come with the straps. The rest of the bows they re small bolts except for the bow 6 they are aluminum metric rivets. I have some of those if you need them.
The straps should also have small flaps to cover the bolt heads so they don't rub against the underside of the top and end up making a hole in it.
Member
Yes they're screwed into near the header, but there's loops if I recall, from the front of the tensions straps that small metal pins go through and then anchor into the top of the headliner. I'm not sure if you can get to them with the top up or not, I haven't tried.
Member
Great DIY went through it all and got my top on in about 6 hours...(I got the diamondmall top without the plastic)..only part I don't understand is at the end for the bow straps you say to put the short fabric part one on first......how in the world are you suppose to put the long one on after you put the shorter on one?????? There is not way to wrap the long piece around the shorter unless it is taped to the top.
Not complaining just trying to under stand, your directions were awesome until I got there. Just do not see how that will work, I am going to be using High Heat Contact Cement to put mine on and not tape.
And thank you for the DIY because diamondmall didn't send directions or anything with the top.
Member
I used 2 sided tape that I got at the hardware store. It was super thin stuff. I attached a strip of tape to the bow and wrapped the cloth part of the top around it. Then I put tape on again and wrapped the second part around it. Luckily the ribs for the head liner are plastic and they can stretch over all that material.
I did a second top a few weeks ago. Much faster this time. Instead of tape I used headliner contact cement. You have to be very careful when you spray it but the end result is better than tape. Much less work too.
Bleed your cooling system http://forums.bimmerforums.com/forum....php?t=1709482The ULTIMATE OEM Alarm/Keyless thread http://forums.bimmerforums.com/forum....php?t=1792200
Member
flyfishvt thanks' so much for the feedback, think I understand now. Very much appreciated.
Member
The EZon top recommends replacing a spring to avoid a possible pinching of the top fabric, part 54348201077. Has any one looked at this and considered replacing it?
Member
I installed my top yesterday and wanted to share a few things I noticed. My car is a 96 318 with a manual top.
I found the factory rivets to be 4mm and 3mm, so a 3/8 was too large (5mm) and I thought about drilling out all the holes but worried I might invite rust at those points. I went to home depot and found 5/32 (4mm) rivets and 1/8 (3mm) available. Also 1/4" of grab worked OK in most places, but I could not get the two lower C-pillar molding rivets to grab with that length. I went to HD and picked up 1/2 and that worked fine. Now I need to be concerned if the back of the rivet might interfere with a folding top.
Everything went well for me and I had the most difficulty putting back rubber seals. On the rear bow seal, I had to loosen all the philips screws on the retainer to push the seal in all the way around. Maybe it would have made sense to use some soapy water and I woudn't have had to deal with numb thumbs today.
I also found the EZ-on top looked great, but the only isuse I found was the seams on top of bow 2 and 3 that held the listings ( flaps that are glued to the bow) were slightly behind the bow. I could still glue them on, but I made the mistake of pulling them tight and now I realize that my headliner will not properly clip onto the bow from underneath. I called EZon and the support person said the misalignment was not a big issue and they were only there to keep the top from ballooning on the highway. He suggested wrapping the listing fabric to the contour of the bow rather than pulling tightly on the side that is behind the bow. Hope that makes sense.
I also didn't see the spring that was mentioned in my previous post, so it may be an automatic/semi-automatic thing.
Member
Many thanks to all the threads on top replacement on this forum - couldn't have done my replacement without all of them!
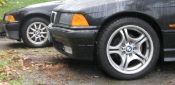
I replaced my top, tension straps and headliner last weekend and have an "almost" new car - 98 M3 with 301k miles. Bought my parts from TopsOnline for $987. I went with the Black Haartz Stayfast top and non-original black headliner, which looks fine to me. Definitely a 2 day job to do it - and you need an extra hand during key parts (e.g. rivels in rear window channel). For the hard to reach rivets (ps, 5/32), my trick was to use a small nut and 1-2 thin washers (#6 i think) over the rivet - i also used the back of a screwdriver to open the channel to fit the rivet gun in. Definitely the hardest part of the whole gig. Old/new photos below...
IMG_0003.jpgIMG_3271.jpg
Member
The only tops I've dealt with are the ones with relief pockets. On those tops there are 2 springs on each C pillar. One keeps tension on the headliner dog ears. The other is attached with string to the relief picket. Replacement tops do not come with relief pockets and no way to reuse that spring.
Bleed your cooling system http://forums.bimmerforums.com/forum....php?t=1709482The ULTIMATE OEM Alarm/Keyless thread http://forums.bimmerforums.com/forum....php?t=1792200
Member
Nice work. My 2 e36s aren't worth investing in new headliner and straps. I used pretty much the same method as you when I did my rivets. I cut a short piece of 1/4" copper tubing and used it as a spacer.
Bleed your cooling system http://forums.bimmerforums.com/forum....php?t=1709482The ULTIMATE OEM Alarm/Keyless thread http://forums.bimmerforums.com/forum....php?t=1792200
 Posting Permissions


 Reply With Quote
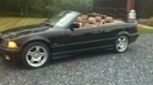
Bookmarks