
 Member
Looks great!
OLD
E30
636whp
1/4 mile: 10.91@144.38
http://www.youtube.com/watch?v=L_f7fUVqblI
NEW BUILD
335d
520whp
635wtq
120.51mph trap speed
Member
Love it all, but especially the 3d printed fuel line holders! Great idea!
--Peter
Member
Nice.
Member
Could you make me some of those fuel line holders!?
u owe my mule an apology
Originally Posted by futureroadracer
 thanks all!
- - - Updated - - -
I can but I have no idea what will fit in an e36 so you will have to draw something up for me.
- - - Updated - - -
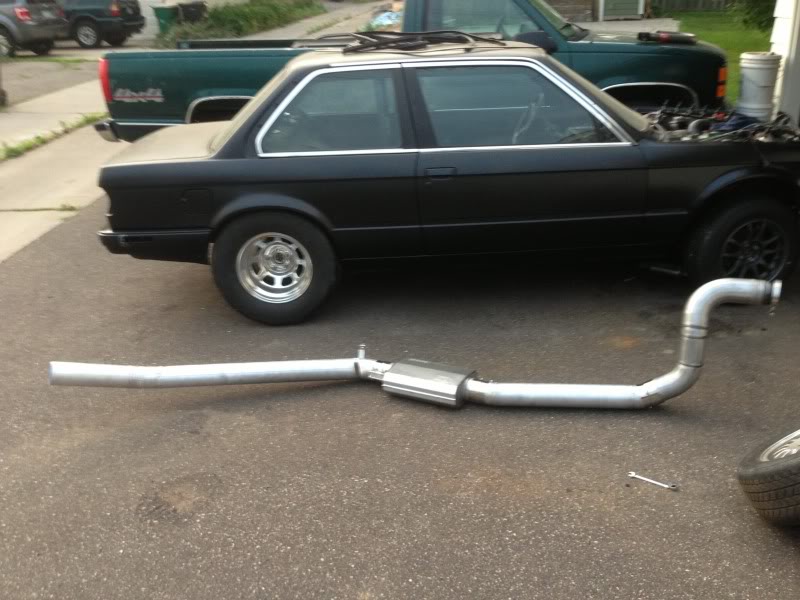
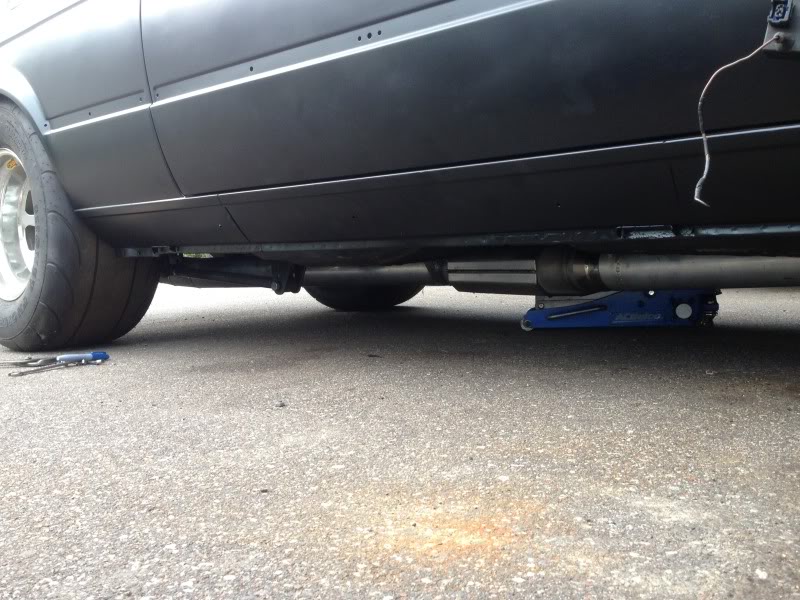
Spent the evening building the exhaust. Allmost finished but I got tired of working in the dark and fighting mosquitoes. Much to my surprise I actually do have room to get the exhaust under the axle without ground clearance issues so I will be running the exhaust out the back after all. 4 inch exhaust sounds massive but once you start working with it it really isn't too bad, assuming you have ground clearance. I really love this aluminum exhaust thing. It looks really nice and is stupid light. We'll have to see how it holds up but so far I highly recommend it.
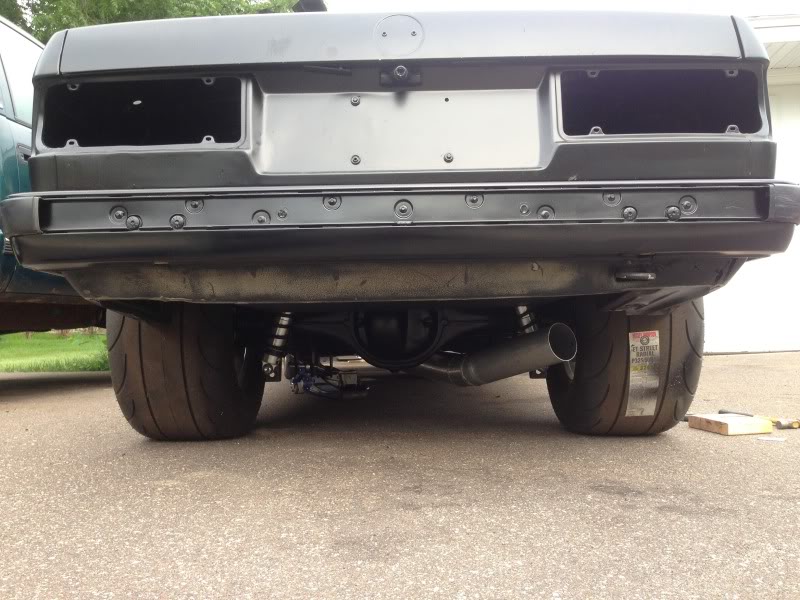
Because of the pinion offset in the rear end there is more room to go under on the passenger side so I will go under between the pumkin and the 4 link bracket and exit out the side right behind the passenger side tire. I really wanted to go out in front of the rear axle but the more I got to thinking about it I started to worry about dumping water out the exhaust right in front of the tire while staging. I've heard that aluminum exhaust tends to condense alot of water due to how well it dissipates heat. Plus if the car ends up being too loud I have room for a bullet muffler right in front of the rear end.
Last edited by someguy2800; 07-12-2018 at 12:39 PM.
86 325es, 2.8L m50, S476sxe, ProEFI 128 ecu, e85, solid rear axle, TH400 trans, 28x10.5w slicks, zip ties, popsicle sticks, tape
best time 9.06 @ 151.8 mph, best 60 foot 1.30
Member
I expect in future I will get some more cash to play with ,going to having making me pistons and cams! I know it really needs more length but what do you really think of my lobe centers? I came up with these number by playing with desktop computer dyno.
Member
I was referring to the fuel line holders.
Luchador
Perry, what material/method are you using for your 3d parts. Just curious, you probably use different materials in different areas.
u owe my mule an apology
I know. The ones I made fit over the studs in the floor than an e30 has to hold the stock fuel lines. I have no idea how the fuel lines are held up on an e36, mine probably don't fit.
- - - Updated - - -
Its usually whatever machine is open at the end of a day. We have a couple different ABS materials, a couple polycarbonate, a PC ABS blend, Ultem, and Radel. The white tabs in the pictures are polycarbonate, and the tan ones are ultem or radel. I build several million dollars of 3d printed part a year. Here are some interesting projects I've done.
We made 4 sets of these in 2 weeks for absolute vodka. They are made in about 13 pieces each.
http://www.jcdecauxna.com/innovate/n...bred-victory-0
full size statue of thomas jefferson
http://news.cnet.com/2300-13772_3-10011411.html
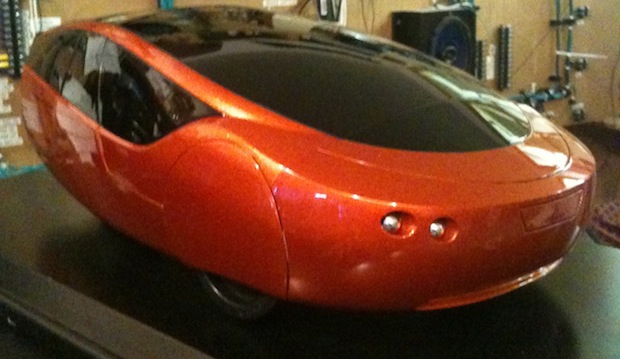
urbee, the worlds first 3d printed car. I helped weld the body panels together
http://www.wired.com/autopia/2013/02/3d-printed-car/
This is a fun one. 3d printed intake manifold for the U of M formula SAE car. I just did some post processing on this. got to drive the car, very fun. That's not me in the picture by the way, just some kid from the school.
Most of what I make I can't show people and much of it you wouldn't know what it was if you were holding it in your hands. I've made parts for half of the OEM auto manufacturers, every nascar team, most of the aerospace companies in the country, nasa and space systems, and every branch of the military. Everything from artwork, consumer products, surgical tools, functional parts that fly in fighter jets and satellites, gun parts, deep water submersibles, parts for nuclear reactors, missiles, helicopter gear cases, fighter jet weapon stanchions, wind turbine blades, parts that make maxi pads, computer enclosures, 4 wheeler fenders, sex toys, air raid sirens, human skulls, bike helmets, you name it, I've probably built it for someone. As for car parts I've built entire engine blocks, cylinder heads, functional intake manifolds, turbo housings, calipers, fenders, bumpers, grills, dashboards, functional air cleaners and brake ducts, oil filter housings, headlights, instrument clusters, transmission cases, entire functional HVAC systems, steering wheels, wheels, intercoolers, and even hans devices. Its cool stuff.
Last edited by someguy2800; 04-08-2016 at 03:03 AM.
86 325es, 2.8L m50, S476sxe, ProEFI 128 ecu, e85, solid rear axle, TH400 trans, 28x10.5w slicks, zip ties, popsicle sticks, tape
best time 9.06 @ 151.8 mph, best 60 foot 1.30
u owe my mule an apology
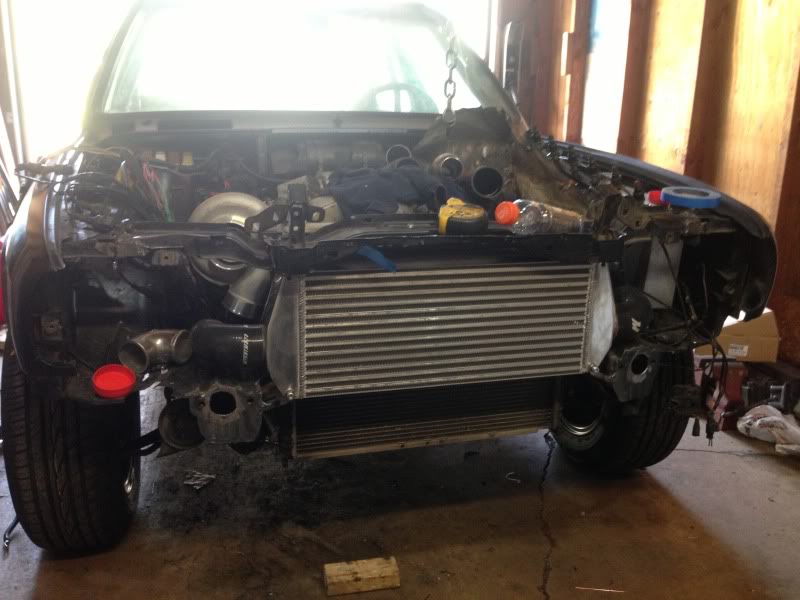
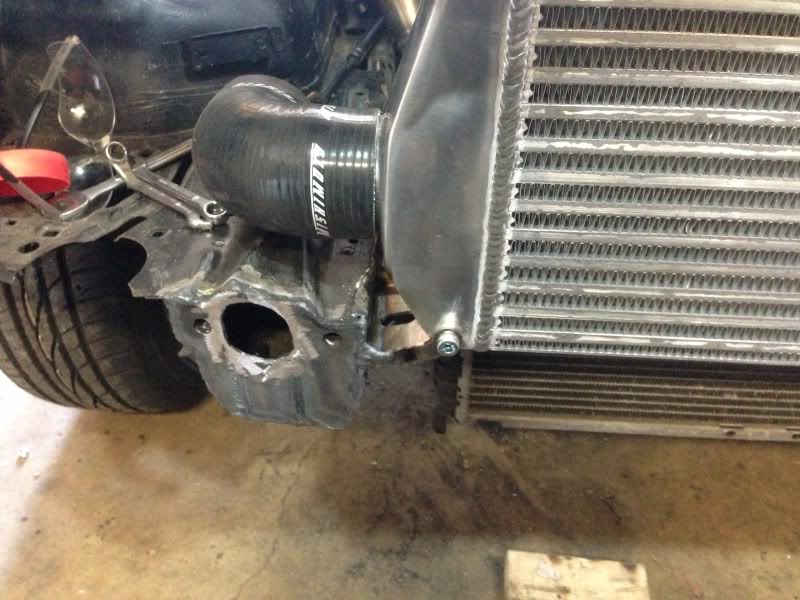
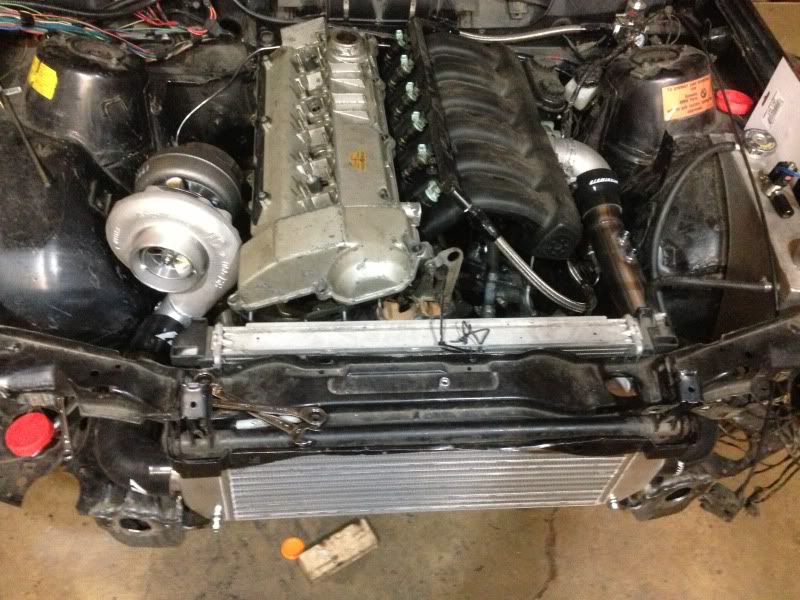
I got my new intercooler yesterday and got it in today. It is a perfect fit. This is the best fitting intercooler I've ever seen on an E30. Unlike an e36 M3, an e30 have very little airflow opening in the spoiler. So your options are either run a big intercooler on the bottom and hack up the air dam to open up some airflow to it, or try to get one behind the kidneys, which is the option I prefer. Unfortunately its very difficult to find an off the shelf intercooler that fits halfway decent in an E30. This Vibrant fits perfectly. Its a bit small at 22x9.25x3.25 core size, but at least 2/3rds of it will be in the direct airflow path behind the front grill. I did notice that it has a very low fin density in an out, so it will be interesting to see how it flows and the thermal efficiency.
here is the exhaust. 4" aluminum .062" wall. I ran out of tubing but I plan to add a turndown to the end.
I working on the charge piping now. I also disassembled my throttle body to weld an elbow on it. Anybody ever tried this? The throttle body did not weld very well at all. Tons of porosity and contamination in it. I'm guessing its just because of the oil soaked into the pores of the casting. The only thing I found to work well at all was to turn the balance to like 40% negative 60% positive, and turning the frequency down to like 30 hz. Then I could at least burn it out and fill it in.
Last edited by someguy2800; 07-12-2018 at 12:46 PM.
86 325es, 2.8L m50, S476sxe, ProEFI 128 ecu, e85, solid rear axle, TH400 trans, 28x10.5w slicks, zip ties, popsicle sticks, tape
best time 9.06 @ 151.8 mph, best 60 foot 1.30
Stay out of trouble.
Straight up race car.
Sorry if I missed it but what are you planing to run in the 1/4?
u owe my mule an apology
nope, street car. If it was a race car it would be running straight methanol with a belt driven fuel pump, no intercooler, a spool, a lenco, the downpipe would be going out the fender, and it would be on wrinkle walls instead of radials. Should run 9's.
- - - Updated - - -
- - - Updated - - -
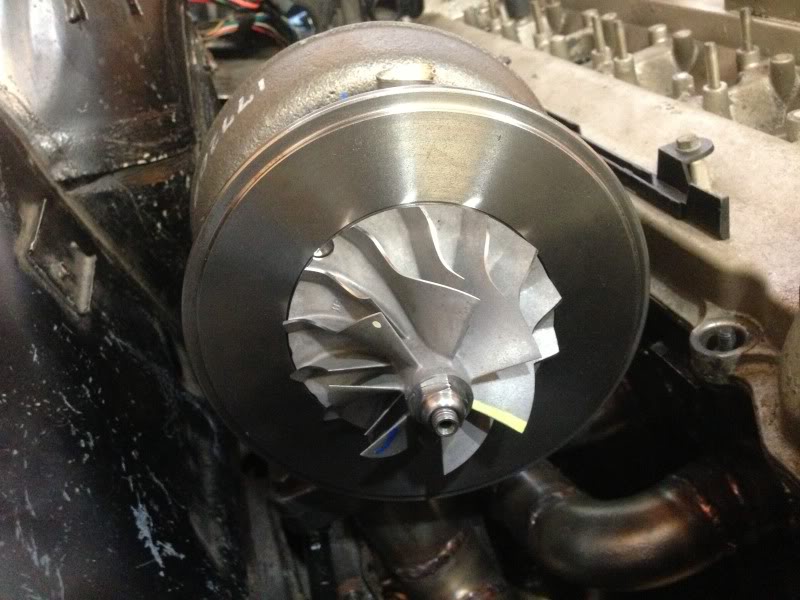
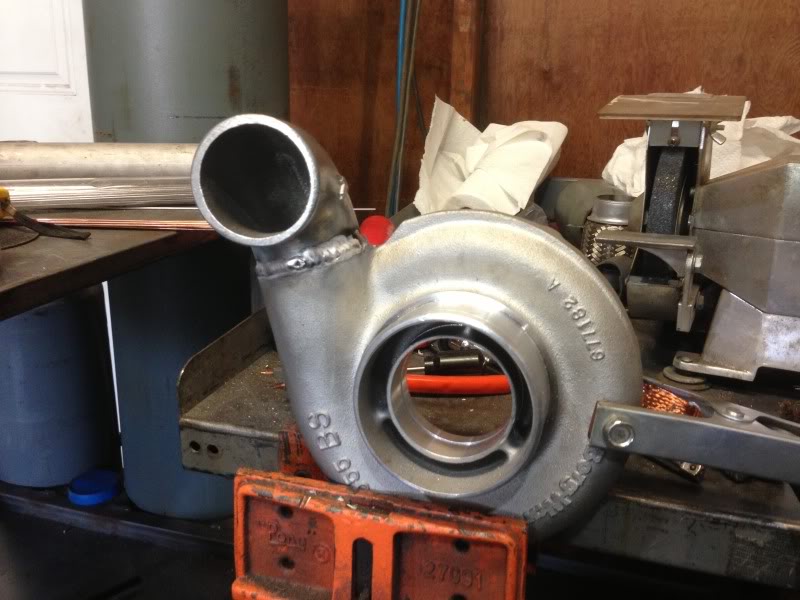
In case anyone wanted to know what the blade aero looks like on an s366
- - - Updated - - -
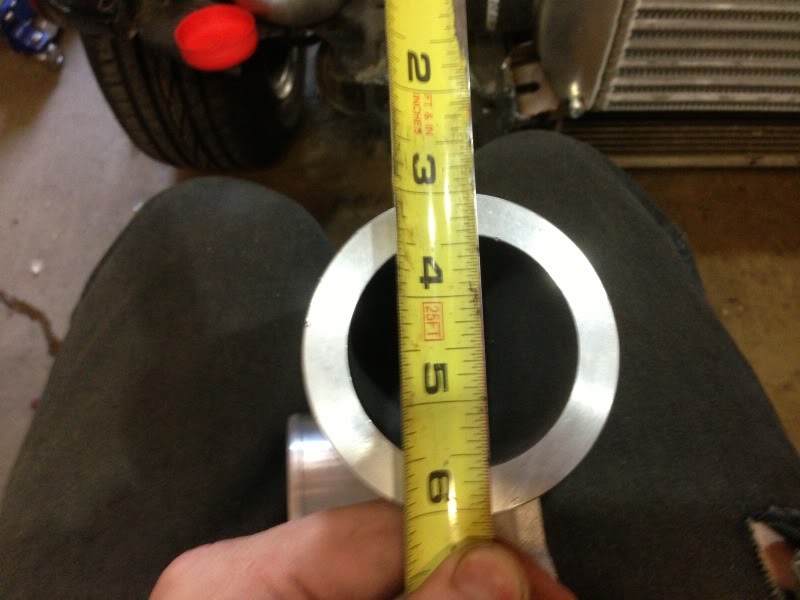
I really hate it when people do stupid shit like this. The flange OD is 3 inches, but the ID is only 2 3/16. Morons
- - - Updated - - -
Here's another shot of the intercooler mounting. Vibrant intercoolers come with little stainless steel mounting brackets and a hole in each corner of the end tanks. I planned to actually mount the intercooler to the radiator support so the two could be removed as a unit but now that its together i don't think it's nessesary. The radiator support actually rests on top of the intercooler and its quite solid now. Plus the radiator support is like tin foil thin so its a real pain to weld on
the compressor housing welded quite nicely. Good casting. As well as i can weld anyway. I'm far from pro
- - - Updated - - -
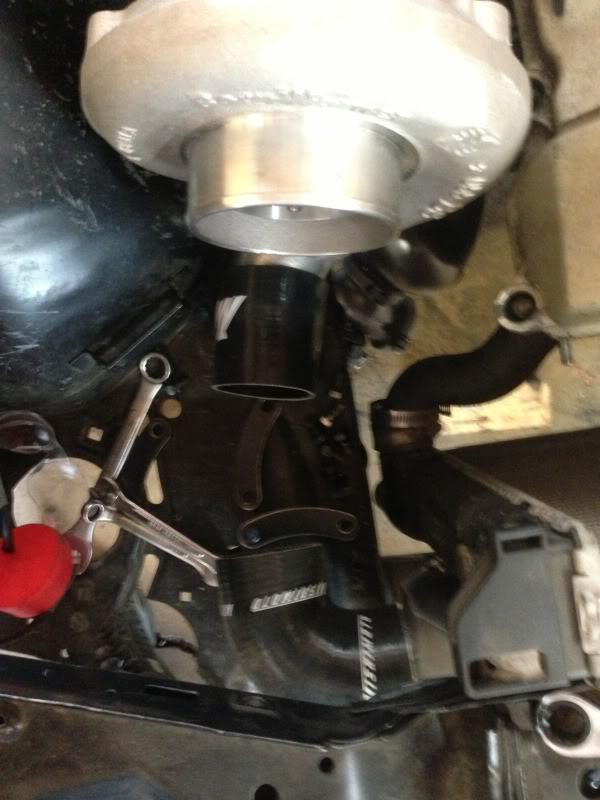
charge pipe on this side will be easy. I'll probably put the bov on this sesction
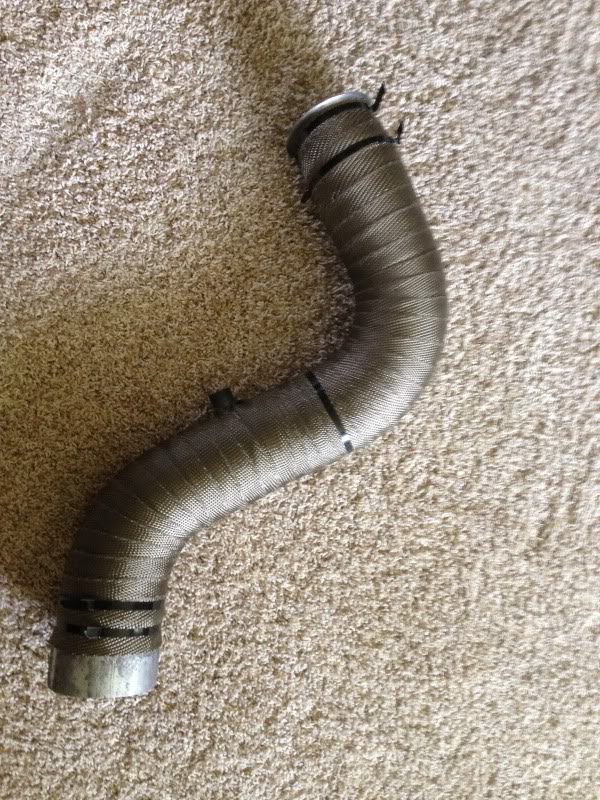
I did this last night. I really like the DEI titanium wrap. It looks really nice and its super easy to work with sense it doesn't have to be wrapped wet. The biggest downside is it isn't very tough. It snags and tears on everything it touches.
- - - Updated - - -

Last edited by someguy2800; 07-12-2018 at 12:46 PM.
86 325es, 2.8L m50, S476sxe, ProEFI 128 ecu, e85, solid rear axle, TH400 trans, 28x10.5w slicks, zip ties, popsicle sticks, tape
best time 9.06 @ 151.8 mph, best 60 foot 1.30
Member
Can those ties really hold on well with so much heat?
u owe my mule an apology
they are stainless steel
86 325es, 2.8L m50, S476sxe, ProEFI 128 ecu, e85, solid rear axle, TH400 trans, 28x10.5w slicks, zip ties, popsicle sticks, tape
best time 9.06 @ 151.8 mph, best 60 foot 1.30
Stay out of trouble.
BUT R U SURREE?
j/k
#1 o-ring fan
Gorgeous updated pics and I love all the information/pics regarding your 3D Printing Career.
Where have I been? Astral projecting.
u owe my mule an apology
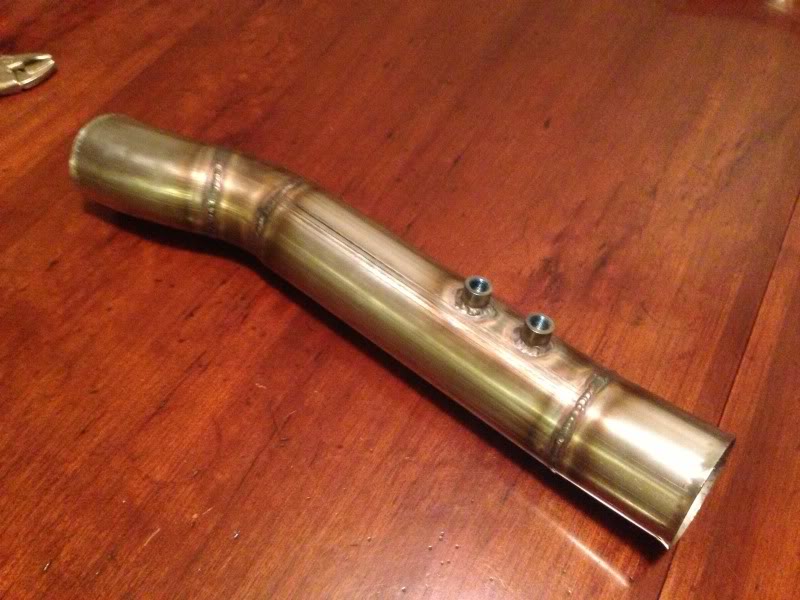
I've been slacking off all day but did finish the charge piping
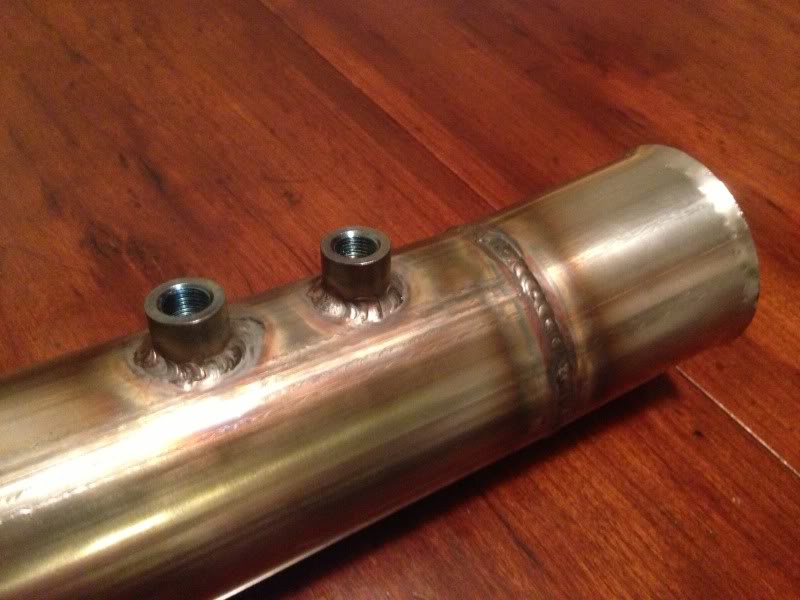
here is the cold side. The two NTP ports are for water meth nozzles.
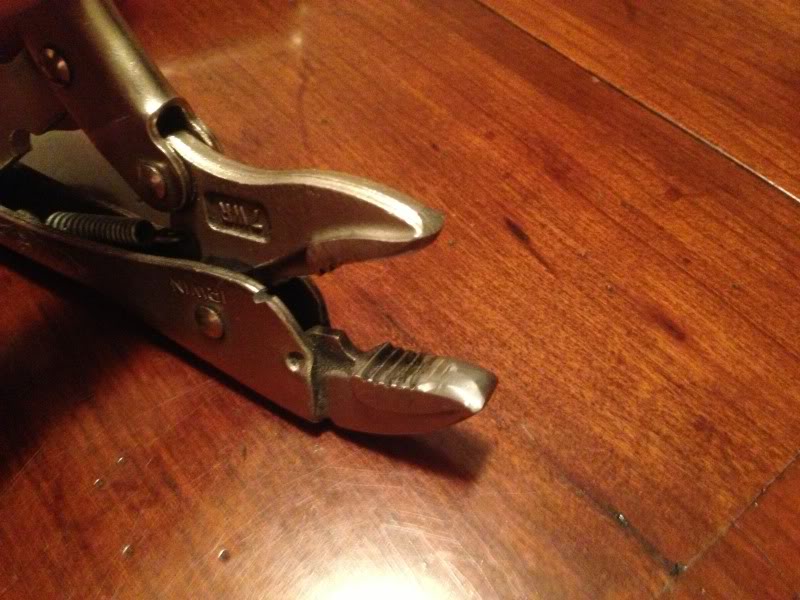
Here is a tip for keeping the silicone couplers from blowing off under boost. Instead of welding a bead on the end just flare the ends of the tube slightly. Much easier and it is a much smoother transition in and out of the couplers. Silicone couplers expand and blow up a bit under boost, so it you just have a straight square end on the pipe, it actually exposes a sharp edge in the flow path once the silicone expands from around the pipe, and its even worse if you either weld a raised bead or roll a bead back from the edge.
To do this just take a vice grip pliers and round over the jaws with a flap disk. Set the adjustment screw so it just barely won't cam over when you clamp down on the end of the tube. Grip down on the end of the tube and bend it. Even 16 ga steel will bend easily by hand. Work your way around the tube bending every 3/16" or so. Takes about 3 minutes per end. Once done touch it up with a flap wheel on the inside and outside of the flare to round over any sharp edges.
Last edited by someguy2800; 07-12-2018 at 12:48 PM.
86 325es, 2.8L m50, S476sxe, ProEFI 128 ecu, e85, solid rear axle, TH400 trans, 28x10.5w slicks, zip ties, popsicle sticks, tape
best time 9.06 @ 151.8 mph, best 60 foot 1.30
Member
So sick.. almost there
u owe my mule an apology
Another 35 lbs bites the dust. The stock fan is useless anyway. I'll probably mount a couple cheap fans to the rollcage with clips

Last edited by someguy2800; 07-12-2018 at 12:48 PM.
86 325es, 2.8L m50, S476sxe, ProEFI 128 ecu, e85, solid rear axle, TH400 trans, 28x10.5w slicks, zip ties, popsicle sticks, tape
best time 9.06 @ 151.8 mph, best 60 foot 1.30
Stay out of trouble.
Race car, don't deny it. Accept it.

Member
That is a meaty looking evaporator.
u owe my mule an apology
I'll settle on streetable race car. I could use that $10m bill right about now! Or a coupon to summit racing that says "gimme whatever I want for life"
86 325es, 2.8L m50, S476sxe, ProEFI 128 ecu, e85, solid rear axle, TH400 trans, 28x10.5w slicks, zip ties, popsicle sticks, tape
best time 9.06 @ 151.8 mph, best 60 foot 1.30
Luchador
Nice, removing the heater box frees up tons of room! I gutted mine and sealed it up. Its now a fan only for defrost, which removes most weight but I wish I could get rid of the bulk too!
At my work we have a SLA machine and FDM. The SLA machine is huge. We have a printed Cummins ISX 15L diesel for display. It has all the rotating assembly so you can turn the crank and watch the pistons move, ect. Pretty cool. We dont use printing much for production parts, but I wish we looked at it more as an option.
Do you have metal laser sintering? Thats awesome!
u owe my mule an apology
we are planning to add that in the near future. We used to have an arcam sintering machine which would sinter metal powder using an electron beam. The part were rather crappy though. I would love to see the cummins motor!
this is the biggest part we've ever done, full size landing gear for a comercial aircraft
- - - Updated - - -
here is another fun one we did for a trade show
86 325es, 2.8L m50, S476sxe, ProEFI 128 ecu, e85, solid rear axle, TH400 trans, 28x10.5w slicks, zip ties, popsicle sticks, tape
best time 9.06 @ 151.8 mph, best 60 foot 1.30
Luchador
Dang, those are some huge parts. Next time I run across something that I think will work as a printing at work, I will give you a PM.
 Posting Permissions


 Reply With Quote


Bookmarks