
 Member
The BMW 8-series is subject to stress fracture in the door handle mechanism, potentially making it impossible to open the door using the outside handle.
The zinc-alloy is overstressed by the return spring for the exterior handle and/or forces created in output arm operating the latch.
Depending on your particular casting and how many operations, the zinc pivot will break sooner or later. But it will break. Both sides.
Replacing the stock cast zinc-alloy pivot with my brass pivot solves the problem by creating a continuous axle that much resists the axial twisting force of the return spring while allowing it to provide the torsional force it was designed for.
The latch actuator arm is sturdier than the original and is in brass, rather than cast zinc.
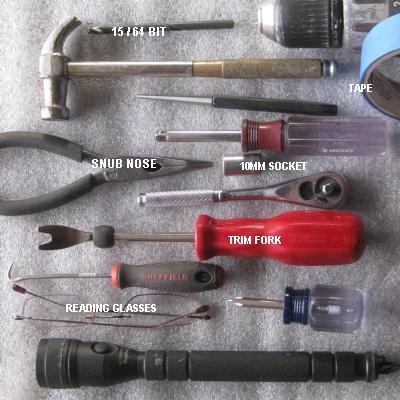
*** Tools ******
The 15/64 drill bit is the british/imperial version of 6mm metric. This is included as part of the kit until further notice.
The trim fork is highly recommended and I will look into providing this as a cost-extra item.
Drill bit: Removes original rivet. Opens up the forward hinge to axle diameter.
Tape: Protects the outside handle from scratches.
Hooked pick: Pulls out the latch rod from its nylon holder.
Glasses and flashlight/torch: For seeing close up into the dark abyss.
Socket and drivers: For two nuts mounting DH frame, and lock nuts on axle.
Trim fork: Door panel/card.
Hammer and punch: Optional. Knocks out a stubborn original rivet.
Pliers: Grabs the return spring. Immobilizes the axle while turning lock nut.
*** Other supplies ***
It would be nice to have door panel clips on hand.
It would be thoughtful to replace the exterior handle trim gasket.
*** Do it *****
The battery does not necessarily need to be disconnected. But there are options.
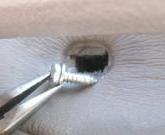
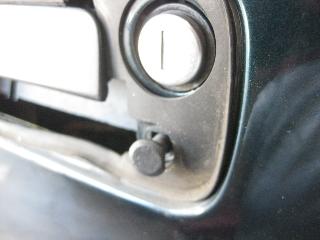
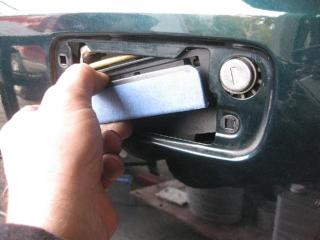
Step one, apply protective tape to your outside handle. Then...
Doorlock stem.
Door panel screws hidden behind plastic plugs. Qty 3. The two behind the door pull seem to well captured in a plastic cavity behind the vinyl leather.
Although I've always gone to an effort to extract the screws, 50-50 chance that they are perfectly happy hanging out in their cavity while you remove the panel.
If you do elect to let them remain in their cavities, then tape over the hole on the panel so there will be no doubt about whether the screws are still there.
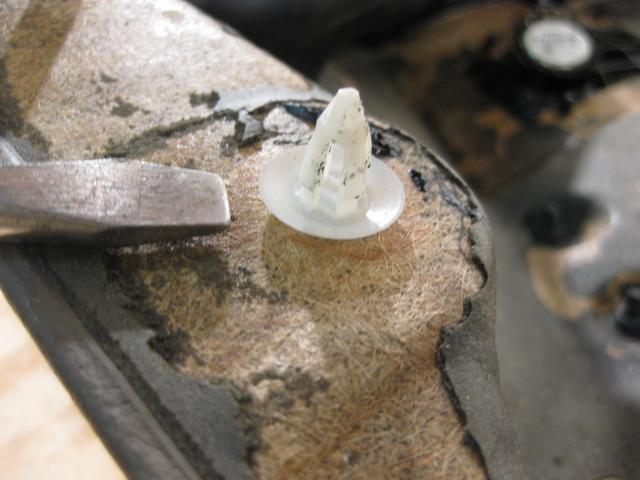
Use trim fork to pop the 10 clips on panel. Sixty percent chance you will break at least one clip.
If you must be rude, use a screw driver in place of the trim fork.
Use trim fork to pull back from 5 clips along window ledge...
as shown in this look-ahead.
Lift outward from the door. DO NOT lift up, or this will happen. You've now been warned.
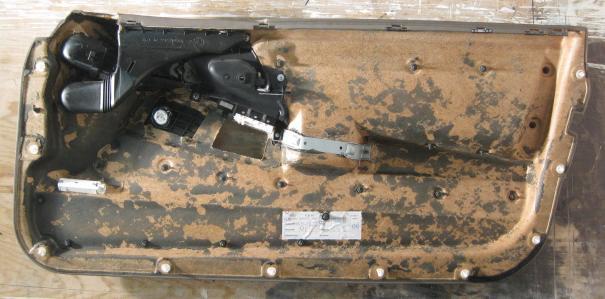
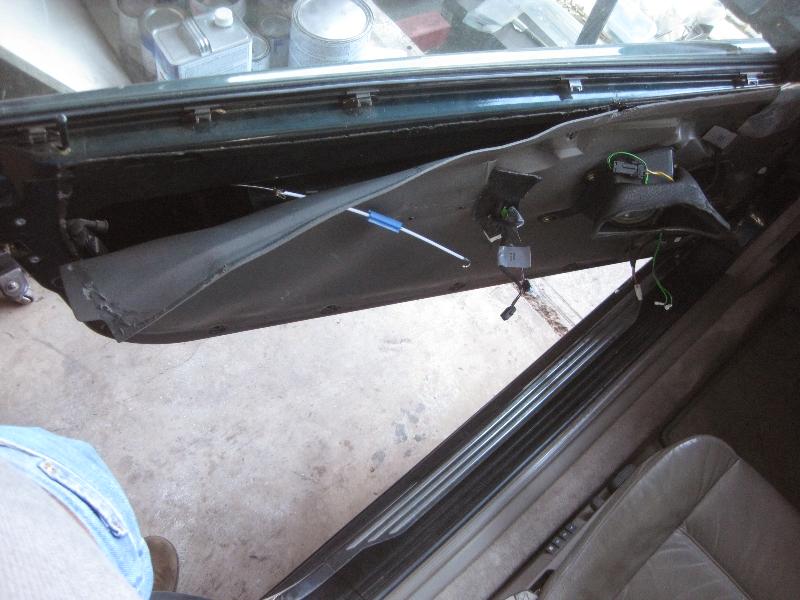
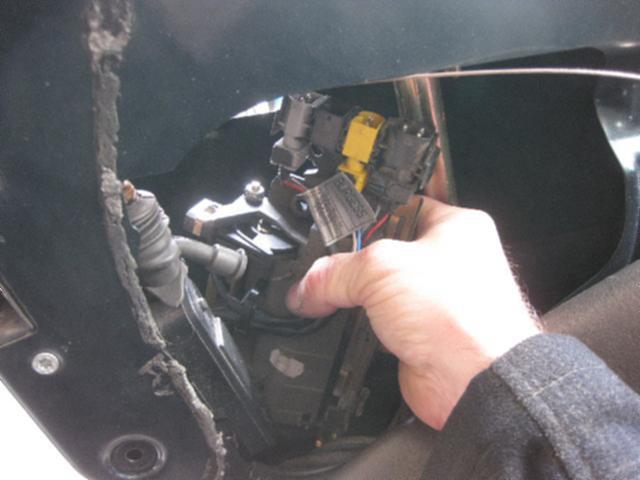
Unhook the inside actuator cable and 4 electrical cables. Set your door panel/card aside in a impenetrable protection bubble.
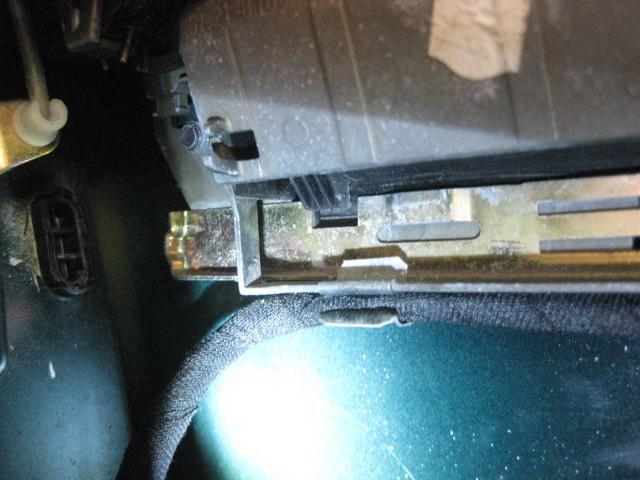
Inside the door, push the trim retainer bar fowarded. Trim tabs should line up with slots in the bar, thus releasing the exterior trim.
I have foolishly forgotten to tape up my door handle. Note also the gasket which you will thoughtfully replace on your own initiative.
Ideally the window glass is in its top most position. Three options:
1) do the procedure with the window in the dropped position,
2) close the door and disconnect the battery,
3) fool the door into thinking its closed, by manually clicking the latch into the closed position.
In two out of the three options, the glass ends up in the up-most position, and the forward bolt is then easily accessible.
DO NOT operate the door handle while you have a socket wrench on this bolt. Bad things might happen. You've now been warned.
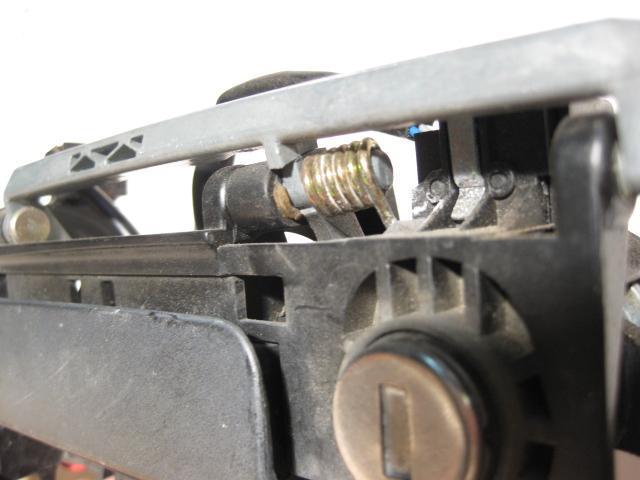
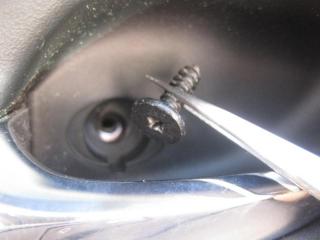
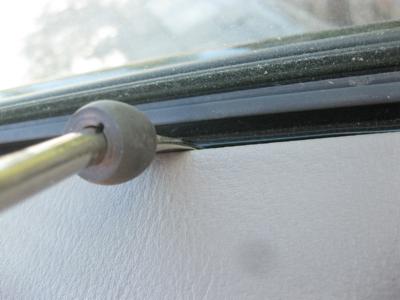
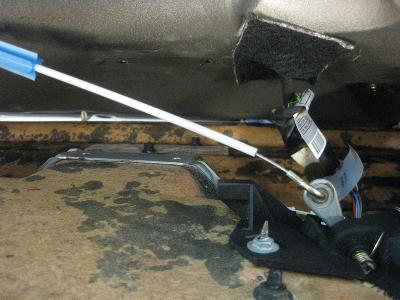
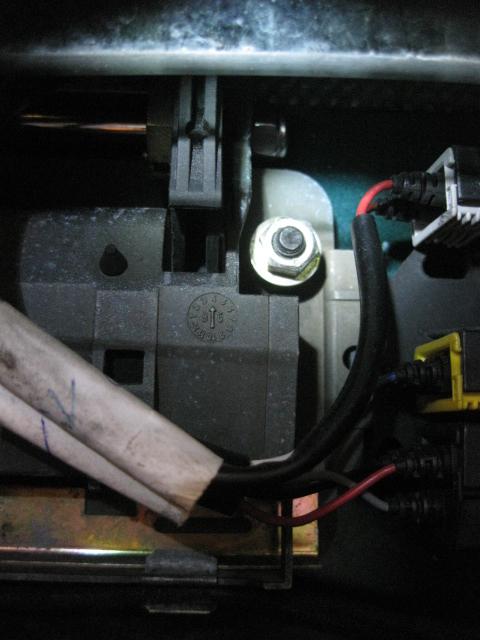
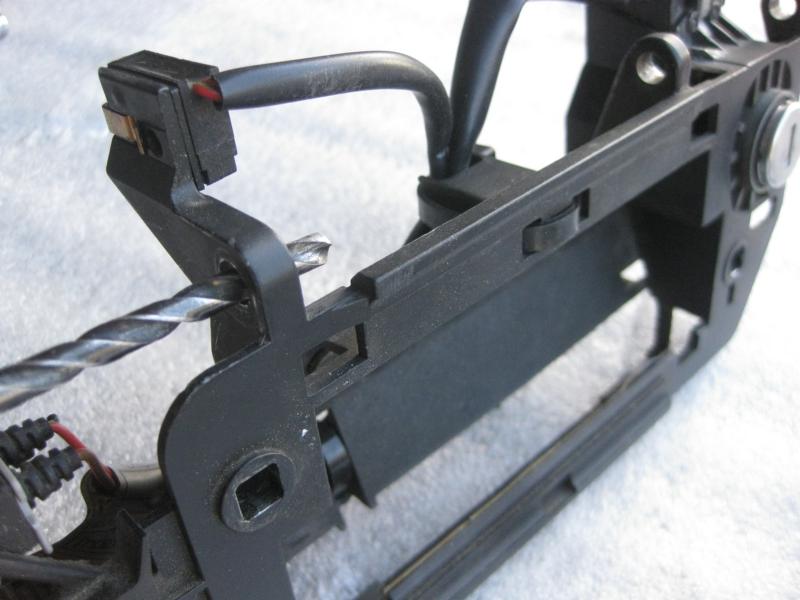
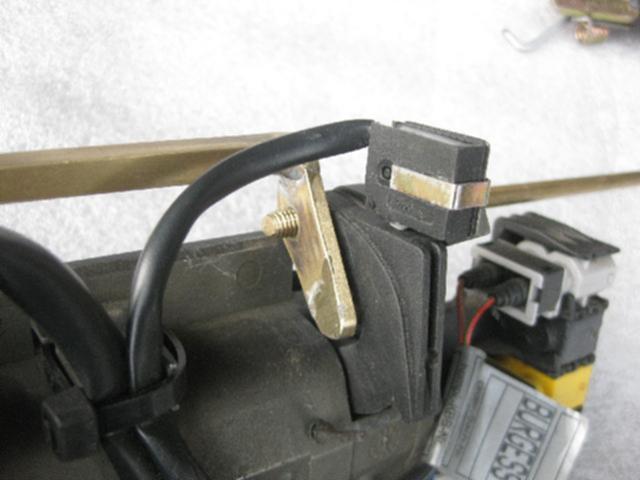
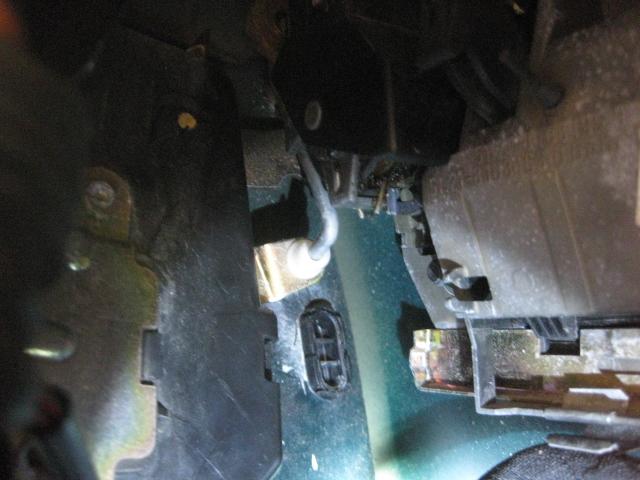
Here is where the actuator rod comes down from the door handle mechansim to operate the latch.
Before moving the door handle too far out of position, you will need to pull the lower end of this rod out of the nylon bushing.
A hooked pick tool, an angled allen wrench or needle nose plier will do.
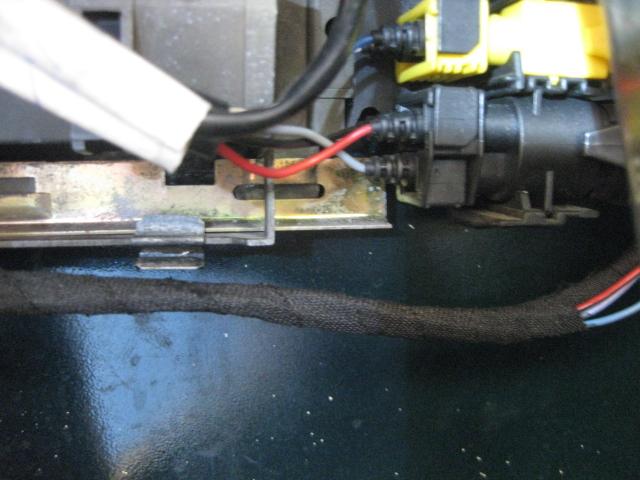
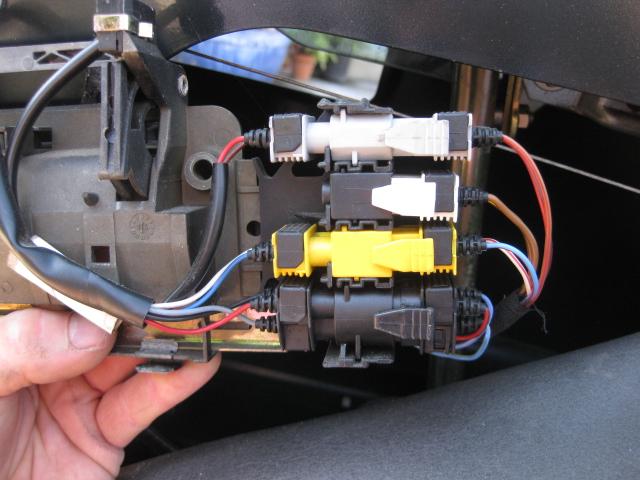
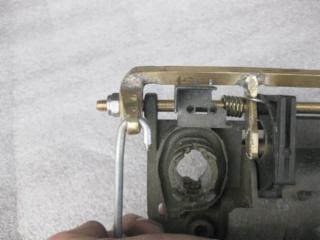
At the forward edge of the door handle assembly are 1 or 4 connectors.
I typically disconnect these, however it occurs to me that a cleverer person could do the pivot swap right next to the door if you had a work platform at just the right height.
*** Zinc pivot removal *****
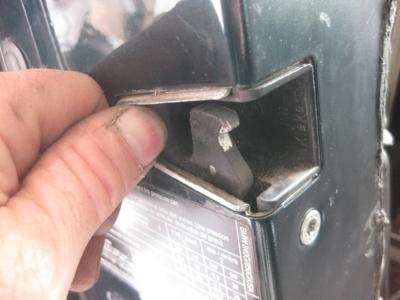
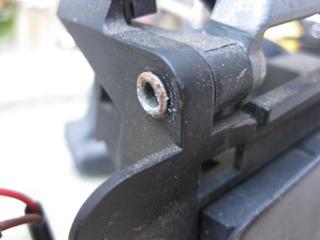
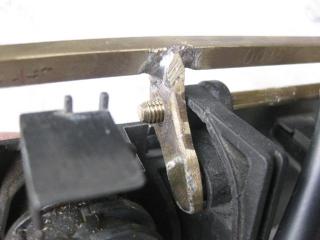
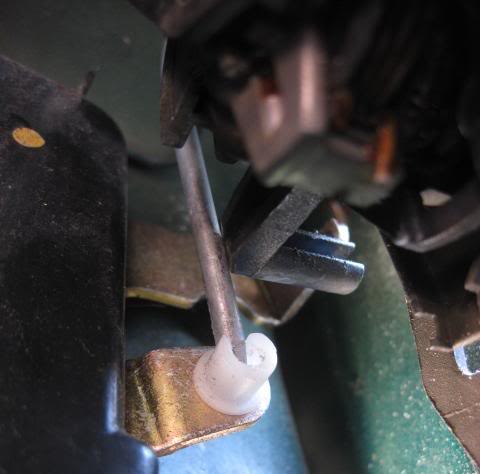
At the forward hinge there is a rivet that is drilled out. The rivet is very soft aluminum.
A well placed finger will keep it from spinning, or use pliers.
The rivet steps down below 6mm as it passes thru the forward hinge.
The reason for this step is so that the rivet can be secured in place without clamping down on the arm from exterior handle, leaving it free to rotate.
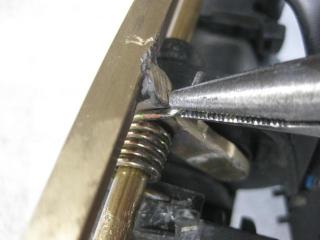
(Until further notice) the kit will includes a threaded rod and the forward hinge on the frame must be drilled to 15/64 (aka 6mm) to accomodate.
Later kits might transition to a bolt that steps down as the original rivet did, thus eliminating the need to drill the frame.
If the 15/64 bit is required, it is included in the kit.
DO NOT attempt to drill the frame with anything other than 15/64 or 6mm bit.
Since the frame is of very soft aluminum, operate the drill chuck manually but DO NOT turn on the drill motor. You've been warned.
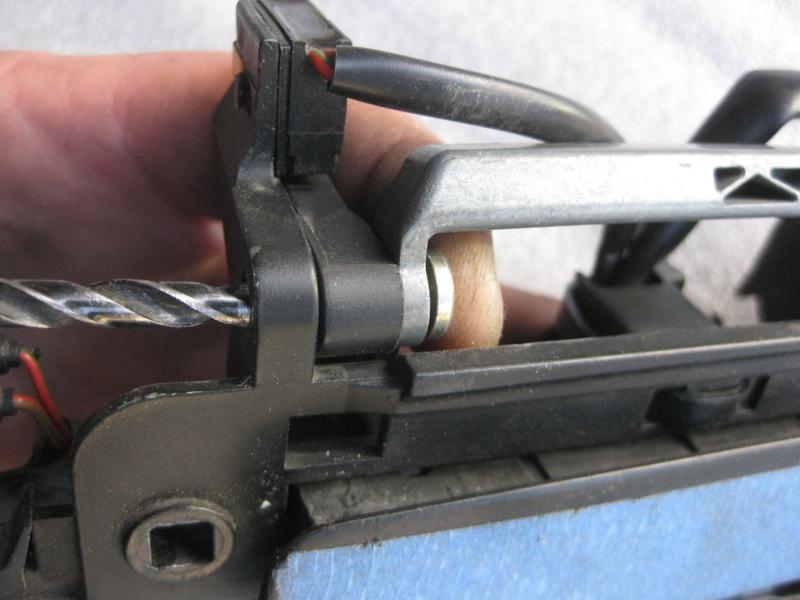
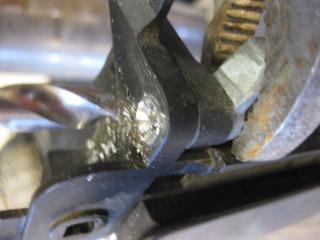
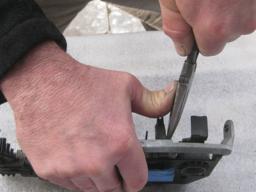
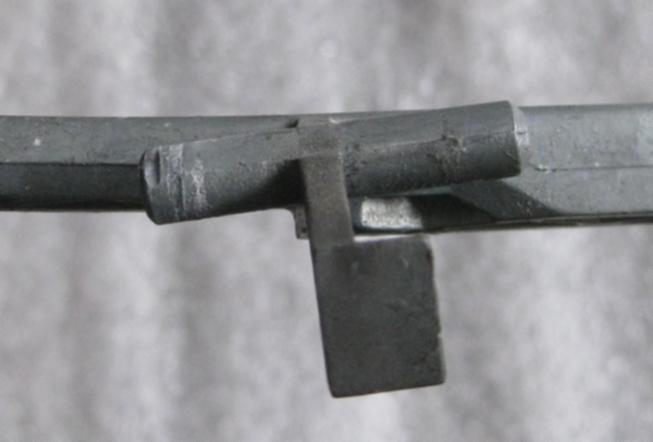
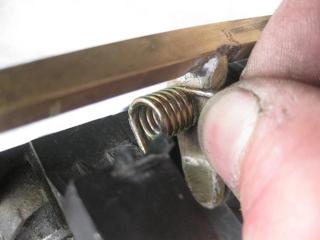
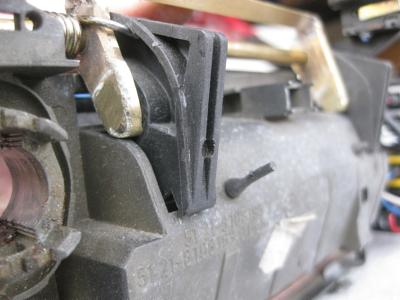
To remove the orignal zinc pivot, the return spring must be released from the exterior handle and from the step in the frame.
While we're here, see how the spring coverts its return force into a twist on the handle input arm. This one is was ready to snap any day.
It would be wise to replace zinc pivots even though they have not snapped yet.
- more -
Admin:
The post had to be broken up because the vB software is configured to allow 30 pics max, whereas I needed to post 47.
vB then wants to append my completely separate follow-up post to the first, again putting me over the pic limit.
Last edited by Hyper; 07-12-2017 at 12:19 PM. Reason: Pic link repair, re PB affair
Member
Thanks for super detailed instructions - can't wait for the hinges - don't need the drill bit or trim fork - have a full set.
Member
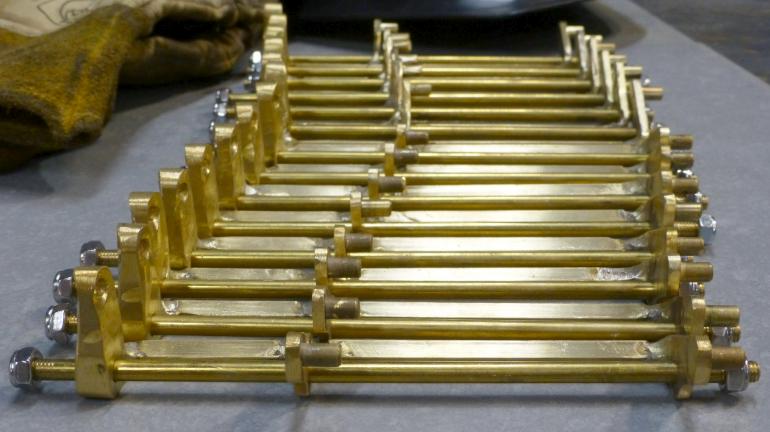
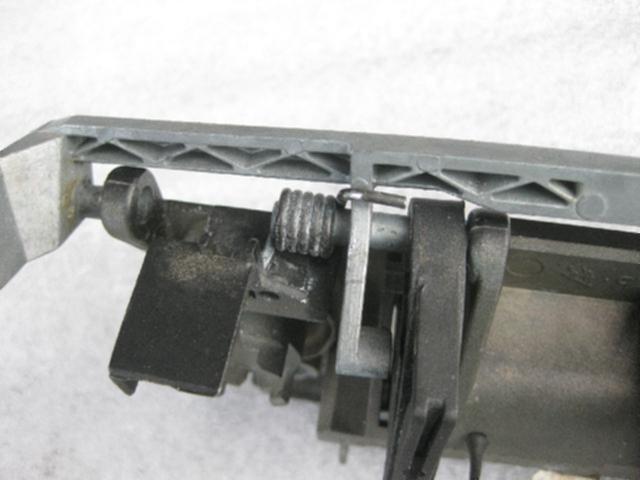
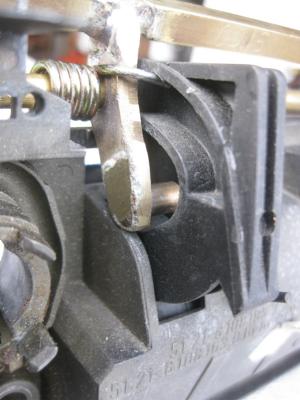
Here is your kit. Torsion beam with arms, axle and two lock nuts. You reuse the stock spring and latch rod.
The first step is to angle the torsion beam into the space between the middle frame and the handle.
Then swing the torsion beam into similar space at the forward end of the handle.
Until further notice the threaded axle is supplied and it is most easily inserted from the forward end. Later kits may use a stepped bolt that must be inserted from the trailing end.
The axle is passed thru the middle hinge...
where the return spring is inserted. The axle should then push thru spring and thru the trailing hinge.
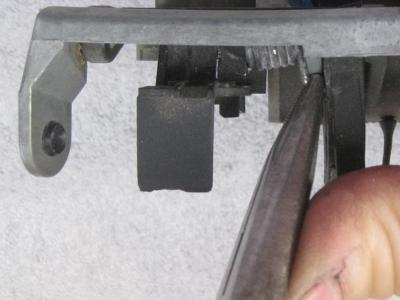
Using a snub-nose plier, grab the return spring and force it down, out and then back into the cavity in the handle.
Use the pliers or vise-grip to immobilize the axle while the lock nut is installed.
On the (until further notice) threaded axle design DO NOT tighten so severly that the pivot can't move.
Check that the exterior handle operates thru a full range, eventually stopping against the frame...
and that, with the exterior handle returned, the torsion beam swings freely. The reason this is important is that the interior handle and central locking must operate the latch without operating the exterior handle against the exterior return spring.
Reuse the latch actuator rod.
**** Assembly install into door *****
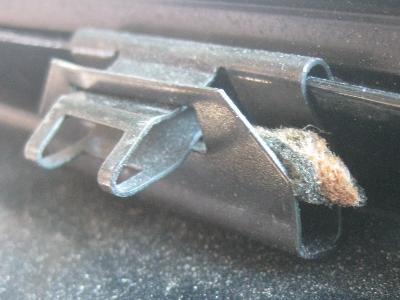
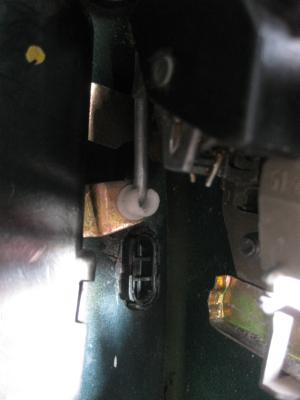
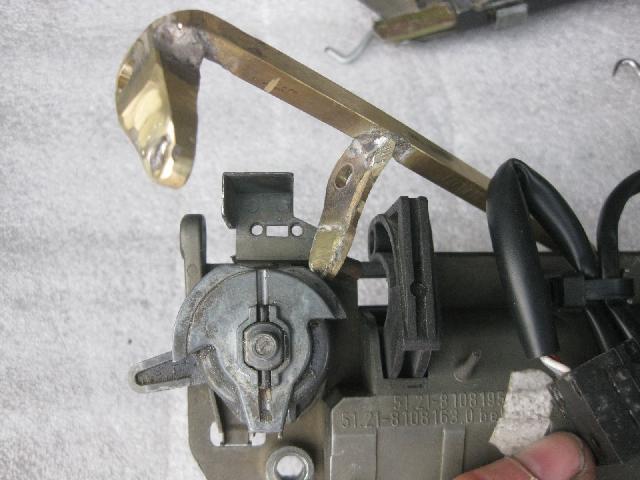
Using your flashlight, have a look inside the door, back at the latch mechanism on the door jamb.
The nylon bushing receives the actuator rod coming down from the pivot. The fork receives the arm from the key cylinder.
Drop the rear end down, being careful not to snag or loose the actuator rod.
Reach around and grab the exterior handle...
and simultaneously snap the actuator rod into the nylon bushing.
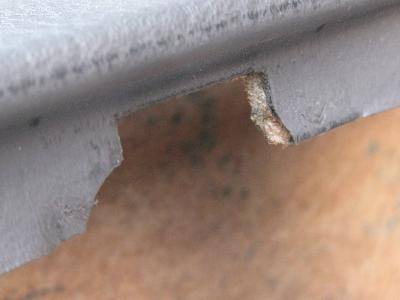
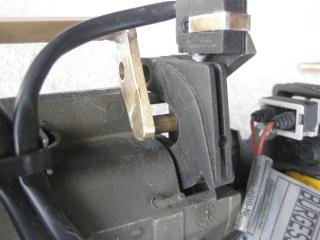
While you were performing this manuever, it is possible to get just a slight peek thru the keyhole in the outside sheetmetal to verify if the key cylinder arm ended up in the fork.
Here, is a fooked fork where the key cylinder arm came in below the fork. No good, try again.
If you use the key to rotate the cylinder (rather than RKE click) to the locked position, the microswitches will misinform the electronics that the car is locked, and set the alarm.
However, the car is not physically locked until the fork says it is and the fork hasn't moved.
Pulling up on the handle will then unlatch the supposedly locked door and activate the alarm.
Only now, rock back the latch mechanism to raise the window glass, allowing better access to the forward bolt.
After snugging down the front and rear bolts, LIFT THE OUTSIDE DOOR HANDLE to open the door latch before closing the door. You've now been warned, but you will forget.
Test the handle.
Continue with 1) handle connectors, 2) harness clip in, 3) outside trim and retainer bar, 4) door panel including wiring, AND 5) interior door handle cable.
*** About the author ***
Hyper lives in his own little world without even a dog, does nothing important, and knows next to nothing about anything.
8pivotalMoments@gmail.com

Last edited by Hyper; 07-12-2017 at 12:32 PM. Reason: Added fooked fork
Member
Thanks Hyper, I need one. Reconsider the dog thing. German Shepard not a poodle.
¿pǝpɹɐʇǝɹ noʎ ǝɹɐ
Copied to DIY forum.
95 840Ci, Calypso Red/Silver, 83k - 99 740i, Black/Black, 185k, Alpina Mods - 01 740i, Titanium/Silver, 40k, Sport Pkg
Complete Turnkey Diagnostic/Programming systems available...PM for details.
http://www.8Coupe.com - Please register, spot, and help the project.
Dependable Engines
Thanks!
meeknet.co.uk
Nice write up and excellent pictures, thanks!
Timm..2007 E64 650i Individual Sport..1999 E31 840ci Individual Sport..ex owner of 2000 E38 740..1999 E38 740i V8 M62..1998 E38 735i V8..1993 E32 730i V8..1988 E28 518i
My BMW Repair YouTube Channel
My Current 840ci Sport Individual
My Current 650ci Sport Individual
My E31 Repair and Information Website
My E38 Repair and Information Website
My E63/E64 Repair and Information Website
Chase - Heroes to a generation
Member
Nice write up!!!
My passenger side door won't open from the outside.
How do you purchase the setup no need for drill bit or trim panel tool..
Member
absolutely outstanding!
Member
You Sir will be getting a beer.
When can we order?
Member
*** About the author ***
Hyper lives in his own little world without even a dog, does nothing important, and knows next to nothing about anything.
[/QUOTE]
All this and a snappy dresser to boot.
Member
Many thanks! Great write up
Member
One small question Hyper: when installing the axle, do you recommend applying a little lubricant, or because it is brass on brass, leaving it dry?
Mad Scientist
Me thinks you'll have to wait for him to make some for that side... handles are mirror images on the passenger side. ~90% of handle failures are on the driver's side, as that seems to be the handle that gets the most use.Originally Posted by kishoreh

Member
Not required. There is very little surface contact between the axle and the torsion beam and we are not concerned about surface wear. If there is binding, then something else is going on, like you tightened the lock nuts too far.
If I ever get around to fabricating a bolt with a step-down to end threads, then this potential problem also goes away.
I have already made handles for boths sides (easily done because my jig inverts into a mirror image) and initial rfq's have been for L/R sets.
Last edited by Hyper; 04-03-2013 at 06:59 AM.
Member
I need one for drivers door. How can I order it ?
Member
Victim cared for via PM.
Member
Hey Hyper,
tried to PM you. Looking for a door actuator kit for my '91 E31. My driver's side door actuator is acting up. Do you have any details?
Thank you.
Member
Victim(s) cared for via PM.
Funny/strange, y'all left me alone for 5 months, then y'all gang up on me in the same week, blow out both my finished inventory and my raw material stash.
Plz plan out your pivot breaks a little better.
My preferred biz adrs is still 8pivotalMoments @ gee male dot com
Member
Ok, you pot-metal maggots.
Bring.
It.
On.
Last edited by Hyper; 07-12-2017 at 12:38 PM.
Member
I want a set plz!
91 850 (Panzer), 2012 Mini Cooper Countryman (WifeMobile) www.wuffer.ca
Member
My Christmas present to myself, and Lola likes. Thanks again Hyper! Great fix for the pot metal blues.
Member
Excellent, makes me want a set even though its not broken yet. Great write up, thanks or the excellent design and the support to the e31
www.wokke.de
excellent write up. But I don't understand why you make it so complicated. Must cost a small fortune to produce those sets.
Member
Hey there Hyper, I purchsed one from you this summer and had it installed. Of course it works perfectly now; just wanted to say thanks for creating a repair for this issue. Without it we'd all be sunk.
 Posting Permissions


 Reply With Quote
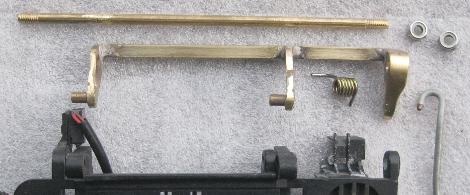


Bookmarks