

 Member
Stunning. I wish I had your skills
Member
Thanks a lot. I'm thinking along the lines of the GT300 class in Japan's Super GT series. They have 300 HP max in cars that don't weigh a whole lot but have very large tires. Lots of downforce, as well. We'll have to see about selling kits. I've put several hundred hours into this. I'm not so sure there's a demand for such an aggressive kit. It really does compromise street-ability given the 4" of ground clearance. Not quite "hellaflush" but not practicalOriginally Posted by e30polak

Keeping the molds in shape is perhaps the biggest challenge after making the dies. Fortunately, I am keeping the dies off the car so I can store the molds over the dies so that they'll keep their shape. I'll also be building wooden frames around the molds to help keep their shape in check.
I've taken countless measurements and have the option of limiting the steering (not something you can get away with on a street car). I would like to move some of these old wheels out before I invest in more, but as a worst case scenario, I may order two 18x11s and to a final test fit all around before ordering the remainder of what I would need.
Thanks a lot!
Thanks but it's really just all about patience. I'd encourage everybody to give it a shot at some point, even if you're just straitening out a wrinkle in a door on a chump car. It doesn't really take a whole lot of expensive equipment and the satisfaction of doing your own work is worth its weight in gold. Step out of your comfort zone!
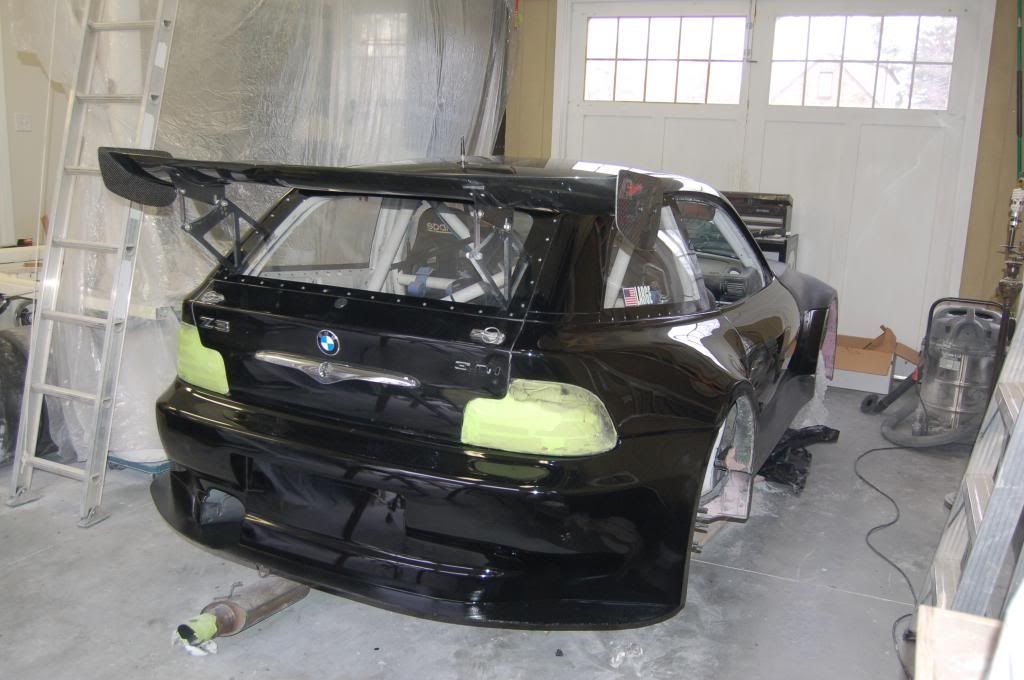
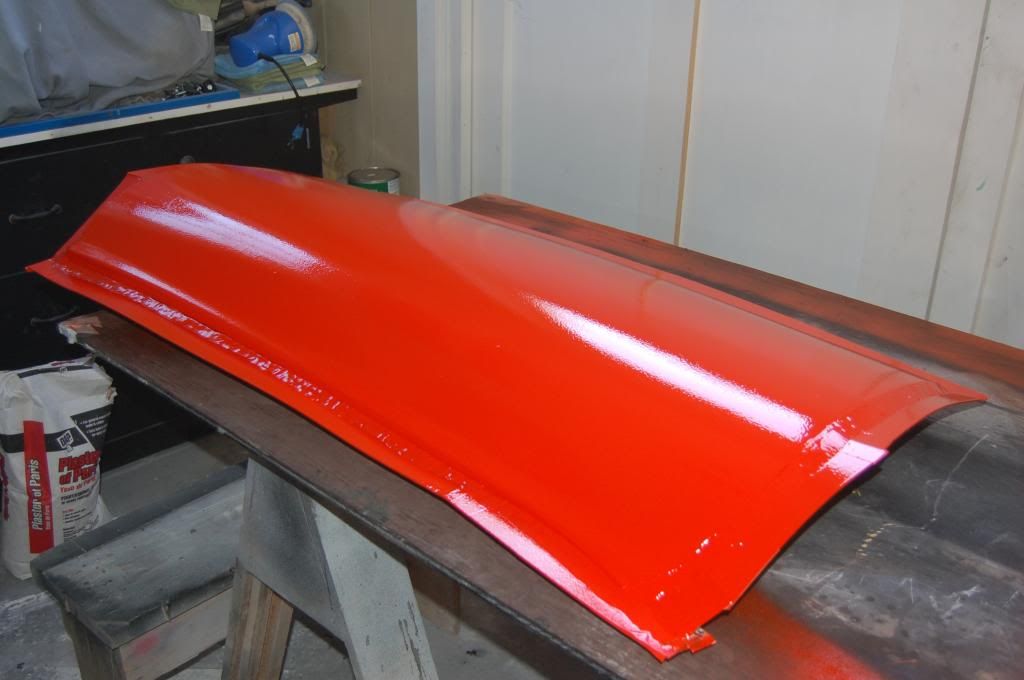
I've been sanding and polishing. You can see the difference between the door and the side skirt below. The door has been waxed several times and is ready to have flanges hot glued on.
______________________________
Nick Large
Member
BMW CCA Member
More!
- Ian
2000 M Coupe, stripped and DE prepped
46mm wheel bearing socket for rent - $30 deposit + $10 fee. PM for details.
Member
With an 11" rim you figure you'll run either the 285 or 305 645/18 slick. If that's the case you'll want at least 2 wheels and tires to put on in the front. My rack is limited too by about 30mm of throw on each side and that helps the tire rub on the inside.
The issue is the rub caused by the outside shoulder of the tire. Like I said before, it threw me for a loop too because when I changed shocks (changed to Ohlins HMRC) it changed the scrub a very small amount and made the tire rub on everything, literally everything.
You may not have the same problems as my car has wider control arms and is also very, very low in the front but in the end I had to change all my body work. Last track day it actually made the car handle weird because the tire was rubbing the body work under compression so basically it was a waste of a day.
Anyway still fantastic job. I just don't want to see you invest so much time and then have a silly little issue.
2000 M Coupe
[Always in progress !!!]
Member
Yeah the car really isn't much lower than stock, believe it or not. I also have standard length control arms. I'm probably going to run 285's. I can't see myself needing (or wanting) anything more with the weight of the car or the amount of power. And I can GUARANTEE that there will be at least one silly little issue that will pop up.
Anyway, here's a little more...
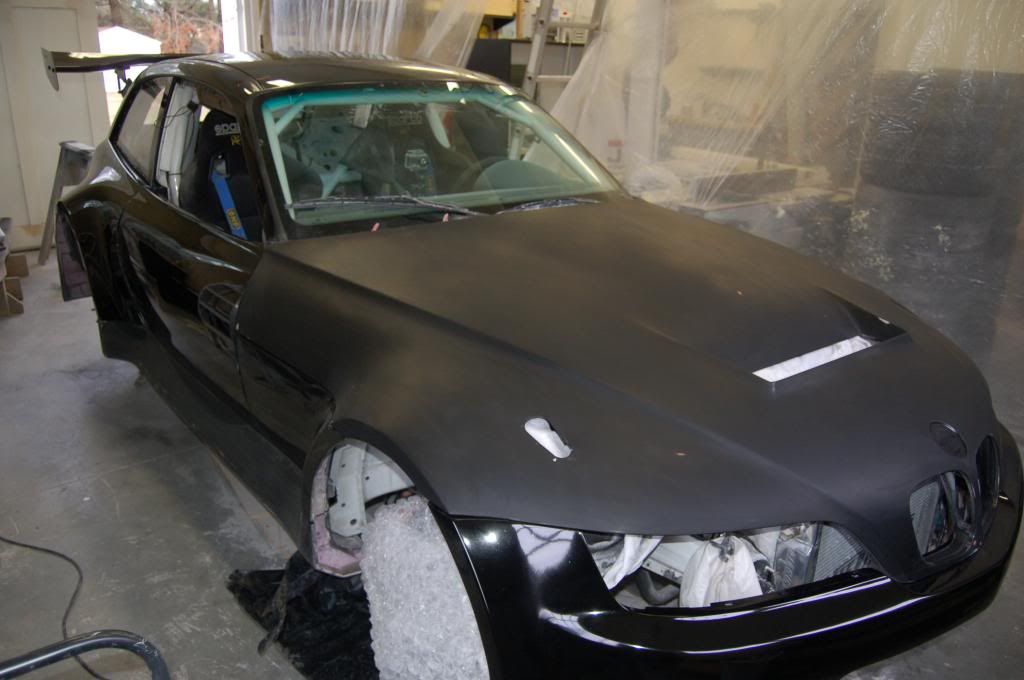
I cleaned the car off and polished the passenger side rear quarter panel.
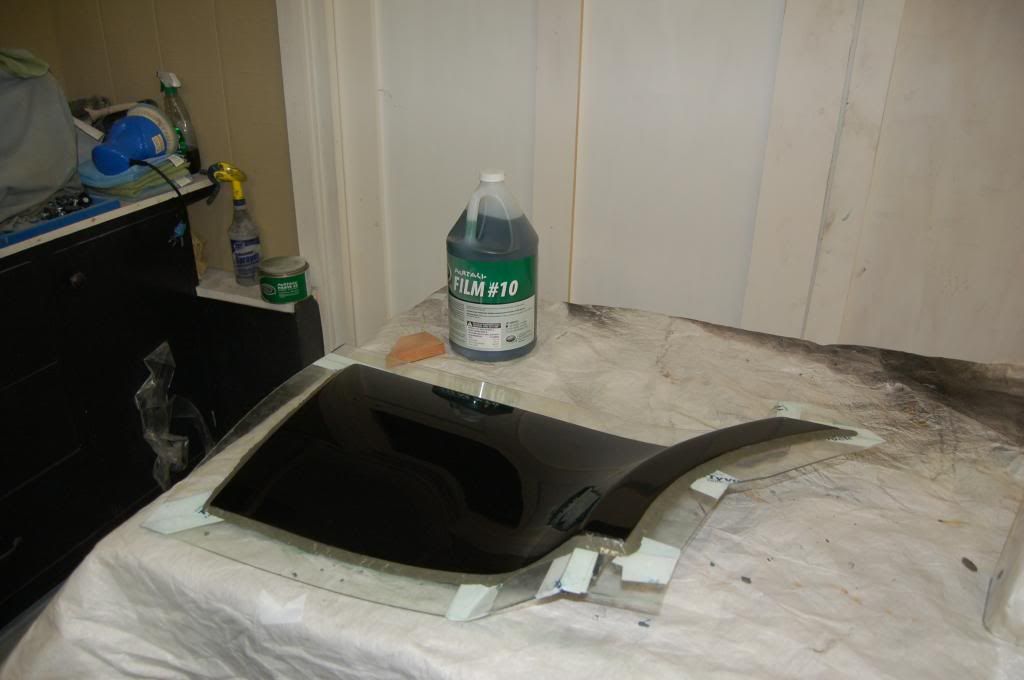
I just drove to Roanoke, VA to pick this stuff up. Just shipped from US composites in Florida. 5 gallons of polyester tooling resin for the molds, 5 gallons of epoxy resin for the actual parts, a gallon of tooling gelcoat, a gallon of gelcoat for the finished parts, an 80 yard roll of 1.5 ounce chopped strand mat for the molds, an 80 yard roll of twill weave fiberglass cloth for the parts, and 15 yards of kevlar for fender liners.
I have helmets to work on this week so progress will be slow, but I'll keep plugging away anyway.
______________________________
Nick Large
Member
Hey completely off topic but what compressor and paint gun are you using? I'm interested in investing in tools to paint a truck I have. Where did you learn how to do most of this?
Member
Hey. I have a 20 gallon, 5 hp devilbiss compressor from Home Depot that my dad bought ages ago. The compressor isn't really critical as long as it's AT LEAST that big.
I did splurge on some really nice guns also from devilbiss (their finishline 4 series: http://www.eastwood.com/devilbiss-fi...r-gun-kit.html) I have one gun for primer (their primer set) and another for finish coats with a set of smaller tips. I've heard of guys getting away with cheap guns, and I did for a while, but it's sooooooo worth it to pay a little more for high quality guns. I can't even describe how much nicer it is.
For conditioning the air, I use the cheap throw-away air dryers (http://www.smitsgroup.co.nz/p2460v0/...-Filter-Single). They do a great job and are good for 20 or so spraying sessions. You can obviously invest in the high-tech and very expensive dryers, but they require maintenance and aren't really economical unless you're a full-time body shop.
I learned online. There really isn't any black magic involved it's just the sanding, which is all about patience.
Hope that helps.
Nick
______________________________
Nick Large
Member
Wow that looks incredible! Since you're in Blacksburg, you should definitely jump over on the CCVT forums and introduce yourself. It would be cool if you could take the car out the CCVT car show in April too.
http://www.carclubvt.com/forum/forum.php
Coupe Cartel Forever!
BMW CCA Member
Progress is looking great!
Seems like you are closing in on the home stretch.
~Ken~ '99 M coupe THE "original" TT Stage 3 - HTA3586R; 701 whp 672 wtq @ 26.5 psi ; NeverSell - CoupeCartel
Member
2000 Z3 M Coupe
Member
Looks great!!
Without wheels it looks like an RC body!!
With the proper proportions :-)))
Member
Looks fantastic Nick! Keep up the awesome work
What work are you doing on helmets this week?
LONG GONE:2003 330i ZHP Imola Red/Black - Turner Motorsports Slotted rotors/ Axxis Ultimate pads, Stainless brake lines, CDV removal/ UUC stainless Clutch line, DIY Clutch Stop, GC Coilovers 500#F 550#R, Vorshlag Camber Plates, TC Kline RSM's, TC Kline Pro Studs, Custom Intake, Powerflex RTAB's and FCAB's, 10mm H&R spacers F+R, H&R 27mm Front Sway, Mason Engineering Race Bar, Williams Engineering 3" Stainless Mandrel Race Exhaust, 255/35/18 Square RE01R's.
Member
I pretend to be a helmet painter every now and then.
______________________________
Nick Large
Member
Many Talents! Do you use an airbrush setup?
LONG GONE:2003 330i ZHP Imola Red/Black - Turner Motorsports Slotted rotors/ Axxis Ultimate pads, Stainless brake lines, CDV removal/ UUC stainless Clutch line, DIY Clutch Stop, GC Coilovers 500#F 550#R, Vorshlag Camber Plates, TC Kline RSM's, TC Kline Pro Studs, Custom Intake, Powerflex RTAB's and FCAB's, 10mm H&R spacers F+R, H&R 27mm Front Sway, Mason Engineering Race Bar, Williams Engineering 3" Stainless Mandrel Race Exhaust, 255/35/18 Square RE01R's.
Member
Yeah I have a couple. Iwata all the way!
______________________________
Nick Large
Ultimate Drift Machine
Incredible work. The fenders look amazing.
Member
Time for an update Nick...lol
Either of the car or helmets
LONG GONE:2003 330i ZHP Imola Red/Black - Turner Motorsports Slotted rotors/ Axxis Ultimate pads, Stainless brake lines, CDV removal/ UUC stainless Clutch line, DIY Clutch Stop, GC Coilovers 500#F 550#R, Vorshlag Camber Plates, TC Kline RSM's, TC Kline Pro Studs, Custom Intake, Powerflex RTAB's and FCAB's, 10mm H&R spacers F+R, H&R 27mm Front Sway, Mason Engineering Race Bar, Williams Engineering 3" Stainless Mandrel Race Exhaust, 255/35/18 Square RE01R's.
Member
+1 !
Sent from the palm of my hands by scientific means
"My man did you simply get carried away with your dramatic gesture or were you pointing your water gun at me with lethal intentions ?"
soon to be broke member
Member
Yeah, it is time for an update. I've been making molds!!
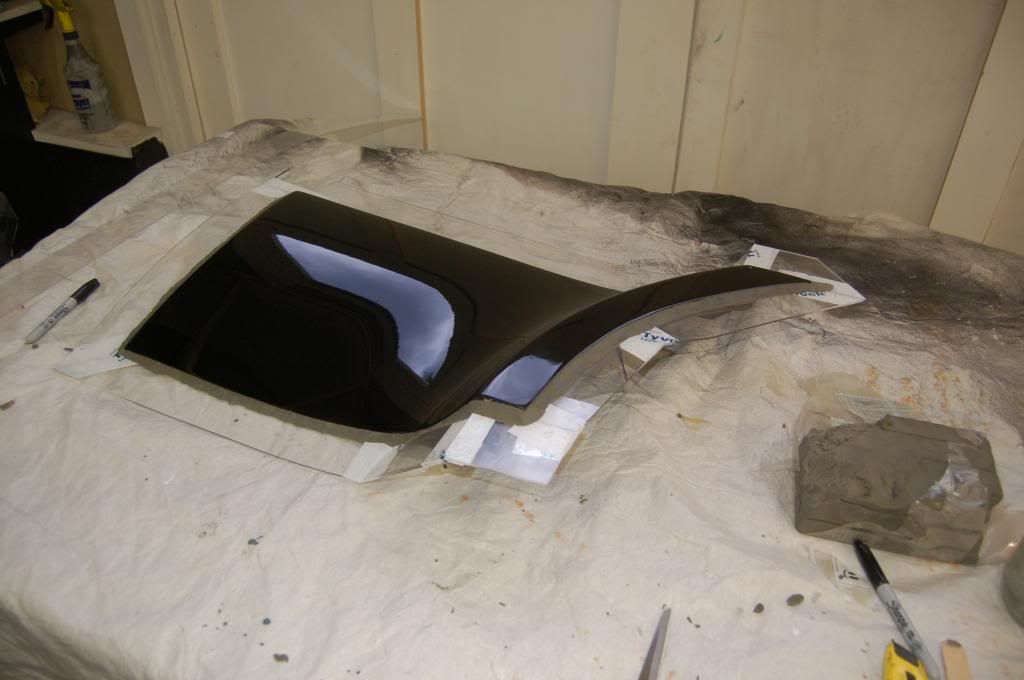
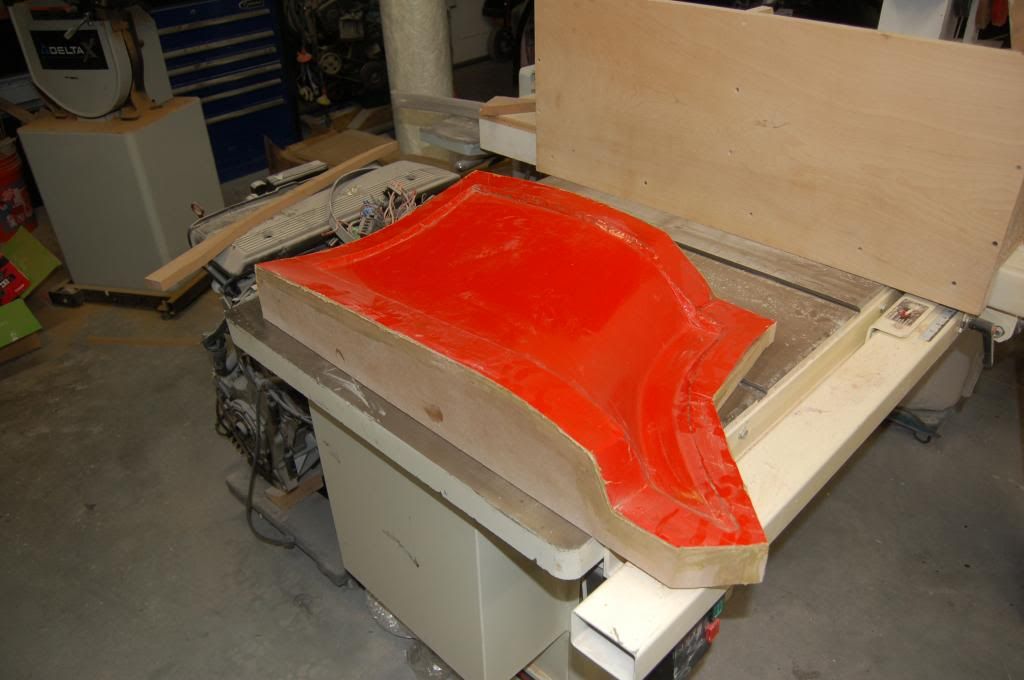
I start out by adding some flanges with plastic. I bridge the gap between the part and the flange with some modeling clay.
Wax the heck out of the mold (4 or 5 applications) then spray PVA mold release.
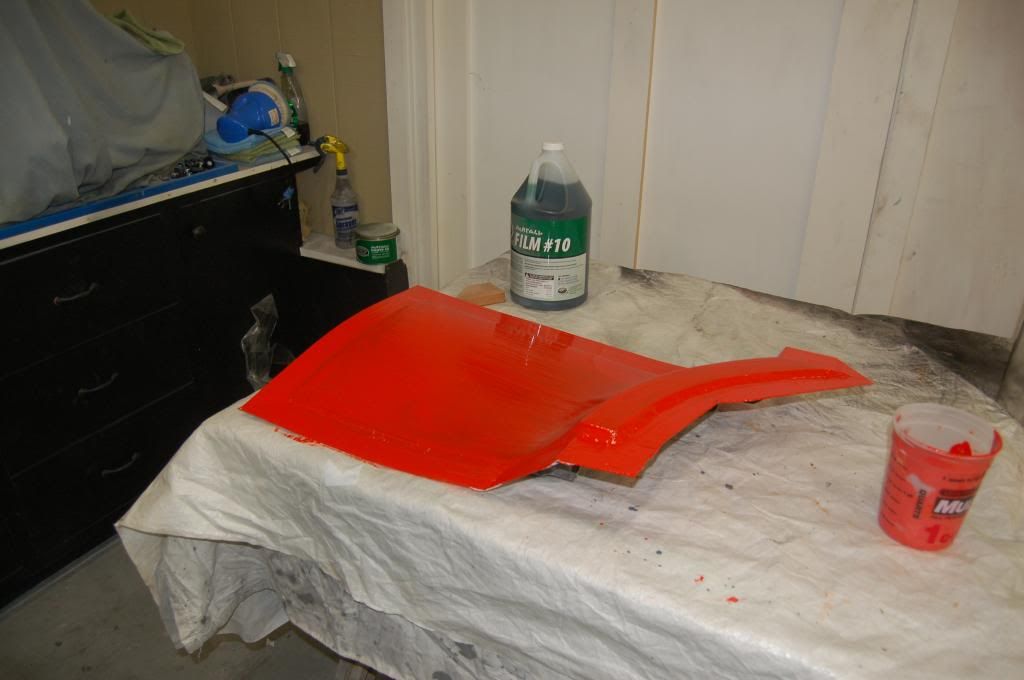
I brushed the tooling gelcoat onto this first mold. I'll be spraying from now on. I got orange gelcoat because they had it and I thought it would be cool. Having used it, I would recommend black tooling gelcoat because after looking away from the mold, your vision is all green and uncomfortable.
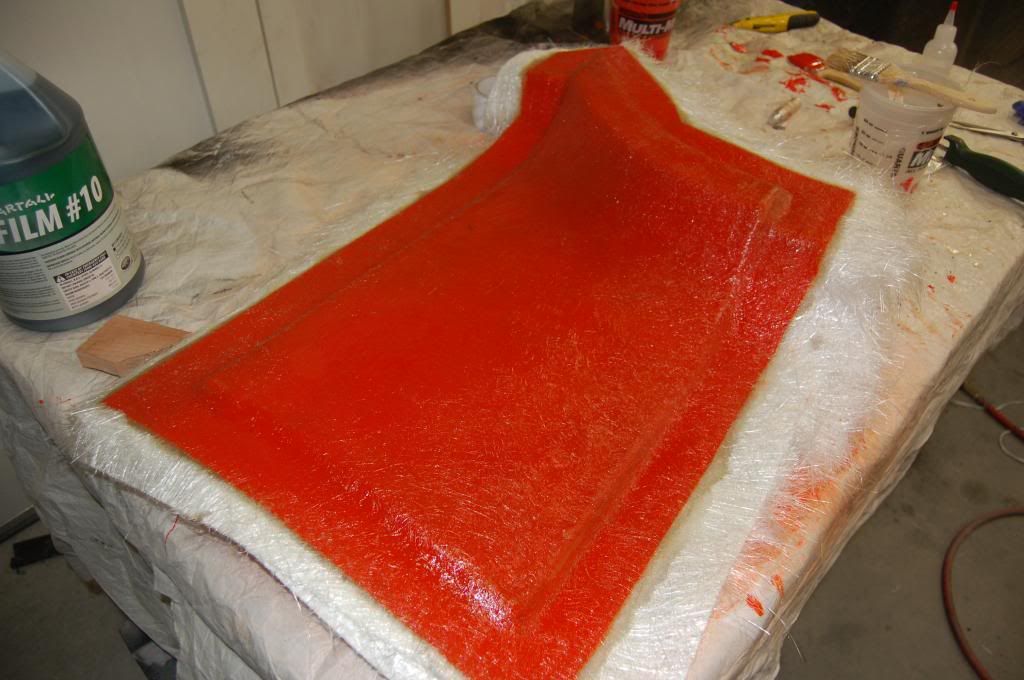
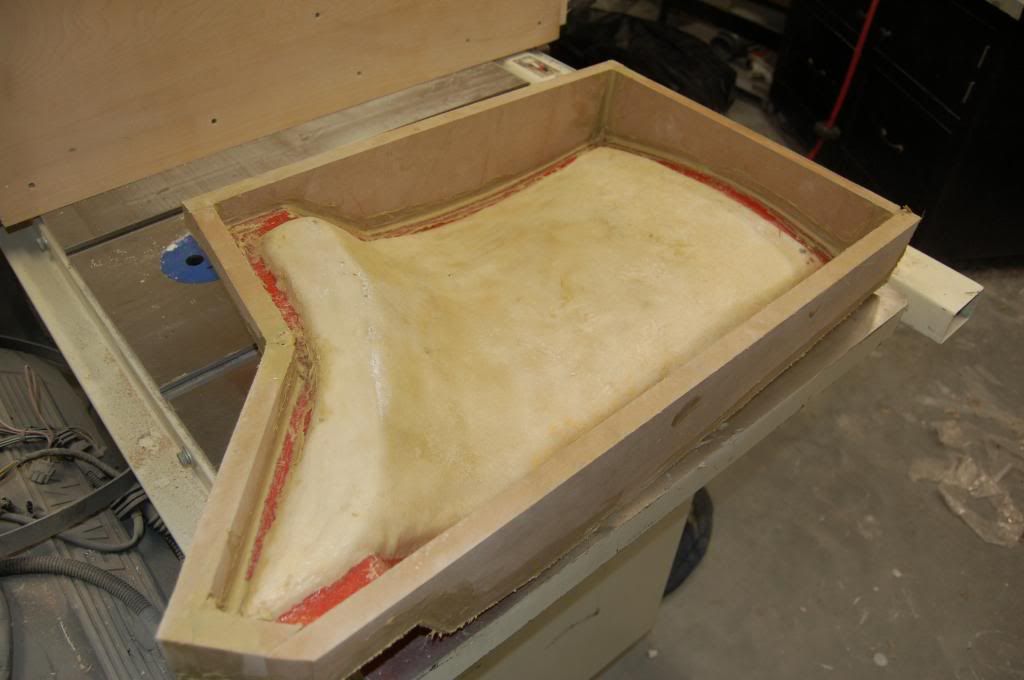
I'm doing two layers of chopped strand mat at first. Once that's dry I put on a half inch thick layer of plaster of paris to give the mold solid as a rock (literally), then put on two more layers of fiberglass. I finished the quarter panel mold and it's very stiff. I'll probably do the hood mold a little differently since it would end up being a couple hundred pounds.
Pop the mold off after everything dries and the only thing that comes with it is the clay.
Here's a shot of the door receiving similar treatment, albeit with sprayed rather than brushed gelcoat
As far as the helmets go, I won't post pictures on here because I'm not sure if the owners would like to have their designs revealed too early, and also because I can't advertise since i'm not a supporting vendor.
Tucker, your helmet has been curing/being worked on here and there. I'm aiming for one notch above perfection since you've given me a good chunk of time to work on it. Rest assured, it is very close and should be stunning!
Now I have to fiberglass that door^^^
______________________________
Nick Large
Member
Favorite thread ever. Nick..great work. I may need to buy some fiberglass doors from you in the future
LONG GONE:2003 330i ZHP Imola Red/Black - Turner Motorsports Slotted rotors/ Axxis Ultimate pads, Stainless brake lines, CDV removal/ UUC stainless Clutch line, DIY Clutch Stop, GC Coilovers 500#F 550#R, Vorshlag Camber Plates, TC Kline RSM's, TC Kline Pro Studs, Custom Intake, Powerflex RTAB's and FCAB's, 10mm H&R spacers F+R, H&R 27mm Front Sway, Mason Engineering Race Bar, Williams Engineering 3" Stainless Mandrel Race Exhaust, 255/35/18 Square RE01R's.
Member
So cool!
And to see it done from a perfectly finished painted parts is crazy...
Thanks god it doesn't effect the original part
Member
I'll gladly brag on Nicks Skillz.. I had him paint my Stilo last year.
Theme: Dual Marque Porsche Martini - BMW ///M
My crummy pics don't do the work justice....
Member
Beautiful work on the helmet!
LONG GONE:2003 330i ZHP Imola Red/Black - Turner Motorsports Slotted rotors/ Axxis Ultimate pads, Stainless brake lines, CDV removal/ UUC stainless Clutch line, DIY Clutch Stop, GC Coilovers 500#F 550#R, Vorshlag Camber Plates, TC Kline RSM's, TC Kline Pro Studs, Custom Intake, Powerflex RTAB's and FCAB's, 10mm H&R spacers F+R, H&R 27mm Front Sway, Mason Engineering Race Bar, Williams Engineering 3" Stainless Mandrel Race Exhaust, 255/35/18 Square RE01R's.
Member
Thanks for posting, Dave! I still open up the folder with all the pictures of that and think about how much I enjoyed painting it.
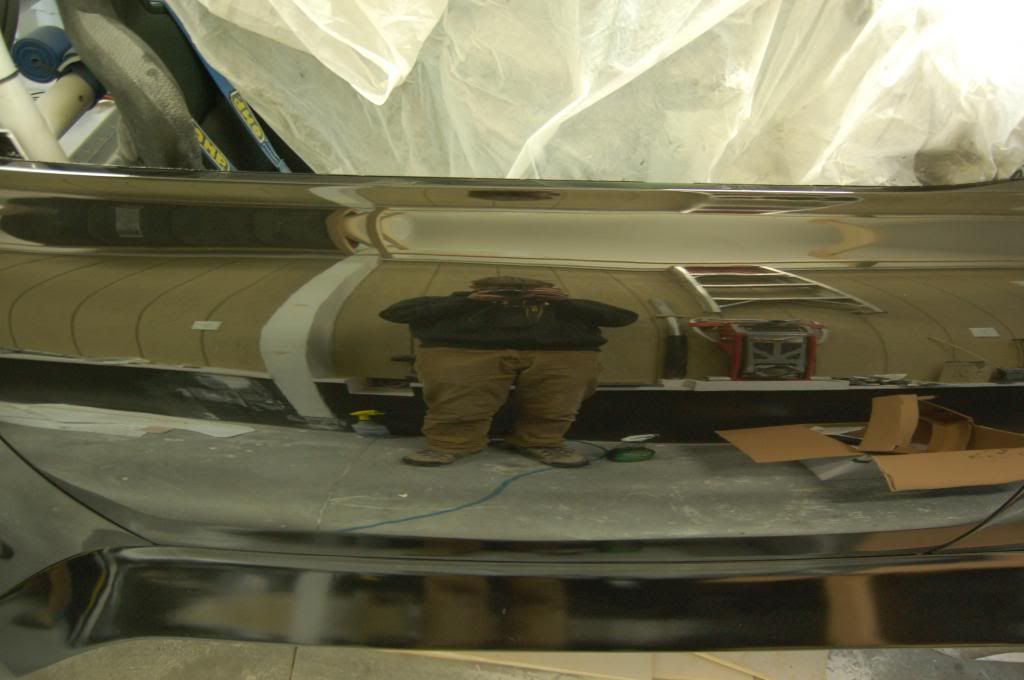
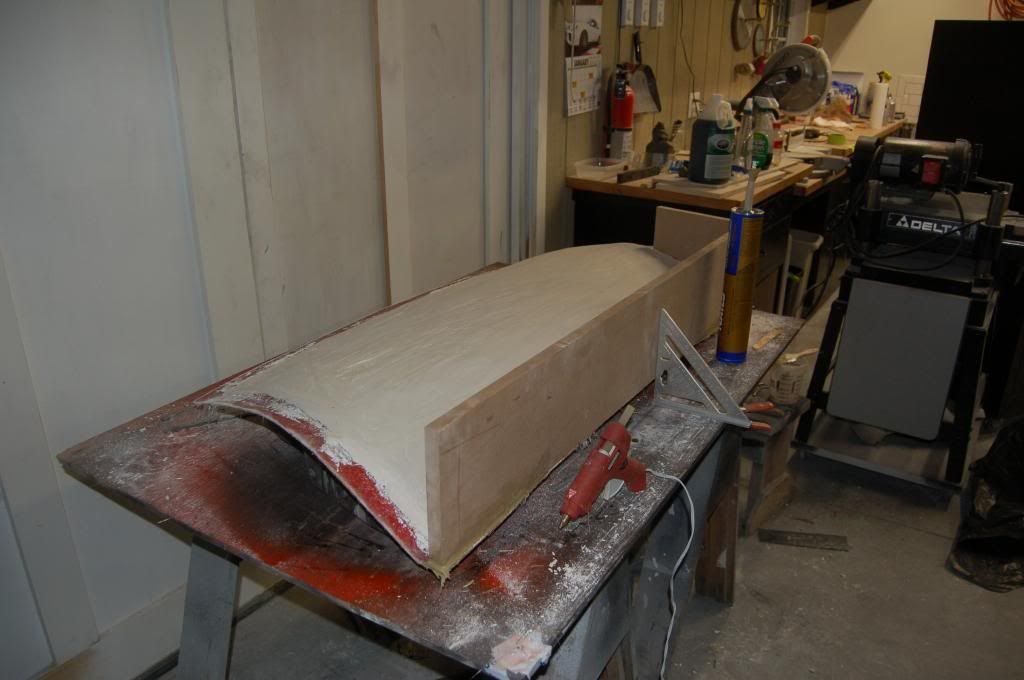
Here's how I'm stiffening the molds and making them easy to work with. I'm building MDF frames cut to shape so the mold can sit on a table without rolling around. Should make laying up the final parts a breeze. I'll add one or two more stiffening ribs inside the quarter panel mold. The door and hood molds will obviously need more... and end up weighing many pounds. I'll coat the MDF with some polyester resin so they don't swell.
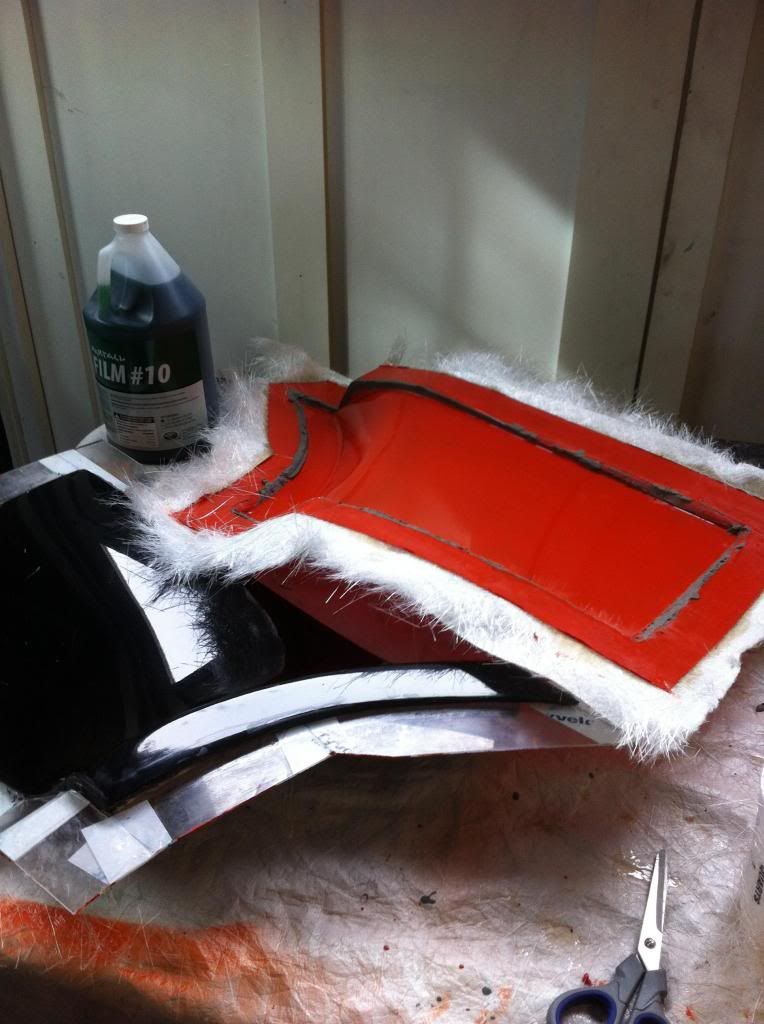
You can see the plaster I coated the mold with. I covered the plaster with two more layers of fiberglass to lock it in.
The door mold (still resting on the door so it will hold its shape) is receiving the same treatment...
OH.... and tell your friends that my wheels are still for sale! They need to get out of here ASAP!
Last edited by Calaway16; 02-19-2013 at 10:09 PM.
______________________________
Nick Large
 Posting Permissions


 Reply With Quote


Bookmarks