
 Member
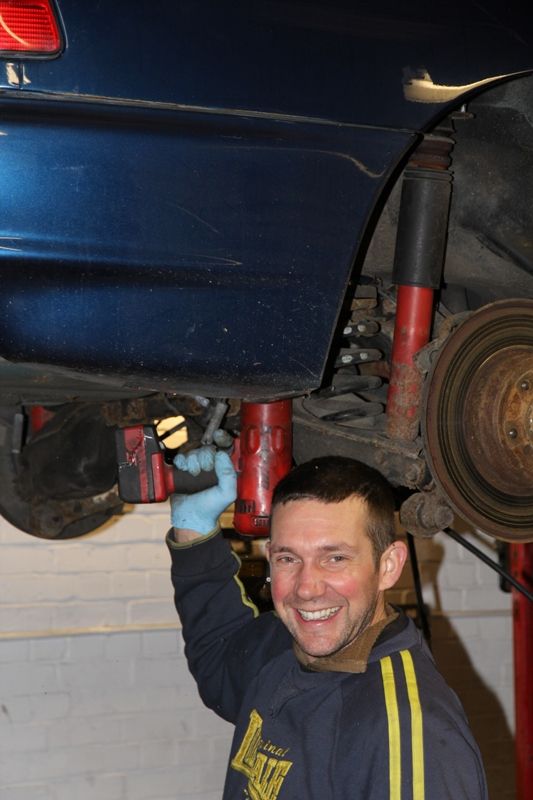
So here we have a procedure to cover a whole number of tasks on the rear of the car.
The reason for the removal in this case was to replace a leaking brake pipe and handbrake cables, but could equally be replacing the subframe bushes or differential removal.
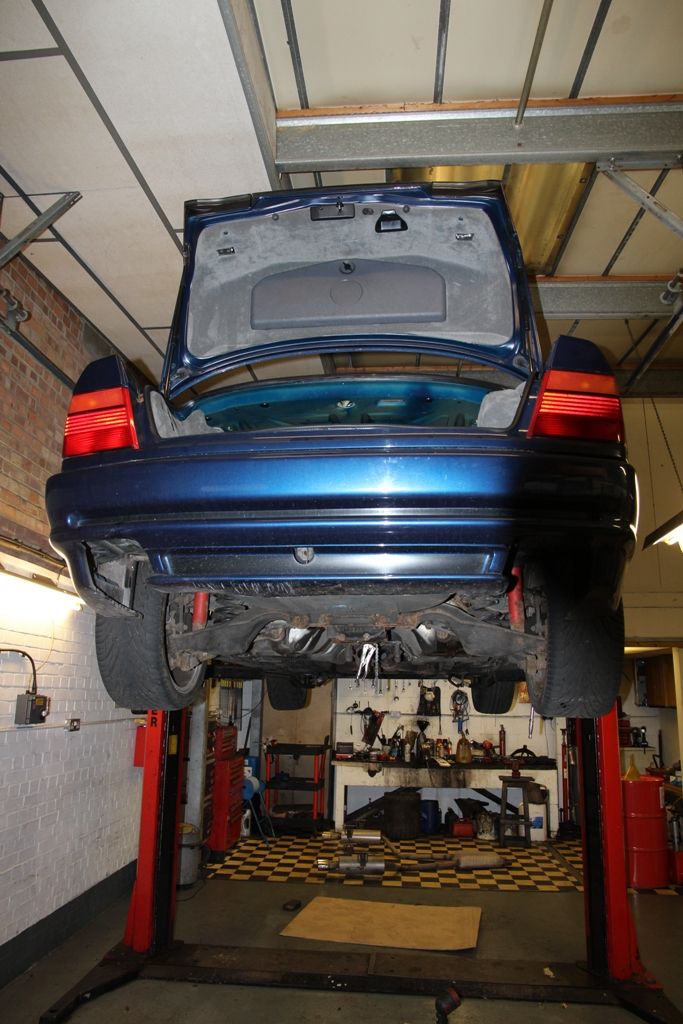
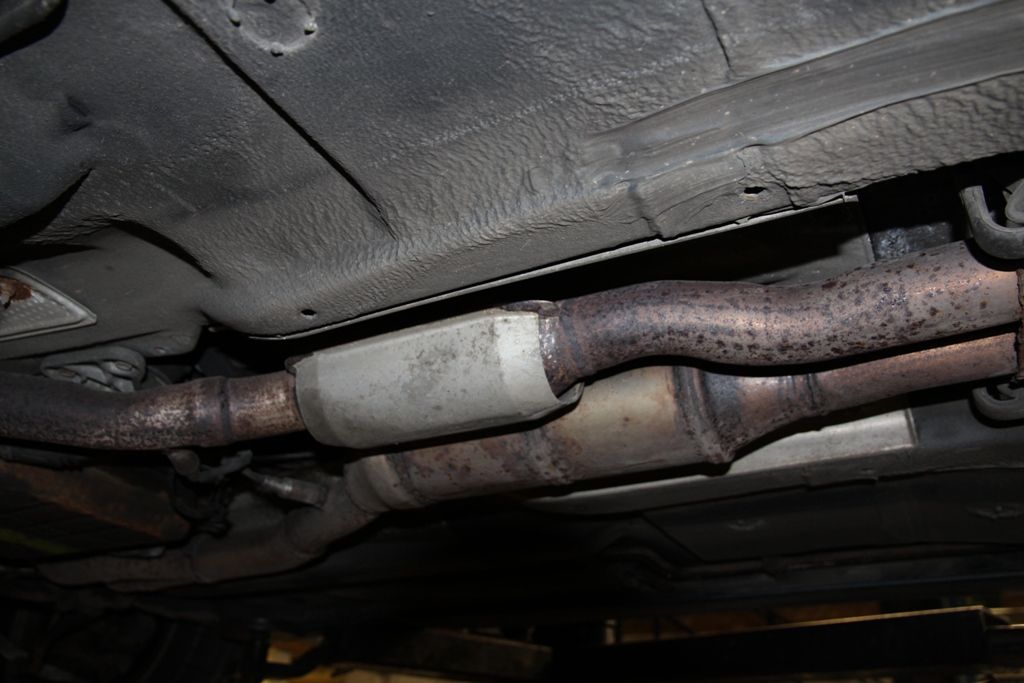
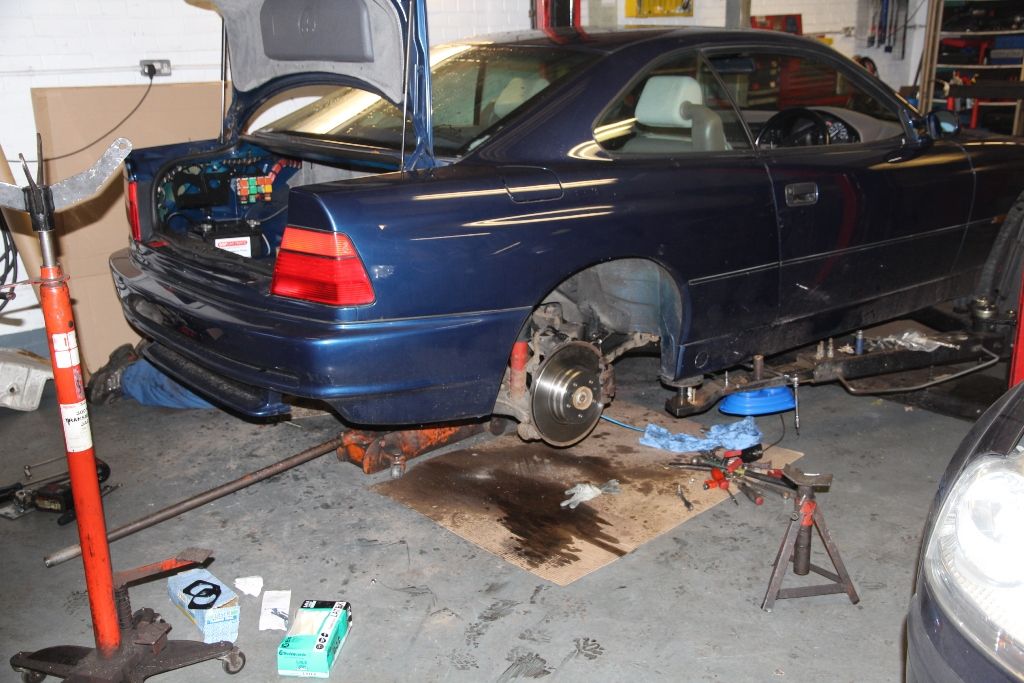
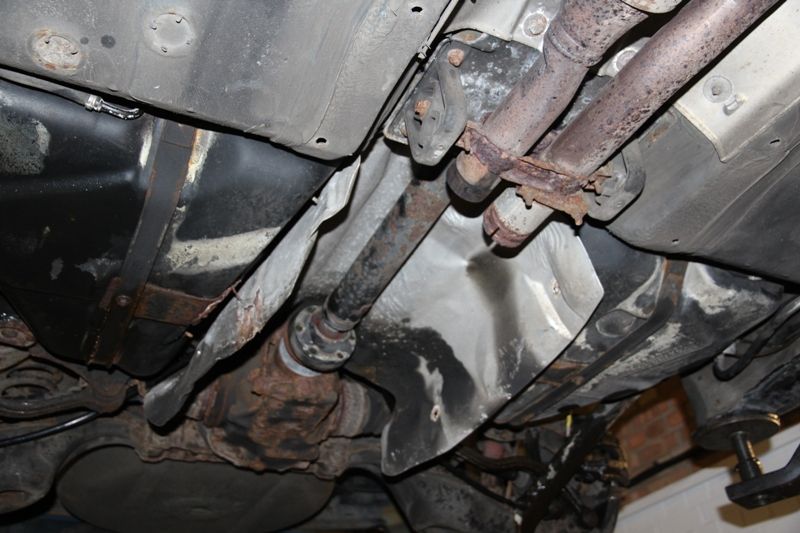
So here we brought the car into the workshop and first job was to remove the exhaust for access.....
We then disconnect the rear caliper flexi hoses on both sides from the rigid pipes on the chassis here.....
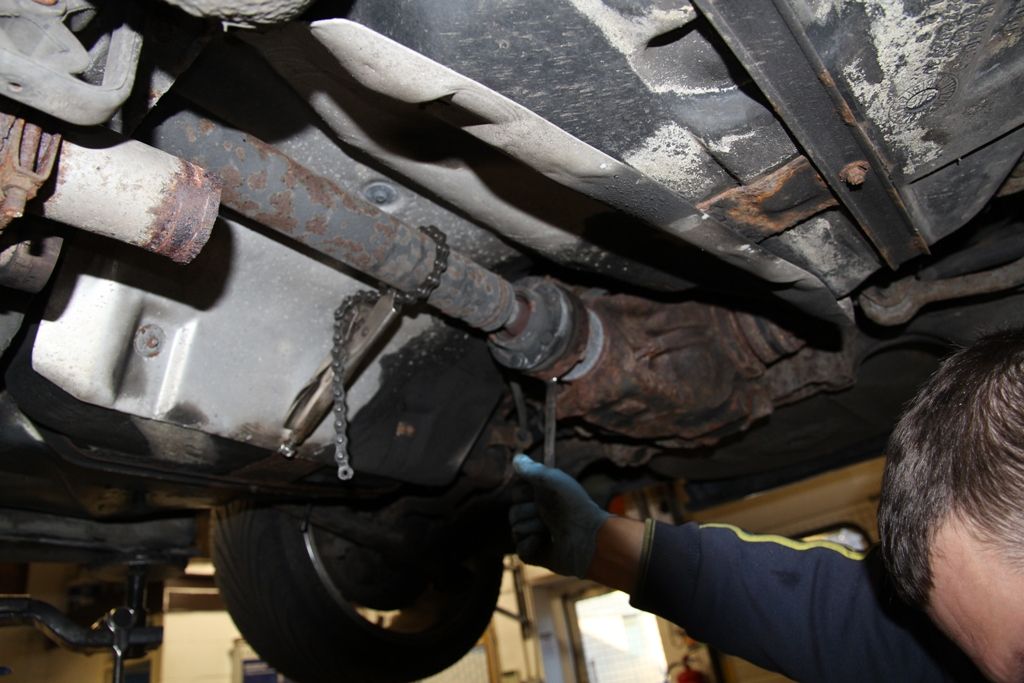
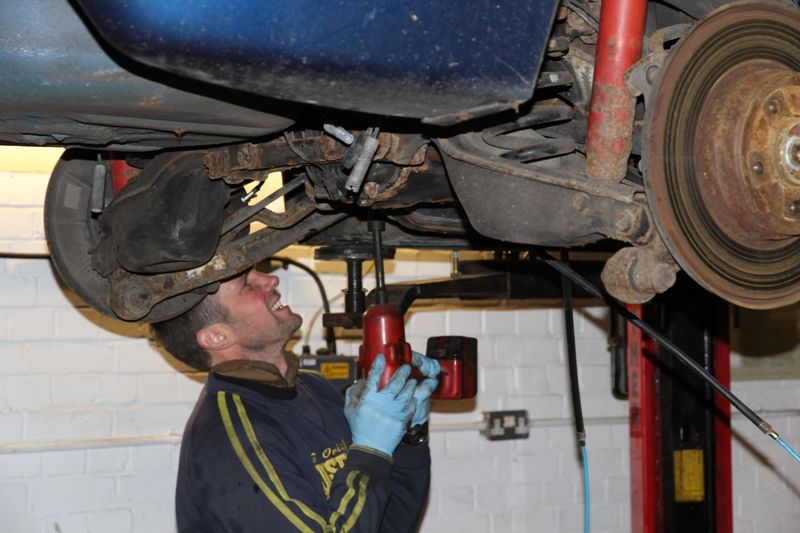
Then, by locking the propshaft, seen here using a chain wrench, we undo the diff input bolts and tap out the studs.....
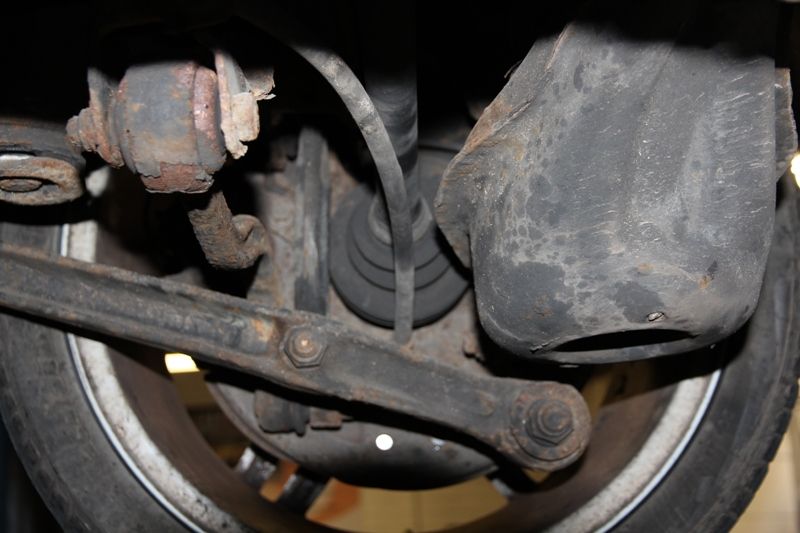
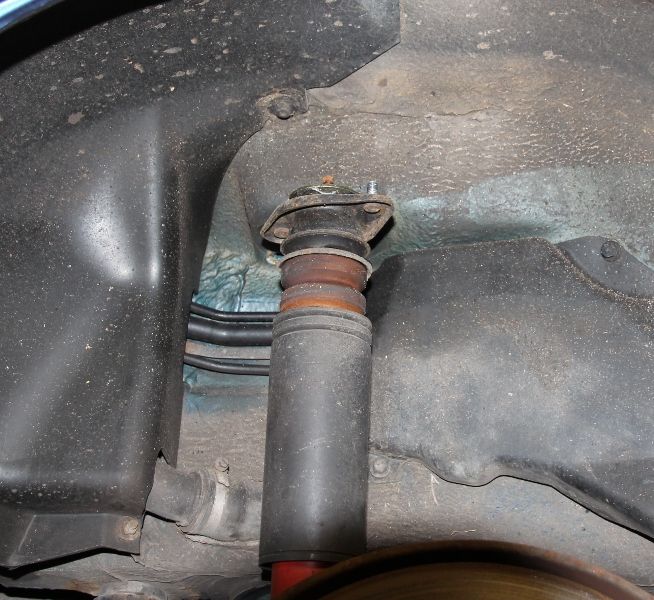
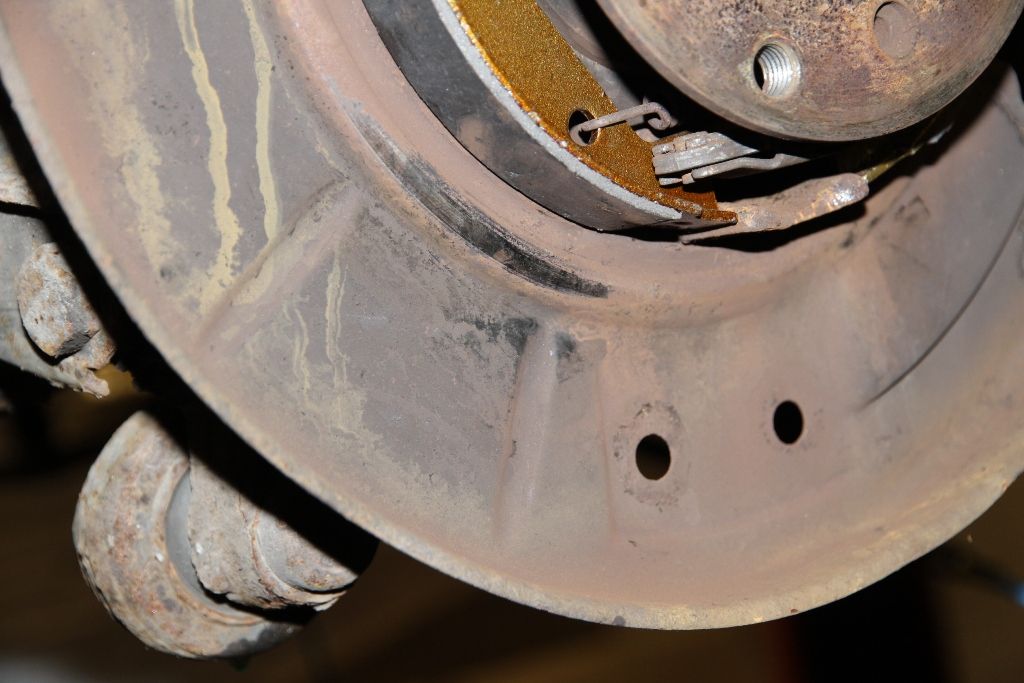
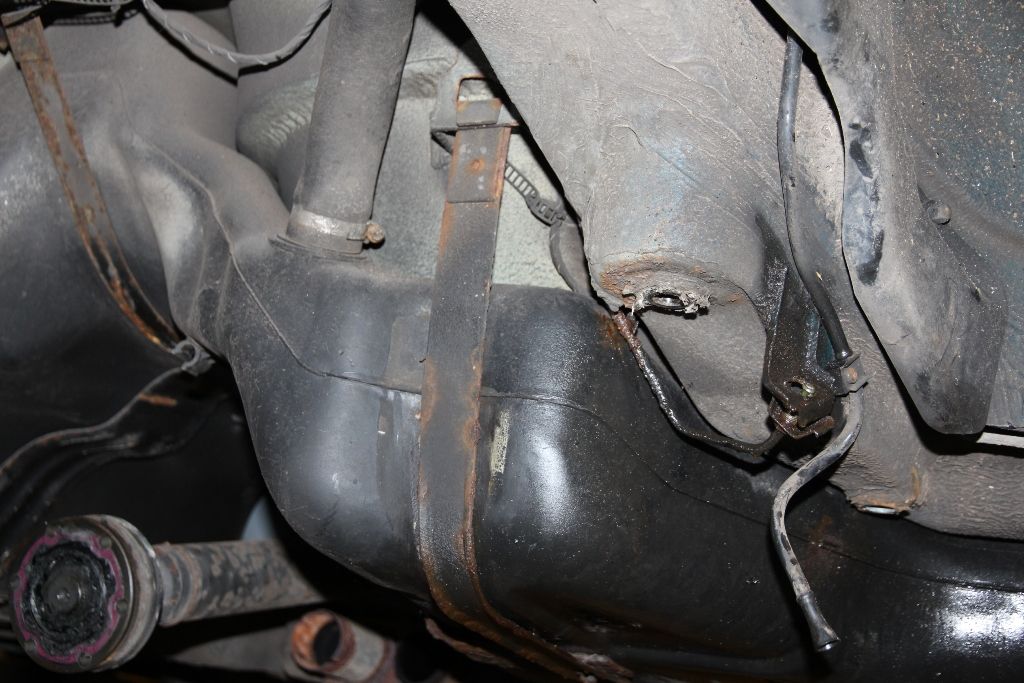
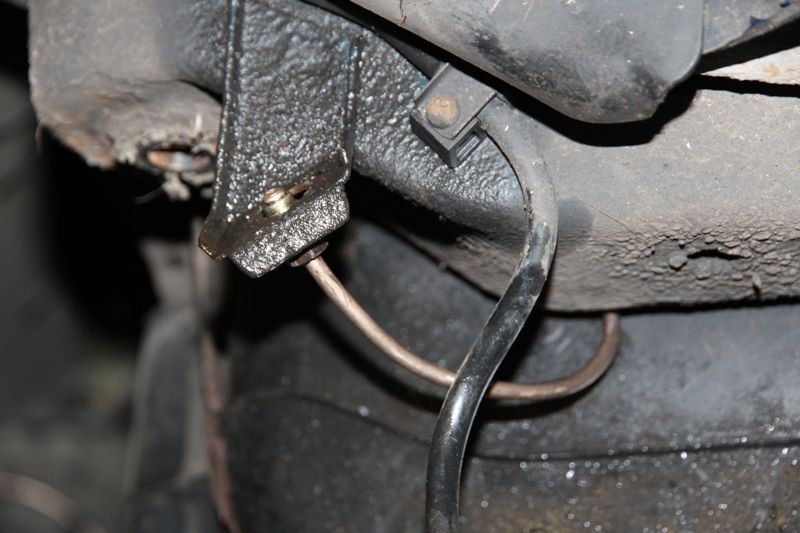
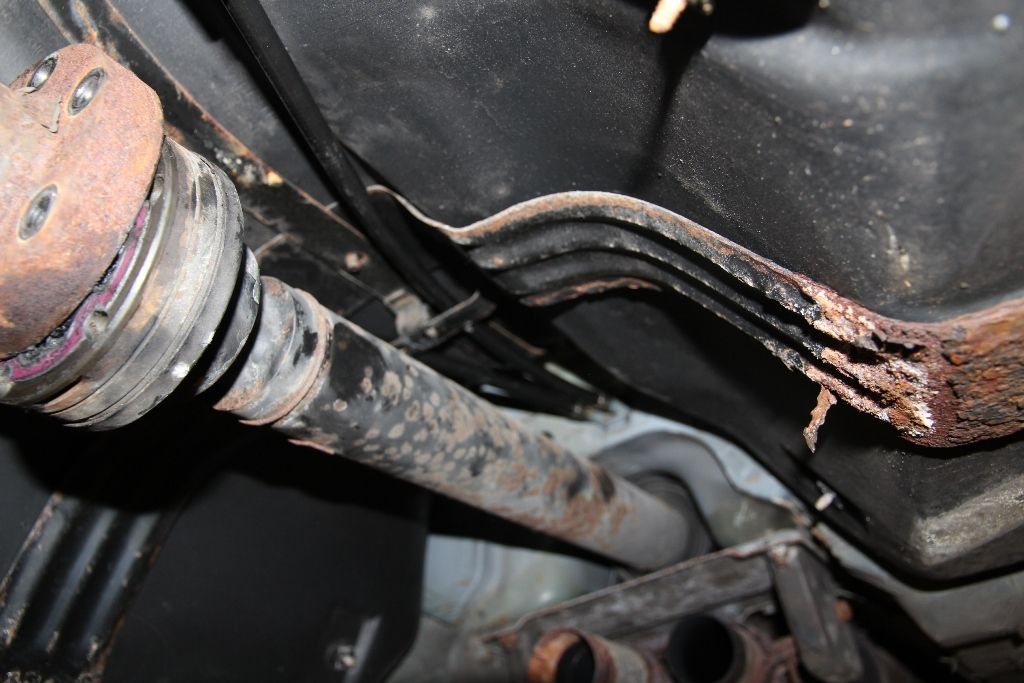
Here you can see the problem with this car. It would appear that at some stage, the car has been jacked-up on a subframe washer, has then slipped off and bent the brake hose so it rubs on the fuel tank.
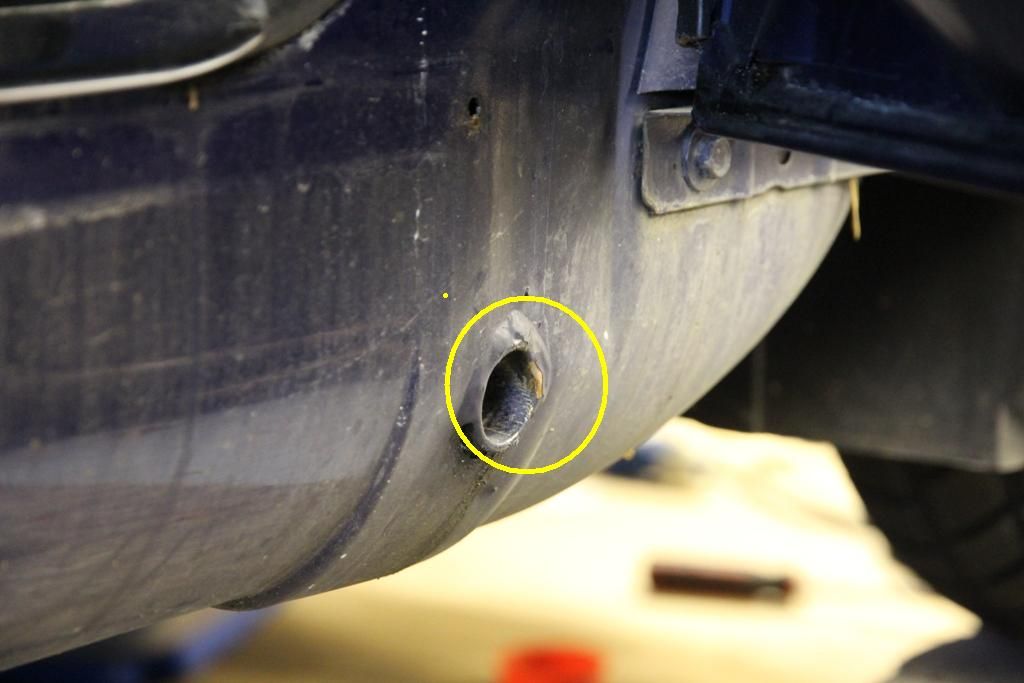
Here we can see that this car has clearly had an aftermarket catalytic converter installed on one bank.
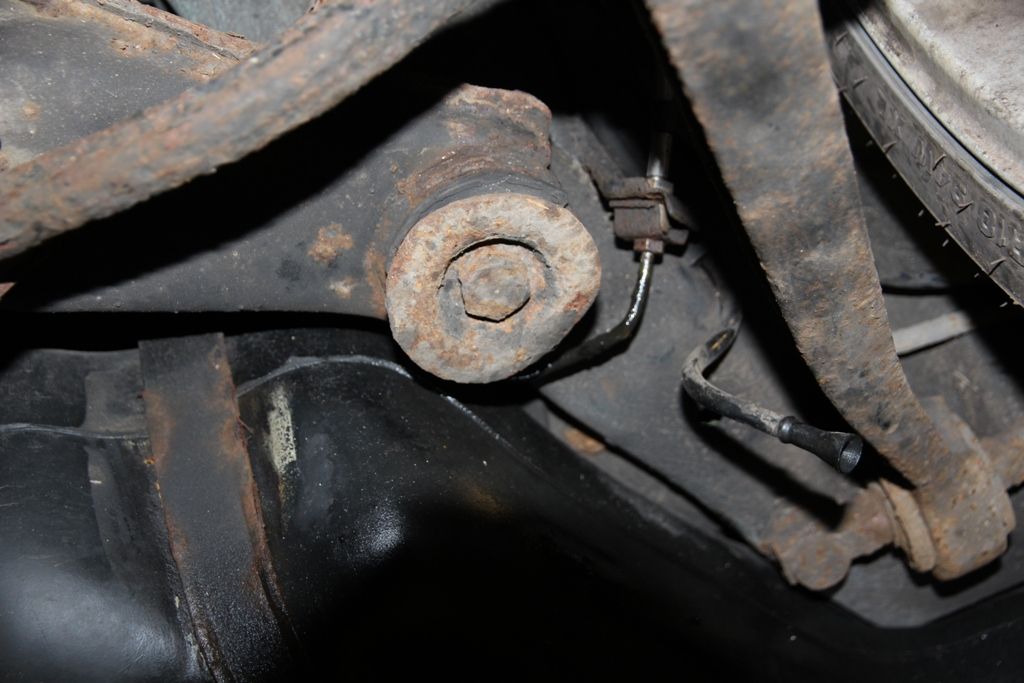
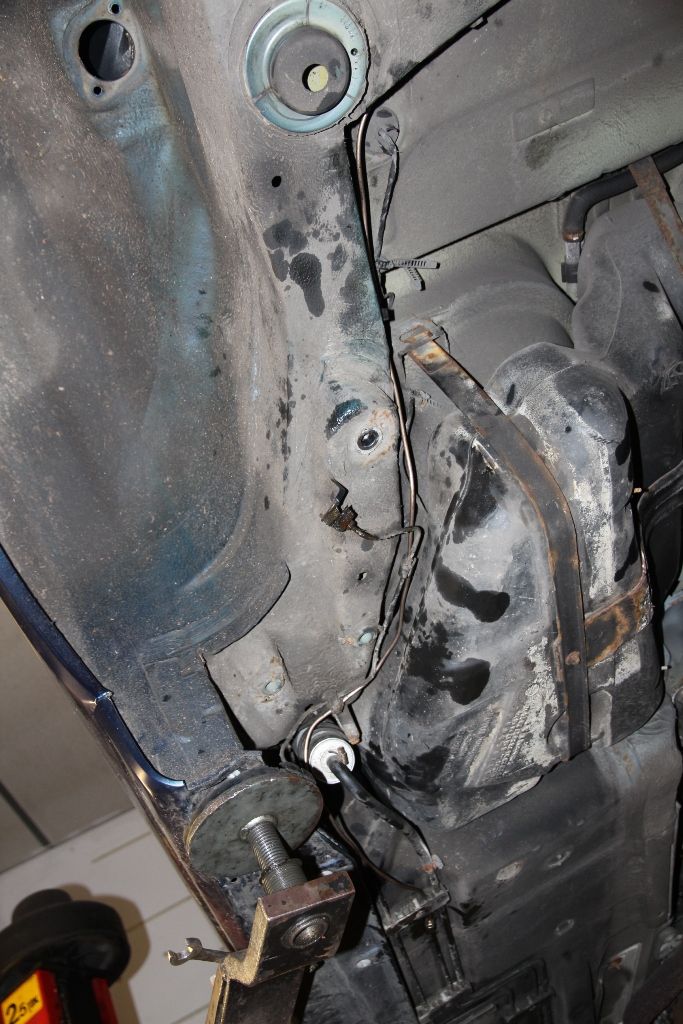
We now need to disconnect the front mountings of the rear trailing arms,
seen here in the advanced stages of coming adrift from the pins and mounts.
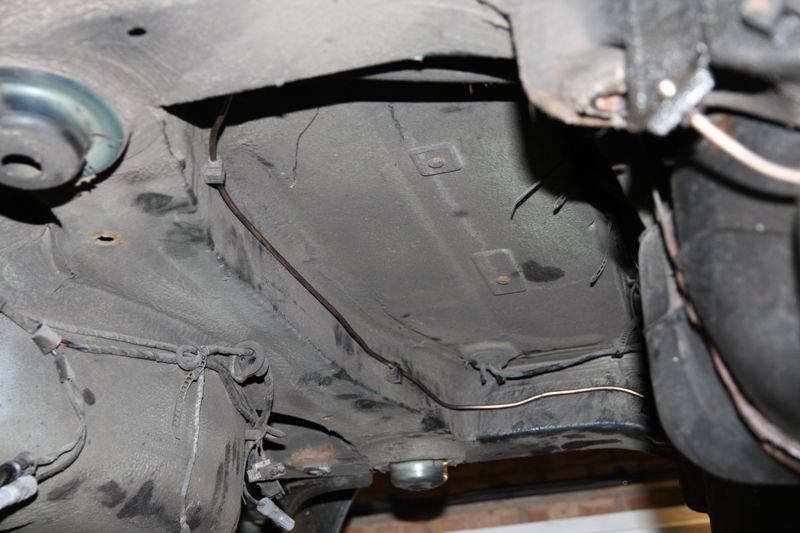
With the heatshield above the propshaft removed, you can see where the 2 handbrake cables exit the floor of the vehicle....
swing under the driveshafts....
and enter the rear of the drum backplate.
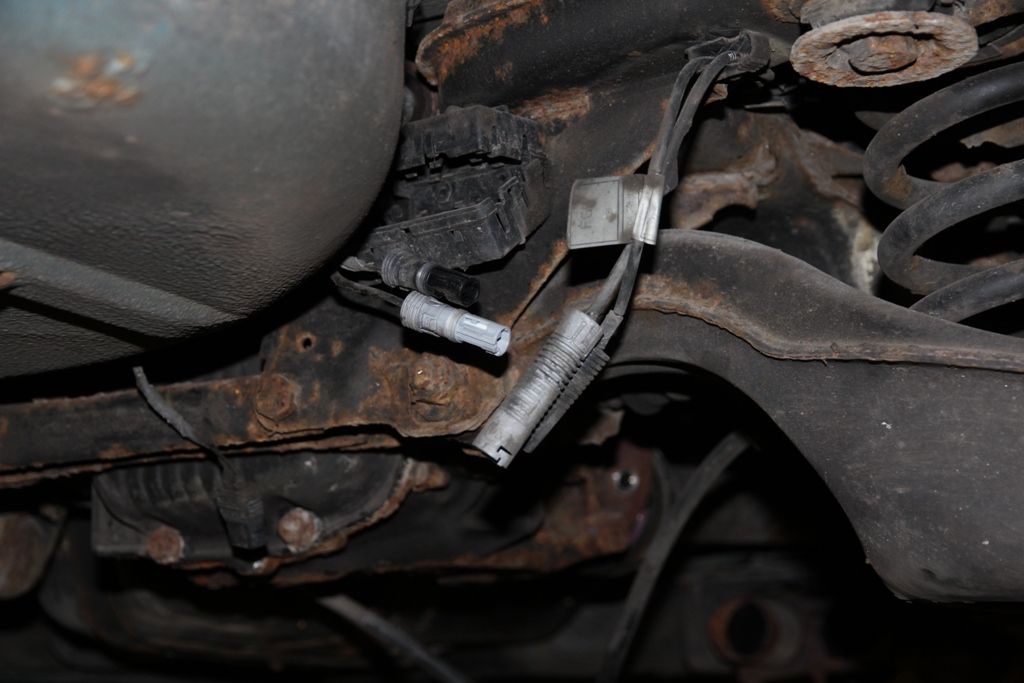
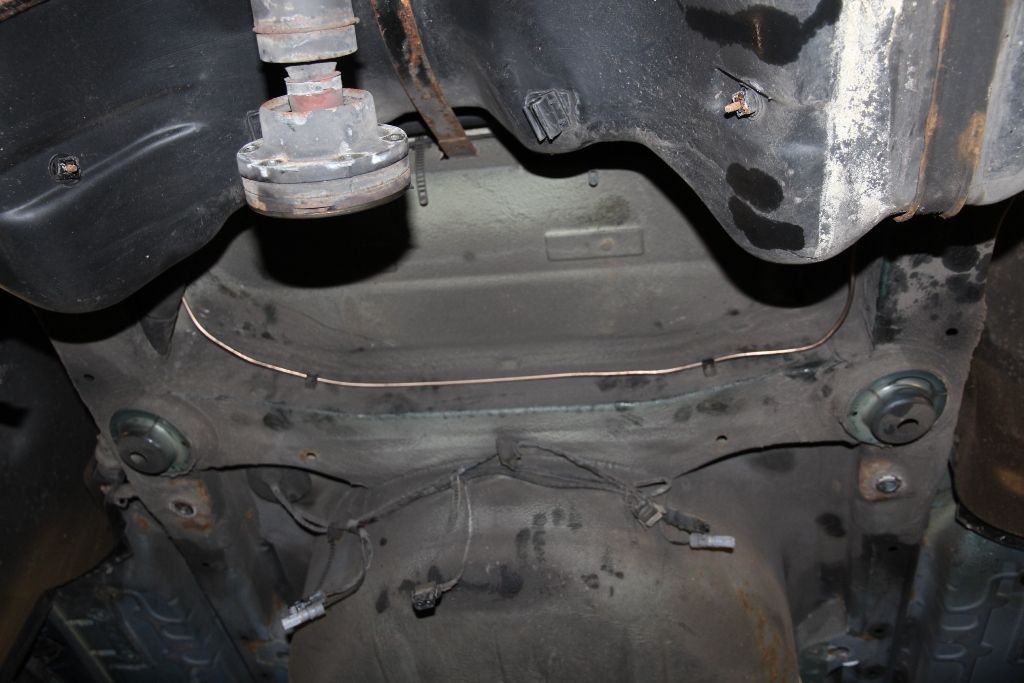
Next job in removal of the subframe is to disconnect the ABS, rear brake pad looms......
and the speedo sender connector in the back of the diff.
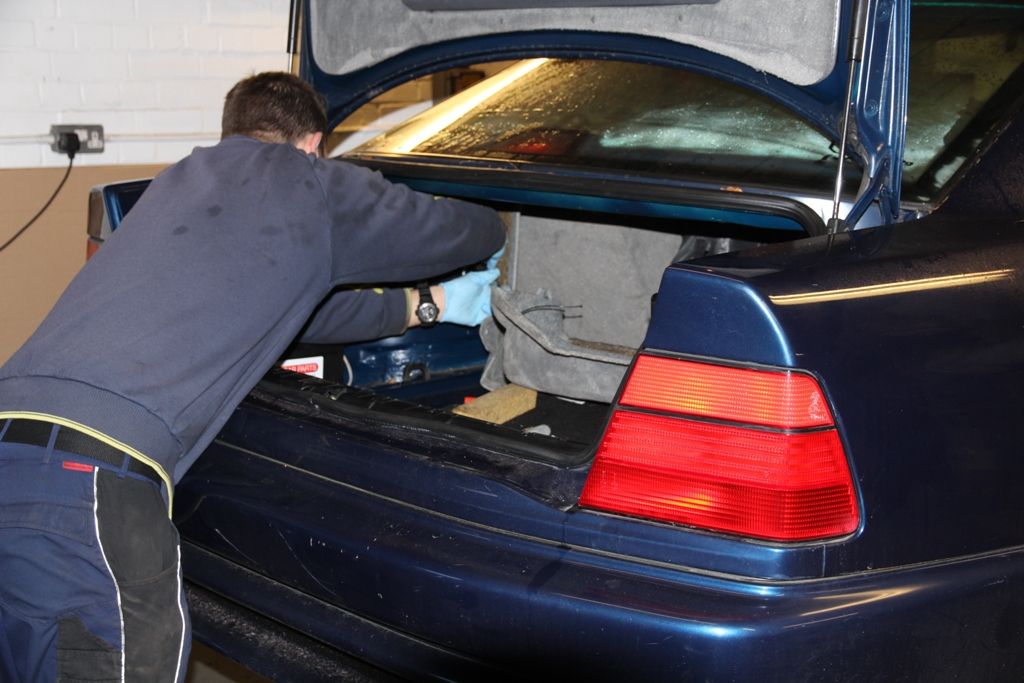
Now, working from inside the trunk, behind the side trim carpets, disconnect the rear strut upper mounts.....
allowing the strut to drop down.
Then loosen the front subframe main bolts.....
and the rear subframe monuts. It can clearly be seen here just how much fun this is!!!!!
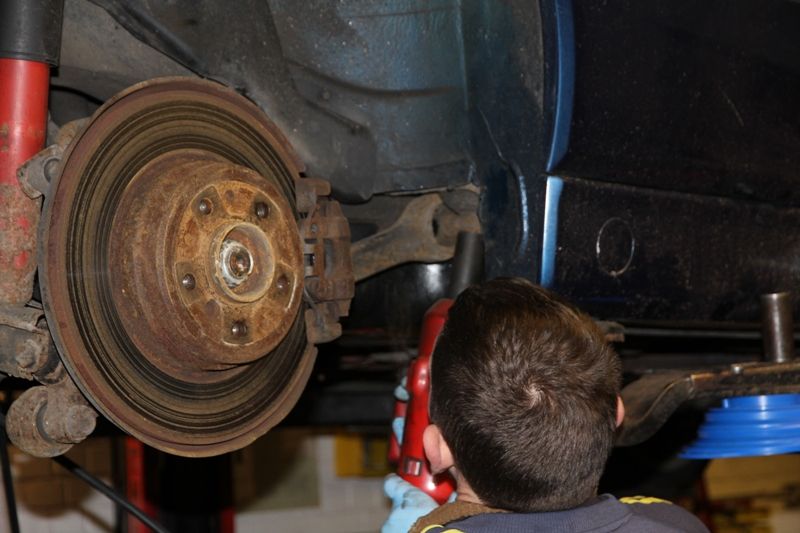
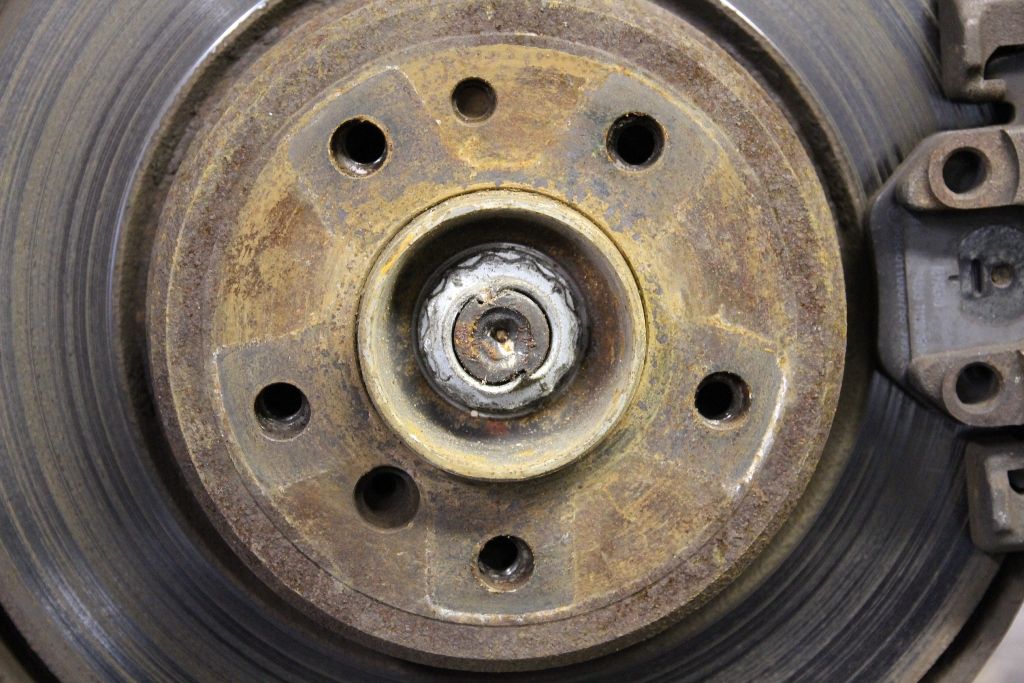
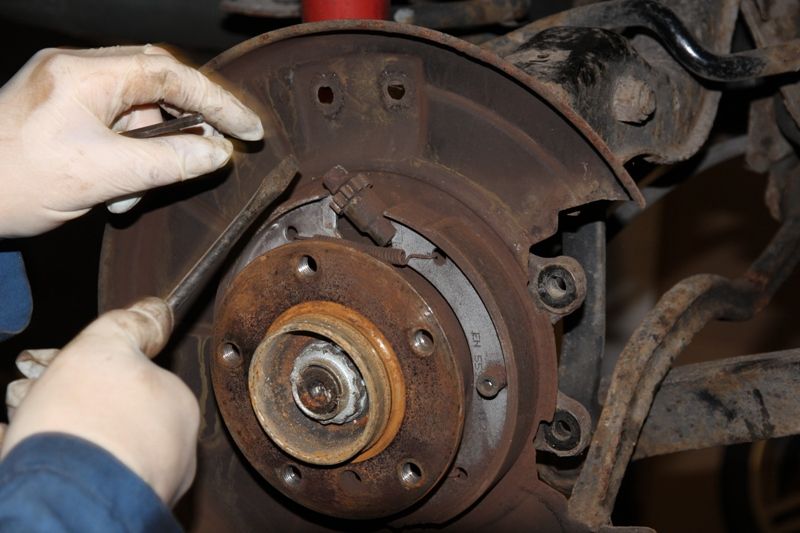
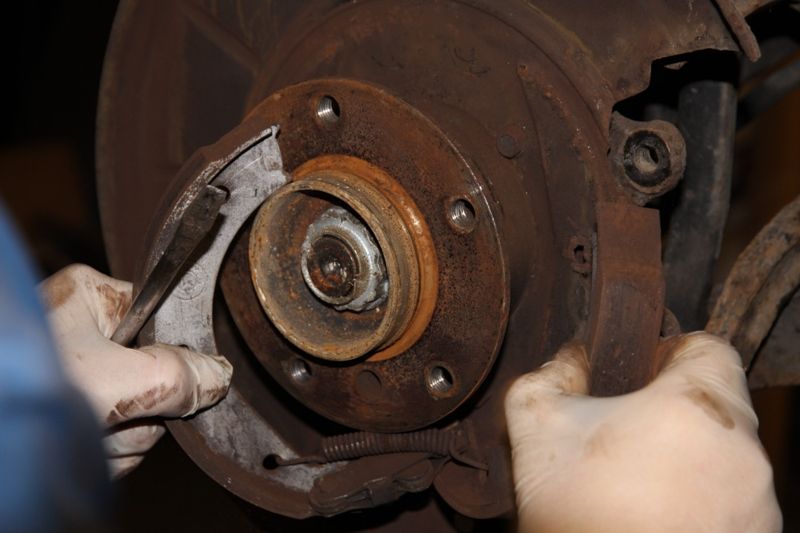
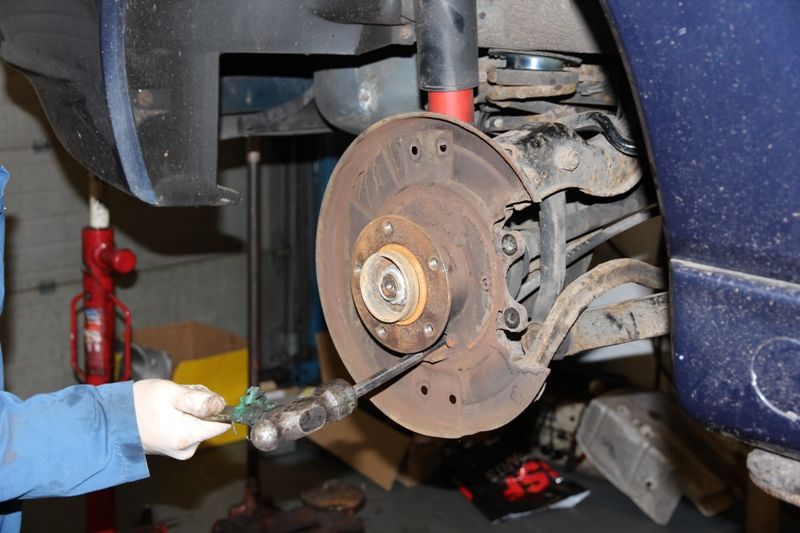
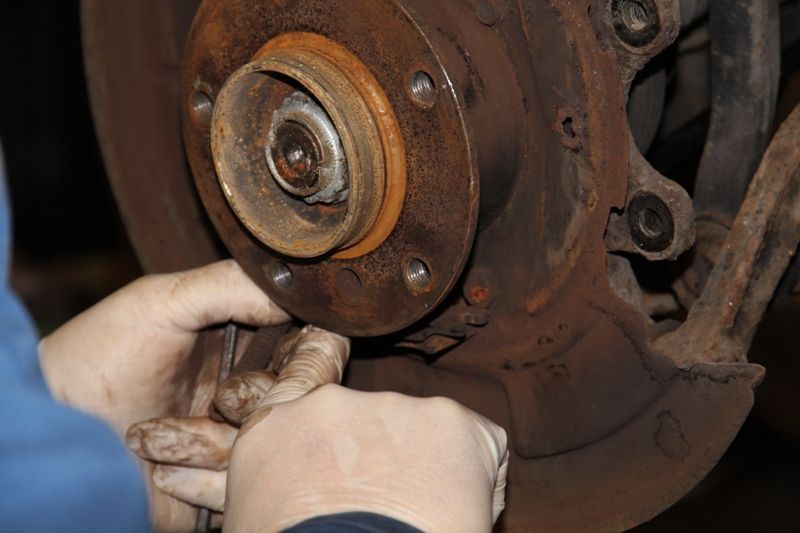
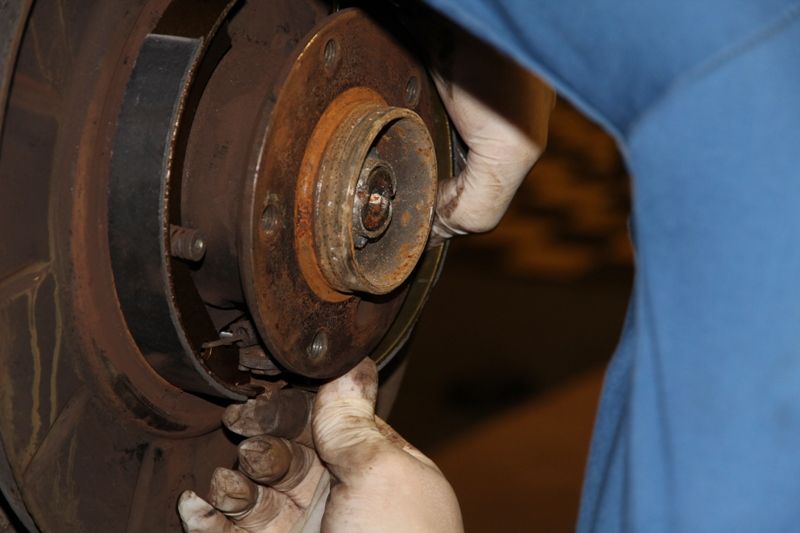
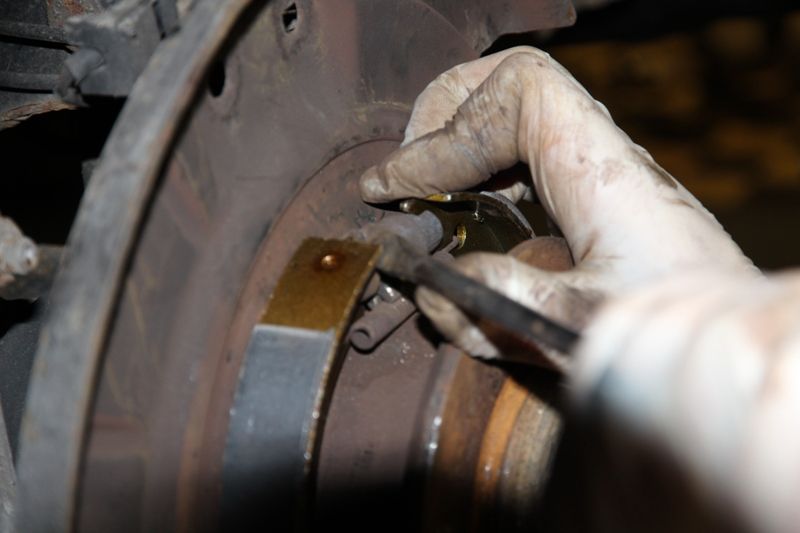
Here we see how the previous technician had decided not to refit the securing screw in the disc.....
or even bother to remove the broken thread of it from the hub flange. (We however decided to do this for the excitement of the day.)
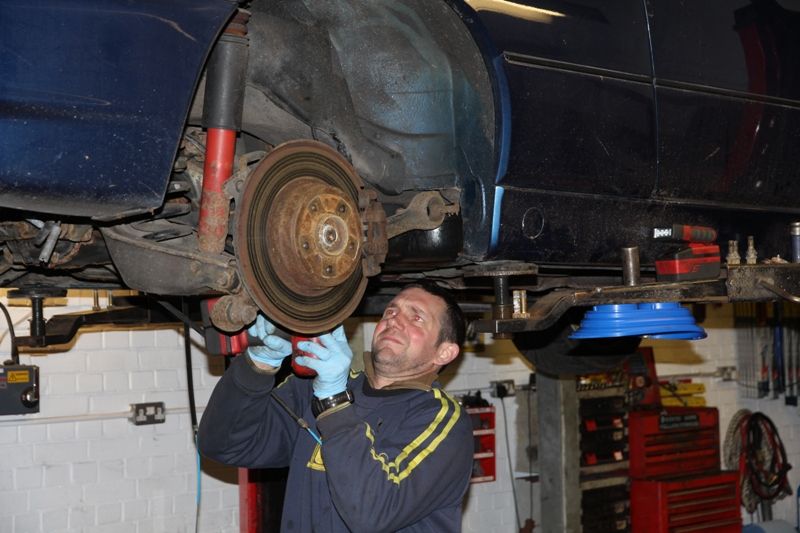
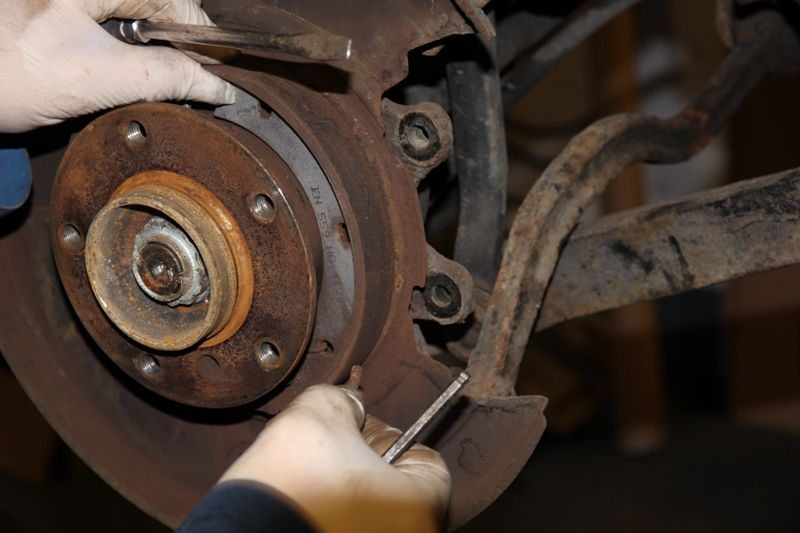
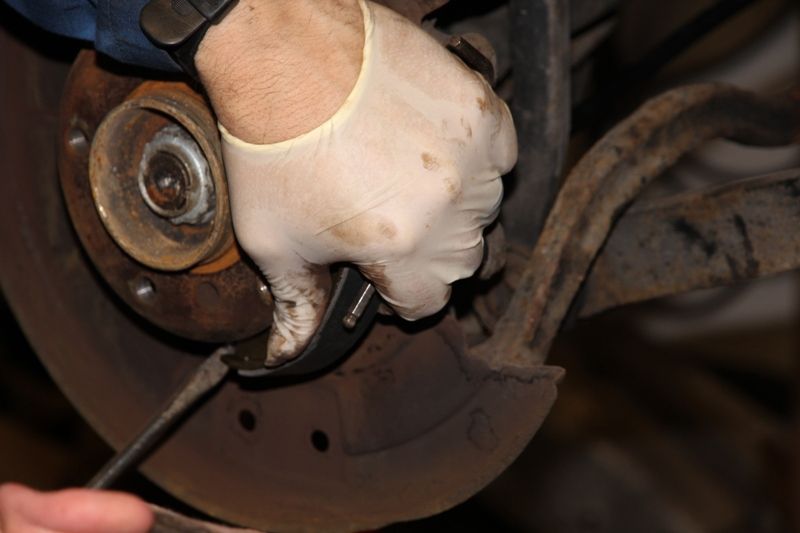
Next, remove the brake caliper by removing the 2x 7mm hex head socket screws and lifting it away....
followed by removal of the 2 bolts retaining the caliper mount. Here we are cleaning off the corrosion to allow smooth fitment and operation of the pads in the sliders of the mount.
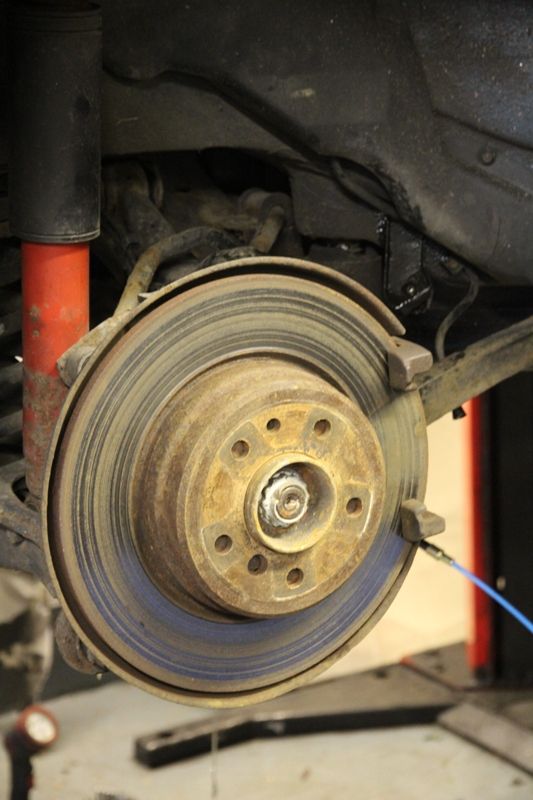
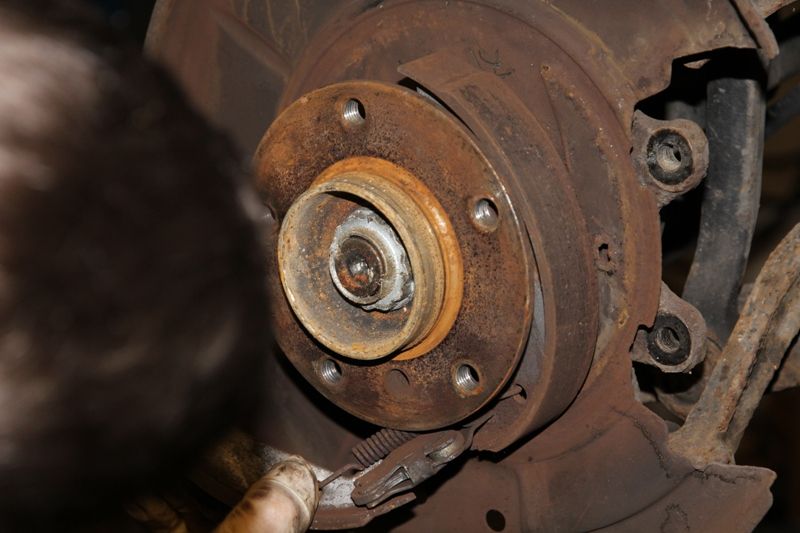
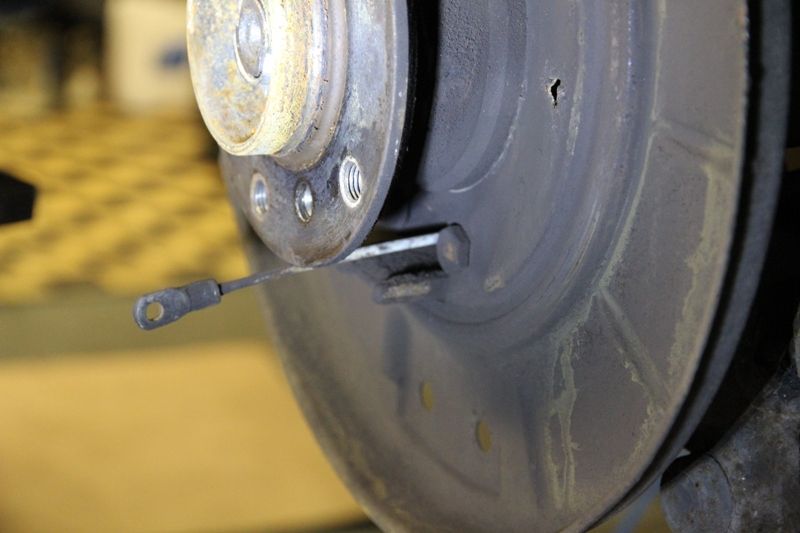
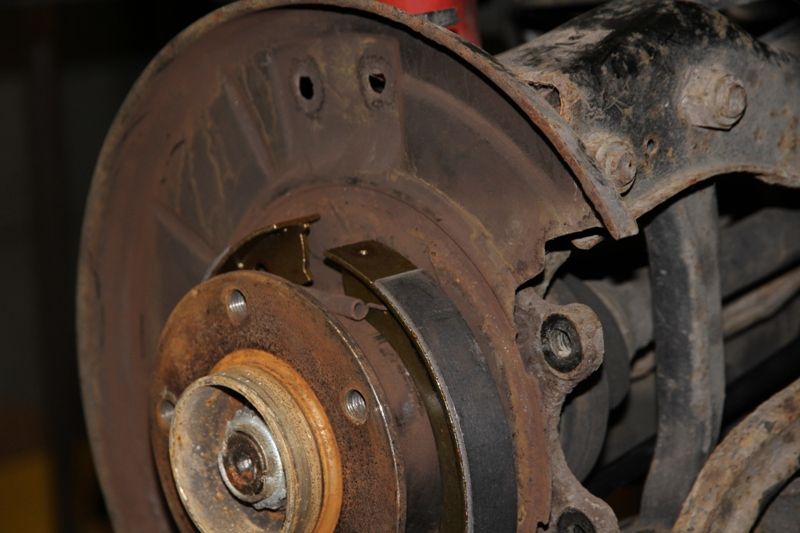
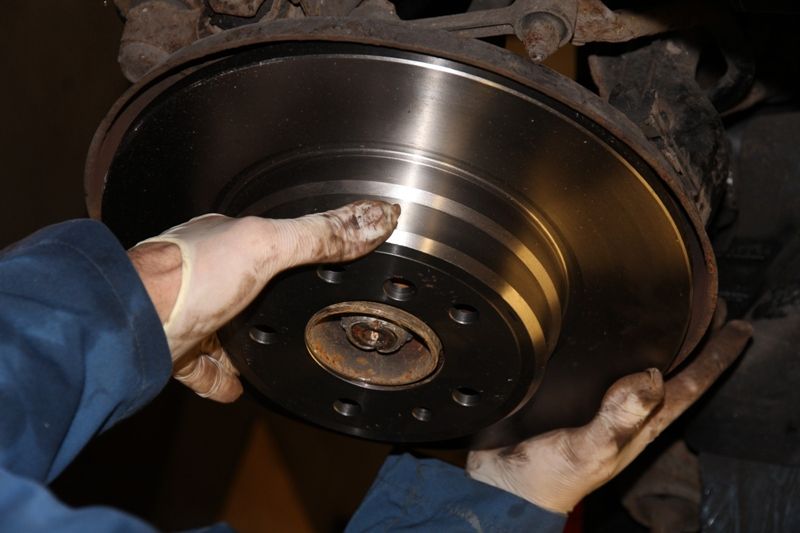
The discs can now be tapped with a mallet to free them from the hub flange and lifted clear to expose the handbrake shoes. Or as in this case, the backplate bent by the previous installer who left it as such so the disc rubbed on it, seen here at around 7 to 8 O'clock.....
Now, removing the handbrake gaiter from inside the car, remove completely, the 2 nuts on each cable to allow the cables to be pulled through the floor of the car as the subframe is removed. From under the car pull the cables through the floor and from out of the plastic clips on the underside of the car.
As these cables are to be replaced anyway, we need to completely strip out the rear handbrakes.
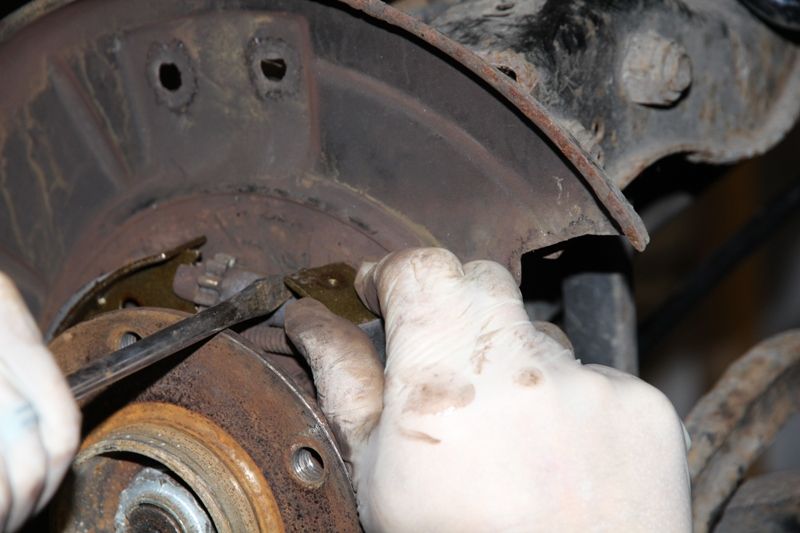
Replacing the shoes is a pretty straightforward job. With the disc/drum removed as described earlier......with a screwdriver, lift out the adjuster....
and using a hex key, remove the hold down springs by pussing in and turning a quarter turn in either direction. The push the tops of the shoes together and remove the top spring.
The shoes will now be all loose and so you can now remove the lower spring and lift off the shoes, exposing the small handbrake mechanism....
or alternatively, swing the shoes around the outside of the flange with the spring still attached and then remove from the mechanism.
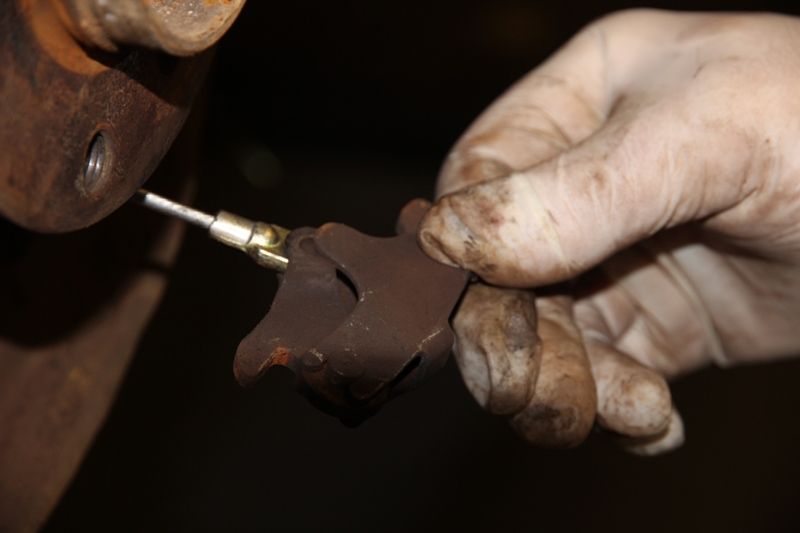
The handbrake cable comes through the backplate and is attached to the mechanism with a small easy to lose pin which when removed, allows the small mechanism to be removed leaving the handbrake cable exposed.
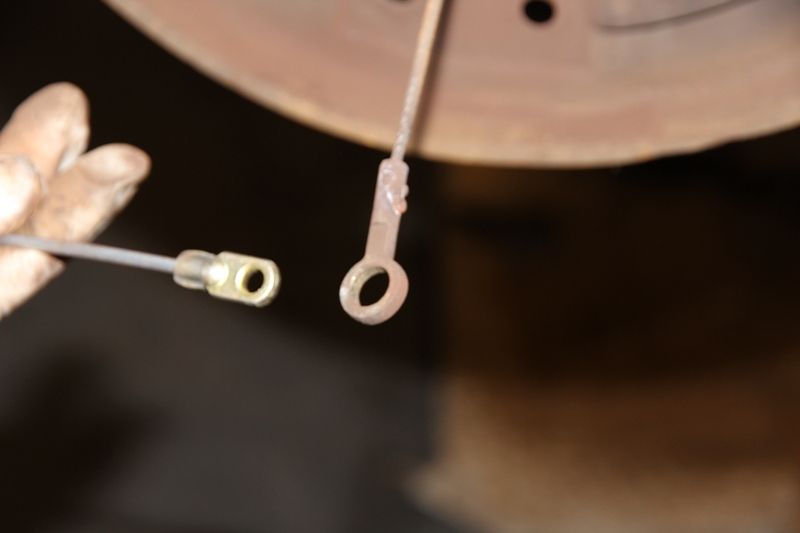
Here we see how our previous "BMW Specialist" fitted the completely wrong handbrake cable, explaining the failure of the statutory test. New BMW cable on the left, existing cable on the right.
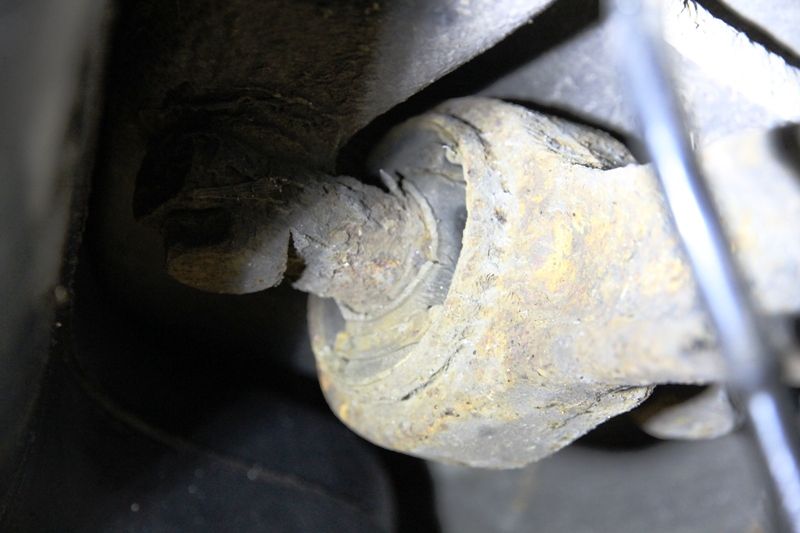
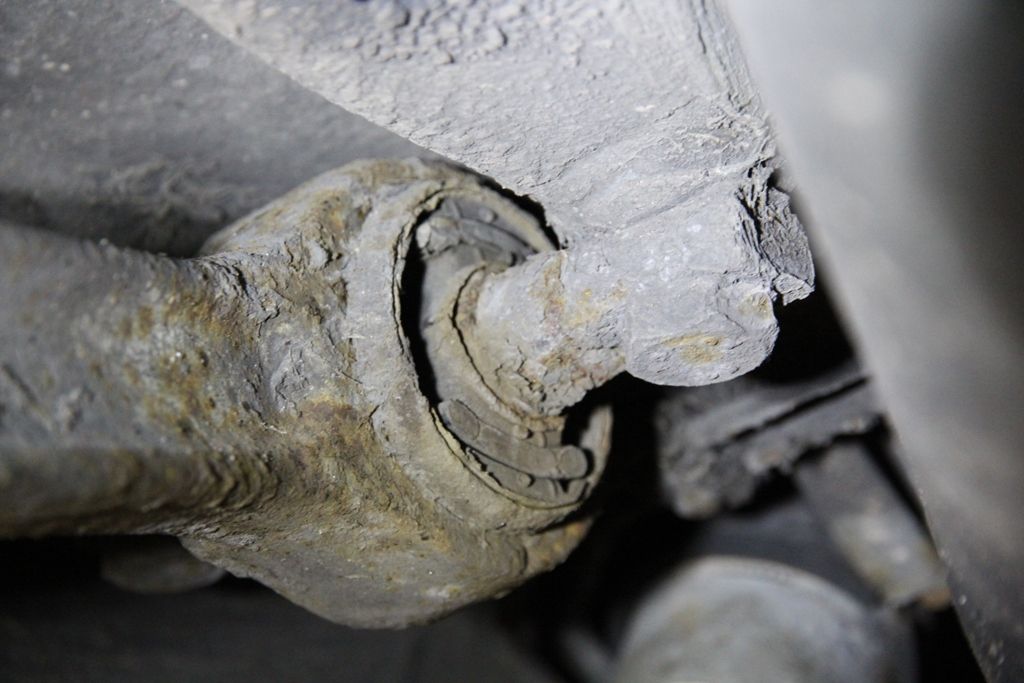
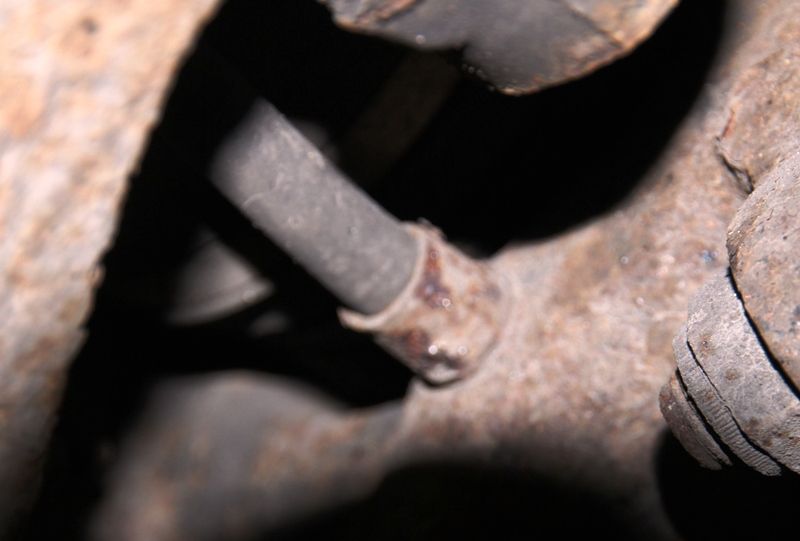
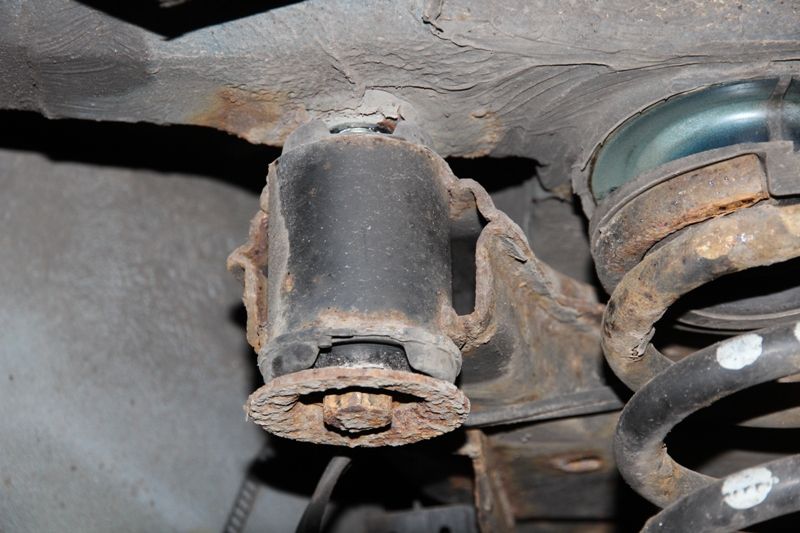
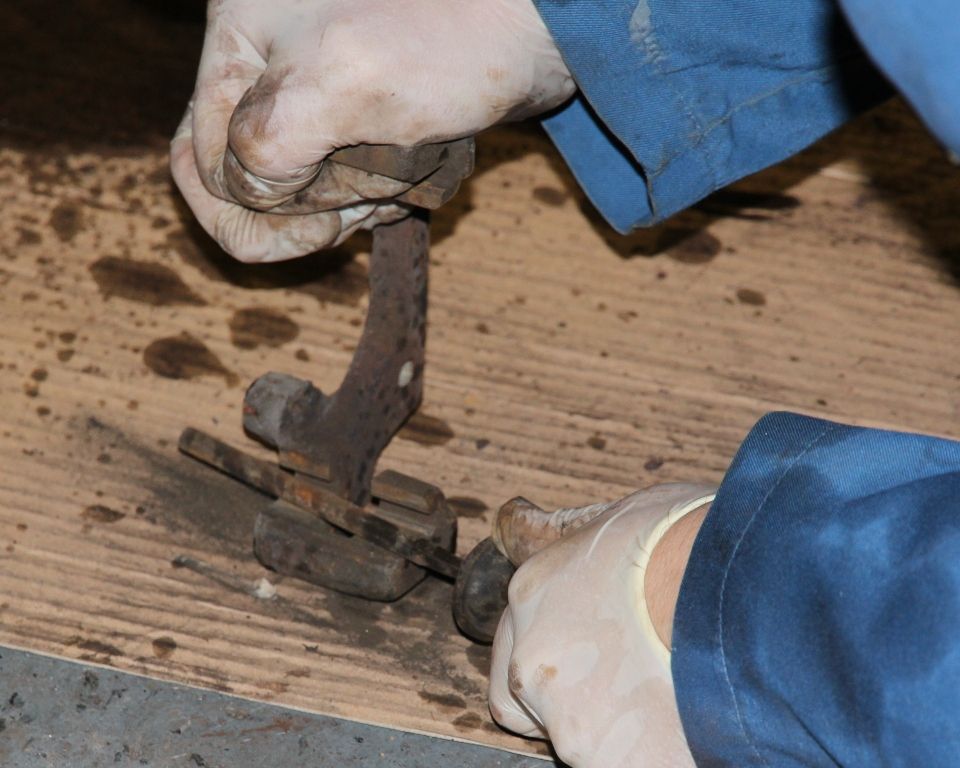
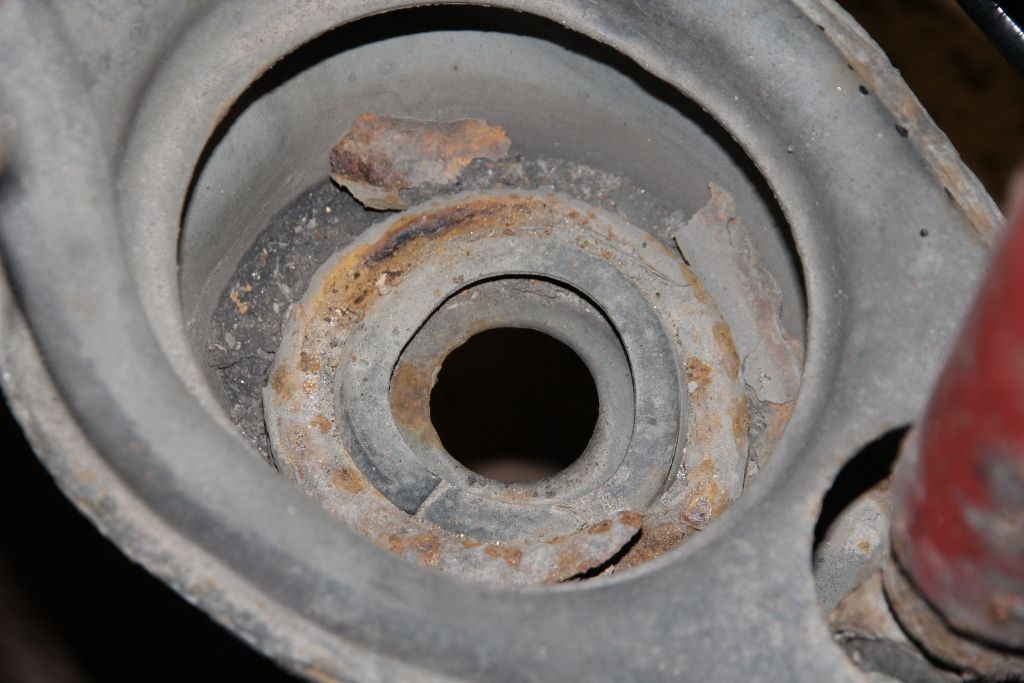
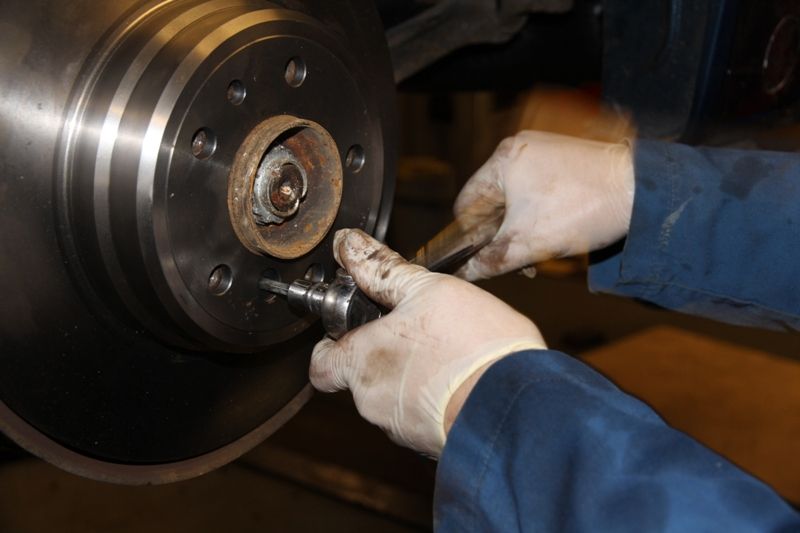
There now lies the task of removing the extremely corroded handbrake cable from the hub carrier and there is no subtle way of achieving this on a 15 year old car so......
followed by a cleaning of the hole with a small file.
Member
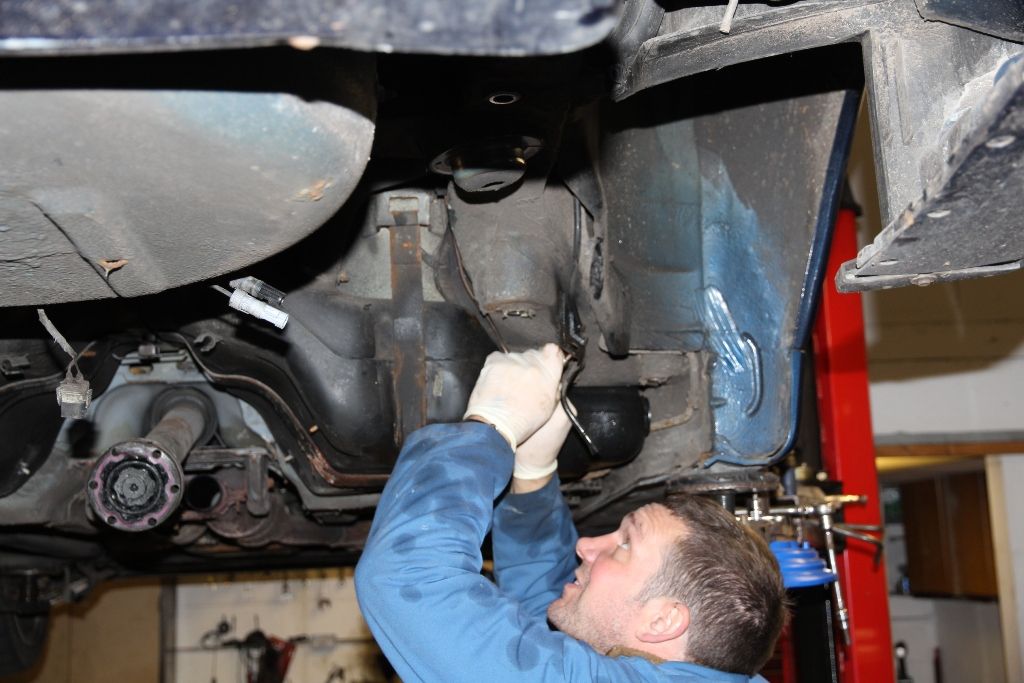
Now, lowering the car down and supporting the subframe on a jack and stands, we can completely remove the subframe bolts and lift the car off the subframe.
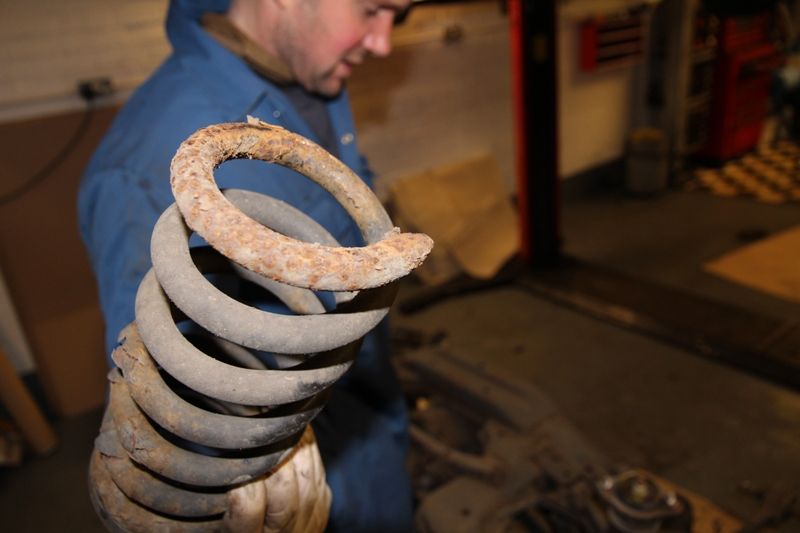
O shock and surprise, a broken rear coil spring......
Which looks like its been that way for a while undetected.
The chafed hose and the consequencies can now clearly be seen.....
So with a few metres of brake line and some fittings, we get to work.....
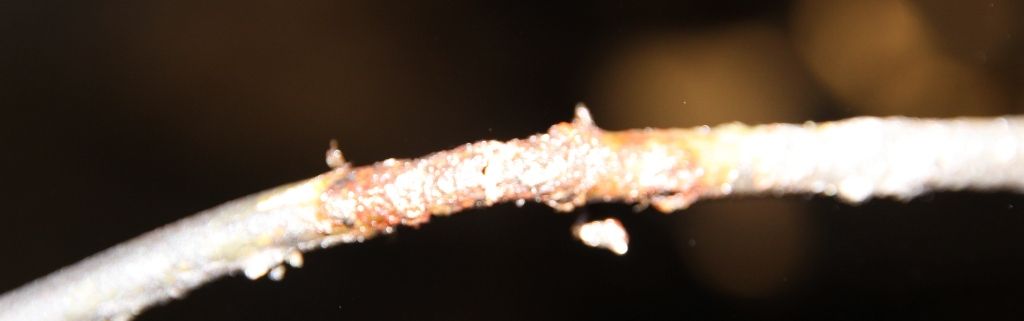
Here the damage and tiny hole in the old line can be seen....
Here it is clear the impossibility of doing this with the subframe in......
We can now lower the car back down onto the subframe and get the 4 main mounting bolts started......
Lifting the car back up, we can feed in the floor heatshield.....
and lowering the nose of the diff slightly, re-position the propshaft into the drive flange and then tighten all 4 subframe mounting bolts.
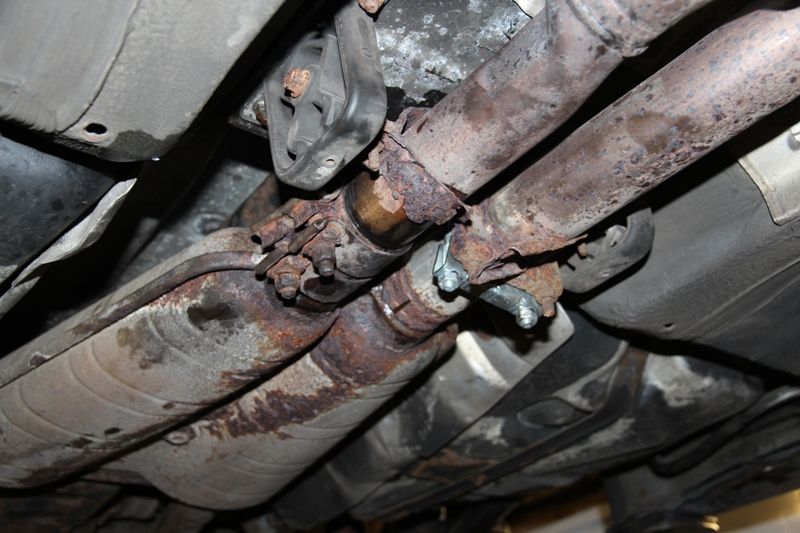
Refit the exhaust........here the center mount has probably seen better days!
We can now reinstall the rear brakes.
Refit the small handbrake mechanism on the handbrake cable....
followed by one shoe and its hold-back spring....
and the bottom spring and the other shoe.....
Then the top spring......
and adjuster.....
Now using a screwdriver, turn the adjuster a few slots at a time.....
until the disc only just slides over the shoes but without binding.
The disc retaining screw can now BE FITTED.....
and the disc checked for free movement without binding. A tap with a mallet on the hub area of the disc will help centralise the shoes. The calipers can now be refitted with new pads, reattached to the brake pipes and bled.
Now refit the wheels, double check all the bolts and fixings, reinspect all hoses and cables are both reattached, routed and clipped correctly and you are ready to go.
8Tech.
Last edited by 8Tech; 11-29-2012 at 04:41 PM.
Member
Great write-up Gerry. Doesn't seem ad daunting as it once was.
Member
Thanks 8 Tech, keep them DIY's comin
www.wokke.de
Great write up Gerry. A bit too late for me though.
Is this an average UK car or a very poor example? Looks pretty shocking from underneath.
I was waiting for this handbrake cable corroded in the wheel carrier part - and then it came. Last pic in 1st posting.
When I did my rear axle I actually had to drill out the shit.
The previous "mechanic" must have been a total idiot. Also a wrong cable can be fitted using some copper grease to prevent corrosion. Sometimes I have the impression that grease is something most mechanics seem to hate. Same thing with the small securing screw on the rotors. Apply some copper grease and never ever have an issue again.
Cheers
Wolf
Member
I think this is a little worse than average. My own underside has surface rust, sure but not like that.Originally Posted by wokke

www.wokke.de
What?
Your car has rust? Shame on you.
Member
Well, I have no rust
Member
Mine too, the bottom of the car is rust free though.
Member
Great write up! I hope my brake line doesn't need changing for a while.
Our roads are like driving in the ocean during the winter, tons of salt sprayed Onto them every time it drops below 0c.
Last edited by Omega man 1969; 11-30-2012 at 01:32 PM.
www.wokke.de
But who drives an 8 in the ocean?
Not much better here but 8 owners have winter cars.
Member
Only the fools from top gearyep, the E38 for the winter!
Learning to be Faster
LOL. X5 for the winter for me while the 8 takes a long maintenance nap.
Manual Swapper
Wow, the corrosion is shocking.
Nice writeup though!
Member
How's this for a nice BMW specialist mod? Same car.

Member
Nothing like that
Me too, its good the way only the exhaust seems to attract it and I can live with thatjust about
Member
My car is all rusty also. I was shocked at the extent of it as can be seen here when I removed my sill trims........
www.wokke.de
Damned.
Barely worth a restoration.
Member
Rust is a typical problem with cars from Uk. I had four eights from Uk and and several other models and all had problems with rust even those for 8-9k.
I think the climate is doing all the work. Yours is a little worse than average. You should take some action as soon as possible before will be too late. All rust parts should be sandblasted, some parts may break up during this operation if they rusted completely.For sure you will have rust in the doors in the water drains and under roof trims and all around the rear and front windscreen. I alrady done one restoration like this is a lot of work to get this right. After removing the parts and sandblasting best to take it to the galvanize and after that powder coat them.
Anyway great write up!
Member
Thanks for the tip on the rear calipers taking out the guide bolts first. First time on any car I have had to do that to get access to the Main Bolts. I have Bookmarked this for when I rip the rear suspension apart.
Member
Thanks Great Instructions, rear end needs a refresh https://youtu.be/5cKT2LJz3A8
IMG_20211127_145706_1.jpg
Last edited by rjjablo; 11-27-2021 at 06:31 PM.
 Posting Permissions


 Reply With Quote
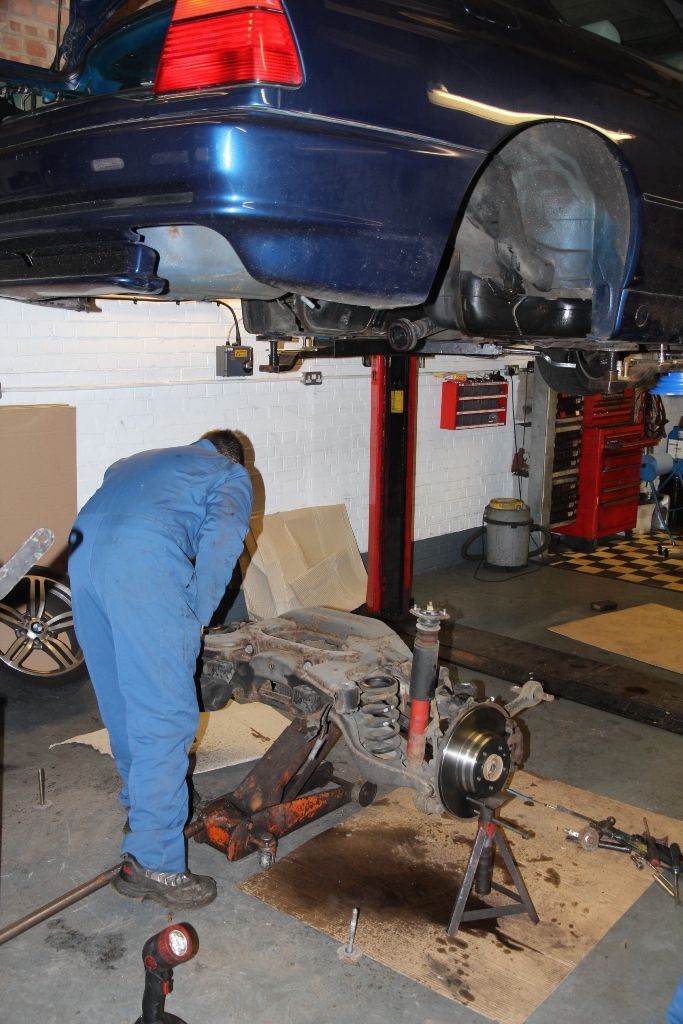


Bookmarks