
 Member
What brand of gloss black paint did you use? Looks amazing!Originally Posted by RVAE34

Member
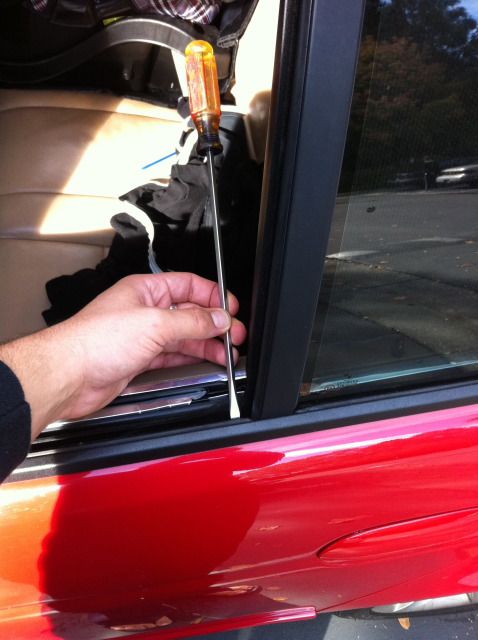
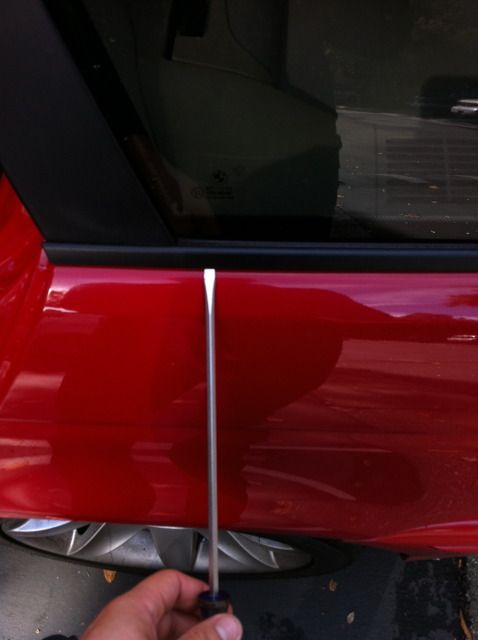
FWIW - go to Harbor Freight or similar store and buy the multi piece plastic pry set instead of using screwdrivers for this sort of work.
I think the set from HF was $7 and eliminates the worry of scratching anything.
I dont know half of you half as well as I should like; and I like less than half of you half as well as you deserve.
Having No Trouble Here
BMW CCA Member
if you read the thread he says there's places those don't work, which is not surprising to me - I have those but sometimes you need a screwdriver type thing instead. but if you read the thread he also says you should probably tape up the screwdriver, which is an absolute must - I'd wrap it in electrical tape down the tip w/ only the tiniest bit of metal at the tip exposed where you use it to pry on the tabs well away from the paint. another trick when prying is to slip a thin piece of cardboard under the shaft so there's no chance it slips and scratches or dents.
2003 M3CicM6 TiAg
2002 540iT Sport Vortech S/C 6MT LSD TiAg
2008 Audi A3 2.0T DSG (the daily beater)
2014 BMW X1 xDrive28i (wifemobile)
Former:
1985 MB Euro graymarket 300SL
1995.5 Audi S6 Avant (utility/winter billetturbobattlewagen)


Member
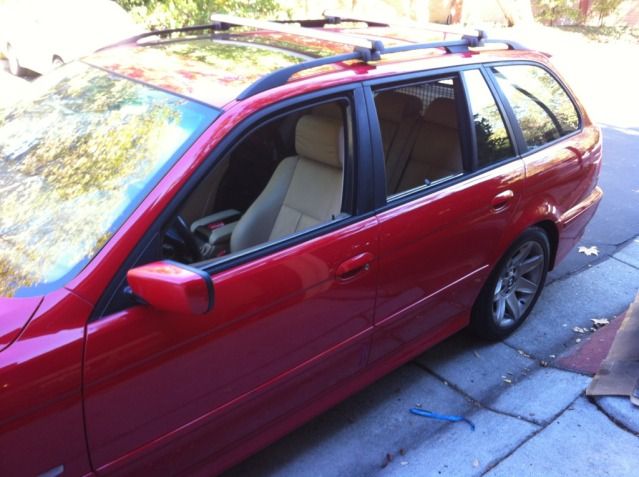
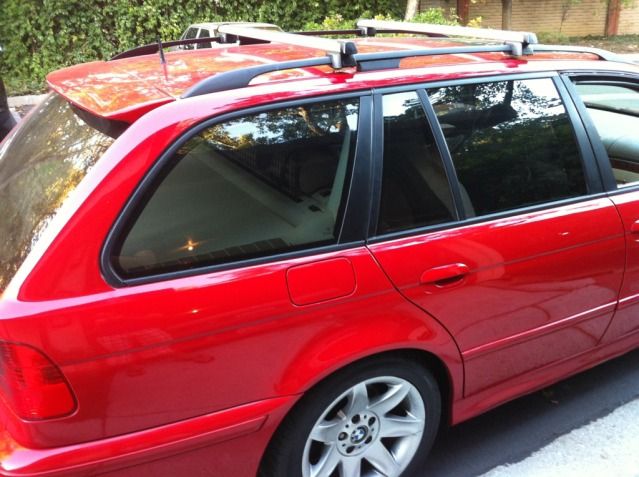
Hate to resurrect an old thread but this is the most informative one. I'm having trouble reinstalling the rear fixed window lower trim on both sides. on my '02 it looks like there is a bunch of arms(?) or some type of clip. i can't seem to get one to open, let alone the six or seven of them. any one have pointers for reinstalling these?
all the others just seem to pop in. is there some sort of up-down motion to pop them in?
Member
anyone?
Swagon
I think I remember having to slip one end over the clips (The top end I think) and then push down on the bottom to snap it in place. Either that or vice versa (slide the bottom over and press in on the top). But this is just from memory as it was a while ago when I did mine.
Member
i tried fiddling with them for about thirty minutes but still no luck. i just don't get why they went with a third (and totally unrelated) attachment system for just these two lower cargo window trims.
if anyone else runs into this problem or a solution, please PM me. the youtube videos i've found are for only sedans.
Member
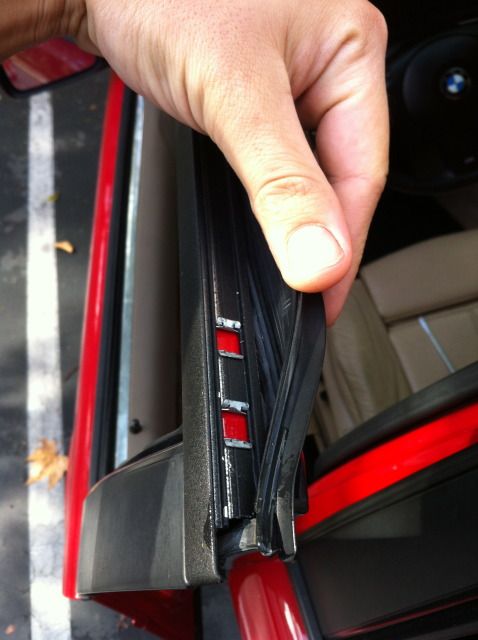
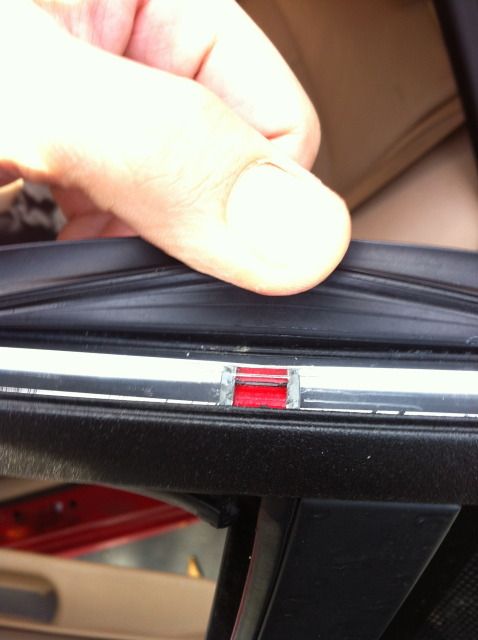
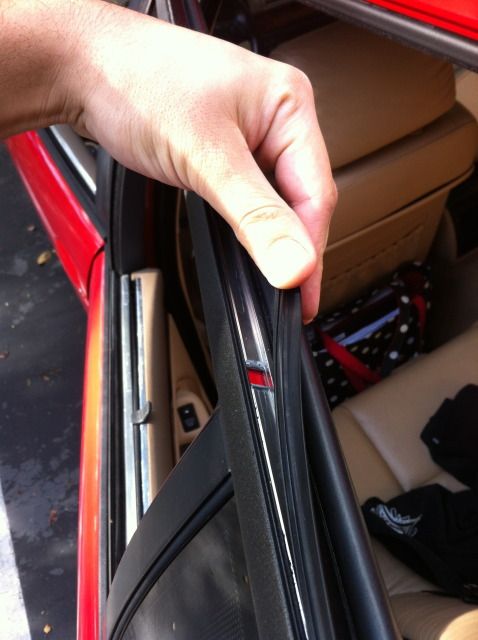
Slide them in from one end. The clip in the picture is oriented the same way it slide out of the trim. The tabs with holes and the tab between them will be exposed you slide it into the trim.
- - - Updated - - -
Slide them in from one end. The clip in the picture is oriented the same way it slid out of the trim. The tabs with holes and the tab between them will be exposed when you slide it into the trim.

Member
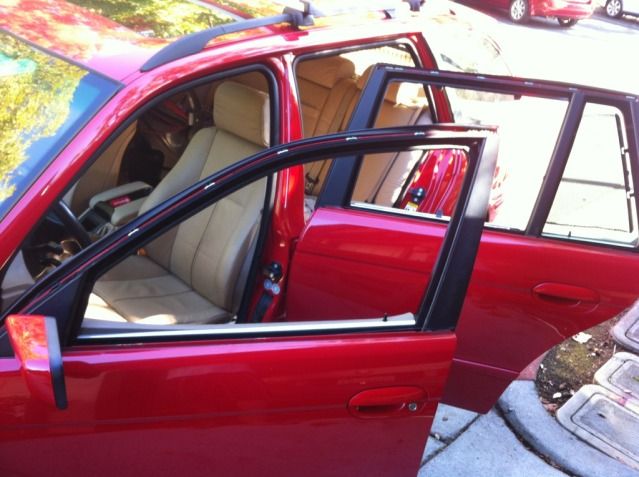
Just did the swap on my 2 wagons. Pretty straightforward, I was unable to pry the lower door outers from the inside so I worked them up from the outside. I only bent one out of the 8 up, the 7th one I pulled I think and only because I got under just the aluminum and not the rubber. Still usable, I straightened it out and it's fine. The D window trim is a little odd, the upper is really easy, it just pushes in, the lower fights a bit and I found it easiest to remove the clips from the trim, mount them on the rubber on the body and then press the trim onto the clips. Very time consuming as I was removing and replacing two of them, plastic dip spraying the chrome ones before I remounted them and remounting all 24 pieces. Yeah, 2 cars, 24 bits. It took a while, but worth it.

98 328is
02 525ita
80 528i
81 528ia
and decades of owning and driving BMWs
Member
AH thank you! just finally got them done today. i figured out the slide part myself. had the rest of the pieces on, but i rushed it initially when i wrapped them in vinyl. i also foolish didn't look to see if this thread had any replies. Appreciate your detailed pictures none the less. these will help other touring owners in the future.
Member
https://www.realoem.com/bmw/enUS/sho...diagId=51_3645
What do you figure the trim with the clips that the aluminum window molding attaches to would be? I'm stumped. Or Still drunk.
Dismembered
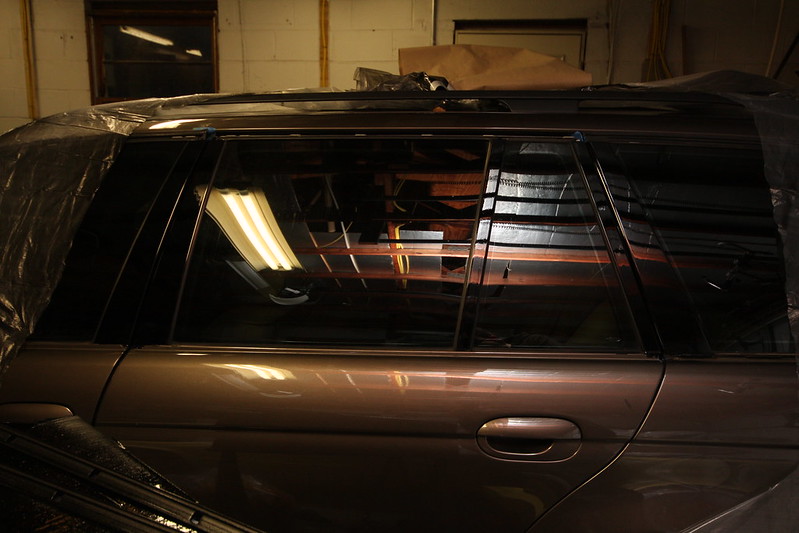
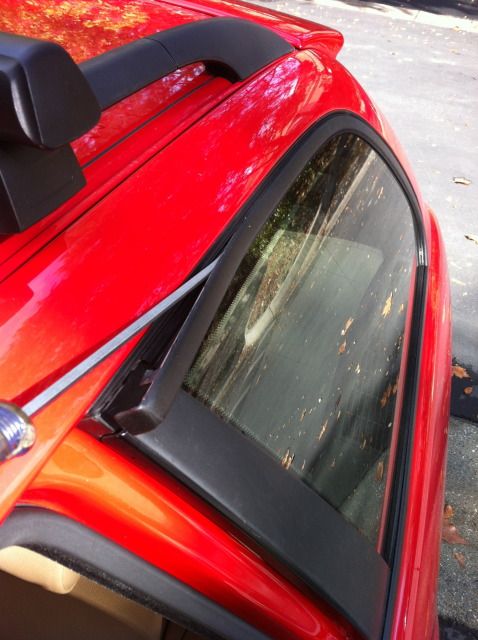
I just de trimmed my old wrecked wagon which I junked last Friday. It's all straight forward until I removed those lower trim pieces in the rear side windows. I knew those would be fun trying to reinstall once I get done covering the pieces with the gloss black 3M vinyl that I ordered. The other ones would be the vertical side cover that mounts on to the rubber frame piece, same part as those bottom trims, that the door shuts onto, front edge of the rear corner window. Seems like they had different engineers trying to one up each other on designs, sometimes, I'd like to wrap my hands around the necks of these idiots that think they are smarter than the otherengineers that they work with.... Obviously trying to be crafty, not realizing that one day, a crazed whackjob like me is gonna get a hold of his neck, and squeeze his zithead out.
Where wuz I? Oh yeah, so that vertical trim piece has those three clips that clip onto the rubber/plastic rear corner window frame piece which I would like to replace, meaning the rear glass corners will also need to be cut out, mounted, and then urethane back on. The vertical trim piece would then be placed in, top of the plastic/rubber frame, and then slid down onto those clips that would lock it in, then that lower trim piece, I knew would be fun figuring out, but didn't have time to figure it out at the time of removal.if they give me lip, I'm epoxy gluing them on.... screw those nerd designed clips. Those plastic/rubber rear window frames, discontinued, anybody have a link to where a clod like me could order both right and left pieces? Last time I checked, the two guys on eBay that had them, don't have them anymore. Same thing goes for the ones that hold the quarter glass windows on the rear doors. I have one of them, can't remember which, I'm gonna find the other side, the rubber lips that meet up with the glass has all deteriorated from old age.
Set the controls for the heart of the sun
Member
Yeah Snotty, the qtr side glass rubber is only available with the glass, and in chrome trim (or flat black)for $550? each. I love my wagons, but a grand for rubber was more than i could do. If it was still available with shadow chrome, i might have.
When i checked a couple months ago, they had plenty in Germany.
The door qtr window- plastic mount was getting short , I bought 2 pr.
Buying parts to keep these cars up, might be cheaper to buy that mint garage queen and start over mechanically.
Dismembered
$550! Jeeez...... well that sucks, what the hell are they thinking about??? That something Audi marketing department would do. Some of these a$$holes need their heads shoved up their a$$es..... A buddy of mine who bought a wagon recently, I was looking it over, I noticed that the paint was kinda fresh, checked those rear corner window trims, all new rubber, nice and soft, I look at mine, both of mine, all parched up, hard as a cardboard rock. $550, that's ridiculous, and the old glass is fine, I guess the old stuff stays on the car until I get my hands around the necks of these marketing pukes. I don't care for a mint garaged queen, unless it came from a friend, and I had a hand in keeping it up. I'm happy with my cars, they've been touched only by me, I know what I put into them, done to them, during my time of ownership. And if they were stupid clean, perfect? I would end up being afraid to drive them, with all these non driving pukes all over the place.
Set the controls for the heart of the sun
Member
Which rubber exactly are you referring to thy comes with the glass? The fixed window in the door or the rear trunk side window?
Sent from my iPhone using Tapatalk
Dismembered
The latter, WagonsHo is right, to get the gasket, you gotta get the whole thing, the glass along with the chrome trim. Cheapest I could find, $422 each side.
The door quarter glass frames are available, right side part #51348190650, left side is 51348190649. $32.43 ea, I didn't bother shopping around, shoot, I shoulda called BMW Of Alexandria, I still have my wholesale discount over there, probably could have gotten that for $24 or so. I already had the left side in a bag, I just put in an $800 order at FCPeuro for a bunch of parts for my three E39's, got the right side coming. Keep in mind, you have to cut out the glass from the door. Before replacing it and applying the assembly back on with urethane, make sure to inspect the door's metal and address what scratches you may have placed on the door from cutting the old frame and glass out. Properly seal it back up with urethane primer. Hell, I'm sure you could use the semigloss black POR15 too.
Set the controls for the heart of the sun
Member
I got the frames, I also have rear side window seals but one of em I had to source on eBay and came from the UK. The other was the last in stock wherever I got it from...
Sent from my iPhone using Tapatalk
Dismembered
If you remember, send me a link to that seller. I had him on my radar, but I suddenly can't find him. he used to get them every now and then, think he was selling them for like $112 a piece at the time. It was a seller from the UK from what I remember.
Set the controls for the heart of the sun
Member
98133364_661410744408588_4493249271583211520_n.jpgOk guys.. I'm stumped, although I only had 10 mins or so to mess with it tonight. How do the rear quarter lower trim pieces go back in, or should I say what's the trick? Any Tips? Pic for attention... (Younger Brother reflection in the window lol)
Thanks
Last edited by rickadootrd; 05-19-2020 at 11:14 PM. Reason: add picture
Member
Try this: https://ebay.com/usr/bmminiparts
Searched my email after eBay history wouldnt load any deets.
Last edited by scottieducati; 05-19-2020 at 11:21 PM.
Member
Anyone?
Dismembered
Thanks! I saved it, but it doesn't look like he's got any right now. I think I missed the boat.
- - - Updated - - -
I pulled those off my old parts car, I was thinking those were gonna be a pain in the a$$ going back on, myself. See my earlier rant on this part. Ten mins is gonna be nowhere near enough for even one side.
Set the controls for the heart of the sun
Member
- - - Updated - - -
I pulled those off my old parts car, I was thinking those were gonna be a pain in the a$$ going back on, myself. See my earlier rant on this part. Ten mins is gonna be nowhere near enough for even one side.[/QUOTE]
Thanks, I missed that post of yours... Those BMW Engineer Bastards! I'm going to attempt the slide method, hopefully it works and I won't have elevated blood pressure level's and blind rage this time.
Dismembered
Thanks, I missed that post of yours... Those BMW Engineer Bastards! I'm going to attempt the slide method, hopefully it works and I won't have elevated blood pressure level's and blind rage this time.[/QUOTE]
Haha! Yep, just keep your cool, if it kicks your a$$, I walk away, grab some coffee, or a beer, come back and suddenly the little bastard just clips on, but this piece of trim, the stupid engineer that dreamed that piece up needs to be tard'd and feathered after burning his skin with a torch...
Last edited by BimmrMeUpSnotty; 05-20-2020 at 07:36 AM. Reason: Stupid goddamned spell check
Set the controls for the heart of the sun
Dismembered
Ok, maybe the engineer doesn’t deserve a tar and feathering, I’d still kick his a$$ though for trying to be different.
wondering what to do today, I trekked out to a junkyard about 12 miles away, they had a 528 wagon that I was eyeballing on their website, the tailgate was half way latched, put power to the car with my jumpbox, press the button, nothing. So, the beauty of this wagon, it’s got a full black interior, I just want the cargo section so I can convert the rear of mine to black. Even the tailgate is in awesome shape, no rust what so ever, and it has a black interior panel on it that is completely fastened on it properly. I didn’t have enough time to go in and get the thing open, but they have a 2002 540 sport that’s in process right now, it’s about to get released to the yard in a day or two, I’m heading back to nail that for the two rear 9” style 66’s, the sport seats, and whatever else is good. Car is whole, nothing wrong but the guides. Then I’m gonna climb into the rear of that wagon and pull the emergency cable that’s in the tool section, pop that sucker open.
ok, got sidetracked, reason I’m posting this on this thread, I screwed around with that damned piece of trim! Lol, almost forgot!
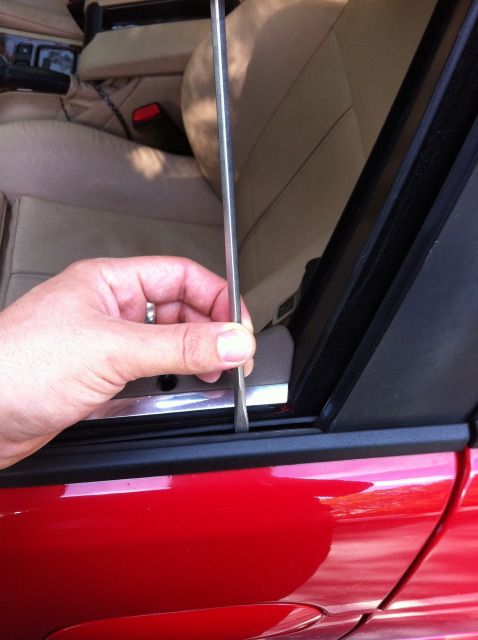
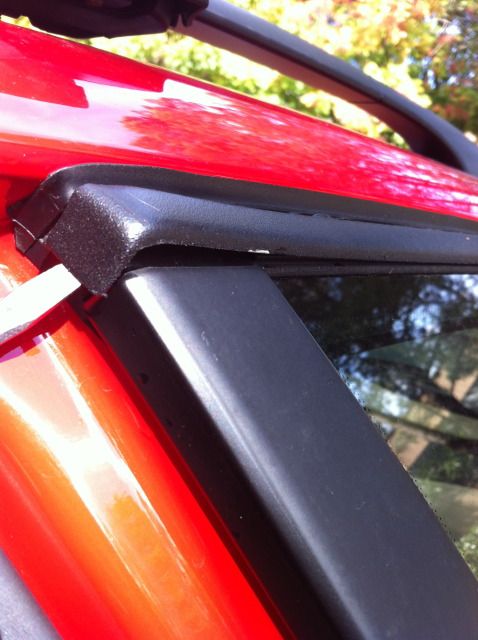
Anyway, that trim isn’t so bad going back on. Anyway, so to take it off, you use your flat pry tool, starting from the top push down and pull out. Clean out all the debris, eyeball the piece of trims rear side, those clips? Push them back in, they slide side to side too, they line up with the rubber gaskets sections where they stick out, start from the bottom, push the upper section in, and do the rest one clip at a time, not so bad actually.
Set the controls for the heart of the sun
 Posting Permissions


 Reply With Quote


Bookmarks