
 Luchador
Good info on the cam sensor. Some day I hope to mess with an engine made later than the early 90s, so I can put this to use
Member
Going down in a buddies GLI on Bentley'sOriginally Posted by BobRoss

Nice!
Hey Gunni, was hoping you would have something to say about this lol.
Jorgen said he will be looking into it as well, he told me to give him a week and he would be able to figure out how to make it work with the VEMS.
I'm going to forward him this info since you've already scoped it.
Do you think the input would be Hall or VR for this Siemens sensor?
Member
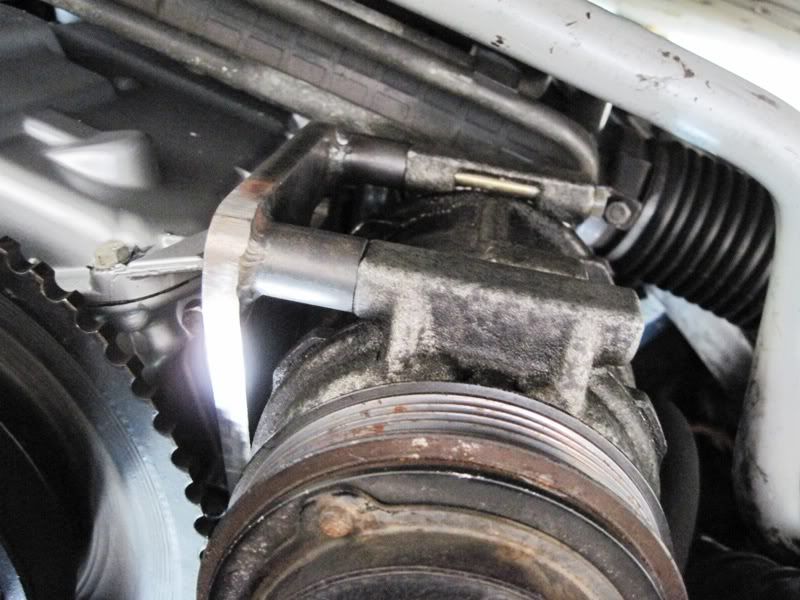
From bobs original post. Looks very simple, but I do not see a tensioner. Looks like it moves the compressor down, which confuses me since I ran my intercooler piping just beneath the compressor when using the stock compressor bracket (trimmed a bit of course).
Last edited by cragg56; 09-26-2012 at 01:19 PM.
Facebook.com/LUXFAB
Member
Well, I have always been part of the dark side, I went from a Turbo 328i to my first S4 and the rest is history
I currently own a e46 M and a e30
Anyway, I'm happy to see you here, I'm sure you will make something really good come out of this like you did with the B5S4 scene, without your sig link I would not be where I am!
Good luck with everything!
Last edited by GWerks; 09-26-2012 at 01:45 PM.
Member
Sounds good man. Maybe see ya on the strip. I'll be on lookout for you from a black vr mk1 gti
[ 1990 325is Turbo ]
"..a true hotrodder wouldn't be content until he had created a car so violent, so totally sick
that the act of dropping the hammer would result in instant death. Anything less results in the need to go faster."
-Tony DeFeo
Turbo or GTFO
When I think about it I didnt note the voltage, although from the picture it seems it swings from +Xv to -Xv so vr would work (it seems).
Let me see if I can find that trace as a saved .csv file and I´ll check.
I´m also not sure how a single tooth on the cam is able to make it change frequency every revolution unless the ecu is doing something to the input voltage 360° after the frequency change to reset the sensor to low frequency or vice versa. Maybe I´ll try and bench run this sensor and see how it behaves.
With great challenges comes great engineering.
Gunni - IG : @gstuning_ & @pnpecu
Don´t PM ME, I won´t see it
Member
haha... looks like the roles have reversed this time :P
Thanks though
Well that should narrow it down lol... sounds good dude, be safe!
It seems like BMW depicted it as a VR sensor, but I truly don't understand it's format. Jorgen said he will scope and measure a stock M52 powered E36 so maybe that will us some needed info as well.
Anyway, moving on....
Yesterday I started to clean the entire engine bay.... luckily there was none of that was stuff anywhere, just some oil and dirt...
Some good old Easy Off and engine degreaser and some elbow grease with a brush and the bay came out looking brand new!
Before...
After...
Also a big order of parts... rad, tie rod ends, engine mounts, thermostat, WP, seals, etc, etc...
That's about it for now, after H2Oi the head should be back and I'll be starting reassembly of the motor with the S52 cams, MLS, and starting on the wiring for the VEMS.
Last edited by NOTORIOUS VR; 06-16-2013 at 11:50 AM.
Member
Time for another update... After a good time @ H2Oi this year, I came back needing/wanting to finish my project after being without my car there this year.
So I started with picking up some goodies that I ordered for myself that were waiting @ the border for about a week.
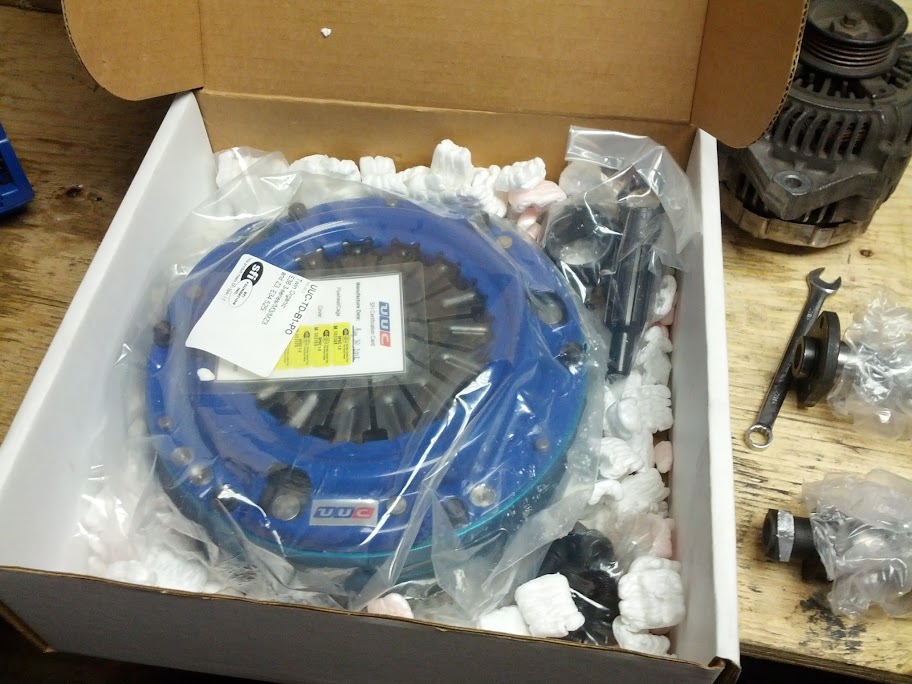
UUC Twin disc:
S52 cams:
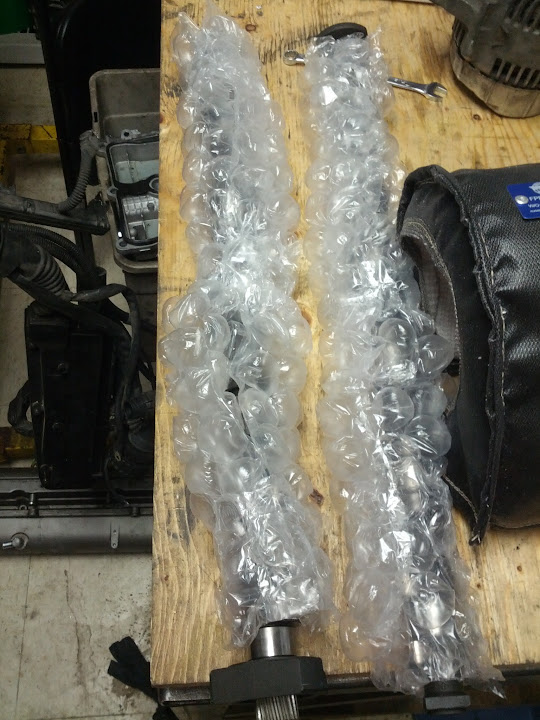
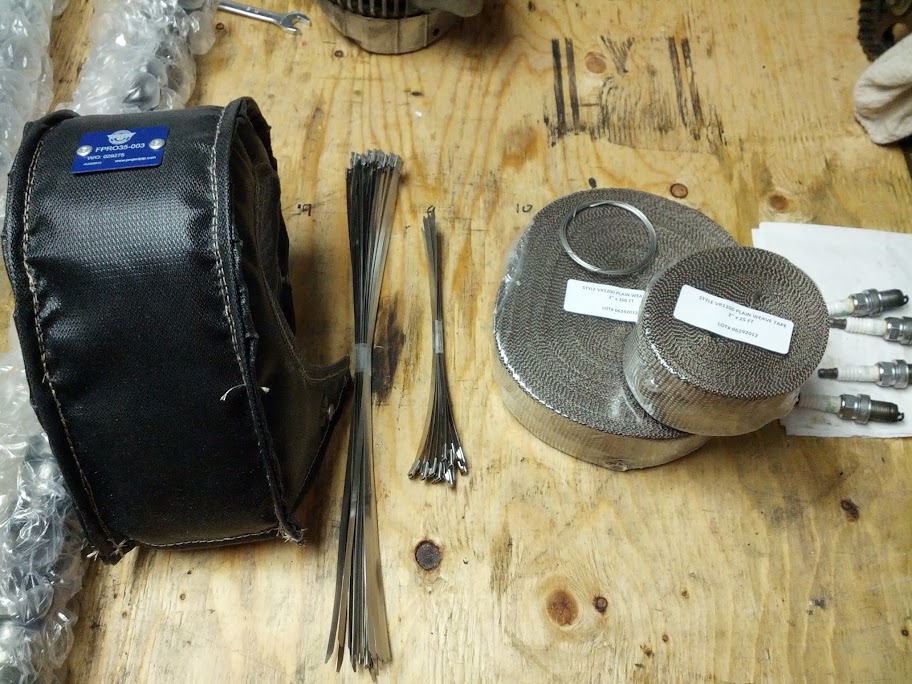
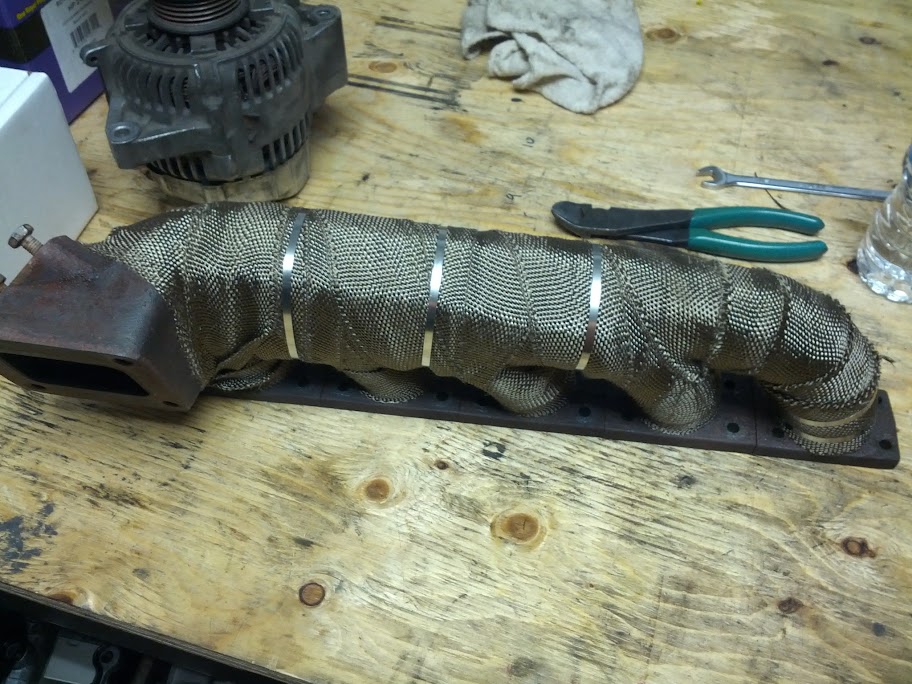
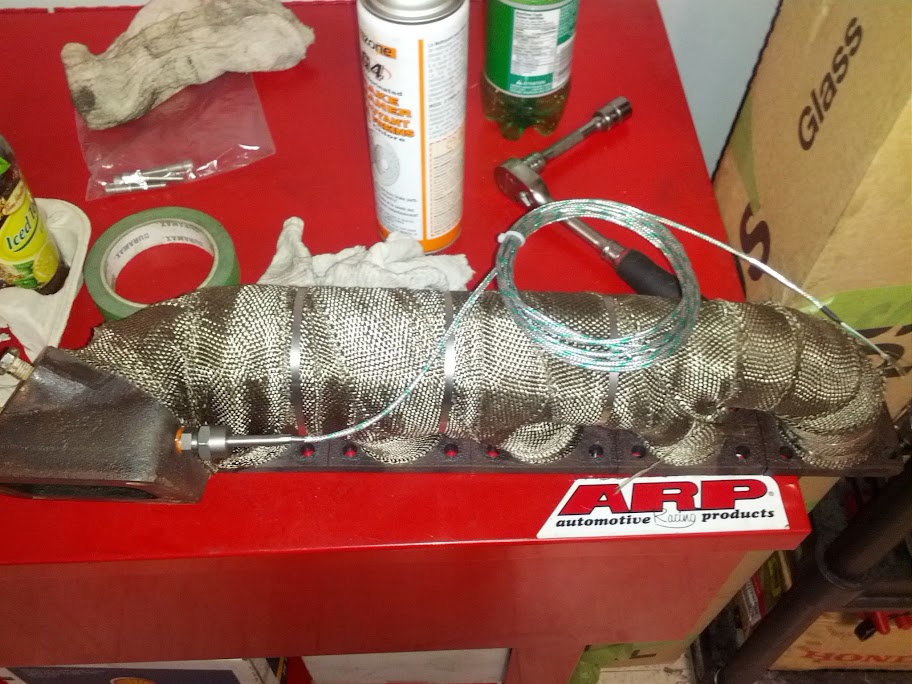
PTP Turbo blanket and heat wrap for the DP and SPA manifold:
Of course I dug right in to wrap the manifold... was my first time wrapping and most of it went well except for when I got to the collector area, that was a disaster. Not much of a way to wrap it properly though, so I did the best I could...
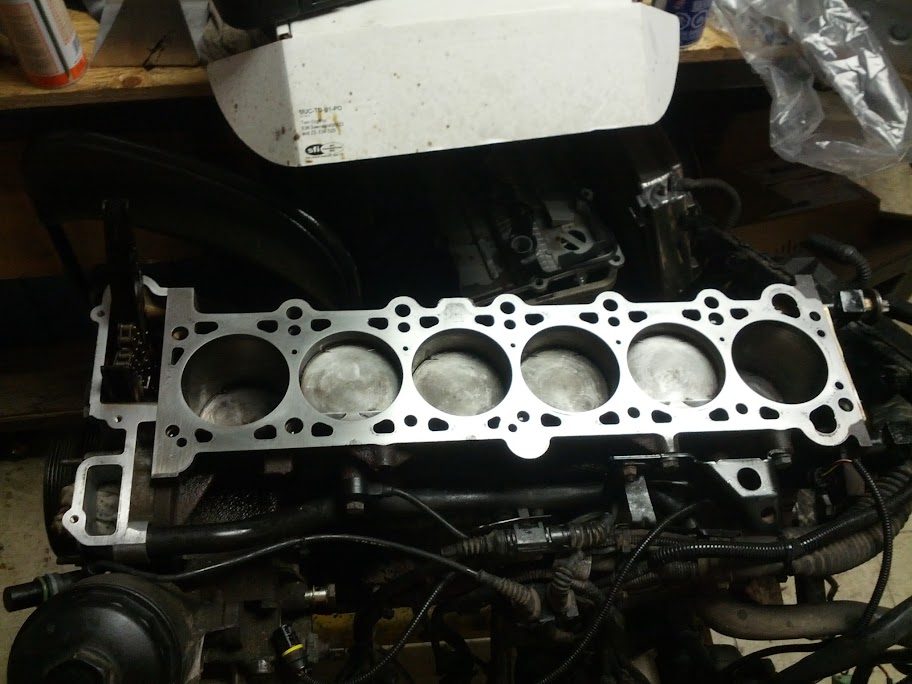
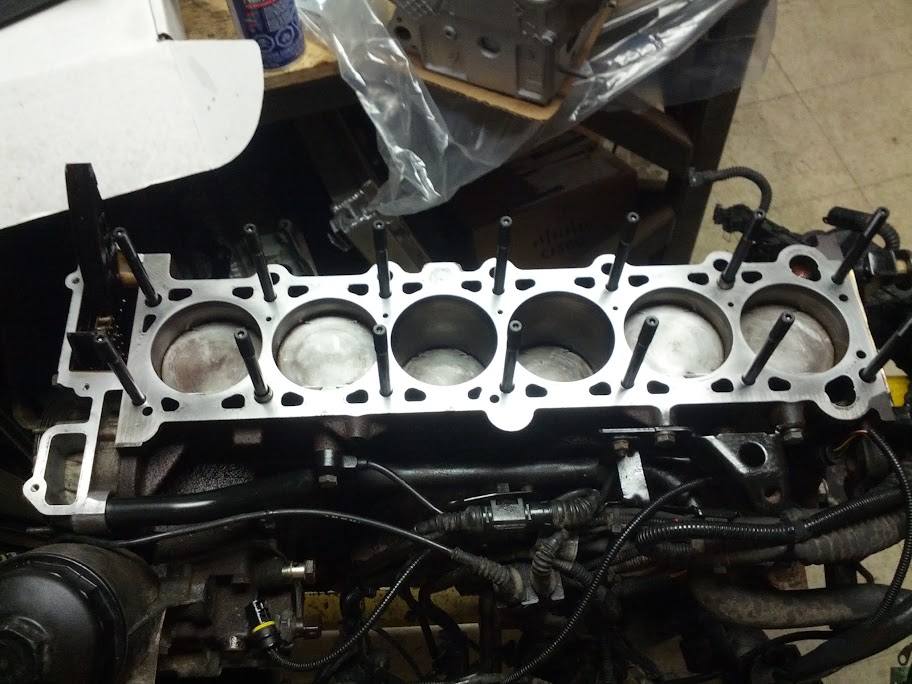
The next day I prepped the deck with 400 grit...
installed the ARP's...
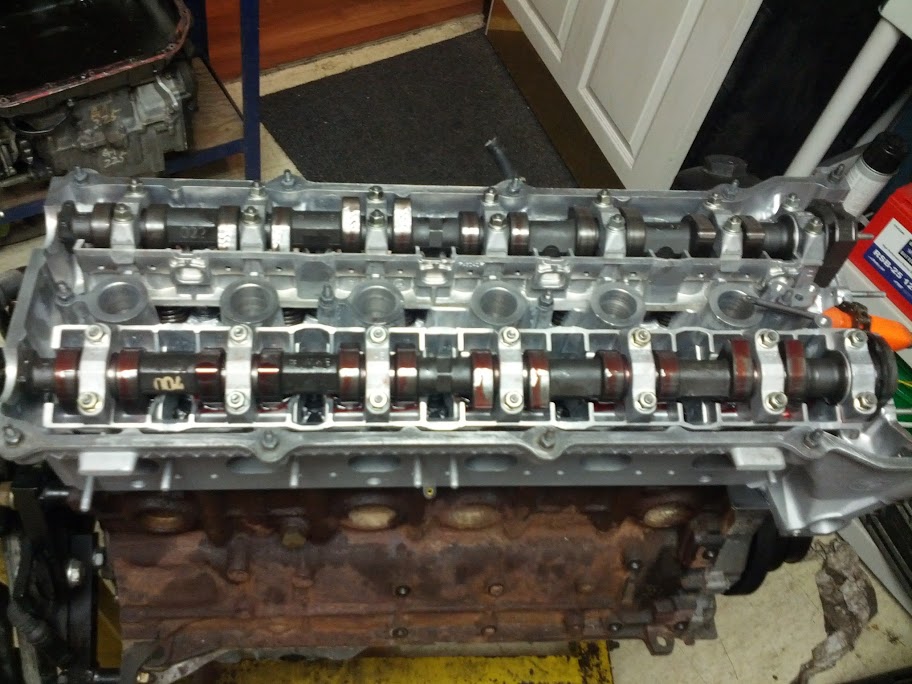
and then the Cometic and freshly straightened and refreshed cylinder head and TQ'd the studs...
That's how I left it for the night, and to let everything settle and re-check the TQ of the studs tomorrow.
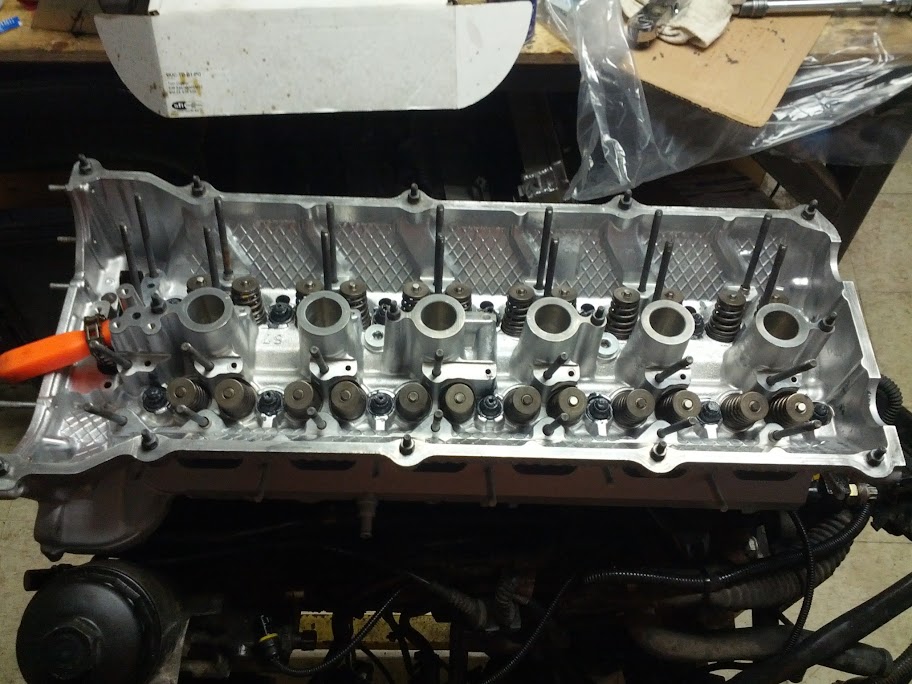
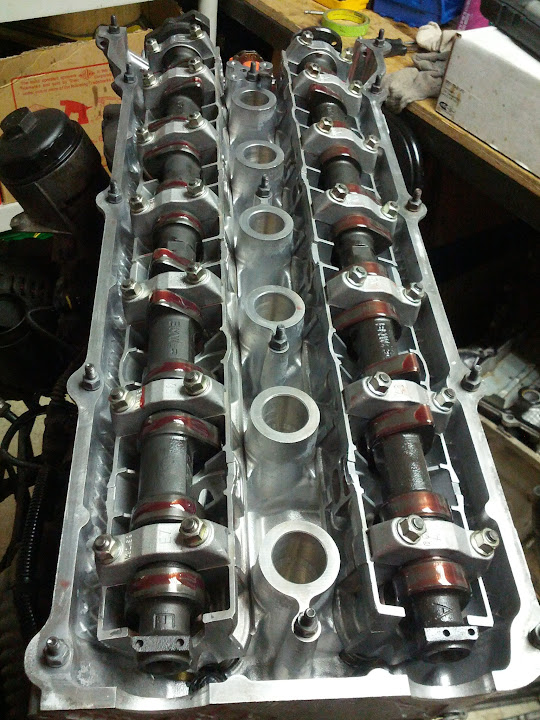
and starting this evening, I checked all the of studs all were perfectly still @ 85 ft-lbs. With that out of the way, I proceeded to install the intake camshaft...
and then the exhaust cam...
lubed it up some more...
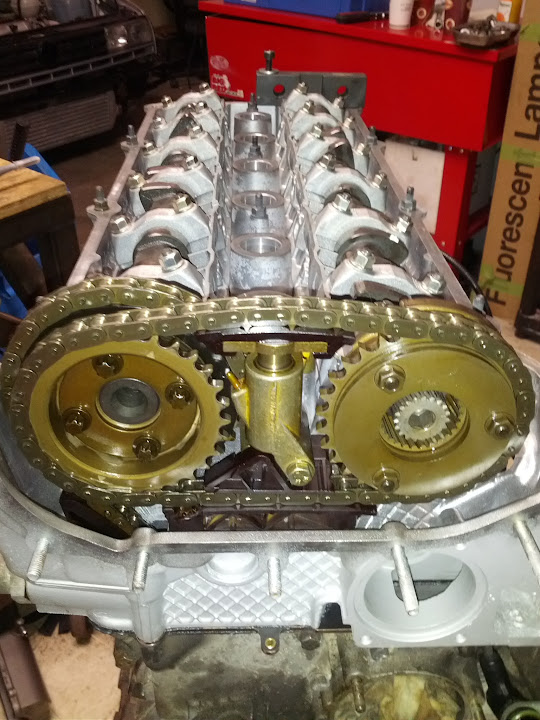
timing chain...
everything set...
annnnd, that was it because I forgot to order the VANOS cover gasket... soooo, tomorrow is another day and I hope to get that all buttoned up
Last edited by NOTORIOUS VR; 06-16-2013 at 11:54 AM.
Member
For what its worth I have the Federal 595RS-R on my BiTurbo M3, putting down almost 500lbs at 3600 rpm. They are holding up great on the street, starting to grip in 3rd gear. 245/35 front and 255/35 rear on 18x8.5 on all 4 corners.
I have not tried them on a track though, but I can imagine that they will not hold up as well as the Michelin CUP or the Toyo R888's.
1995 E36 M3 GT #111
3.0L S50B32 EURO Single Vanos with ITB's and Twin Garret GT2252 Turbo
VEMS Standalone (www.vems.hu) most features enabled.
Brakes, suspention, rollcage, seats, harness, wheels and tires.
 Member
Awesome pace man!
Member
I see you've stumbled upon my secret sauce machine shop...It makes sense because I was talking with Dominic(the owner) the other day and told me he had machined a head like mine! Those guys there are amazing, they take long but they do it right the first time
Member
you guys go there?
lol hes not so secret
and nice cayenne calipers up front. lol 8 piston. redonk. can they squeeze under 17s? looks like it to me since you used a regular e46m rotor?
Member
GT110 good to know!
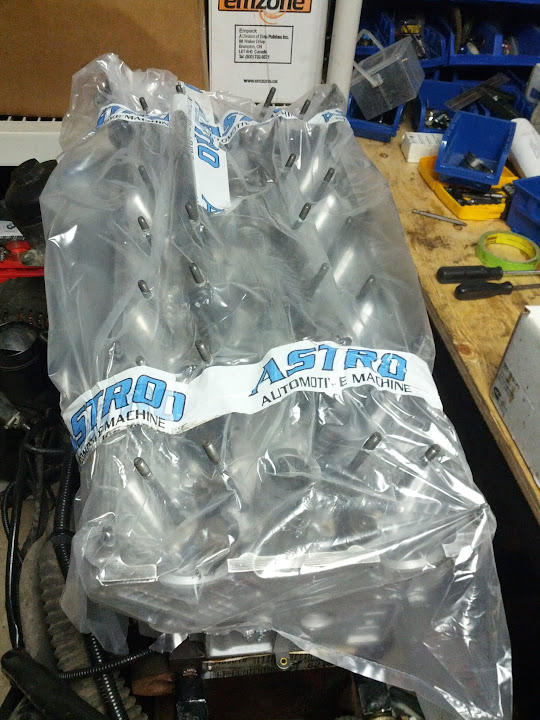
Yeah actually my buddy who owns the shop where I'm doing this project uses them. So far I've only heard very good things about Astro. My head was badly bowed and needed to be complete disassembled and straightened. Apparently it's a common issue with the straight 6. So I'm hoping after everything I won't have issues with the HG sealing.
I highly doubt they will fit under anything under 18's. It's a 350mm setup and with multi piston calipers that take up quite a bit of space there will be no room.
Member
You are raising the bar with this build, james cameron.
PT6262 - SPA Mani- NickG Tuning - TiAl - CES Cut-Ring - Blood Sweat & Tears
PT6262 Budget Build!! | CES Cut-Ring Install Thread
LICENSE SUSPENDED
ROFL
You know I caught that one.
1996 332IS
Built 3.2
CES/Steed TS Precision 6466, spraying a "$π!℅" load of meth.
Technique Tuning 80# tune.
1/4 mile 10.84 @ 136.72
Your 1 and only stop for all your BMW performance needs
WWW.CESMOTORSPORT.COM
senior LOUNGE creator
Very nice. I assume this will be using the pnp VEMS?
If liberty means anything at all, it means the right to tell people what they do not want to hear.
― George Orwell
Member
There is no pnp VEMS for the M/S5x, I'll be doing a straight wire in using the OE harness though. I've decided I will never go back to the Siemens ECU so I will slim down the OE harness and use it as is.
Member
oh 345mm rotors..I assumed stock 325 e46m rotors.
probably wont fit a 17. those are massive calipers.
as for warped heads...if the engine has over heated...aluminum head and iron block...they dont like that.
I will definitely want to see this car in person when done
Member
Should fit. I run 348mm with wilwood 6 pistons. Generally, the more pistons, the lower profile the caliper.
Member
Looks great
Member
Kinda smallish update... it's Thanksgiving long weekend here so not much work has been done.
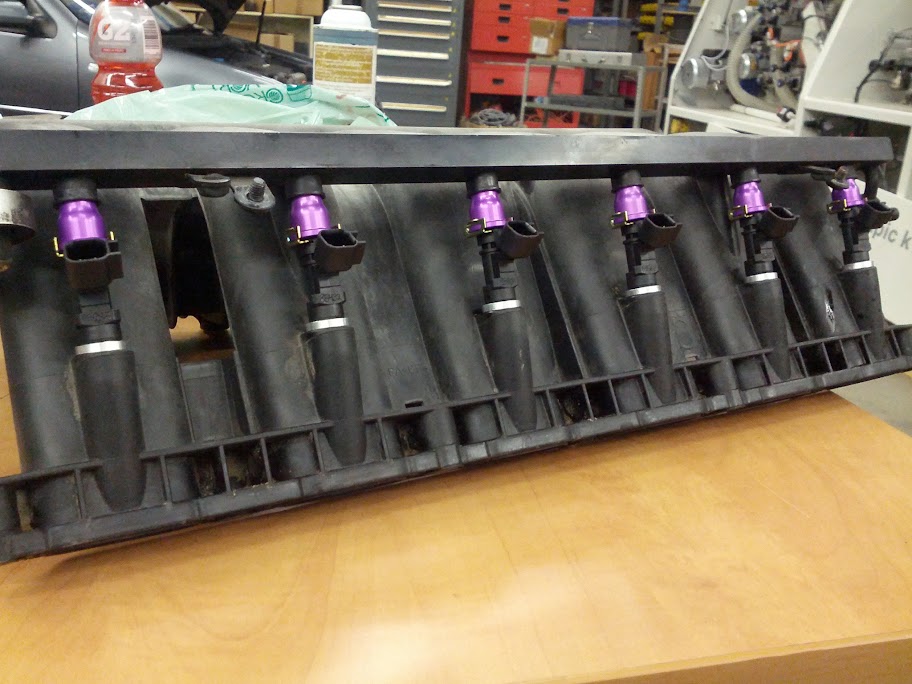
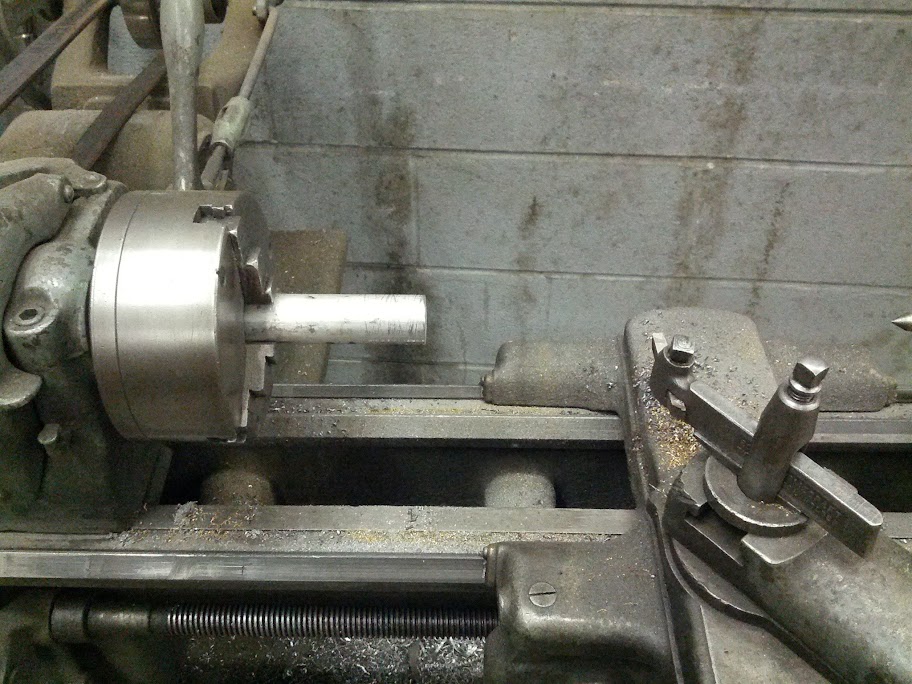
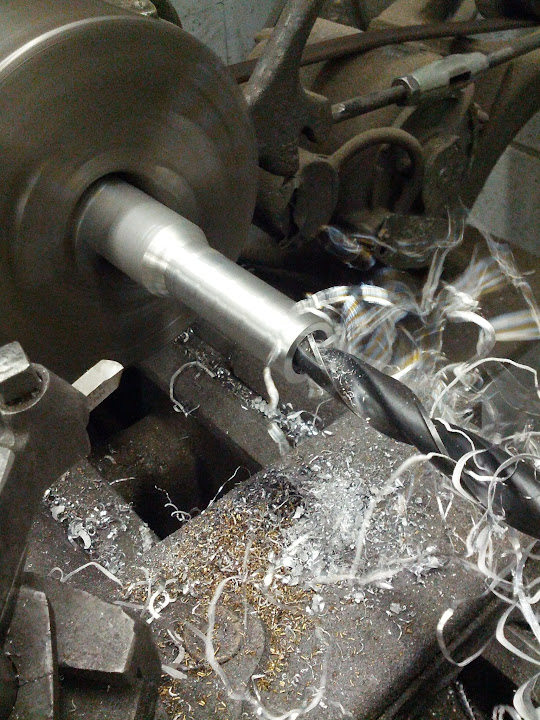
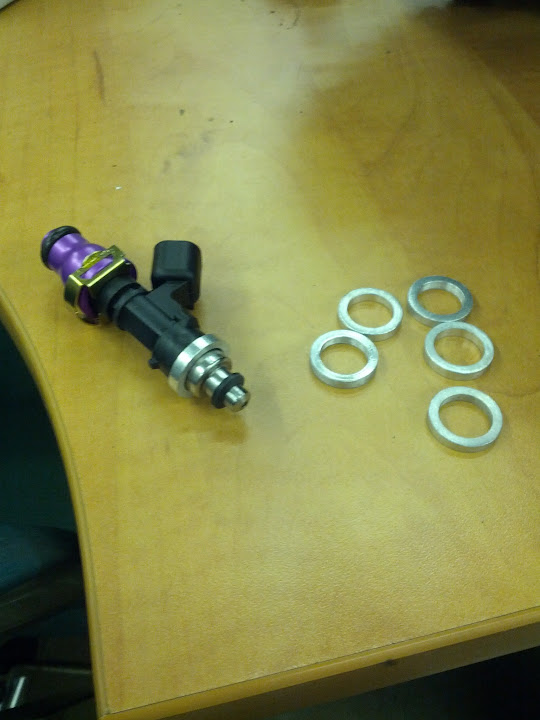
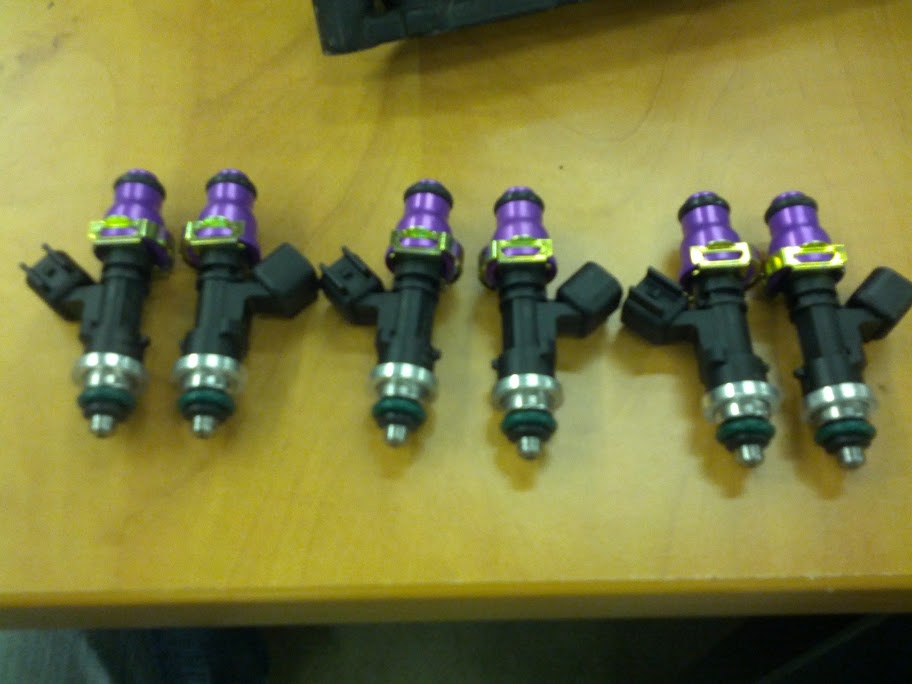
I did manage to pick up some solid round aluminum stock from my buddy Marco @ SEM Motorsports, and went to my work on Sat night to spin up some injector spacers on the lathe.
As some might know when using ID's with a stock fuel rail & M50 mani, the injectors are slightly too short, and could move down which leaves the top o-ring in the rail to be right at the end and possibly have a fuel leak. Since we don't like or want potential fuel leaks, I took up the slack by machining some spacers that will not allow the injectors to move.
- Outer dia: 19mm
- Inner dia: 13.3mm
- Thickness: 3.3mm
We have two lathes at my work that the service guys use, this is a small one (belt driven as you can see) but it works quite well with smaller things and softer materials like aluminum.
Started with round stock:
Once I reached 19mm outside diameter, time to get the inside to the proper size... 2 step process:
final 13mm drill:
and then slice them off at the thickness I required:
I did have to mill the inside of them open slightly which I didn't show (for a final opening of 13.3mm) but that's only because it was getting late and I wanted to go home lol.
Anyway, here is the finished product...
Last edited by NOTORIOUS VR; 06-16-2013 at 11:57 AM.
Member
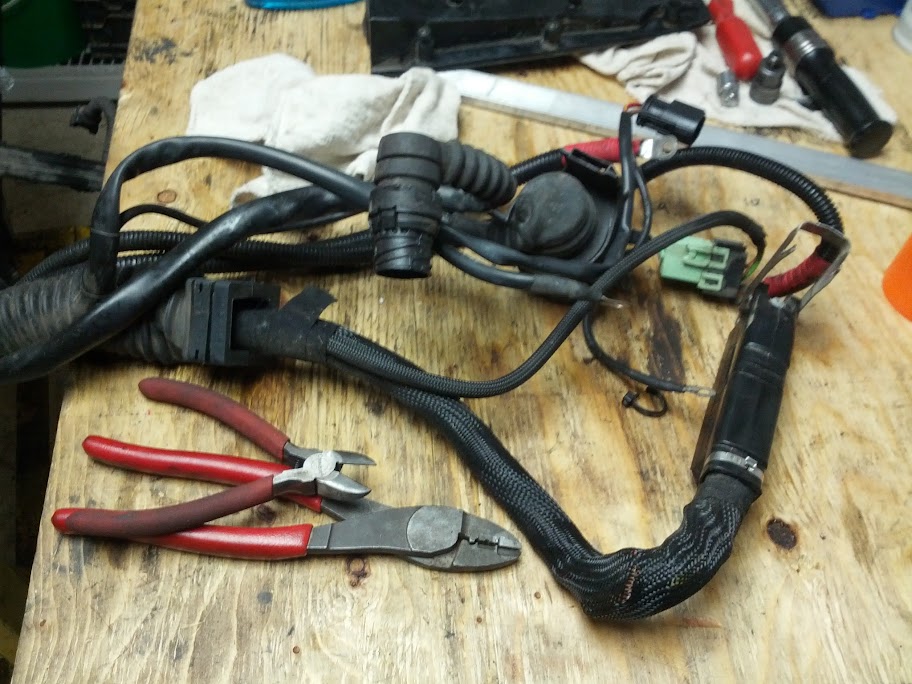
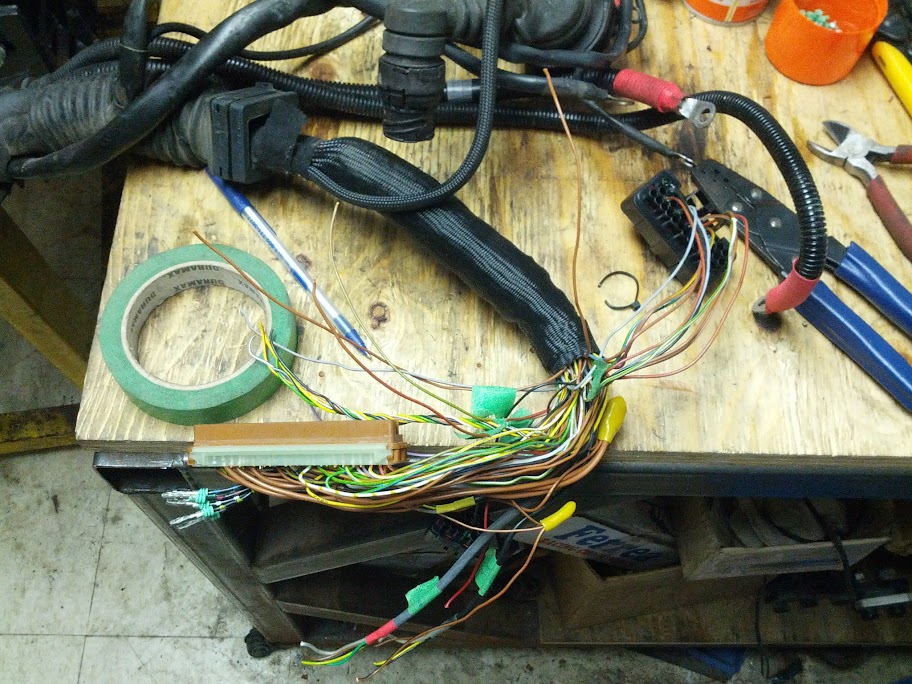
So on Tuesday, I decided to tackle the wiring... I knew it was a pretty big job ahead of me converting the harness from OBD2 Siemens to a plug in to VEMS, also slimming down the harness from all the unneeded BS that I would no longer be using after.
The start...
starting to sort and shrink the harness...
88pin connector gone!
Pulling the spaghetti out...
Organizing the mess:
all cleaned up!
Used one of the O2 sensor connectors to use as my 4 BAR MAP sensor wiring that I will mount under the IM:
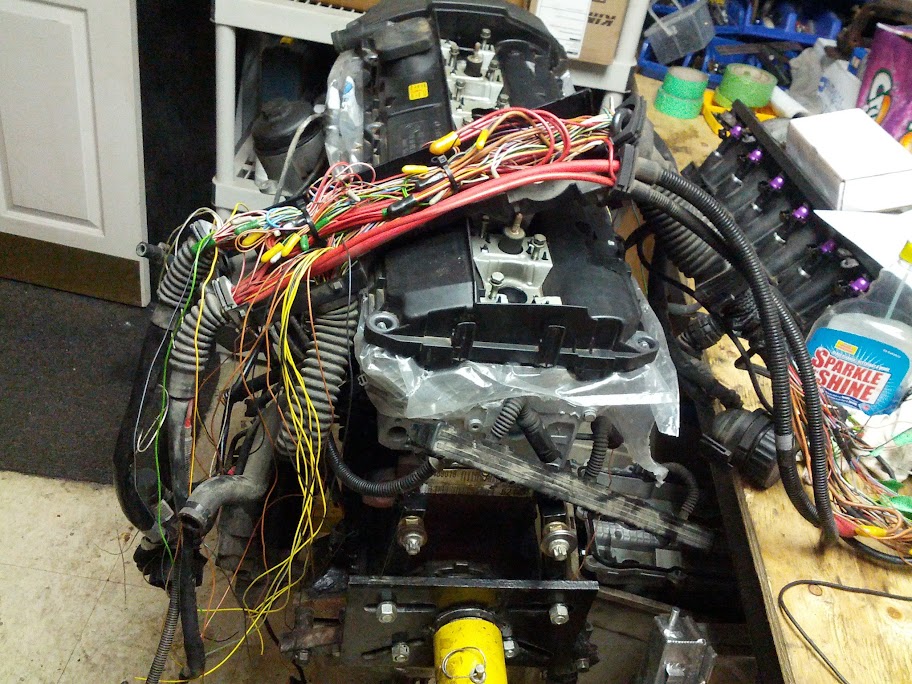
Finishing touch after two nights of work:
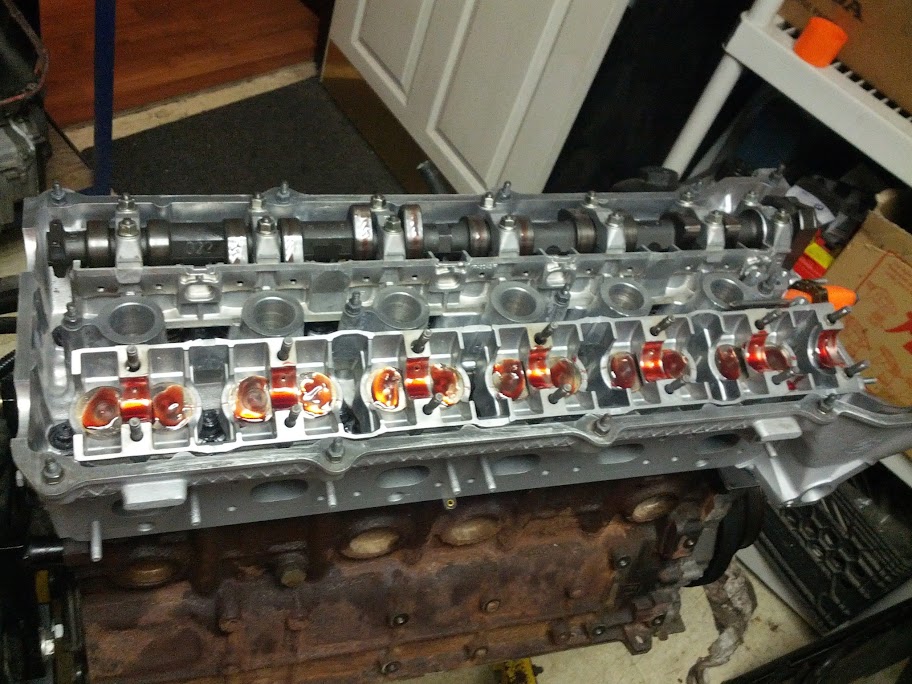
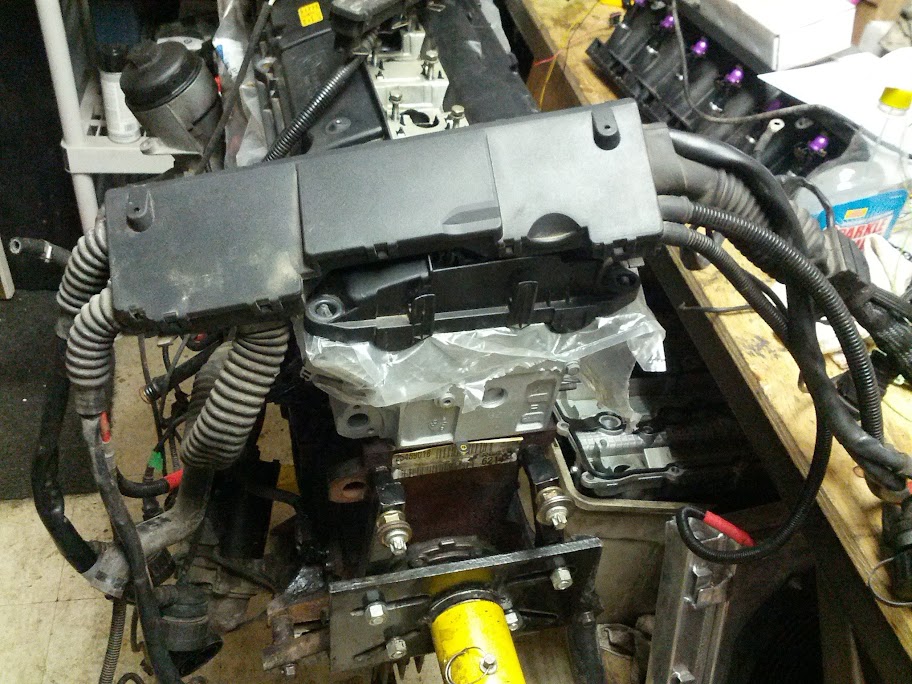
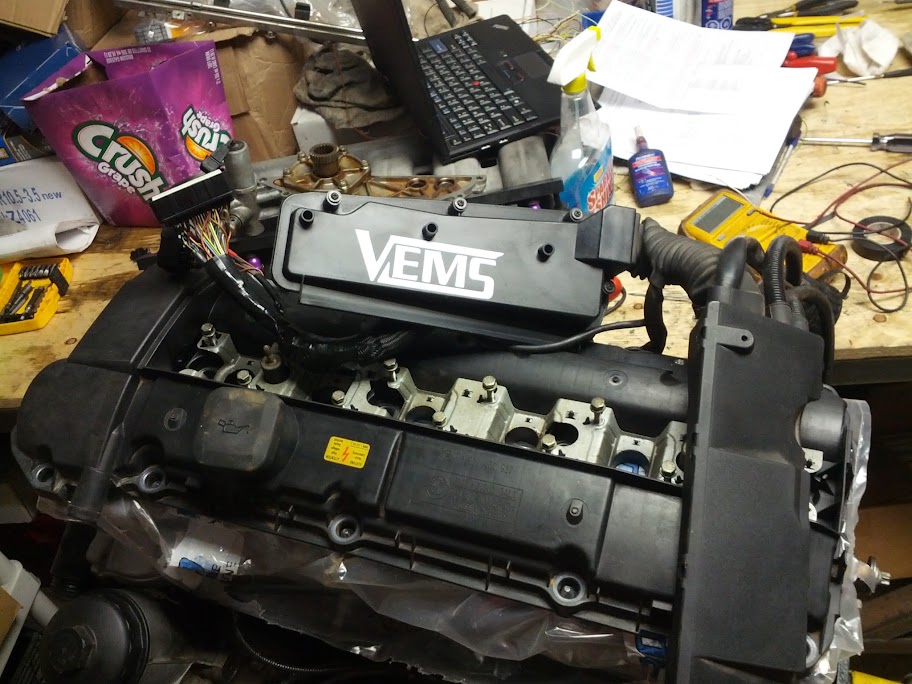
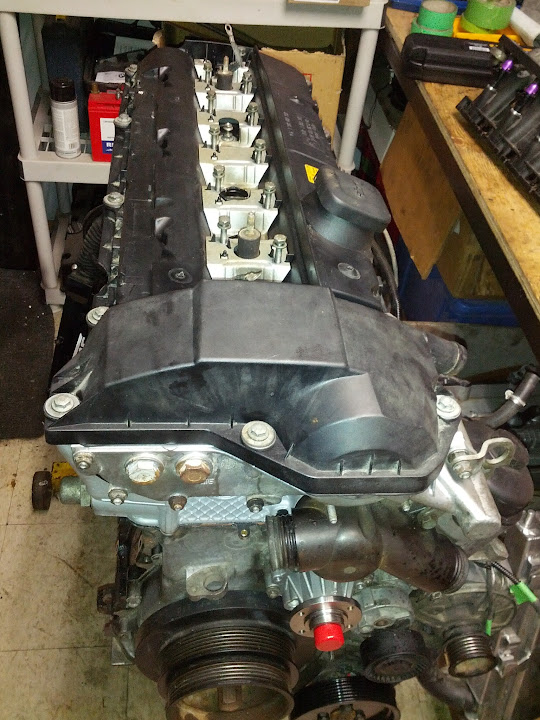
Yesterday I got all the rest of my gaskets that I needed to button up the head... so I installed the VANOS unit and buttoned down the valve cover...
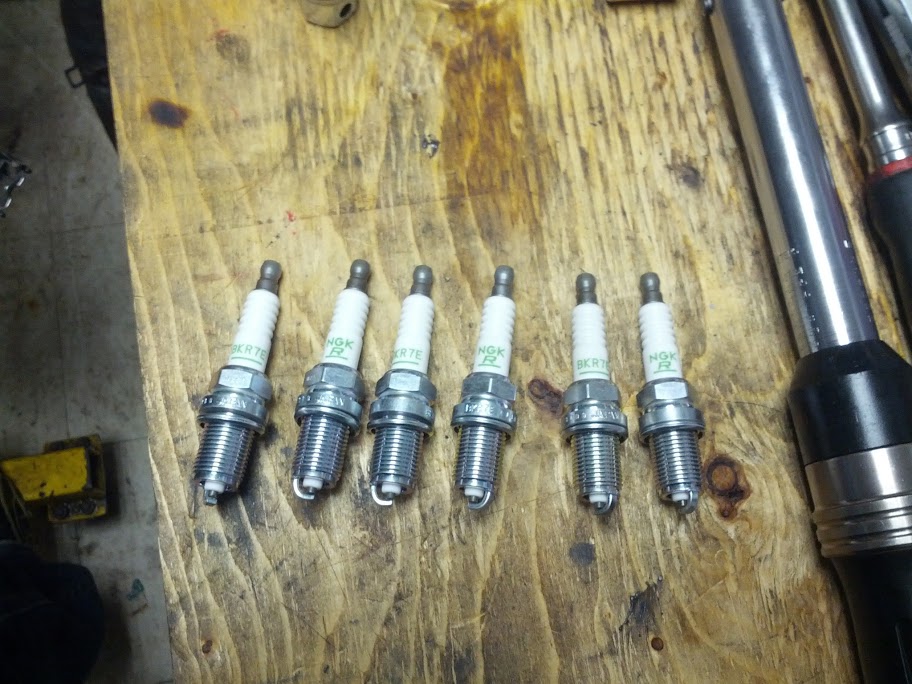
Installed a fresh set of BKR7E's gapped to 0.024-25"...
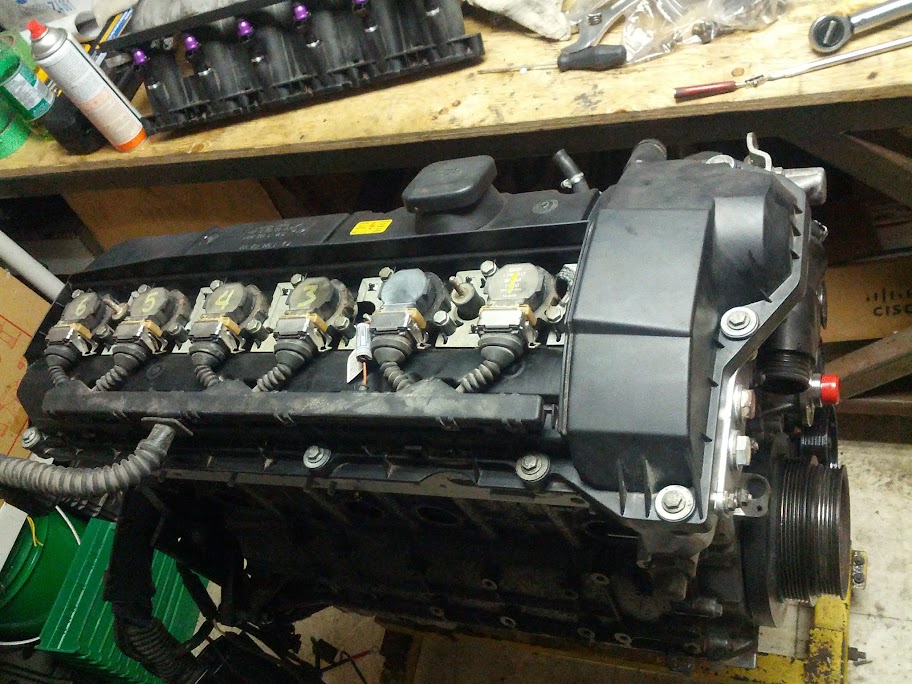
and installed the COP's..
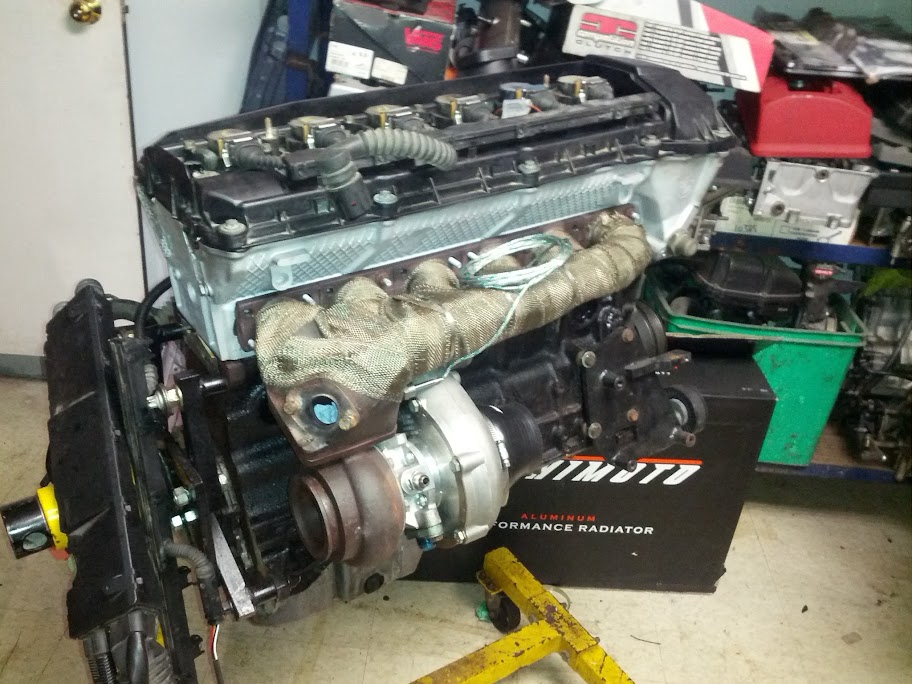
Then it was time to test fit the SPA manifold, unfortunately the flanges were cut and due to previous heat cycling it didn't want to slide over the exhaust studs). So I went and drilled all of the flange holes slightly larger on the manifold and while I was there drilling I also drilled a hole for my EGT sensor...
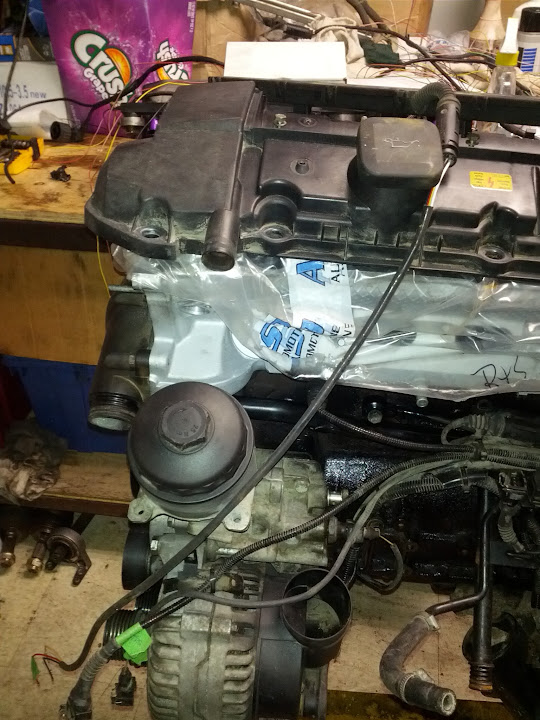
Manifold and turbo on the motor so I can choose where to put the drain..
By the looks of things I'm going to make it straight shot into the pan directly under the turbo instead of going past the turbo and using the 45 deg situation that the previous owner used, and I will be looking to making hard lines for the turbos water cooling instead of using the rubber hoses that came with the kit from Bob.
And of course due to the limited space and some very rusted manifold bolts I had to put in an order to BMW today for 24 new M54 exhaust manifold studs (they're shorter by a few mm) and nuts. Should be here tomorrow, which should allow me to get the motor back in the car at the latest on Saturday after installing the new RMS and the UUC twin disc
Last edited by NOTORIOUS VR; 06-16-2013 at 12:02 PM.
Member
props for all that work you are putting in! quality work right there!
Facebook.com/LUXFAB
 Posting Permissions


 Reply With Quote
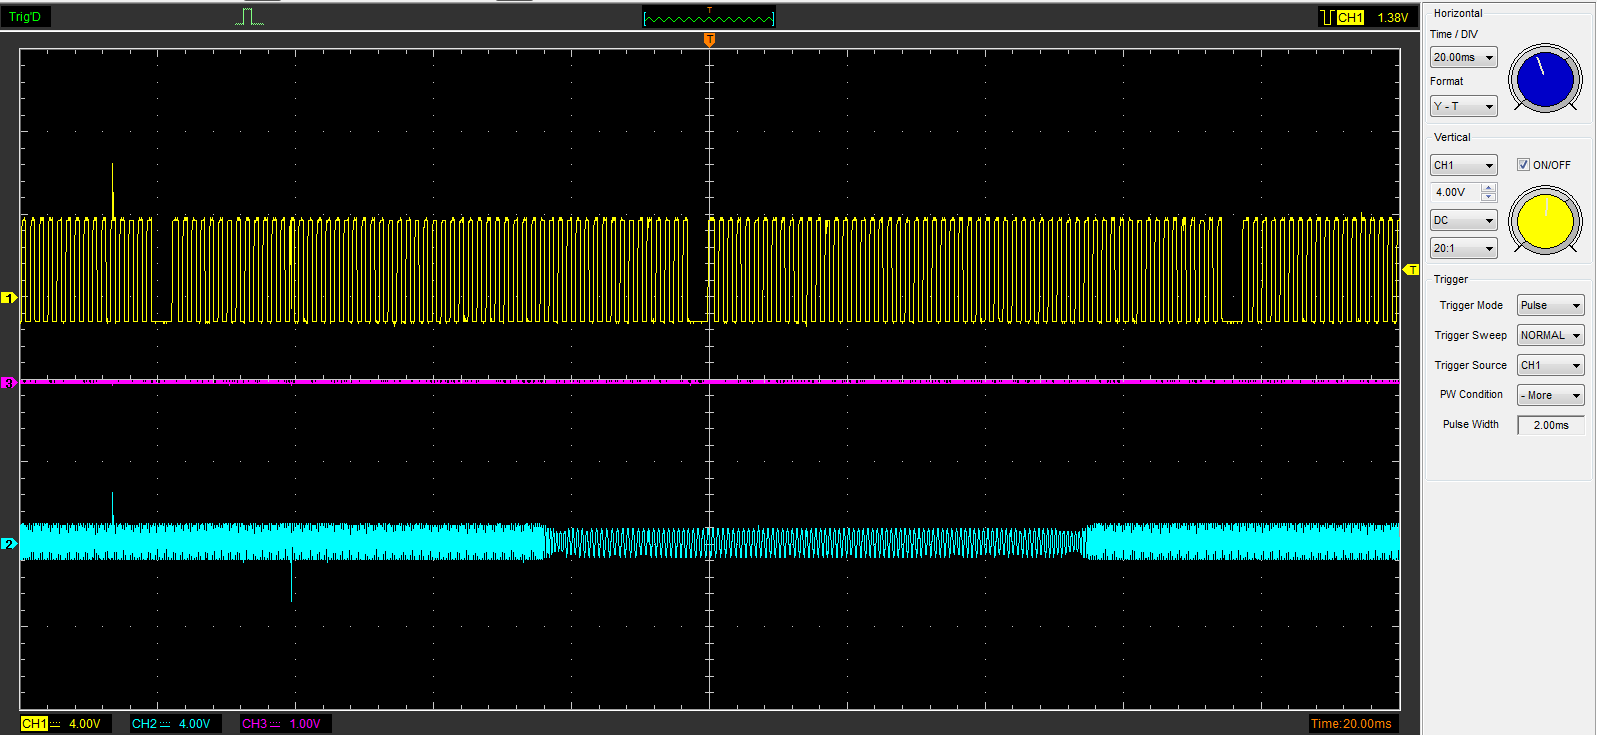


Bookmarks