
 Still has a E39
Supporting Vendor
Still has a E39
Supporting Vendor
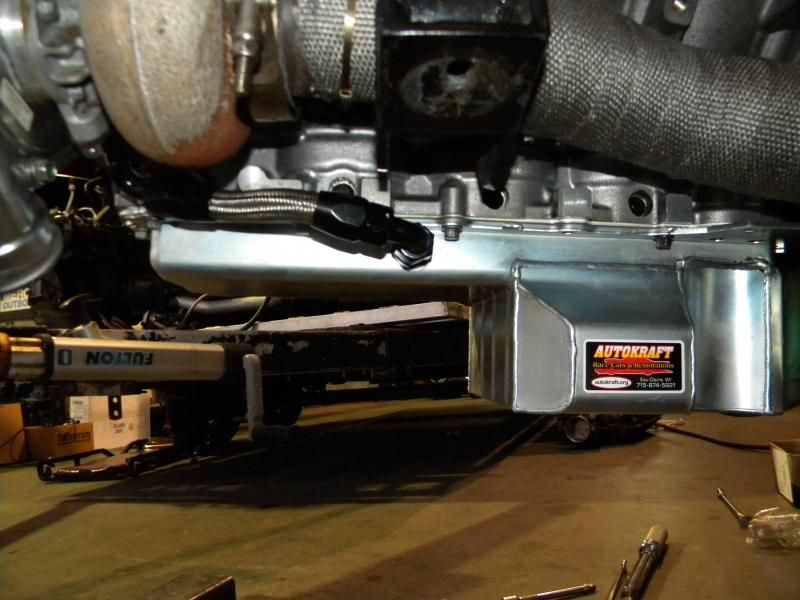
There has been a lack of updates because there has been a lack of productivity. I havent really worked on the car much. Time to get back on it, really hoping to make it to a couple of get togethers next month. Got my M5 axles last friday and I threw them in the growing pile of parts for the car. I have nearly everything I need to get it back together, just need to get on it. Messed with it a little bit last night, drilled the Autocraft pan and used a -10 bulkhead fitting for the turbo drain.
Last edited by M5Hunter; 03-12-2014 at 11:02 AM.
Swagon
Very nice. Just enough elevation on that drain to the pan..
Still has a E39
Supporting Vendor
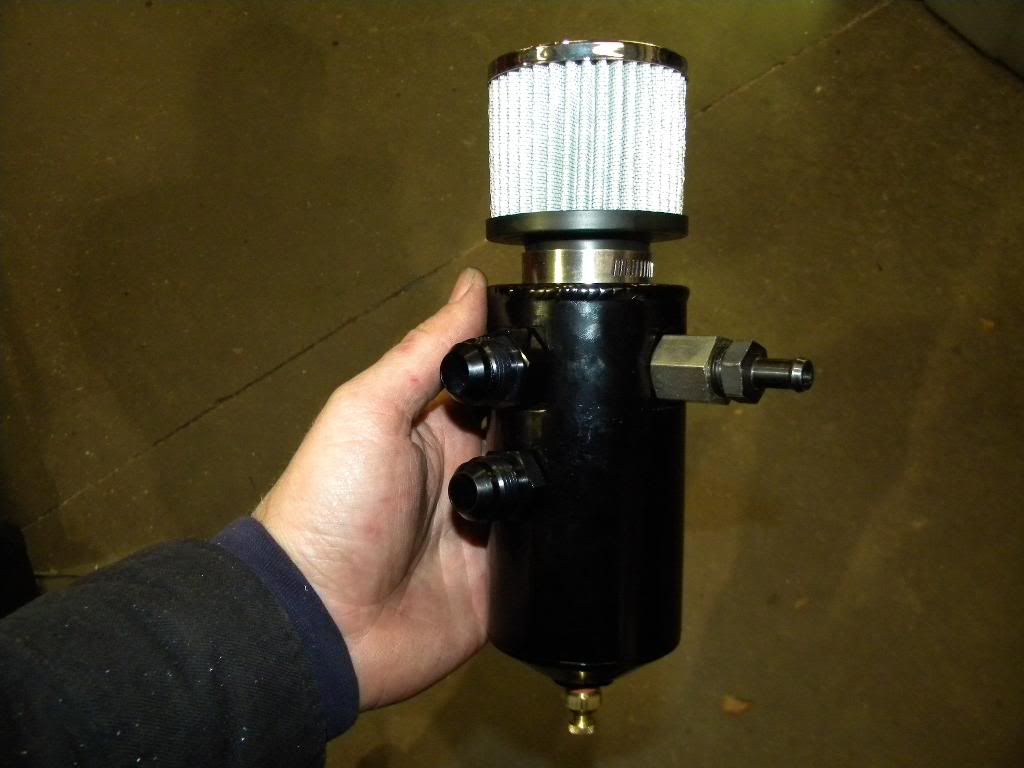
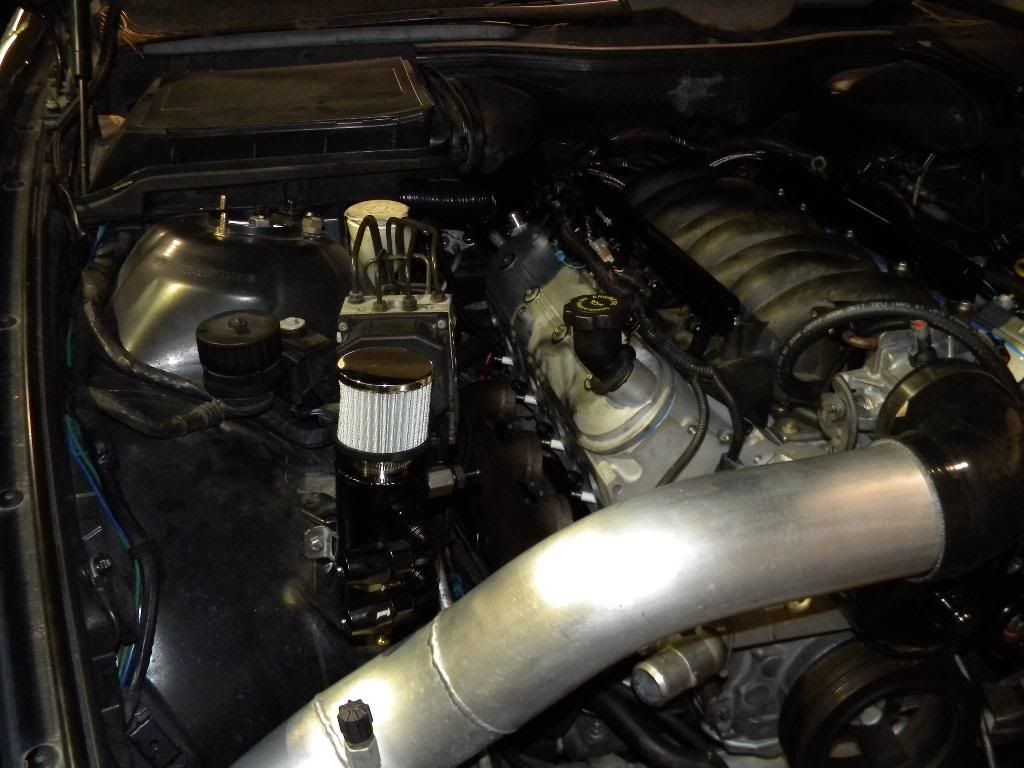
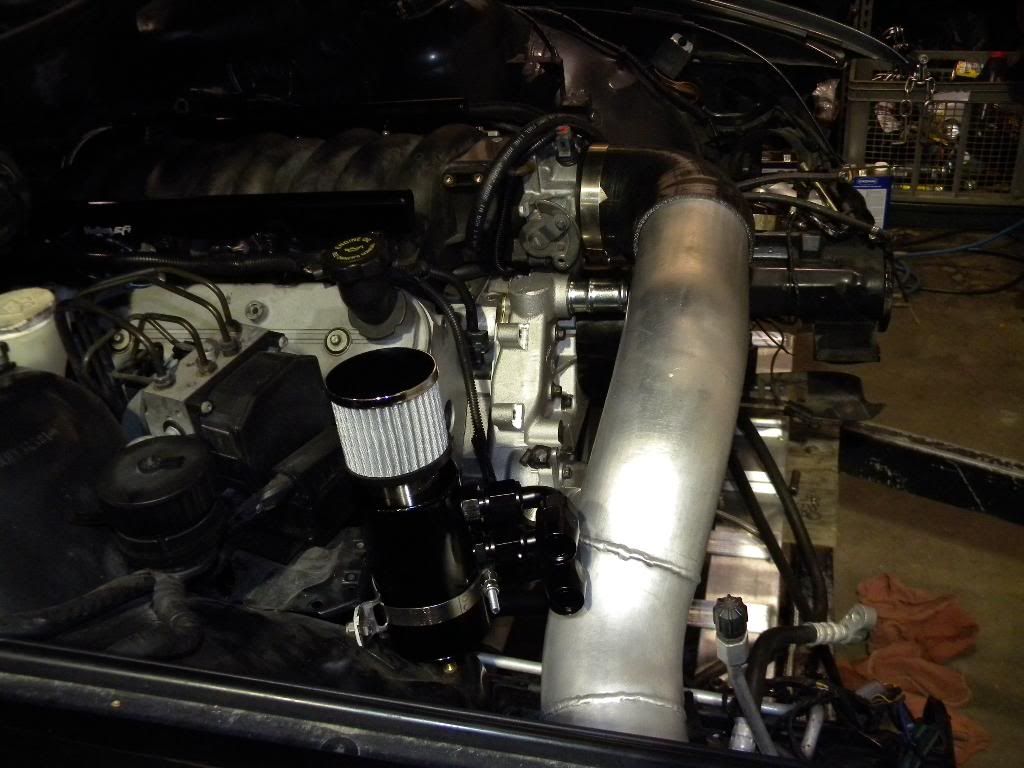
I decided that this time around I was going to do a legit PCV system. In the past I have pretty much always just run open breathers. Doing that has a few down sides. One being the oil residue that usually collects around the breathers. The second is the smell that usually makes its way into the cabin of the car. I was more concerned with the built motor since its setup a little loose as compared to a stock or NA motor. I did a lot of research... A lot. I even ordered a few cheap catch cans to see what they were all about. All my searching led me to a guy who was almost in my back yard. http://www.mightymousesolutions.com/
very happy with the product and customer service. I had him add a second -10 fitting to the can so I could run a -10 line from each valve cover. It's got a one way check valve on it that ties into the stock pcv hookup. Then I added a fitting in the valley cover that will vent to the turbo inlet. It also has a breather on the top which has a "flapper" in it. Durring normal driving, it will function as a stock PCV system. When boost builds up, the check valve closes and it starts pulling extra pressure through the valley cover. If the pressure overcomes that, then the flapper in the breather will allow pressure to release. It's a very cool setup, I can't wait to put it to the test!
Other than that, I got a new water pump and knocked out the heater hose fittings so could tap threads into it. I want to put 90* fittings in it to keep the hoses away from the manifold. I also did the Comp trunion bearing upgrade on the stock rocker arms. The motor is back in the car perminaly and I started hanging the accessory's on it before I headed home for dinner. Made good progress this weekend, it's nice to see it coming back together. Planning to put the M5 diff in on Tuesday and measure for my driveshaft.
Last edited by M5Hunter; 03-16-2014 at 07:04 PM.
Swagon
Decided to post this here too..
Clay and I had a photoshoot for a feature in Modified Mag but unfortunately, Modified and a bunch of affiliates owned by the parent company went under. I had taken some photos that day myself and since it seems unlikely they will be in any other publications, I felt it was about time to share mine. Here are a few of my favorites.

Still has a E39
Supporting Vendor
Thanks for posting those! What a shame the magazine shut down before publishing this shoot.
Worked a little on the car last night, here is the Autocraft oil filter adapter that got 2 -10 fittings welded on for the oil cooler lines. I also drilled and tapped a hole for the turbo feed line.
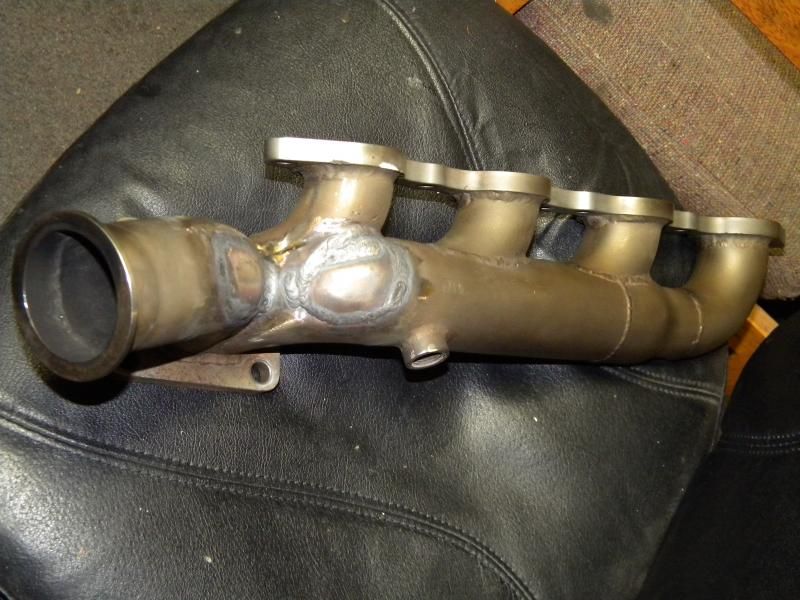
Also got the old wastegate flange cut off the manifold and made a couple fill in pieces and welded them in. Still have to grind the welds down, but I'm very happy with the outcome. I think after they are cleaned up, it'll be hard to notice the holes were ever there.
Member
Where are you going to put the revised wastegate placement?
E39 LSX SWAP PARTS FORSALE
Member
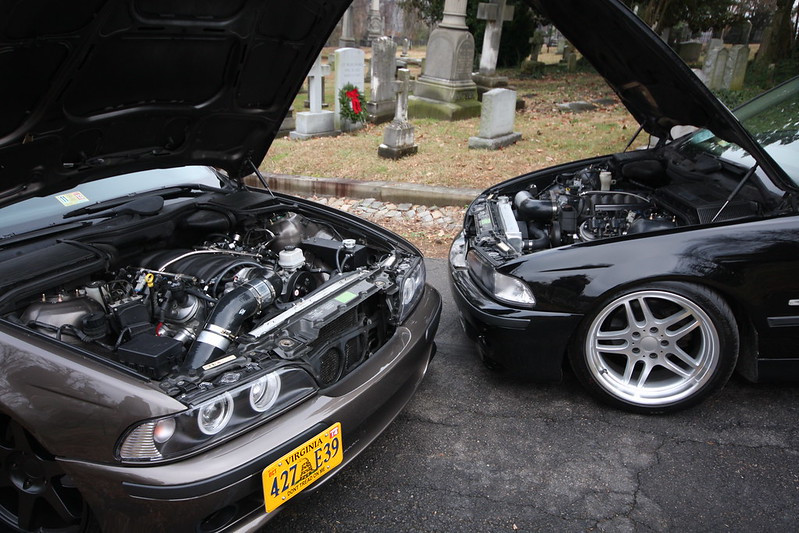
Love all this E39 goodness in Richmond! One of these days soon, I'll be back on the road and catch up with you guys, though my S62 will be somewhat out of place!
--Peter
Member
Originally Posted by herrubermensch

That's what you say now but whenever you is around my car there are lots of sneers and haughty derision, and that's just the stuff I see

Last edited by rao; 03-18-2014 at 05:44 PM.
Rob
Prior projects:
1998 540i with 6.6 LS2/T56 Chevy Power
- pictures and details
1992 325i with 6.6 LS2/T56 Chevy power - pictures and details
1995 M3 with 6.6 LS2/T56 Chevy power - pictures and details
Member
IT'S THE WHEELS!!!!
LOL.
--Peter
Swagon
Hahaha!
Peter, hoping all is well with you. It's been a while. We definitely all need to get together soon.
Still has a E39
Supporting Vendor
The wastegate will be moved to a more "traditional" location. Pics coming soon.
Member
Cool was wondering if going with an internal gate turbo like Borg Warner EFR!
E39 LSX SWAP PARTS FORSALE
Still has a E39
Supporting Vendor
Sticking with the same turbo for now
Still has a E39
Supporting Vendor
Today was a real "1 step forward and 2 steps back" kind of day. Started off first thing this morning finishing up the new manifold design.
Put the turbo and wastegate on the manifold.
While I was there, I painted the Turbonetics logo black instead of red.
I was rolling at this point, but this is where it all goes south. While installing the manifold/turbo on the motor, I was unable to tighten one of the manifold bolts up to the torque spec before it pulled all the threads out of the head. The only way to repair the thread was pull the motor back out of the car. What a kick in the @$$.
Back out
While removing one of the other bolts, I found a pile of aluminum on the threads of the bolt. had to drill, tap and heli coil 2 holes in the head.
Here is a picture of the manifold/turbo back on after the bolt hole repairs.
Also, I was having problems before with sparkplug wires. Even though there was some room between the wires and manifolds, they were still getting hot enough to start to melt the wires. I decided to route the wires around behind the manifold and under it. I switched the pins in the main coil harness plug to reverse the order of the coils to have equal length plug wires.
Tomorrow morning I will cut and route the sparkplug wires on the drivers side, then put the motor back in. After that its hook everything back up and hopefully fire it up before I head home for dinner.
Last edited by M5Hunter; 03-29-2014 at 09:02 PM.
Member
Nice work.
I am so leary of torquing bolts in aluminum. I see to experience what happened to you all the time!
Doug
'97 M3/4
Member
What are specs on that Turbonetics turbo?
1995 E36 turbo v8
Member
Subscribed!
Current:
'97 E36 M3 Track/Street Silver Coupe
'03 325XI AW Sedan
Prev:
'02 E46 M3 Active Autowerke Stage 3.5 S/C'd IR/IR Coupe
Still has a E39
Supporting Vendor
The turbo is a T4 7868 with a .96 AR.
I should have stayed in bed this morning. Day started ok, got the motor back in and ready to start. Fired right up and sounded good.
Click link below to see first start!
http://i12.photobucket.com/albums/a2...psddc27f0d.mp4
After that instated hooking everything else up. Got all the accessories on and the exhaust hooked up. Then I decided to check the oil level. Pulled the dipstick and it broke about 4 inches from the end. The broken piece fell into the oil pan. Not sure how or why it broke yet, all I know is the motor has to come out AGAIN to pull the pan and retrieve the broken piece.
Member
Maybe you will be lucky and the frag can be fished out through the oil drain hole with a telescoping pen magnet. Definitely worth a try.
I wonder if those cheap harbor freight scope style cameras would help locate where's it at in the pan?
540i-LS3-TR6060 swap thread
Major Lazer
What a dipstick move by the dipstick! I'd support the engine from up top and drop the subframe a few inches to allow oil pan removal.
Last edited by Schitzo; 03-30-2014 at 08:22 PM.
2003 M5 LSx l 6 Spd Manual l 4.10 LSD
Build Thread
The chassis must always be regarded as a means to an end and never as an end itself
Member
Wtf! That is the suck!
Member
Oh no! Try the magnet suggestion above. Maybe you'll get lucky.
Doug
'97 M3/4
Member
I was listening to Car Talk on NPR I think a week ago. And someone had the same problem. They suggested just taking off the tube for the dipstick. Not sure if this would be an easier solution for you or not.
- - - Updated - - -
I was listening to Car Talk on NPR I think a week ago. And someone had the same problem. They suggested just taking off the tube for the dipstick. Not sure if this would be an easier solution for you or not.
I feel the magnet will get stuck all the way down the tube. I would thing it might be better to use a sort of extendable grabing tool (Pictured below). I bought one from a cheap tool store for under a dollar and it has saved me many of times.

"It`s nice to be important
but it's more important to be nice"
- Hans Peter Gerdees
Still has a E39
Supporting Vendor
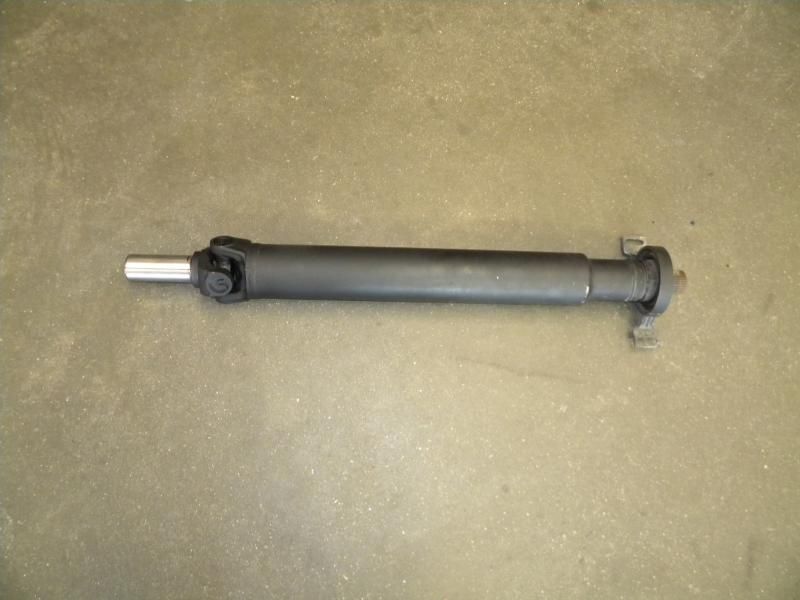
Still haven't had the time to try anything on the car to . I did however pick up my modified M5 driveshaft this morning. Stuck it in at lunch time to make sure everything fits properly and it looks good.
Swagon
That's what she said..
 Posting Permissions


 Reply With Quote


Bookmarks