
 Member
Hobart 140. Best Christmas gift I've ever received!Originally Posted by jhott66

Member
Long time without an update for multiple reasons. Work has been crazy since the beginning of the year and there's no signs of slowing down anytime soon. I bought a house in March which required a full interior paint and some flooring upgrades which are mostly done at this point. And on top of all that I had to move almost 2 cars worth of parts from one garage to another. I finally got everything moved over about 3 weeks ago so I'm finally back to where I can focus on the car again and push to get this thing finished.
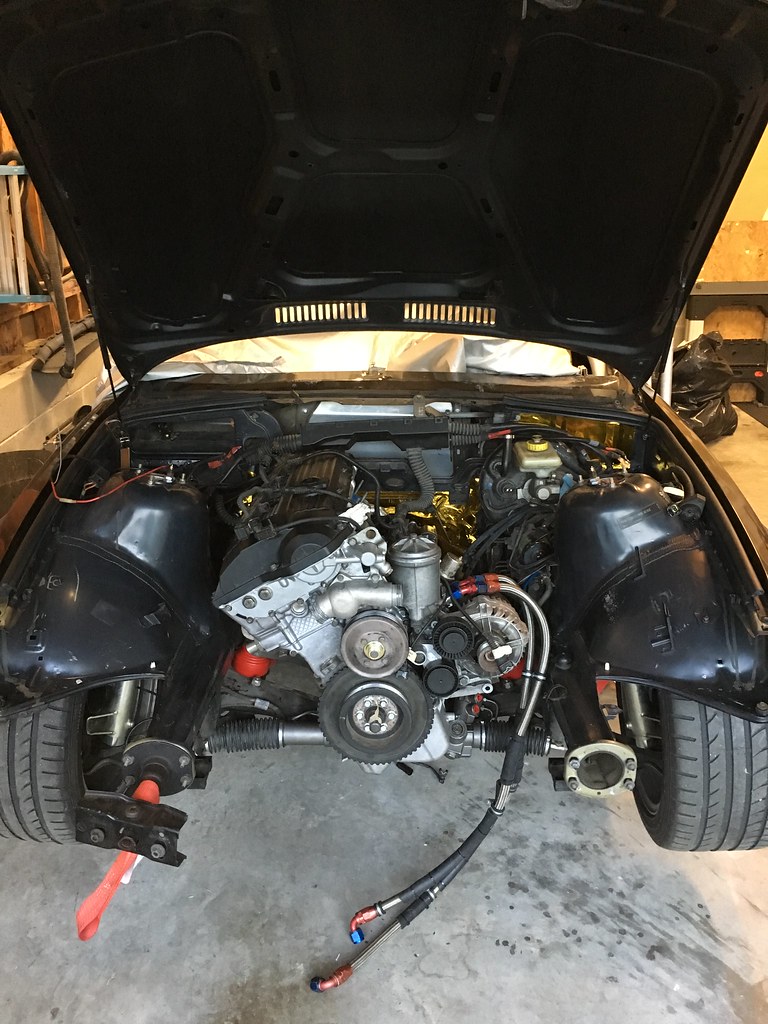
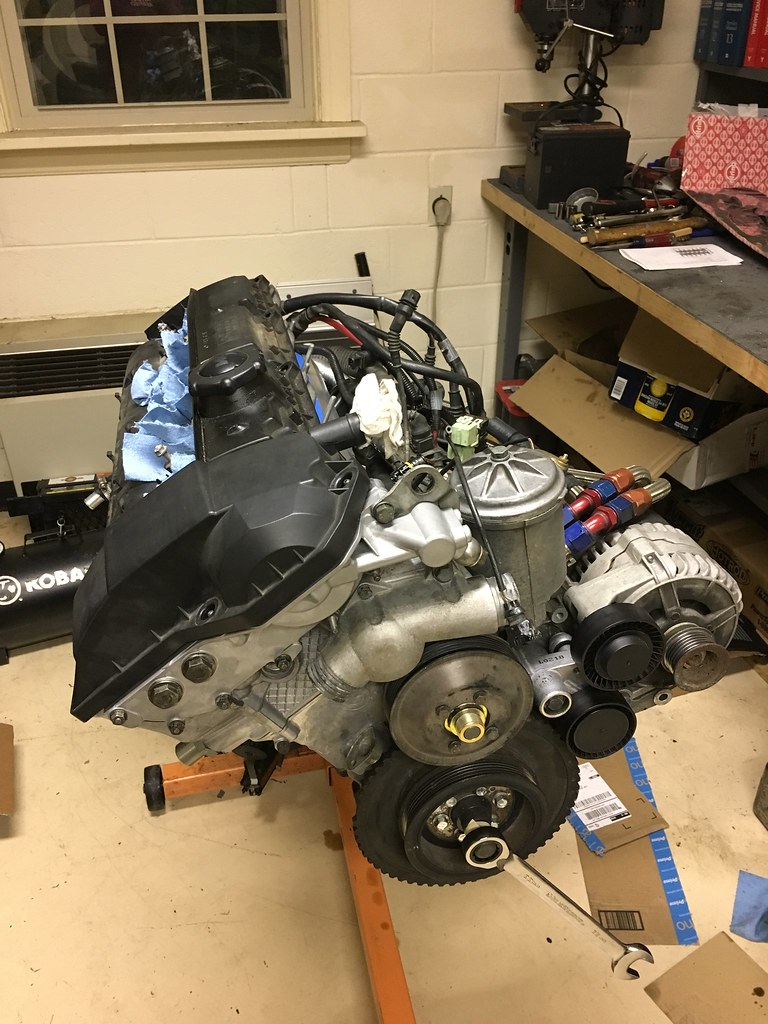
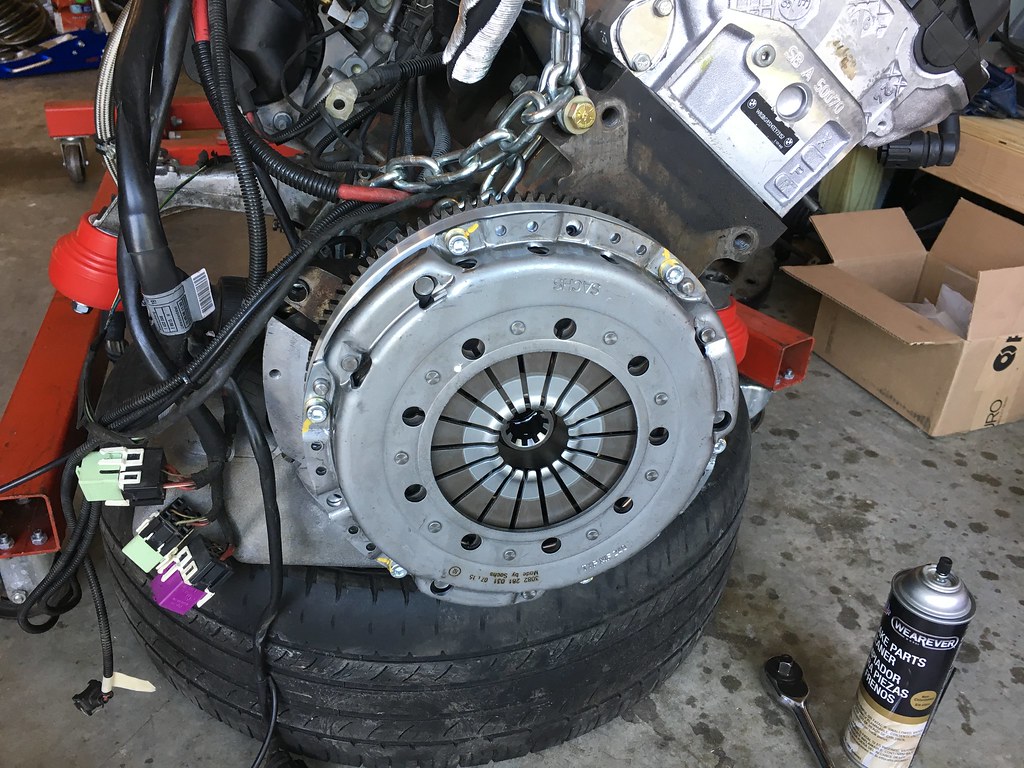
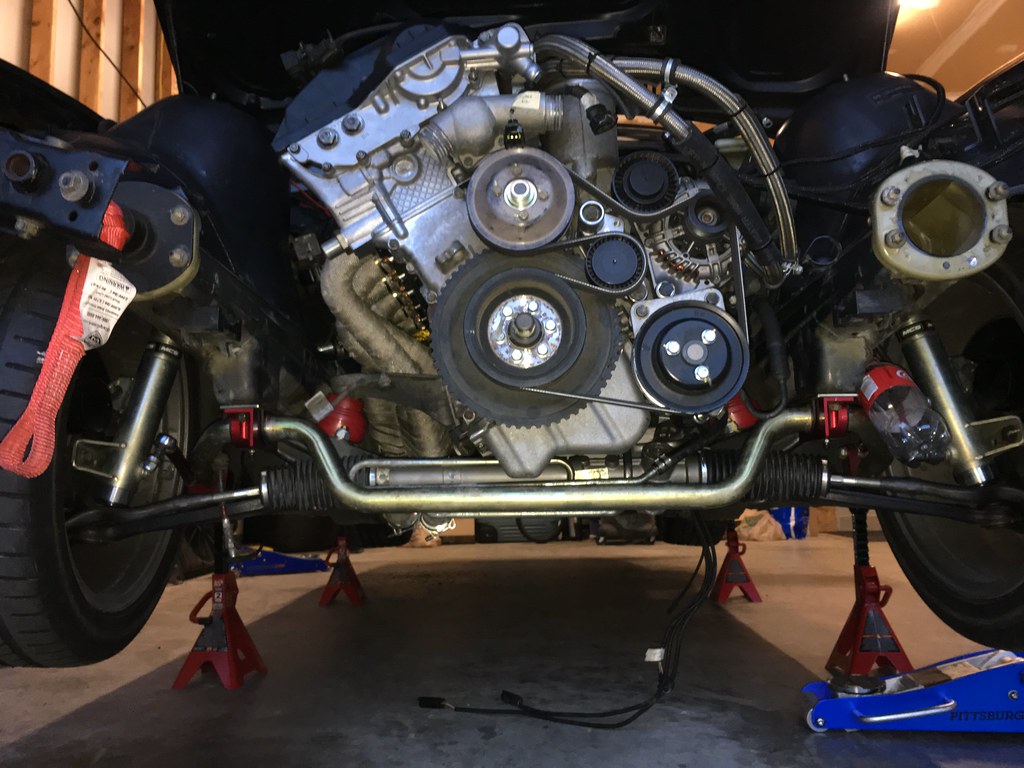
I got the head on, cams in, S54 oil pump and pan on, and got it all timed a couple weeks ago. Last week I finished several small items on the engine and was finally able to take it off the stand a couple nights ago. Dad was in town last night so we installed the JB Racing flywheel, E34 M5 clutch, stock pressure plate and then put the trans on and got the combo bolted back into the car. It feels really good to see the engine in and I'm ready to focus and get it running again soon!
Not many pictures to share as there hasn't been much work going on but here are a few
S54 oil pump installed
Head and cams back on with the engine timed and valve cover sitting in place
JB Racing flywheel, clutch, pressure plate installed
Finally back in the car
Member
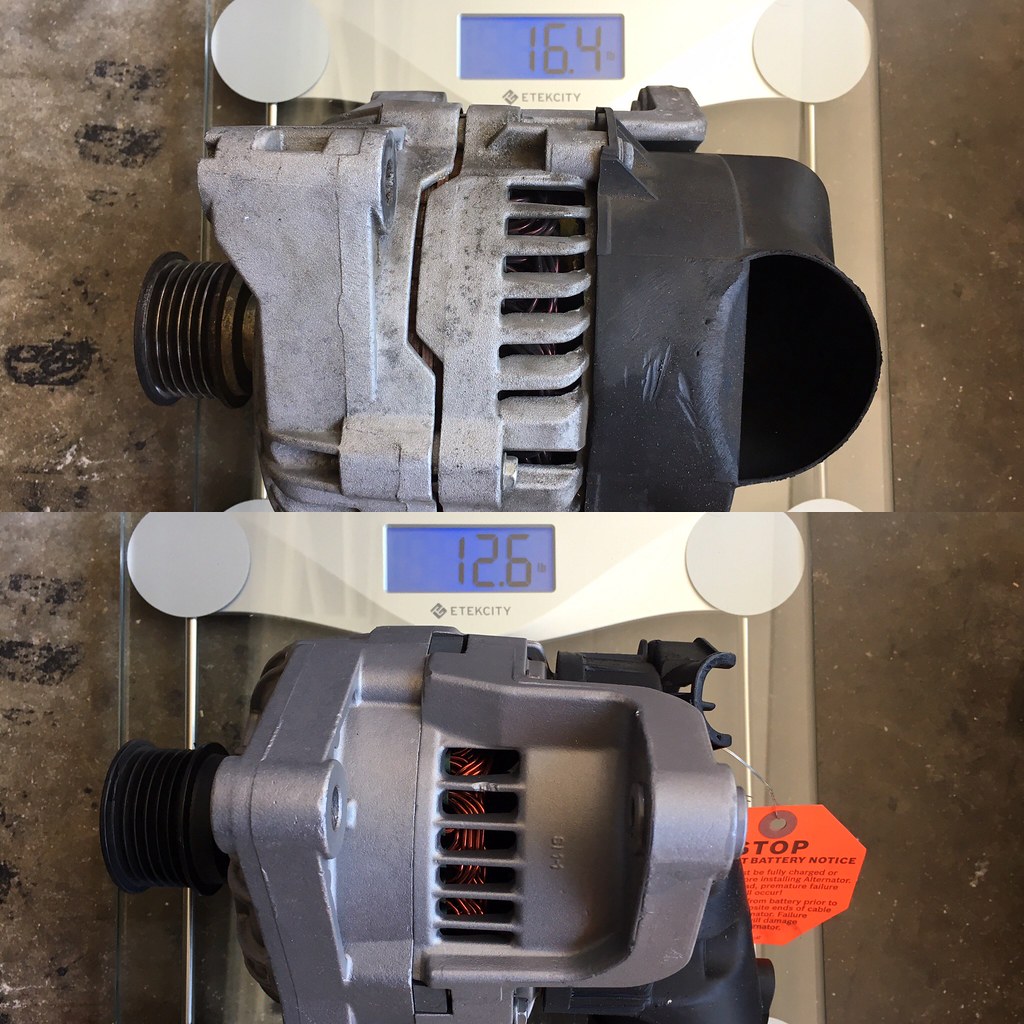
I've been making slow but steady progress lately. I got put the finishing touches on the trans install by connecting the clutch line and installing the shifter. Then I installed reman Bosch 80A alternator to replace our original '96 140A unit mainly as a "while I'm in there" part with the added benefit of saving almost 5 lbs off the nose of the car. Here's the weight comparison:
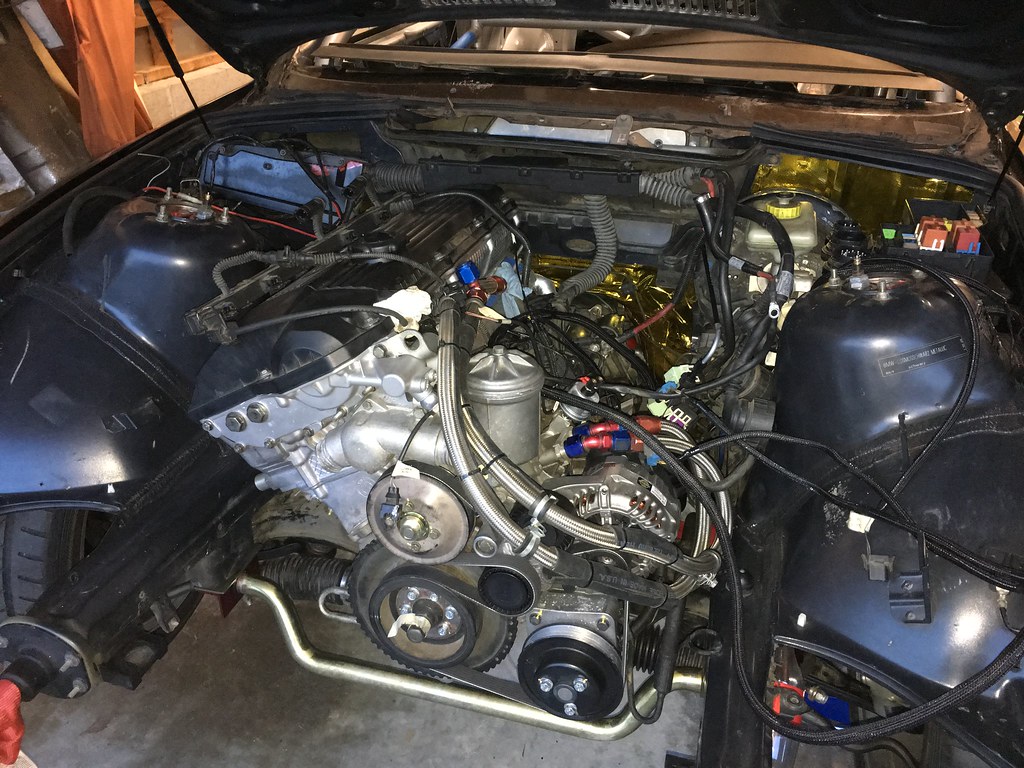
After than I buttoned up the power steering system which included installing a new steering shaft u-joint, torqueing down the rack, installing the pump and lines. With all the accessories finally back on the engine I finished the front by installing a new belt.
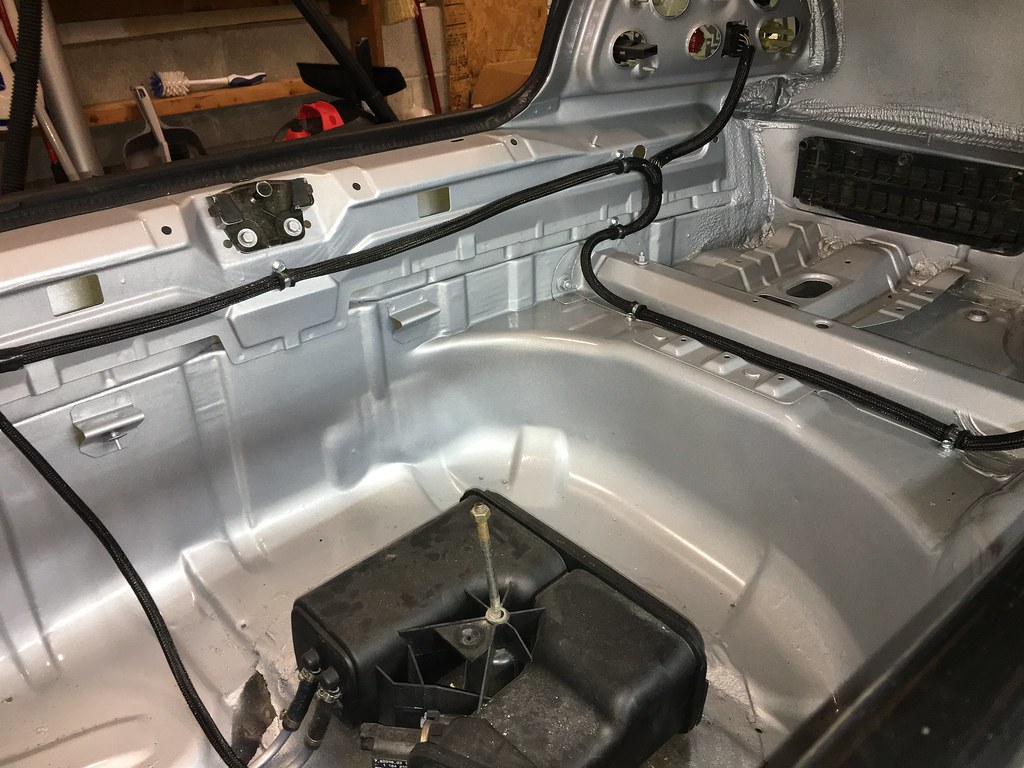
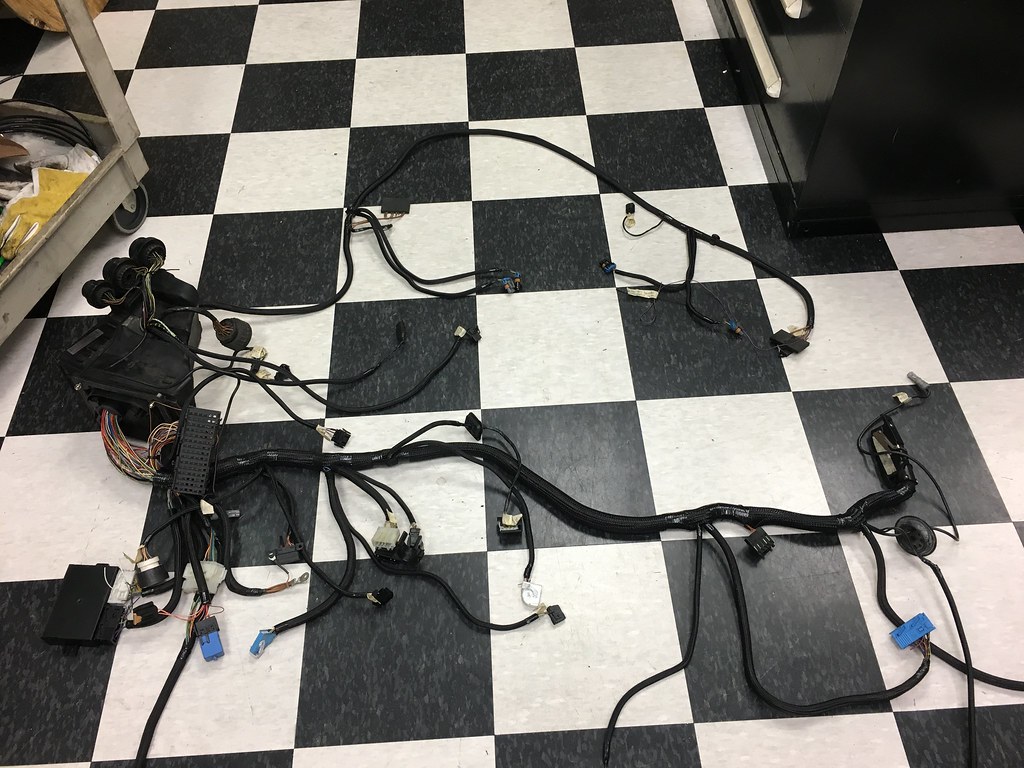
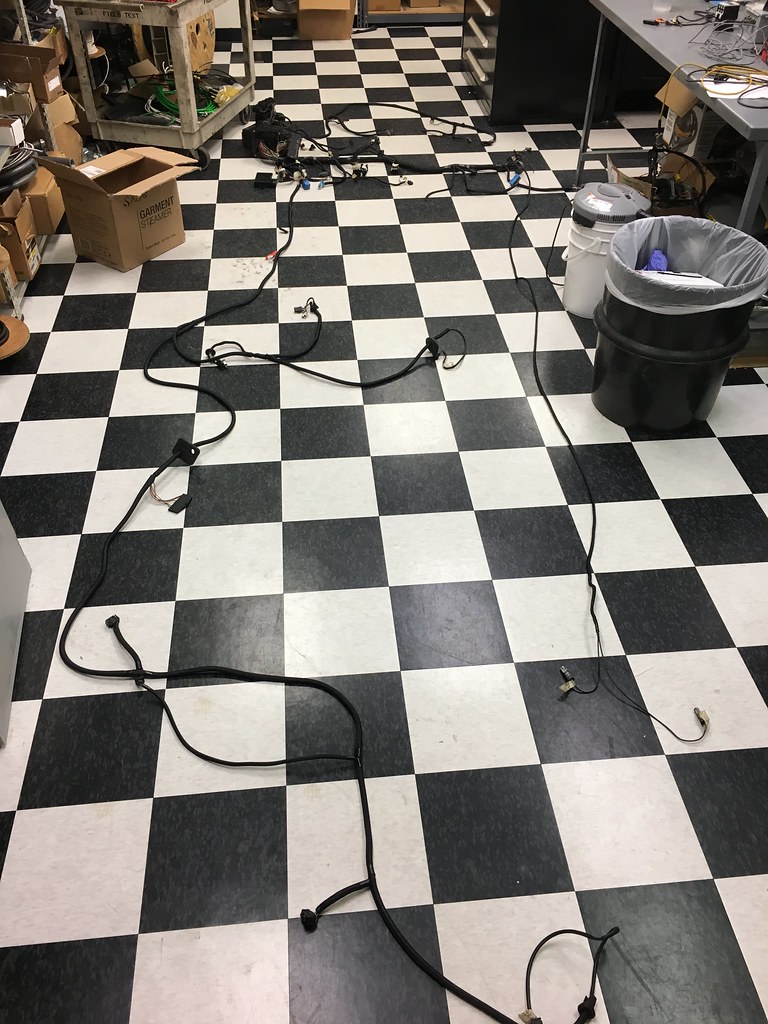
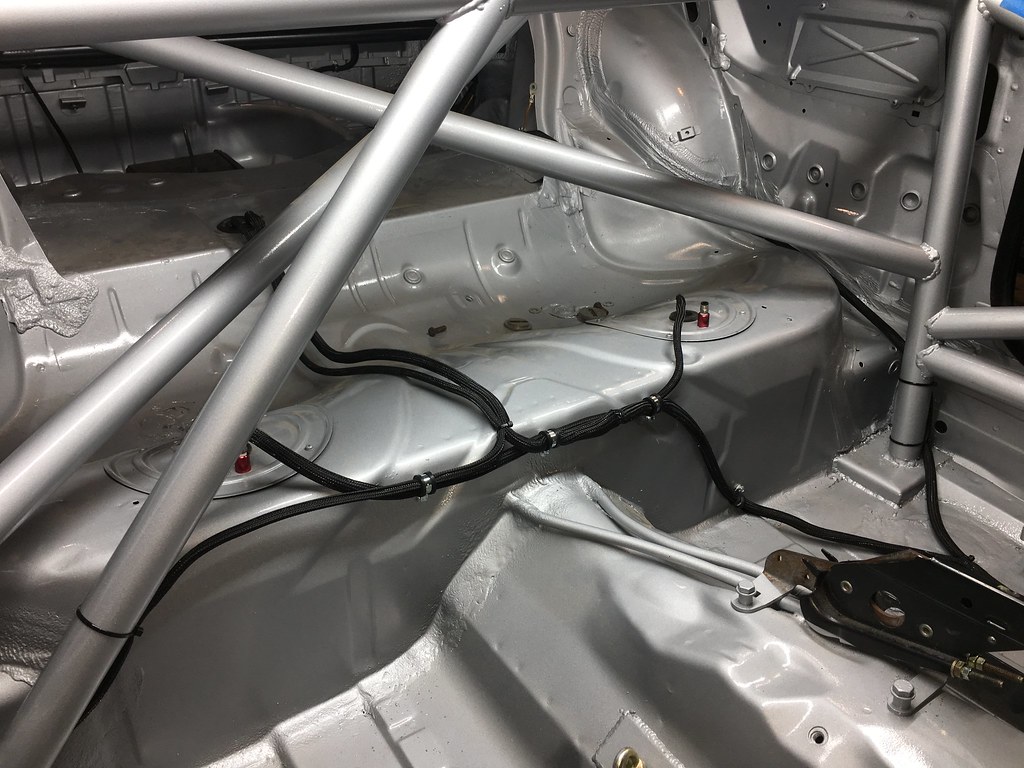
The next big step was getting the wiring harness back in the car. After thinning the harness I wrapped it in braided nylon split loom to keep everything clean and organized. Here's the final product before installing it:
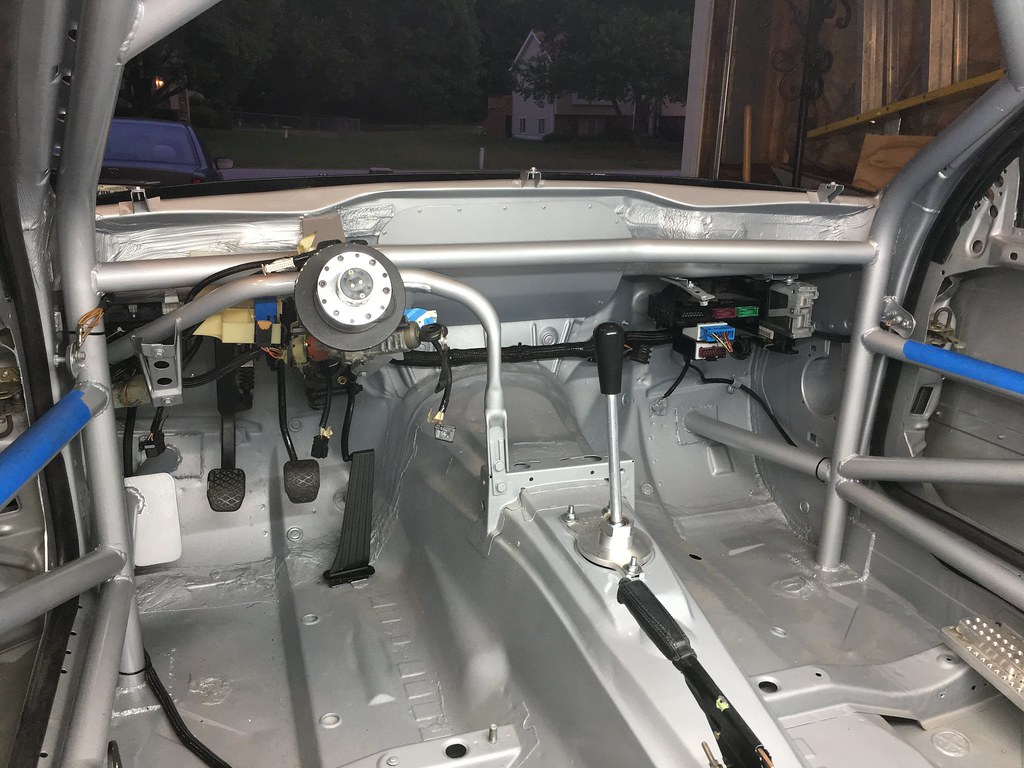
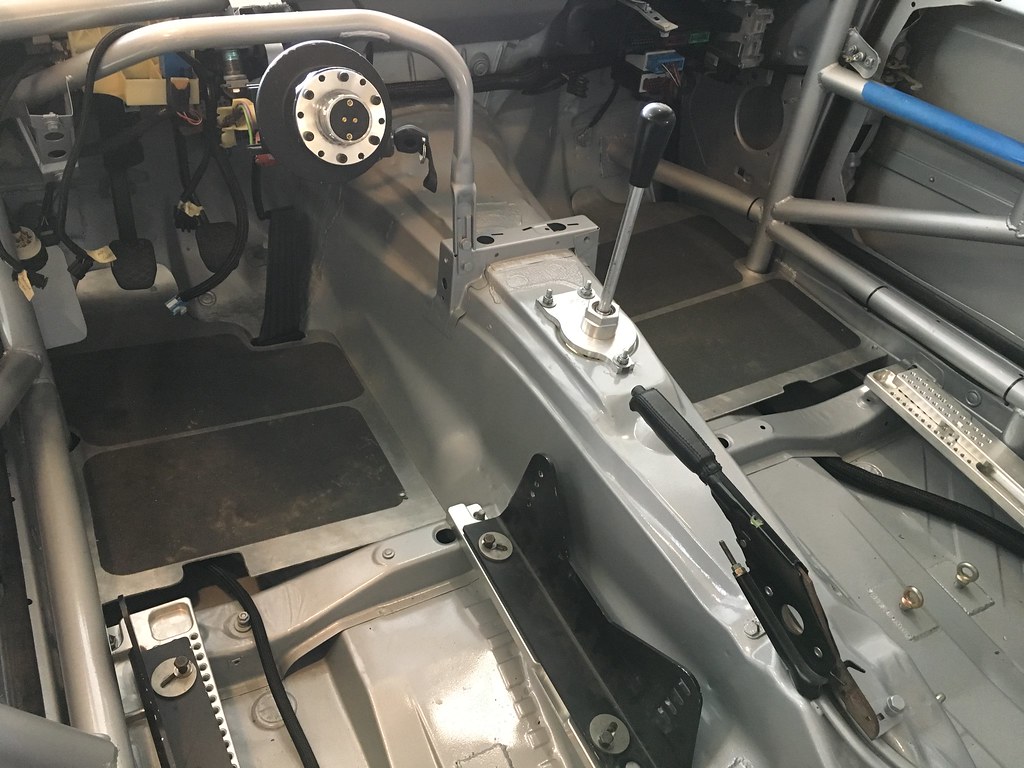
The harness is now back in the car and the front half is connected and secured. I got excited and put the dash back in which was a nice see it looking more like a car again.
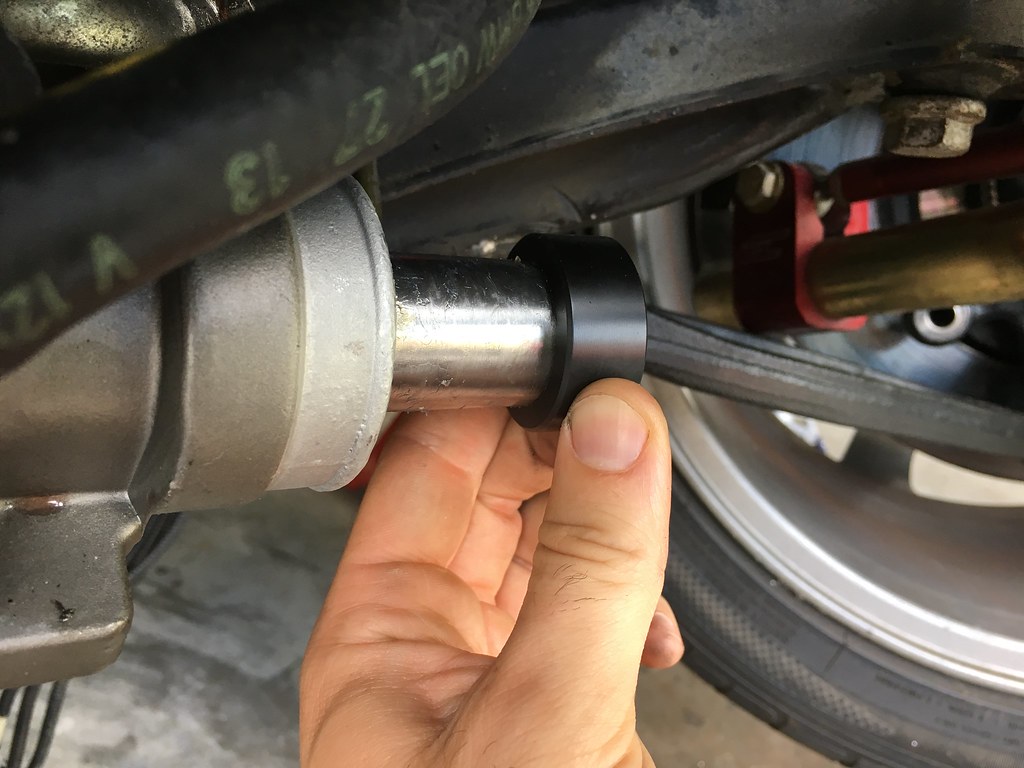
I've been prepping for a big suspension install this weekend when Dad comes down to visit. I replaced the front control arm ball joints with fresh Lemforder joints instead of buying new arms. I dropped off the trailing arms at Delta V Motorsports who was a big help by replacing the rear wheel bearings for me. More pictures and another update after this weekend. The final piece is to install Turner monoball RTABs and then get it all in the car.
Member
niiiccceee.
Member
Looks great man
99 M3 STU/ GTS3 Project
Member
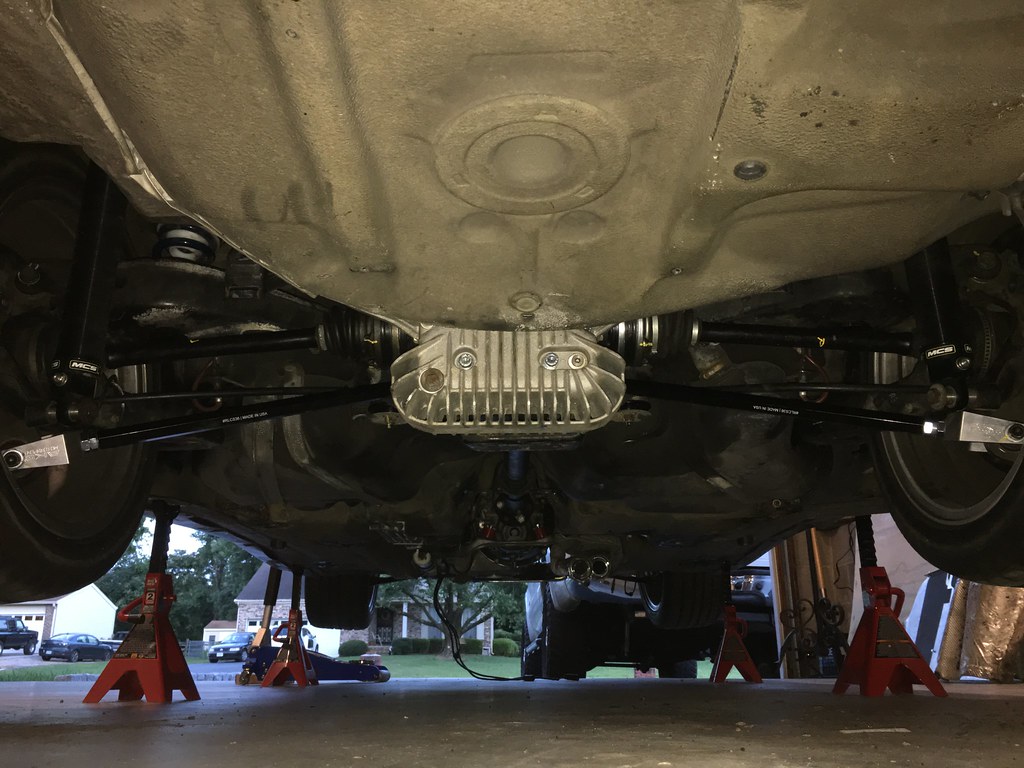
Solid weekend in the garage with Dad for Father's Day weekend. We had a very productive day yesterday and managed to get the rear suspension, diff, axles, driveshaft, and front suspension all in place. Control arms with fresh ball joints, front and rear wheel bearings are FAG bearings that have been repacked with Red Line CV-2 grease, Ground Control front sway bar, the same MCS suspension transferred from the old car, and same DiffsOnline diff from the old car.
Current state of the engine bay. I'm waiting on a couple small parts to arrive before finishing things up, organizing wiring, installing the intake manifold, fuel lines, cooling system, oil cooler, etc.
Tonight I got most of the harness work finished up with some clamps strategically places to secure it throughout the car. I'm pretty happy with how it turned out. Hopefully it works as it should, time will tell.
Member
Great progress. And that harness looks nice and tidy.
Member
Jealous of how clean this is coming together. Nice work.
Member
Looks great.
What are your thoughts on deleting the carbon canister in the spare tire well? I'd like to get rid of mine.
Member
I'm planning to do something like this as stated by James Clay
https://www.bimmerforums.com/forum/s...13#post4323013
I found these diagrams in another thread that illustrate essentially the same thing
Member
Deleted mine as described by James Clay. The only necessary lines are 1) fuel to motor, 2) fuel return from motor, 3) tank filler, and 4) vent line looped in trunk.
It was pretty straight-forward for me but I had the tank dropped already for a complete subframe swap. No huge fireballs yet!
Member
I'm tempted to leave the expansion tank in the RR wheel well and use hose #3 that goes to the charcoal canister as my vent with a loop and small K&N style filter to keep bugs out. I guess it depends on how easy it is to remove and block off lines #15 and #18 with the tank in the car.
Makes Cars Dance
BMW E36 M3 Expert
Damn, that build looks so clean. Wish my dash and wiring looked like that.
On my 99M3, I got my SAP and spare tire well evap thing written out via tuning from Frank Smith.
You could do that and get a tune at the same time!
Ambitious But Rubbish
Damn Eric, this build is so clean. I can't wait to see it jumping curbs with us
My car also still has the canister, I have been meaning to pull it for simplicity's sake, but I don't need the minute weight loss so motivation has been low.
2011 F-150 FX4 | 1997 BMW M3 #404 GTS2 | 2006 BMW M3 Convertible
Out Motorsports
Member
It may already be coded out with the current tune, I'll have to check. I know the rear O2s and SAP are so it probably is.
Thanks! It's taking long than I wanted but the results show and it should be clean and fast when it's done (I hope!).
The weather was nice and I didn't have many plans this past weekend so I got several things done. Friday I installed the Turner rack stop kit in an effort to not tear up more brake ducting hoses in the paddock. Nice kit but the spacers wouldn't go on at all. They're delrin and according to Turner you just push them on and use a block of wood to tap them flush. After some measuring it turns out they are 1.5mm less in diameter than the rack which is impossible to tap on with a hammer. I'm still waiting to hear back from Turner as to whether these were in spec or not but I took the Dremel to them and opened them up so I could get them on. I ended up being able to tap them on once there was about 0.5mm press fit.
Saturday I got the floor pans back in. These were made by the cage builder for the silver car and since he built the cage in the black car also, these fit perfectly right in place around the down tubes.
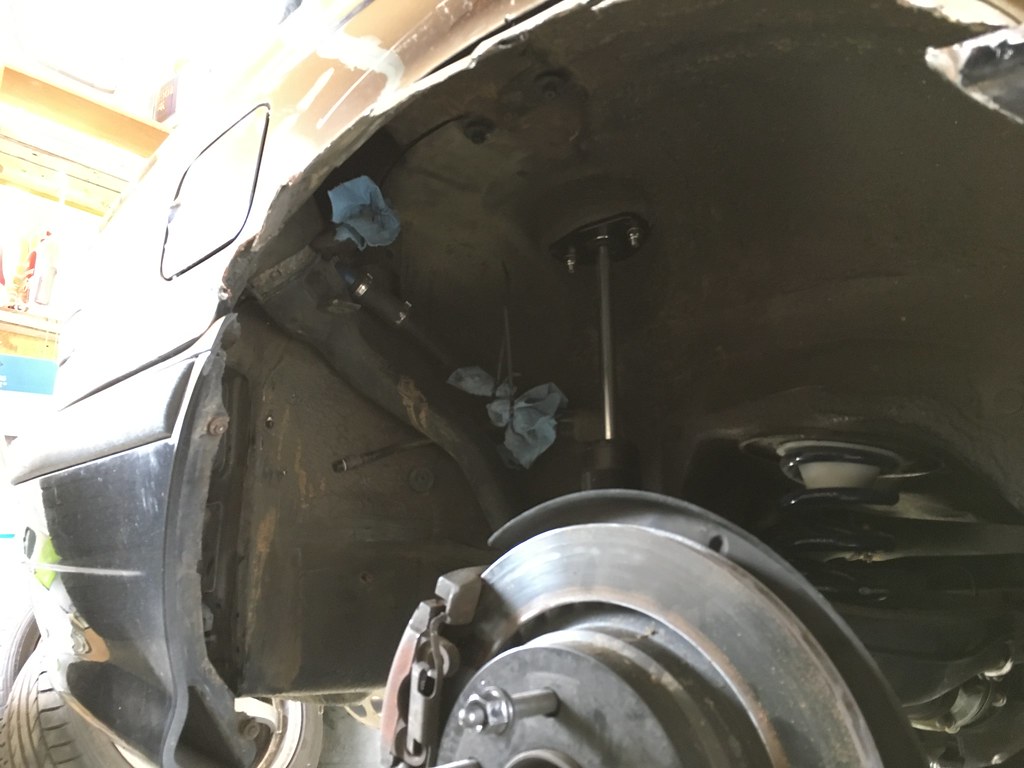
Then I tackled the expansion tank and charcoal canister for the fuel system. I decided to remove both, plug the two lines going to/from the expansion tank to the fuel tank, and use hose #6 (small vent from filler neck to expansion tank) from the diagrams posted previously to act as my tank vent. This falls in line with what is typically done by most racers. I need to get plugs and some fuel rated hose to coil and act as my vent with a small K&N vent on the end to keep bugs out.
The charcoal canister was easy to remove. I also wanted to remove the spare tire mount so I can have a nice, flat surface to mount a cool shirt cooler or ballast weights later on. The mount is simple to remove as it has 3 tabs that go into place and then about 1/3 turn to loosen and pull the whole piece out. The problem is that there is about 1/2" of seam sealer on top and it all has to be removed so you can twist/remove or do what I did which was bend the tabs up and then push the whole mount straight down. Acetone was a big help breaking down the seam sealer but the whole process took way too long and too much sweat. I'll go back and finish the clean up later followed by closing the hole with some aluminum sheet.
Yesterday was more about cleaning, organizing, and gathering my thoughts after a river trip to enjoy the weather. I made a big "to do" list as well as a big shopping list of parts and hardware.
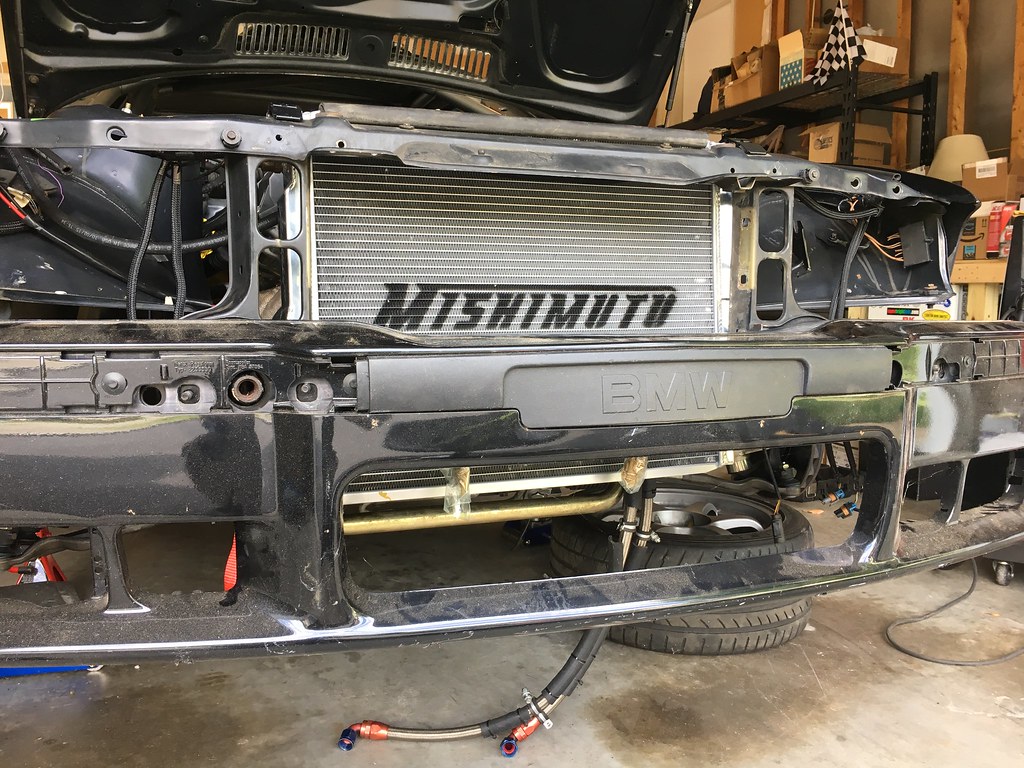
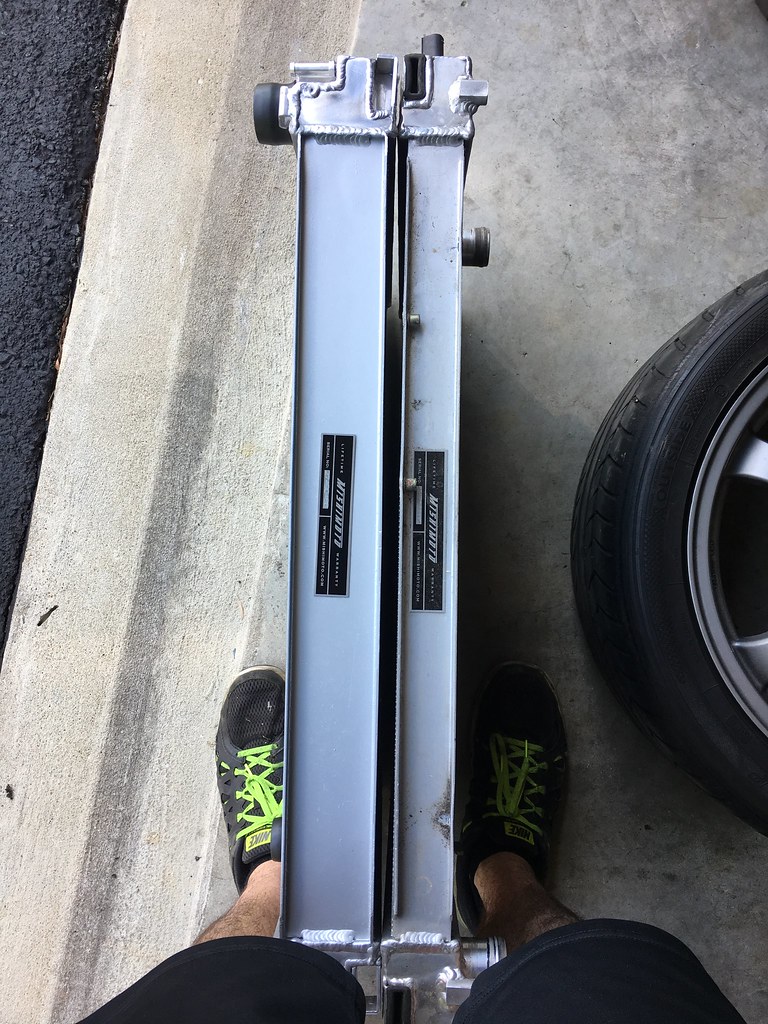
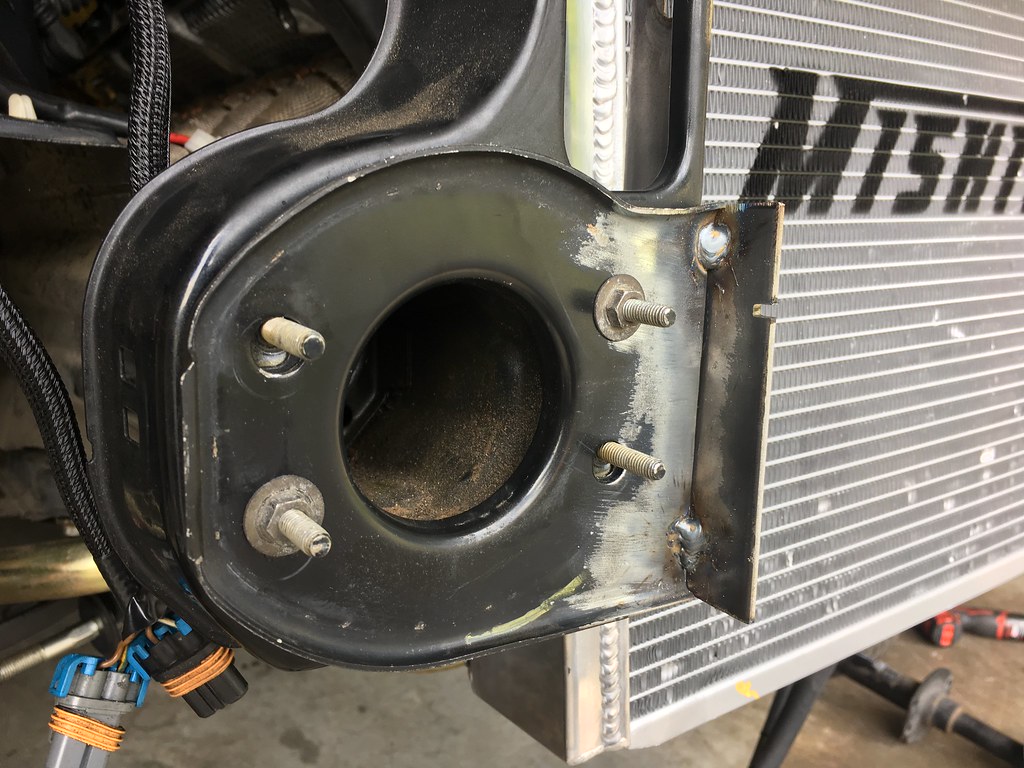
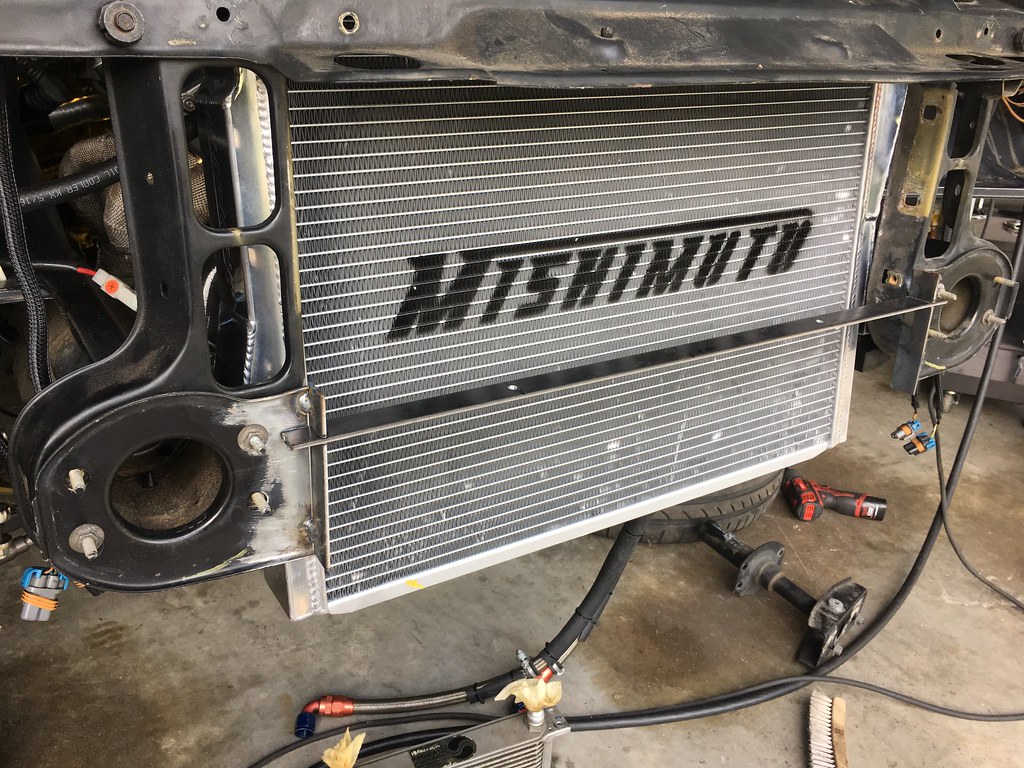
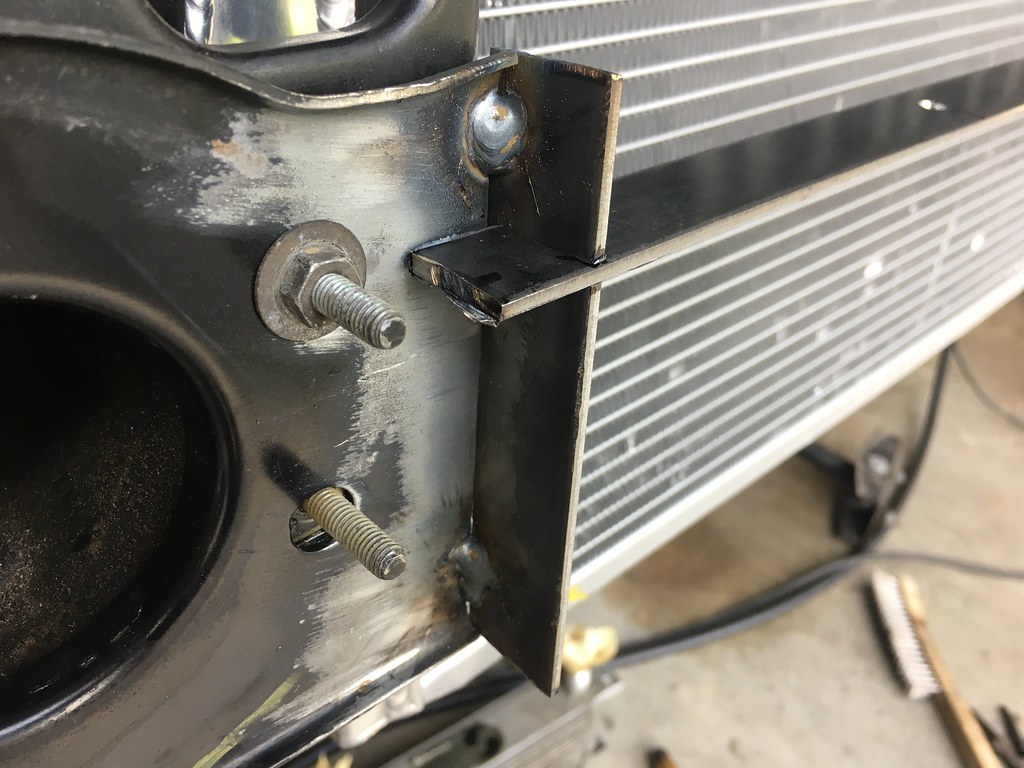
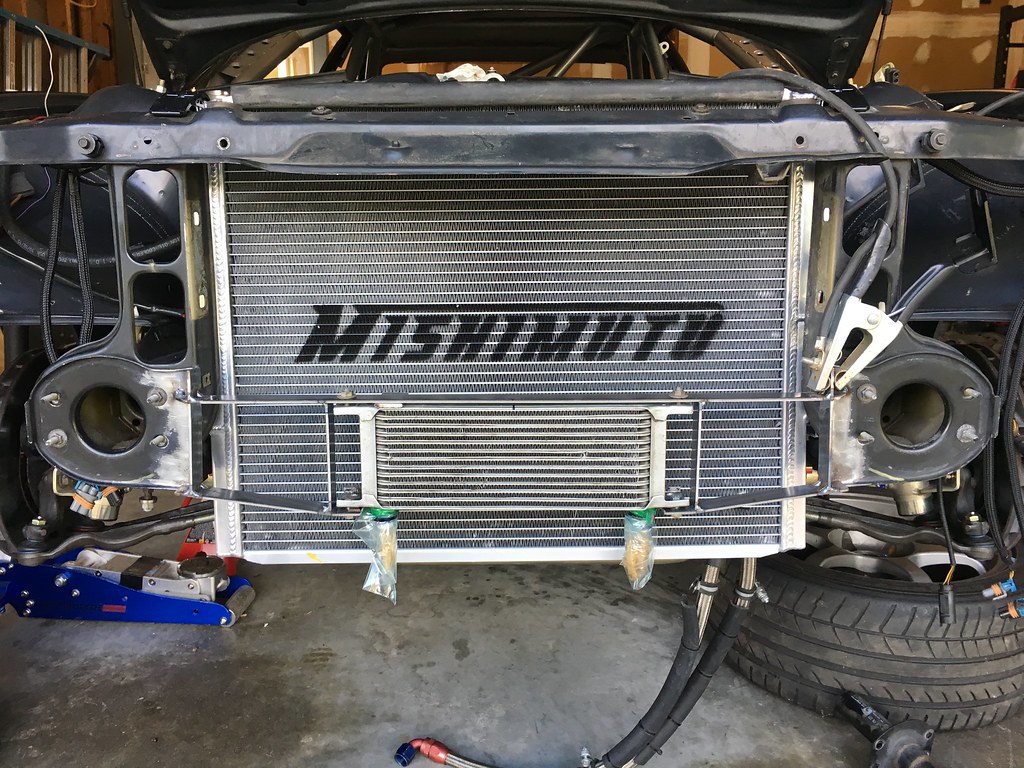
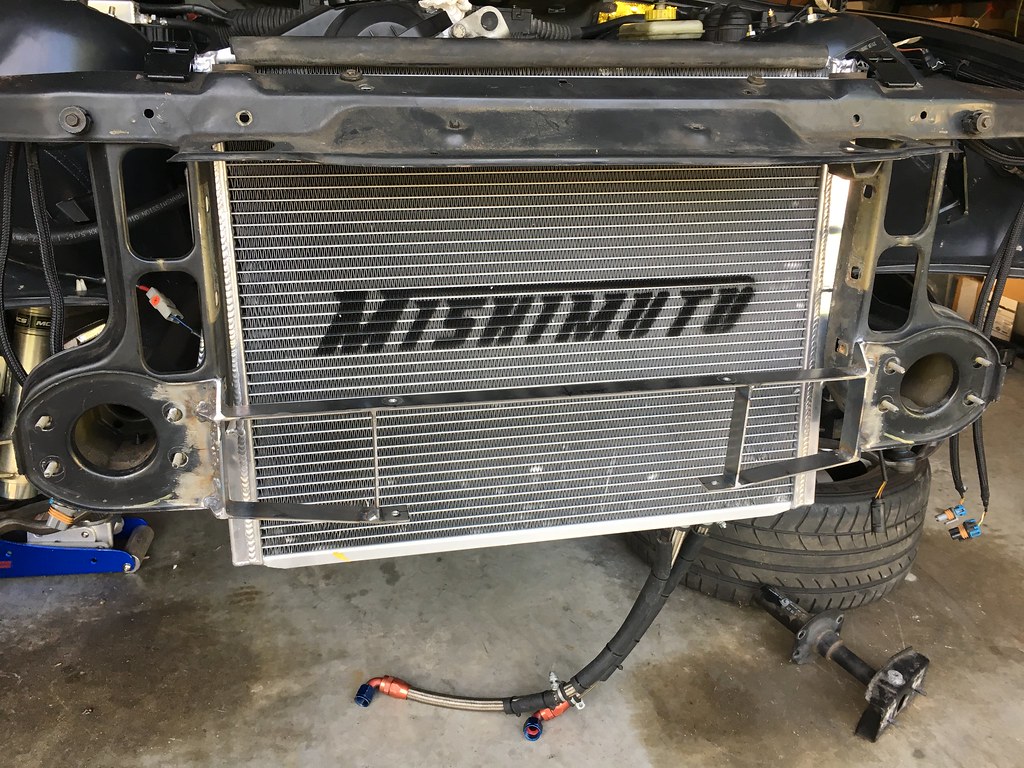
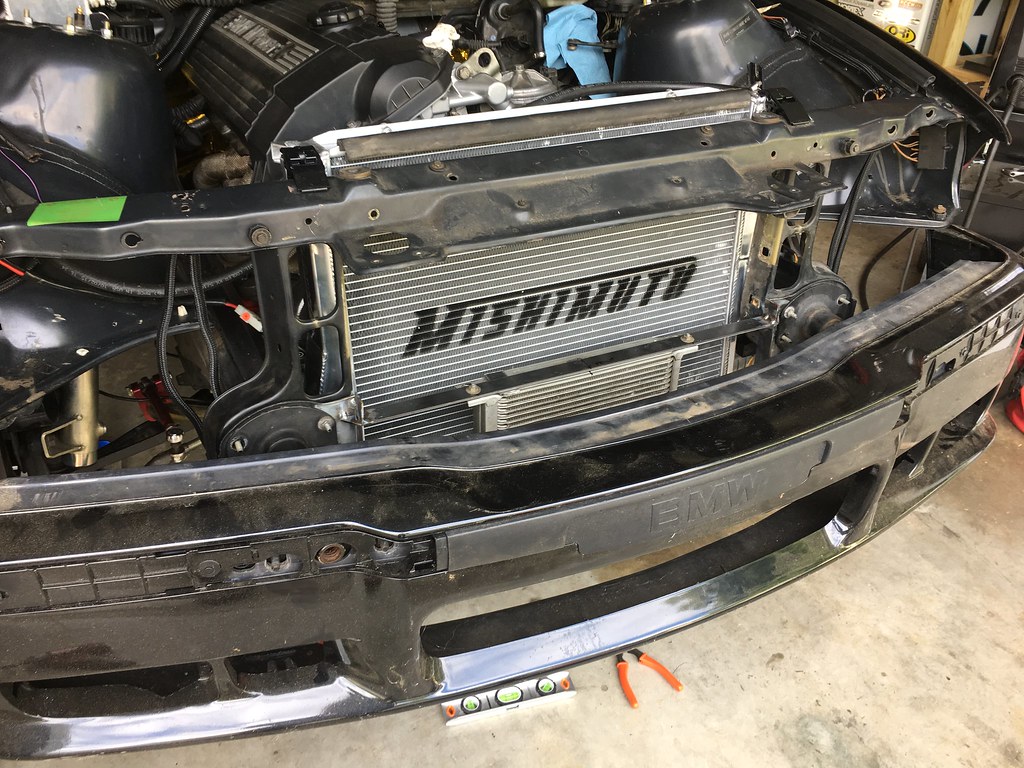
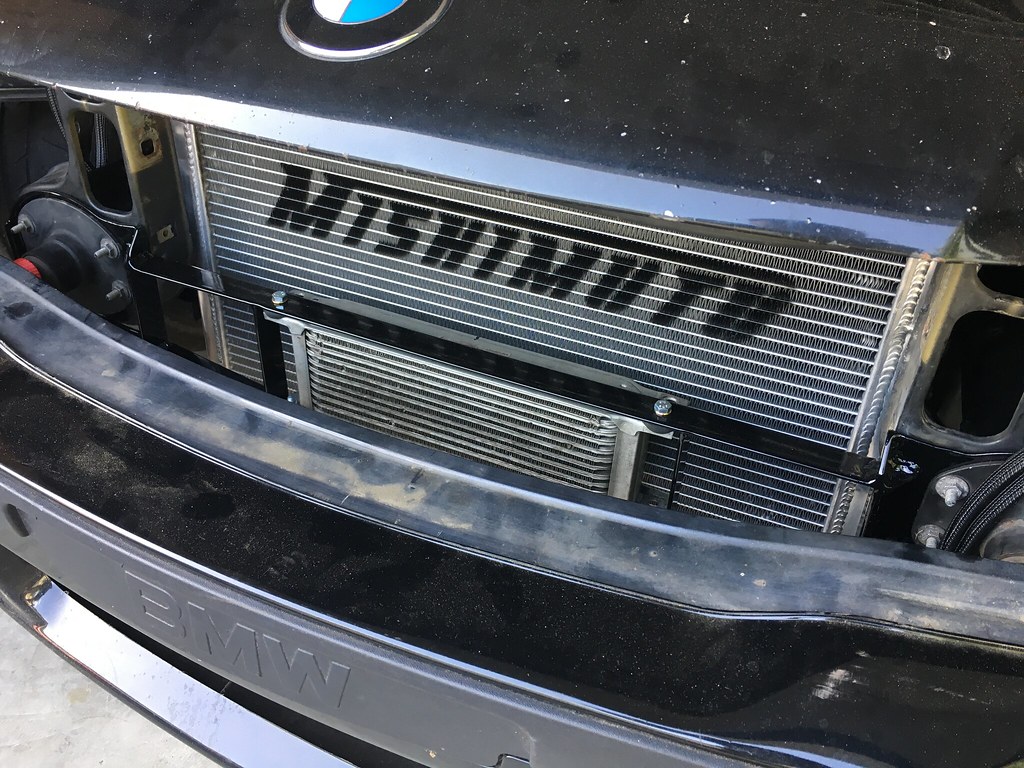
I did manage to accomplish a couple things and marked them off my list such as torqueing the axle nuts and swapping the Spal fan to the new radiator. We're going to be using a Mishimoto Z3 X-line radiator to help keep temps down. It's quite a bit thicker but looks like it will still fit fine.
I'm still waiting on some parts to arrive and I'll be ordering a bunch more very soon to keep things moving.
Member
Good progress dude.
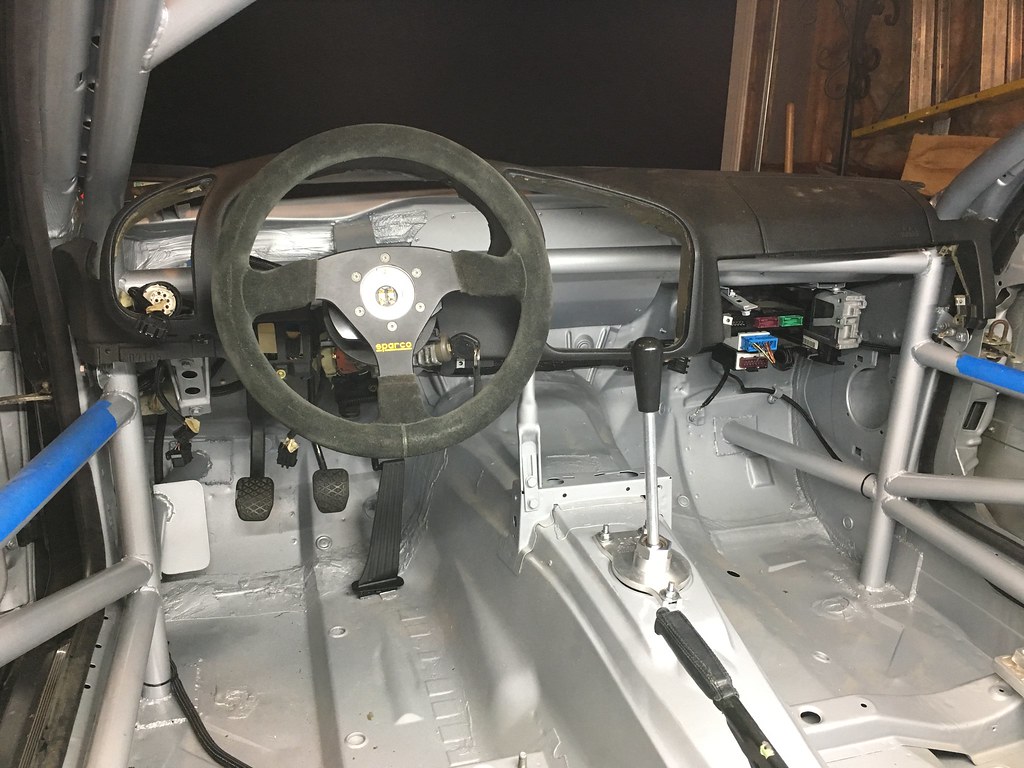
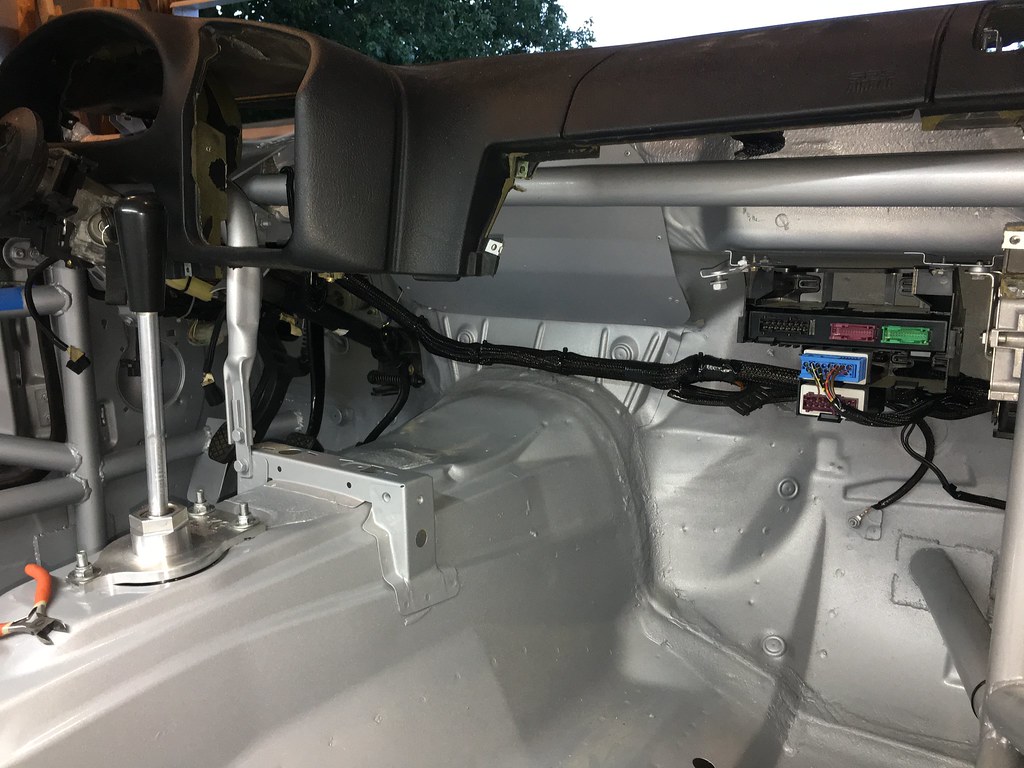
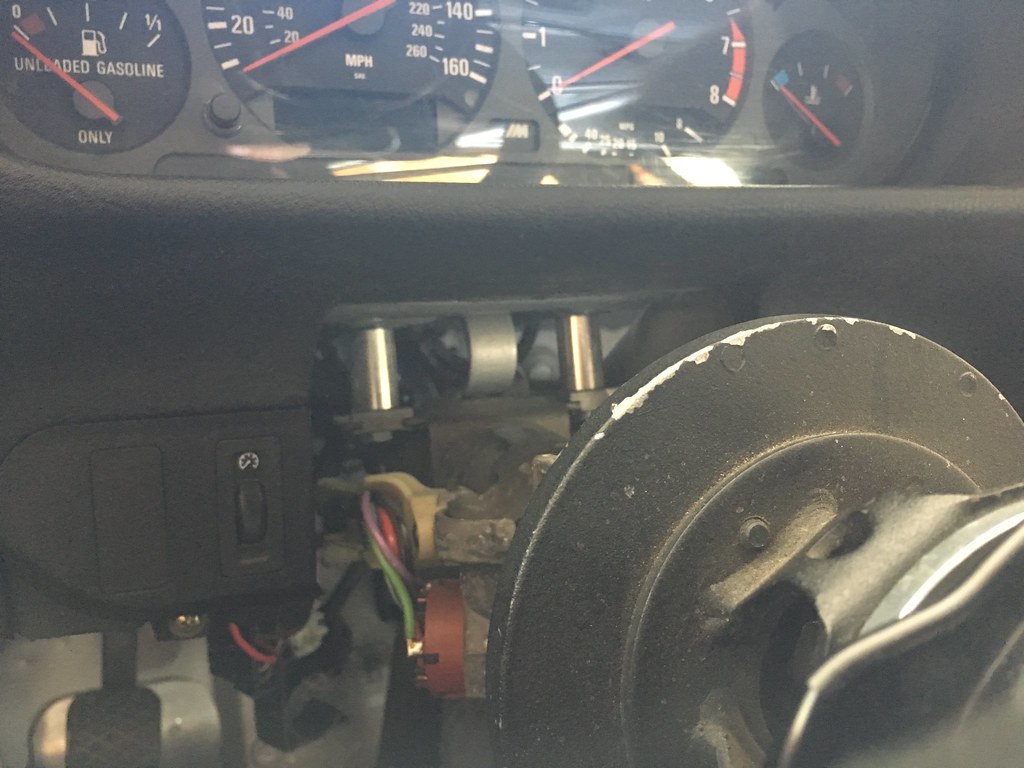
In the picture showing the lower part of your dash, is that module (the only one that has wires going to it) the EWS? or what is it?
I think you might have saved me eleventy billion hours with that one pic.
Thanks,
99 M3 STU/ GTS3 Project
Member
That module is the wiper module. The only modules left in the car at this point are wipers, check control module (near the steering wheel under the dash, head lights and tail lights run through it so I left it), and ABS. I have EWS deleted via the tune.
Member
Here is a post on how to use a three position switch for your wipers so you can delete that module. I have purchased the switch, but have not installed it yet.
http://www.bimmerforums.com/forum/sh...-special-stuff
Member
great work so far!
Member
I'm not sure that's the best way to go about it and the last post in that thread sounds like he's on the right track. Either way, it doesn't bother me much to have the module there at the moment. That might be a project for next year if I feel like it.
Member
I'm back at it after a month or so off for vacation and other summer things. I'm going to be pushing hard over the next month or so to get the car ready for a shakedown event in the latter half of September. I want to race at Oktoberfast (Oct 7-8) with NASA-MA which is the ultimate goal at the moment.
Today I made the oil cooler mount. I was never very happy with the mount in the silver car so I wanted to come up with a better design this time around. I started by cutting out the center of the conderser mount so I could use the ends that fit between the frame rail and bumper shock.
Added some 1" flat bar across the top where the top of the cooler will mount. I notched the bar so it could extend past the vertical pieces and act as gussets.
More of the same 1" bar across the bottom for the lower mounts and then a vertical brace for rigidty. It's a pretty simple design but it's rock solid and should work well. As a note for anyone who attemps something similar: make sure to mount the cooler with rubber so you have some vibration protection. I left 1/8" of space so I can use some rubber washers or something similar.
The final product with the exception of some black powdercoat.
Member
Update!
I finished up the harness and with a fire extinguisher on hand, I put power to the thinned harness for the first time. Thankfully it was uneventful with no smoke or fire! I checked headlights, tail lights, brake lights, and wipers with all working as they should. Success!
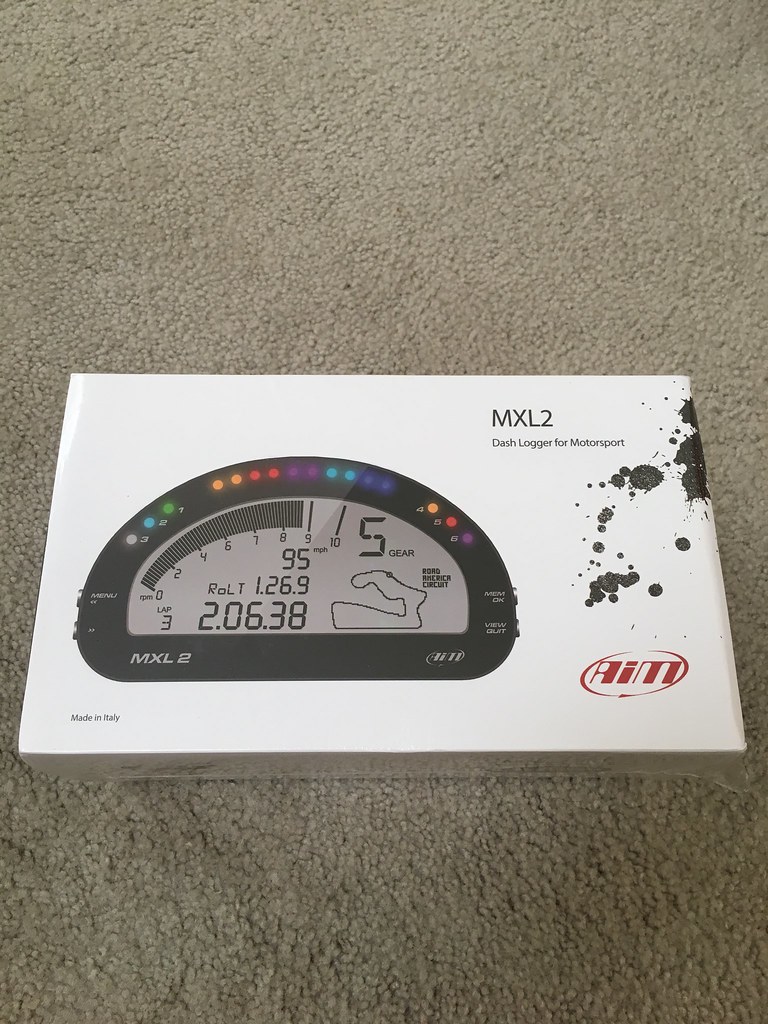
This guy arrived thanks to OG Racing. The Traqmate worked very well but I'm ready to take it up a notch and the AiM MXL2 is one of the best data options available right now. I've already wired oil temp, oil pressure, water temp, and brake pressure sensors to feed into the new dash. I'm working on mounting it now.
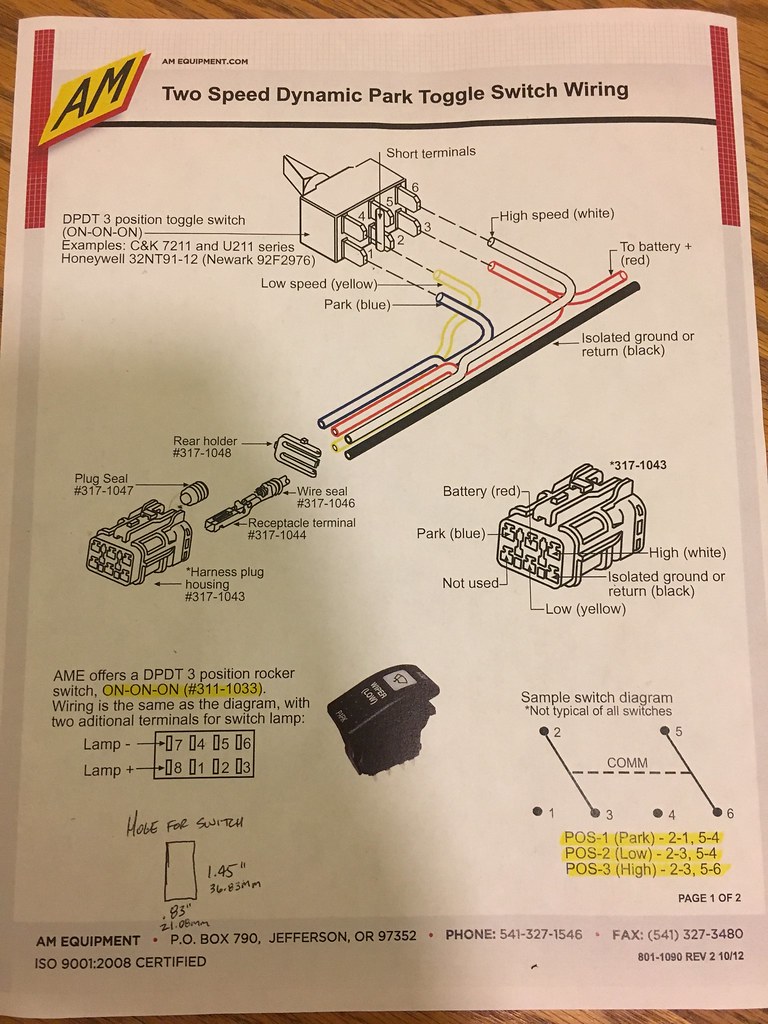
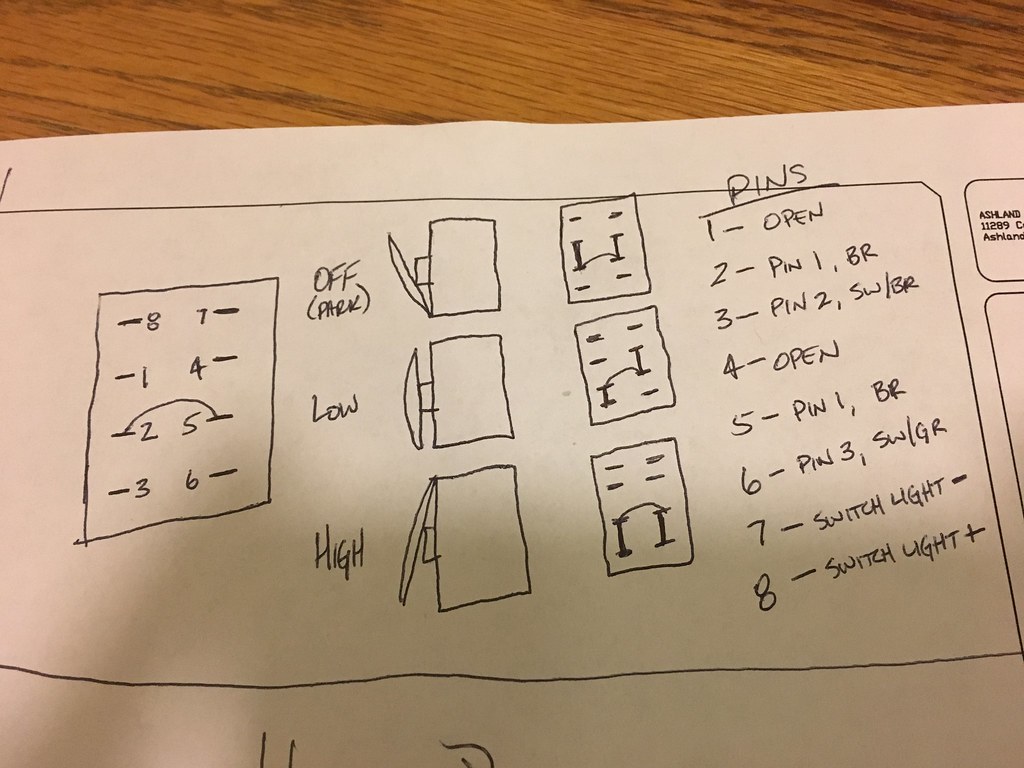
I wanted to move the wiper stalk off the column for the AiM mounting so I studied the wiring diagram and found a DPDT wiper switch for boat wiper systems that will work perfectly. It fits nicely in my Paneltronics switch panel too. Here's the switch and wiring for it. You have to leave the wiper module in place and use the switch to connect grounds depending on what you want the wipers to do (just like the OEM switch). The switch is from AM Equipment part number 311-1033 (bottom half of the page).
Installed spacers and longer bolts from McMaster to drop the steering column. Stock spacers are 0.25" and these are 1.25". I bought 1" too in case its too low.
Final install of the freshly powdercoated oil cooler mount.
With Dad in town for the weekend, we added fluids to the engine and trans in prep for a first start. The first turn of the key on Friday night led to silence. Nothing happened so we called it a night while I slept on where to start troubleshooting. First thing Saturday morning I pulled up the wiring diagrams and started with the power distribution for starting and immediately noticed that theres a wire going from the ignition switch to the EWS module then to the started. I deleted the EWS module during my harness thinning so I ran a quick jumper wire from the X20 connector to the ignition switch connector and she started perfectly on the next turn of the key!
https://www.youtube.com/watch?v=51M4eP3BhBw
Then we did some final checks/prep and I took it for a spin!
https://www.youtube.com/watch?v=h53-BVICyJs
It's been a very productive couple weeks and I'm thoroughly relieved the car runs and drives now. We did a lot more work like full brake caliper rebuilds, bleeding, clutch bleeding, getting the front GC sway bar to work with Bimmerworld MCS end links, etc but stuff is fairly straight forward. I'll take it for exhaust and some other work this week and then the final push to get it race ready begins!
Member
Nice job on everything!!!
Don
Member
Nice! How are you measuring brake pressure?
Cone Killer
tell me more about the spacers/longer bolts to drop the steering column! I have a momo wheel with quick release and would love to lower the steering column some. I'm still totally baffled that BMW didn't put a tilt column in these cars....
'03 911 Turbo 6MT fun car
'18 Toyota Land Cruiser Daily driver/Ski Machine/Off Roader
'15 Cayenne Diesel Wife's DD
'17 KTM 690 "Adv" 2 wheeled Adventurer
 Posting Permissions


 Reply With Quote
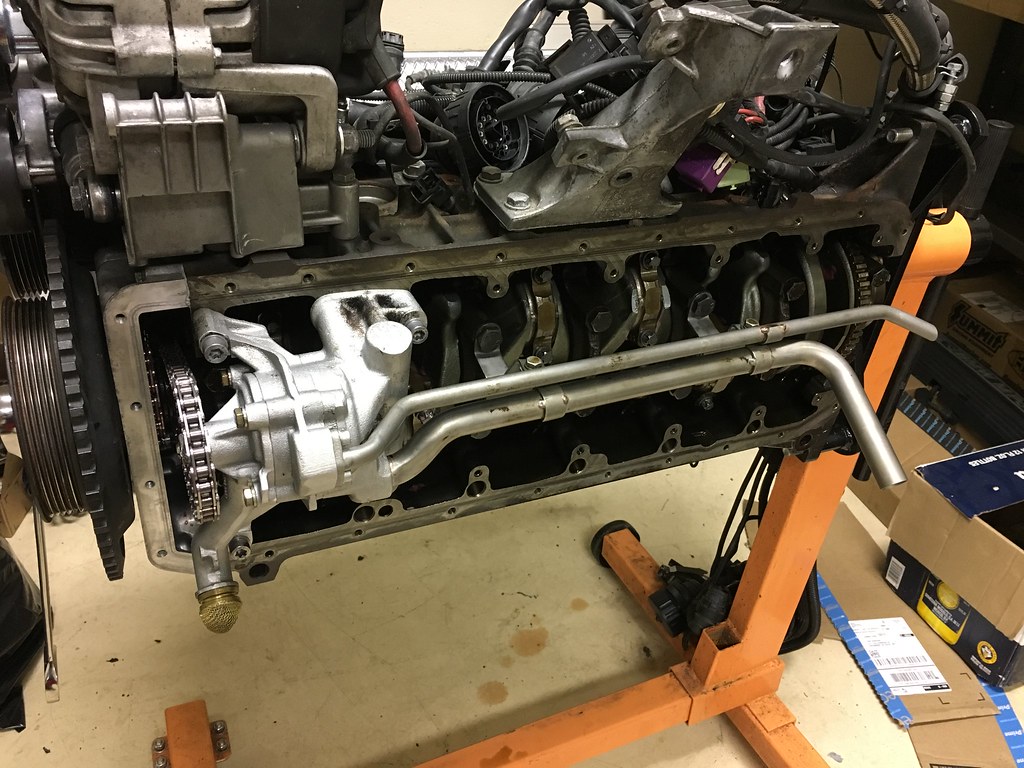


Bookmarks