
 Member
Condolences on the bent metal and good luck with the new build.
There really are mixed emotions in situations like this. Super bummed about the wreck and the cost, but super excited about a new build/project!
Member
Pretty much exactly what I am doing except for STU. Then run whatever TT class it falls into for fun and run GTS2 at a bit of a compromise. Through the years I have found that racing is funner than TT and lapping sessions are more track time than TT. Only thing TT has going for it are the tires. Which help!
Member
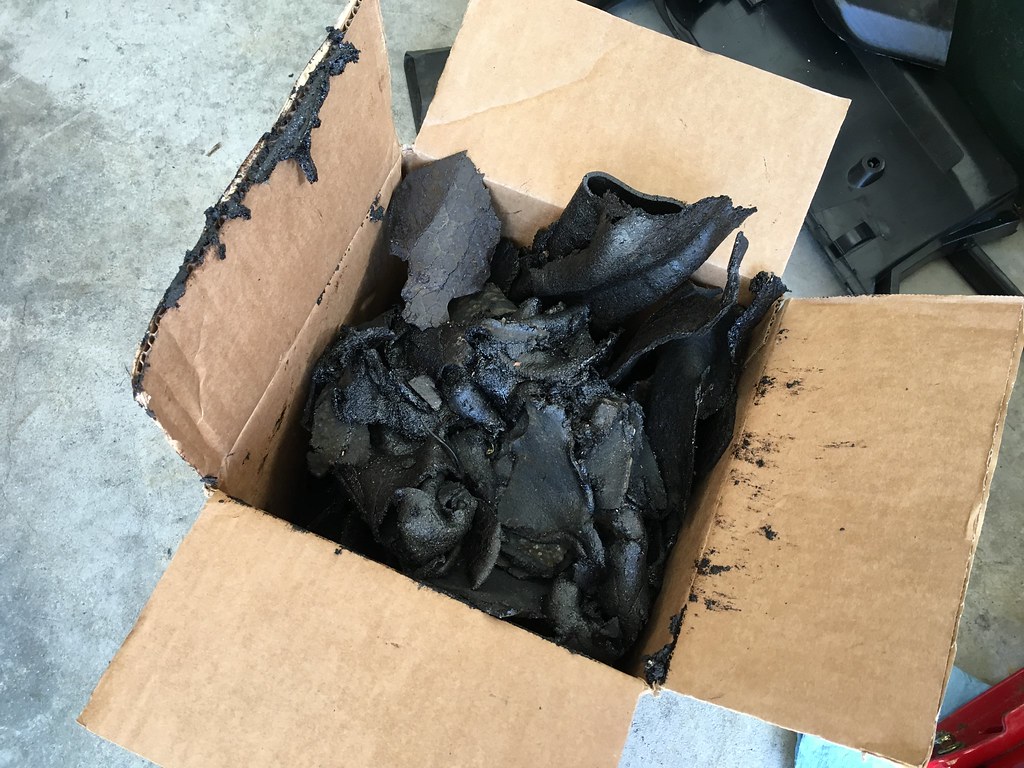
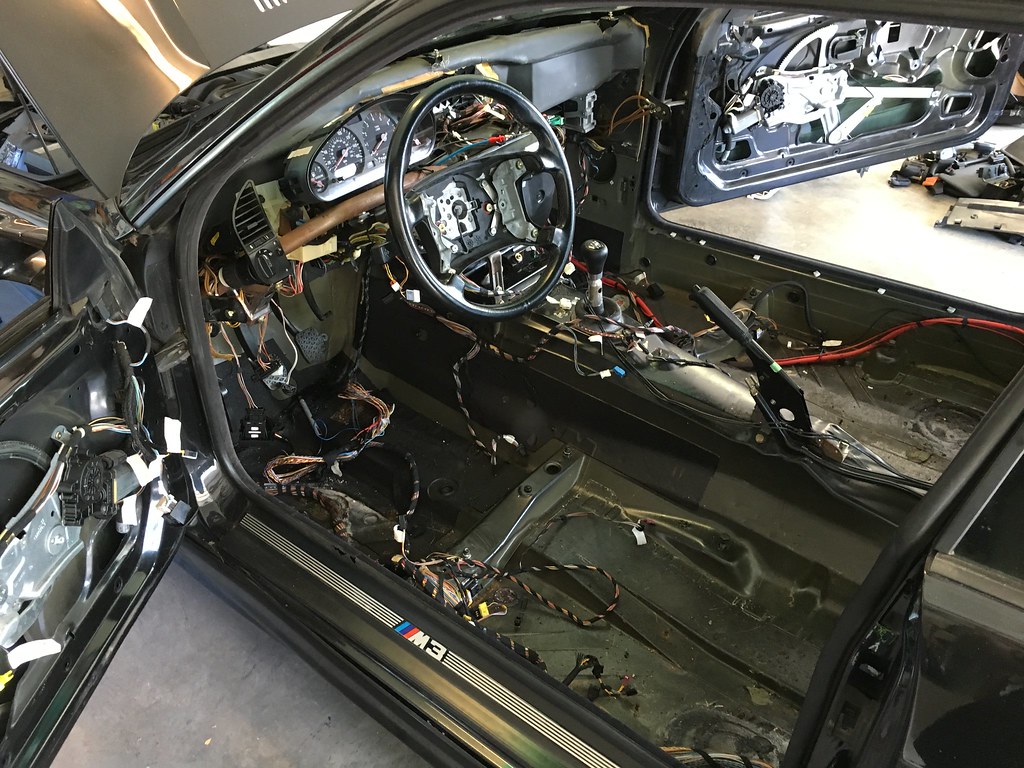
We really got started on the new build this weekend. We got the entire interior removed so we can remove all sound deadening and clean it up like we want. We both want to build a really clean car so we going to take some extra time to make sure every unnecessary piece is removed, wiring is thinned, and it's clean. Dad is going to continue cleaning up the interior and the next weekend we work on it will be focused around thinning the wiring harness.
A couple pictures of progress
This stuff is the worst!
Member
Not much to update lately, life has been pretty busy. I'm ok with that though considering how hot it's been!
We got a new trunk lid on yesterday. No holes and the paint is in great shape. It's ready for mounting our BW wing later.
We also performed compression and leak down tests in the black car's engine in prep for selling it later. We got fantastic results for both! Compression was 185-195 psi and leak down was less than 5% for all cylinders. Not bad for 201k miles!
At this point I think I'd like to shift focus to stripping the silver chassis so I can clean/inspect/prep parts for reinstall on the black car. Hopefully I can get the silver car down to Richmond soon where I can work on it during the week.
Member
Love the build! Do you hppen to know how much weight in sound deadening you've taken out? I'm thinking about tackling mine, but it seems like such a job!
Member
I didn't weigh it but I'd bet it's every bit of 15-20 lbs. It's a pain to remove but the interior looks so much cleaner once it's gone.Originally Posted by Sterk

Member
I weighed 1/2 of mine and it was 15lbs. I am assuming all of it was very close to 30lbs.
I used both dry ice and heat to get mine out. Dry ice worked well on the floor boards but the heat gun worked better on any vertical surface.
Member
Any idea when you plan on selling the engine? Im not too far from you and have been looking for an s52 for my e30.
Member
Probably this fall sometime. The silver car is coming to Richmond this week so I can strip it down. Hopefully I'll have the black car down in Richmond not long after that for the engine swap.
Member
Let the tear down begin!

Member
Love this build history and excited to see progress on the new track car.
Since you have removed the sound deadening twice now, how are you handling spots where the sound deadening overlaps the seam sealer? I'm doing the same now and it seems impossible to get it completely out of these areas. It's hard to see on your black interior paint, but on post 15 with the silver interior you can see it in the corners.
I plan to take it out as much as possible and paint over it.
Member
Heat gun and scraper and lots of sweat/cursing
But seriously, it's near impossible to get all of the adhesive off the seam sealer. We just try to get as much off as possible and we follow up with a rag and Xylene to remove most of the remaining adhesive from all areas of the interior that had sound deadening. I think painting over it is the only way to truly cover it up unless you remove all the seam sealer also.
Member
My car is Estoril and had a lot of luck with Goo-Gone. I spray it, leave it 10 minutes and had a go at it.
If that doesn't work, soak a rag in it and leave it for 20-30 minutes over the affected area. Be warned though, after 2 hours I was getting pretty light-headed....
Member
You sure you mean Goo Gone? That's the stuff that smells like oranges. Goof Off is stronger and will give you headaches. Goo Gone did nothing for me but Goof Off worked pretty well.
Member
Nope I literally mean Goo Gone. Worked like a charm
Member
We'll give Goo Gone a shot. Never tried it but it makes sense that it would work.
Member
I've never done the sound deadening removal but I recently used grease and wax remover to easily remove road tar from a truck I bought. It was a government highways maintenance truck and had little bits of road tar all over the sides of the body. The auto body grease and wax remover took all of it off with a minimum of fuss and effort. Since this black goo sound deadening is tar based, this might work for you too.
Member
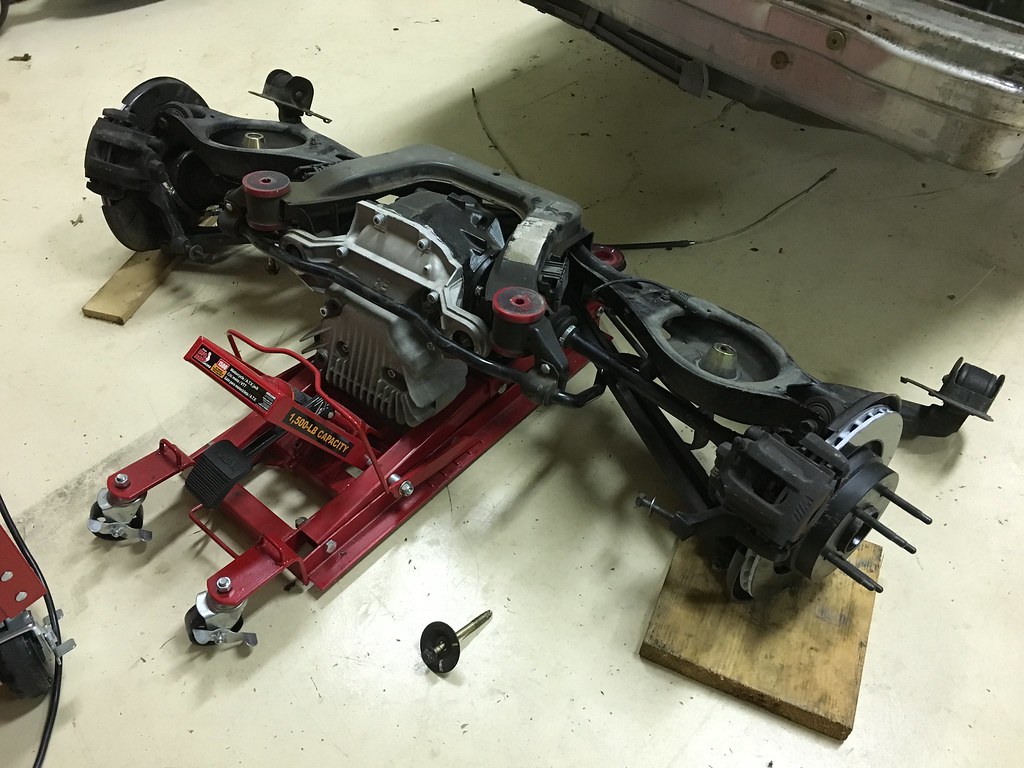
After some frustrating road blocks, the rear subframe assembly is finally out of the car. Now I can bolt up the roller suspension and get to work on the front of the car.
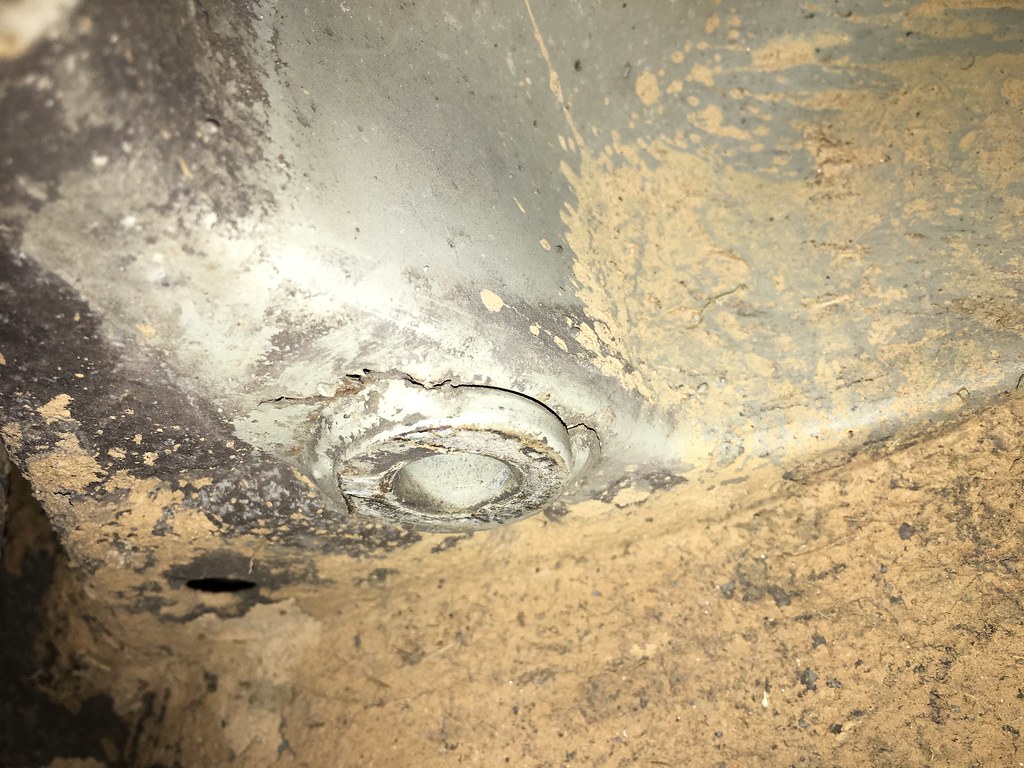
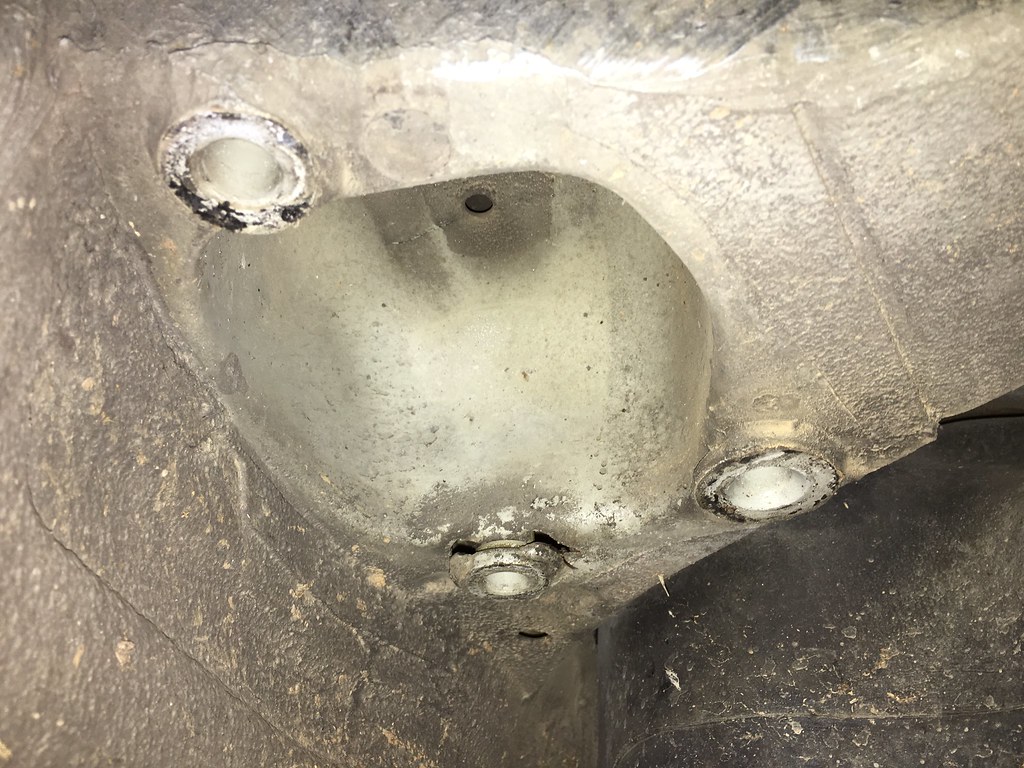
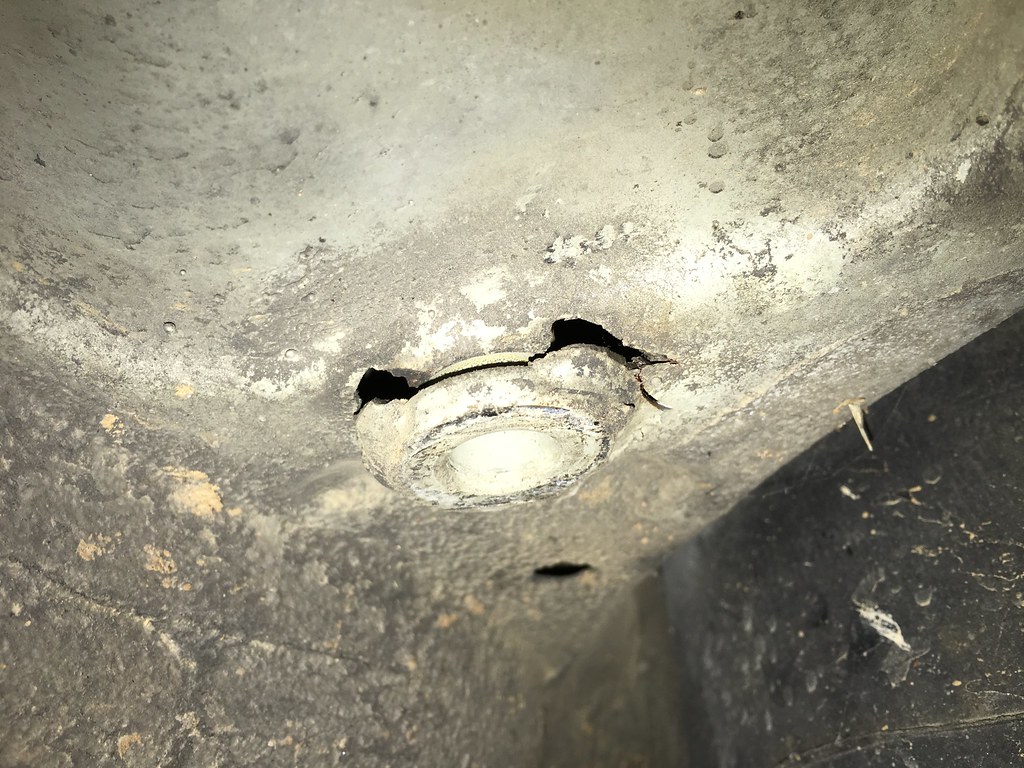
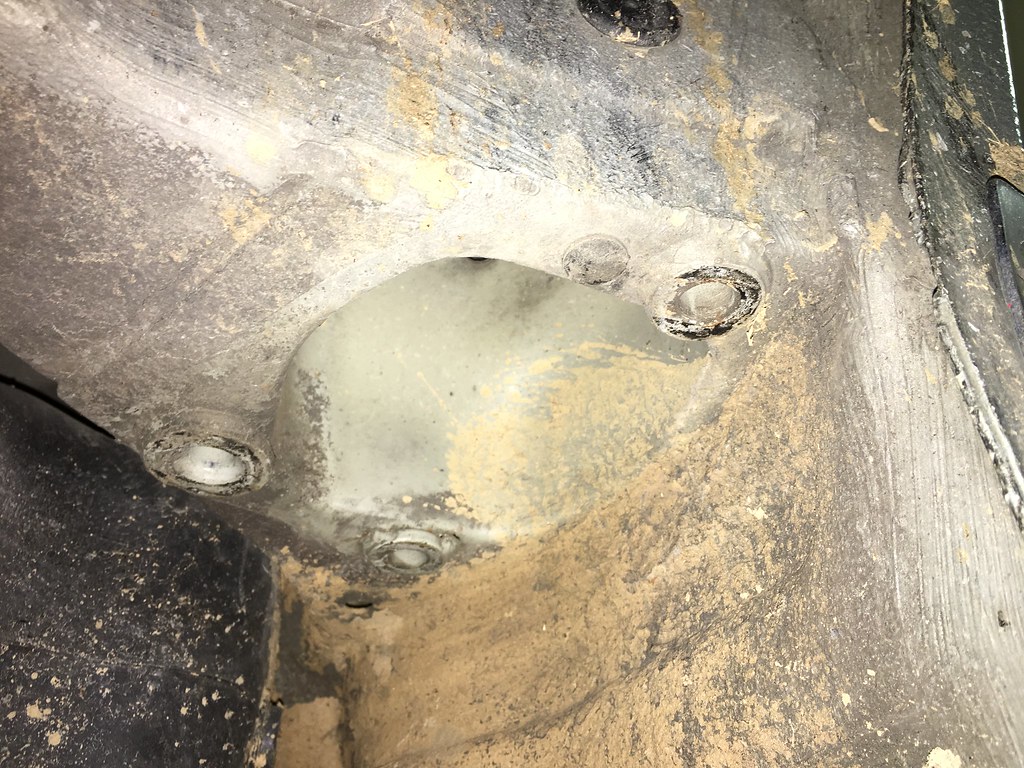
And this is why you should reinforce the RTABs on an E36. We inspected these mounts in January 2015 when we did the full suspension overhaul and they were fine. I chose not to install the reinforcement plates to save points for TT classing. The drivers side is probably worse because the rear fender was pushed into the tire during the wreck but the passenger side was obviously failing too. I was already planning to do full reinforcements during the rebuild so finding this is just solidfying my thoughts and plans.
Drivers side
Passenger side
Member
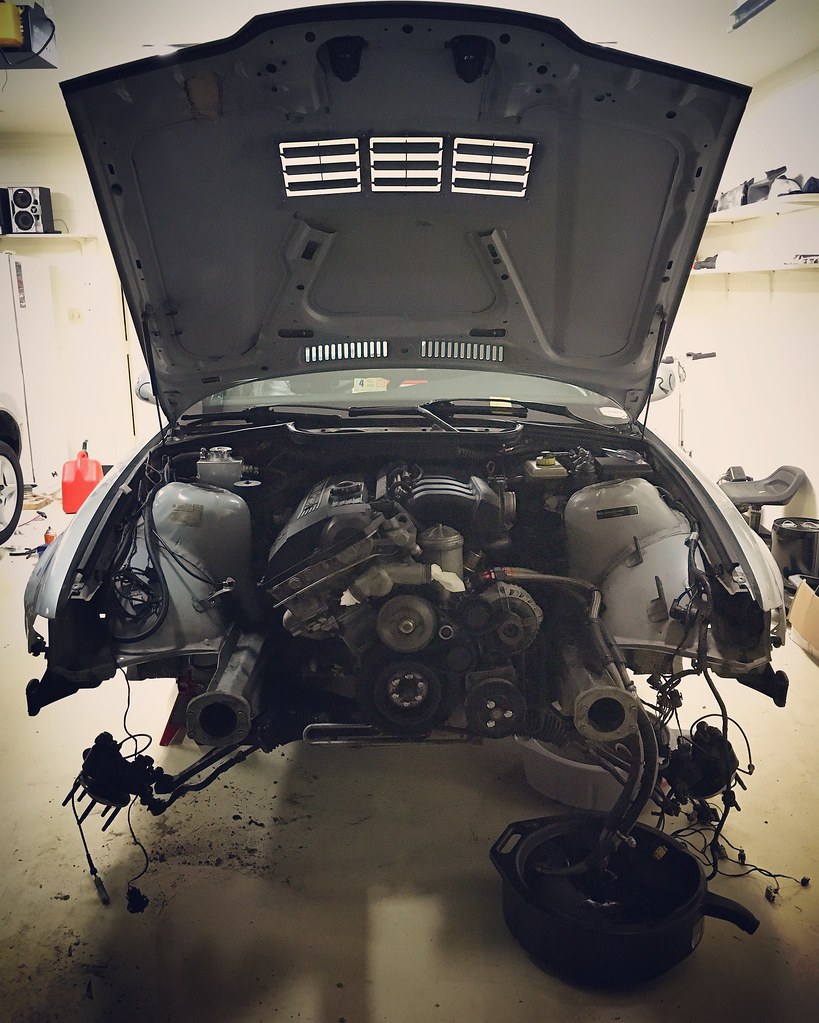
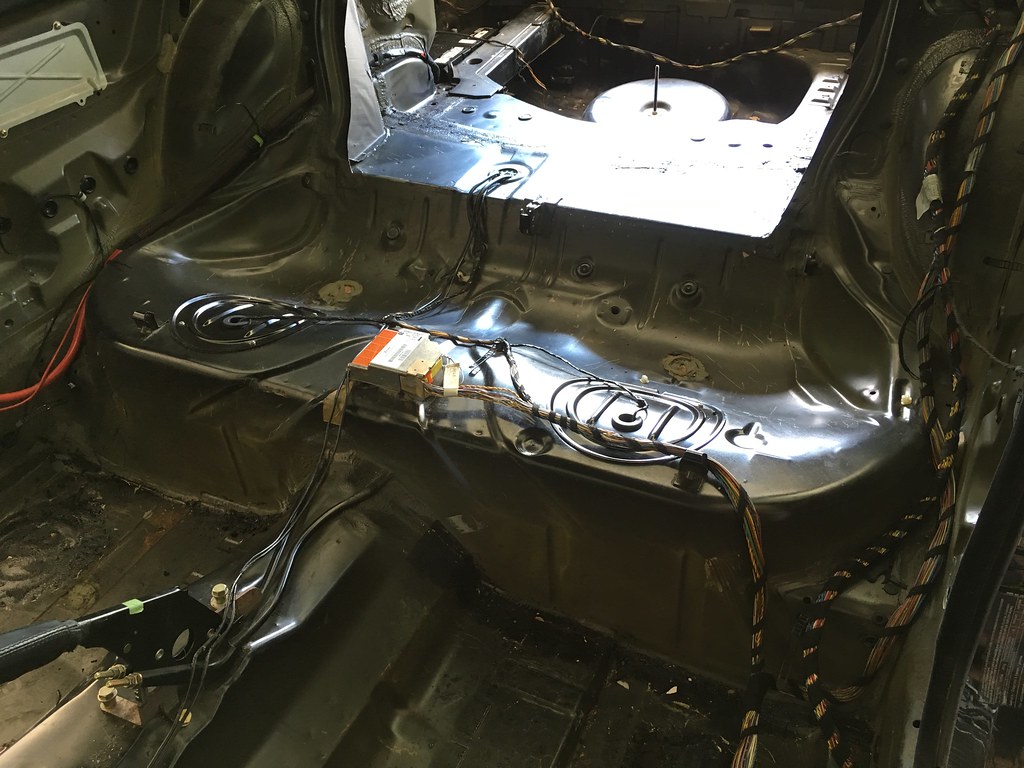
I'm slowly making progress. The entire rear subframe assemble is out and a roller suspension assembly is in. The front suspension is almost apart and will soon be ready for roller pieces as well.
Last night I got started with prep work to remove the engine. Drained and removed the radiator, same for the oil cooler, and go the radiator support and chassis wiring out of the way. I'm hoping to have the engine/trans out in a week or two.
Member
Bah, those RTABs make me nervous. I guess now is the time to slow down and reinforce all the things. Errr, whenever I get a new shell it will be that time.
Glad to see your rebuild is coming along.
Member
Looking forward to more updates! Very inspirational!
Tis by the grace of God that my cars run!
#buttstuff2k14
BMW CCA Member
What type of jack is that you used to remove the rear subframe? Do you think the subframe can balance on a regular car jack?
Build looks great! I need to drop my subframe to check/reinforce but worry about doing it by myself.
Member
Since you're having to rebuild like us, take this opportunity to use all the stuff you've learned during the first build. I skipped the reinforcements consciously to save TT points and in hindsight that was a dumb decision. I think it's unfair that subframe/RTAB/sway bar reinforcements take points considering they prevent you from ripping suspension mounting points off the car but it is what it is. I'll never skip them again to save some classing points.
Thanks!
I used my roommate's motorcycle jack which worked fairly well. I've used a table jack before which worked well too. A trans jack would also be very effective. A regular jack will work but if might behoove you to have a friend help stabilize things as you start to drop it out of the car. If you want the whole assembly to balance on a regular jack, you'll want to have the jack somewhere on the bottom of the diff. If you have the jack on the bottom of the subframe (under the pinion) then it will fall back as you lower it down.
Member
You can lower the entire rear subframe using a regular floor jack but you must go slow and keep it balanced on the jack. The jack has to sit right under the diff. A second smaller jack supporting the diff input flange also helps to balance the assembly as you lower it from the car.
I also lowered the corners onto car wheel dollies (placed the dollies directly under the brake rotors), this helps roll the entire assembly out from under the car.
Sent from my iPhone using Tapatalk
Member
Silver chassis is for sale
http://www.bimmerforums.com/forum/sh...roller-chassis
 Posting Permissions


 Reply With Quote
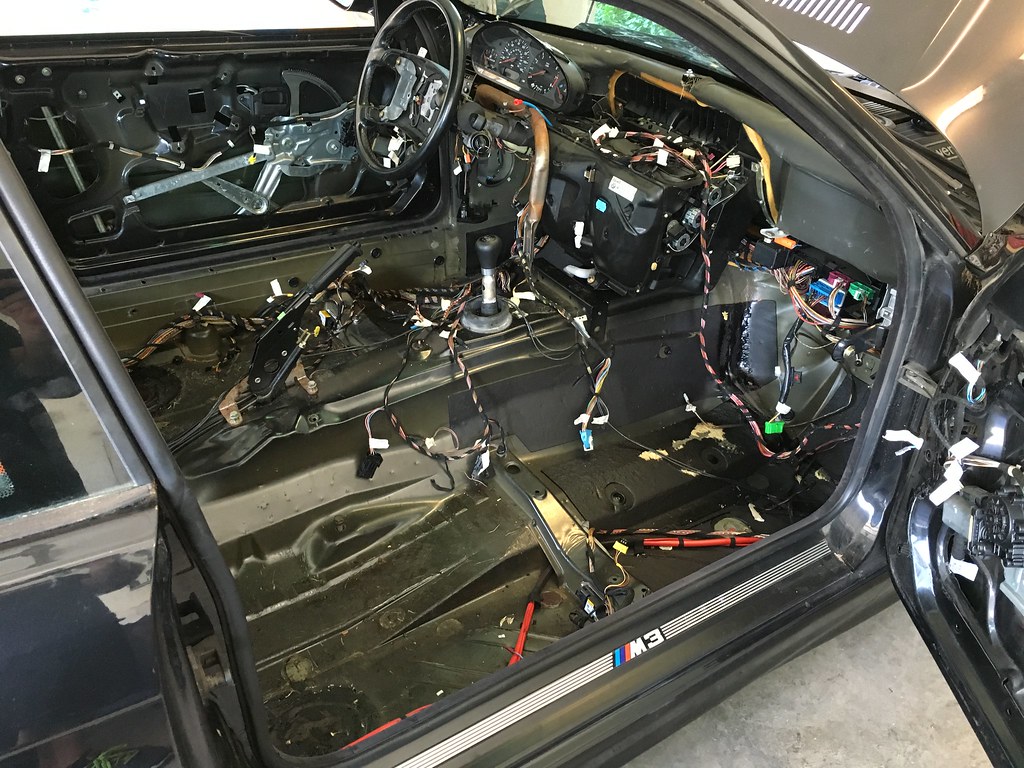


Bookmarks