
 RaceComm
Thanks for the clarification. I'll give the revving thing a try once I get my car back together.Originally Posted by hoki06

Member
After talking with my friend and local race car mechanic, he said he's never seen a car with a tank like this WITHOUT a vent and he believe the stock system vents through the cap. Based on what he said, I'm going to leave mine routed as is.
Ambitious But Rubbish
Yeah, stock system vents through the cap. It pops up if there's too much pressure and sprays coolant across the engine bay in a very artsy fashion.
At least that's what it did when my head gasket blew up at VIR last March and exhaust gases got into the cooling system.
2011 F-150 FX4 | 1997 BMW M3 #404 GTS2 | 2006 BMW M3 Convertible
Out Motorsports
Member
You need pressure in the system. The cap is the vent. Once pressure is passed what the cap is rated, it opens up and relieves.
Here is mine. Bottom goes to heater fitting on water pump, top vent is to radiator, side 3/8's is blocked off. I started and idled the car like this, gave it a few revs, all is good.
Member
I wanted to make sure I have it set up correctly so I called Canton and talked to a gentleman named Bob who was very helpful. He explained that the nipple on the neck of the tank is only used as a vent to atmosphere or a catch can once the system over-pressurizes. The cap I have, Canton 81-030, is a vented cap and the nipple on the neck is how it vents if my system generates over 30 psi (my cap's rated pressure). Under normal operation, the bottom of the cap (below the spring) seals the system at the BOTTOM of that tank neck, not the top, making your current setup is incorrect. If your current setup over-pressurizes, you have no vent for the cap which will send that pressure back into the radiator and something in your system will blow. You need to have the side 3/8" port as your return back to the radiator and the top port by the cap be your vent to atmosphere or a catch can. That was the system is pressurized and still has a vent for the cap.
Last edited by hoki06; 03-01-2016 at 02:06 PM.
Member
Ahhhhhh makes total sense!! I was playing with the cap last night too and pushed on the spring, noticed that the attachment at the top didn't move and was wondering on it vented. Our discussion intrigued me on the cooling system. The OEM E36 cap must have the vent built into it.
So the nipple at the top of the radiator goes to the 3/8's port on the side?
Thank you for clarifying this! I'll fix mine asap!
Last edited by Inflame; 03-02-2016 at 04:43 PM.
Member
I haven't checked to verify this but I believe the stock E36 cap works in a similar fashion as the Canton. Instead of a side nipple in the tank neck the cap simply pops up and sprays coolant everywhere.
Yes, the 3/8" port on the side goes to a 5/16" hose (or metric equivalent) to the nipple on the radiator.
Member
I ran it per your description and it works perfectly, thank you for clearing this up!
Member
Glad I could help!
Member
Final off-season update as the 2016 season begins for us this Saturday at Road Atlanta!
Last week I got the opportunity to practice for Road Atlanta on a Sim Seats racing simulator using iRacing. They have developed a new motion simulator that is fantastic! If you're in the market for a simulator, I would highly recommend Sim Seats. Quality products made in the USA with customer service that is second to none!
http://www.sim-seats.com/
I had some issues with getting the diff installed and induced some last minute stress I didn't need. This past Sunday I removed the stock diff and pressed out the Bimmerworld solid diff mounts from the cover so I could install them in the Rogue Engineering cover. I made a mistake and pressed the bushings out the wrong direction which broke off the thin lip on the outer edge but didn't hurt the bushing itself. However the mounts just slid right into the RE cover, no press fit at all. This is a widely used combo and several racer friends had never heard of this issue. Bimmerworld and Rogue Engineering hadn't heard of it either but both were very helpful in providing dimensions and measurements during my investigation.
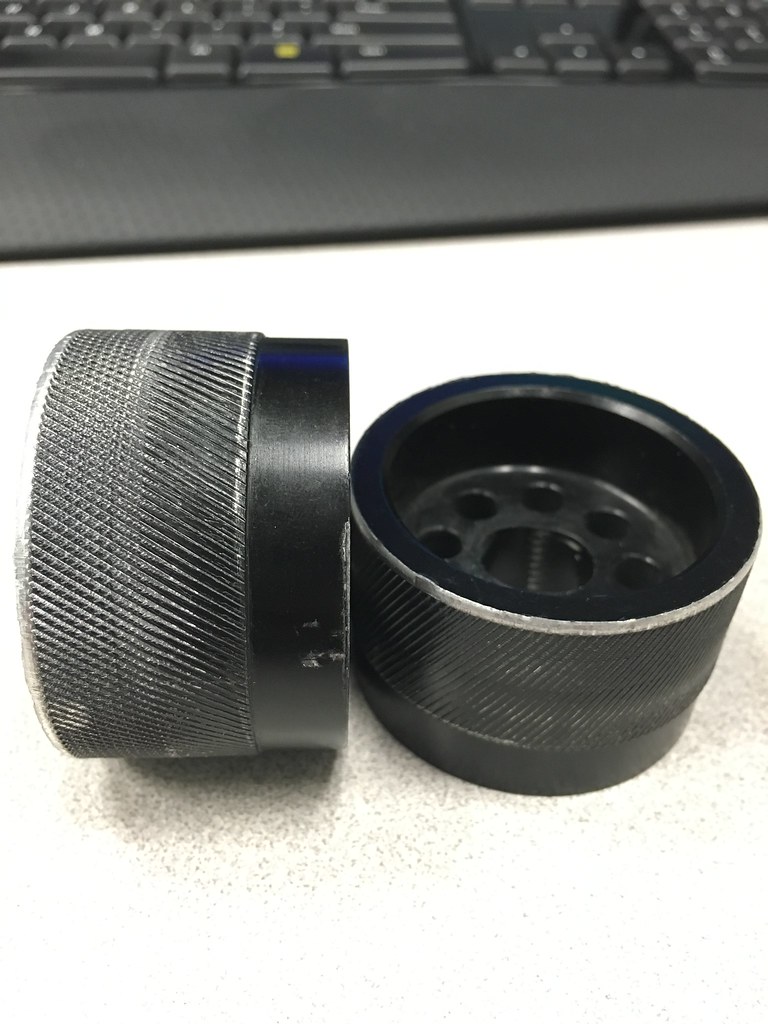
The Bimmerworld bushings are 1.980" +/- 0.001" and mine measured 1.978-1.980" after removal. The holes in my Rogue cover measured 1.983-1.984" which matched other covers on the shelf that Rogue measured for me. Stock bushings fit fine in the cover but since I have the solid front mount already installed I did not want two different materials which might increase the chance of breaking the front diff bolt. Luckily I have some resources at work (full fab shop) so I was able to have our machinist knurl the OD of the bushings to increase the diameter to 1.986-1.987" for a 0.002-0.003" press fit. He also machined the broken lip edge to remove the anodizing so it could be tack welded in place to ensure they wouldn't move.
Knurled bushings (you can see the area where the lip used to be)
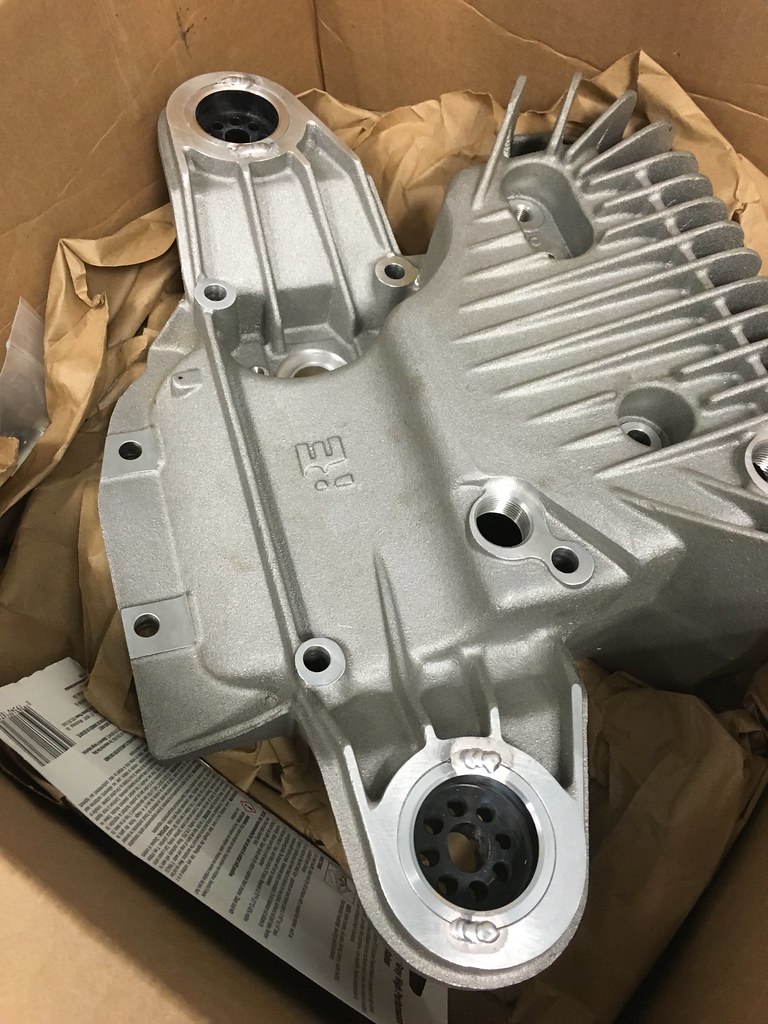
Pressed in and tack welded
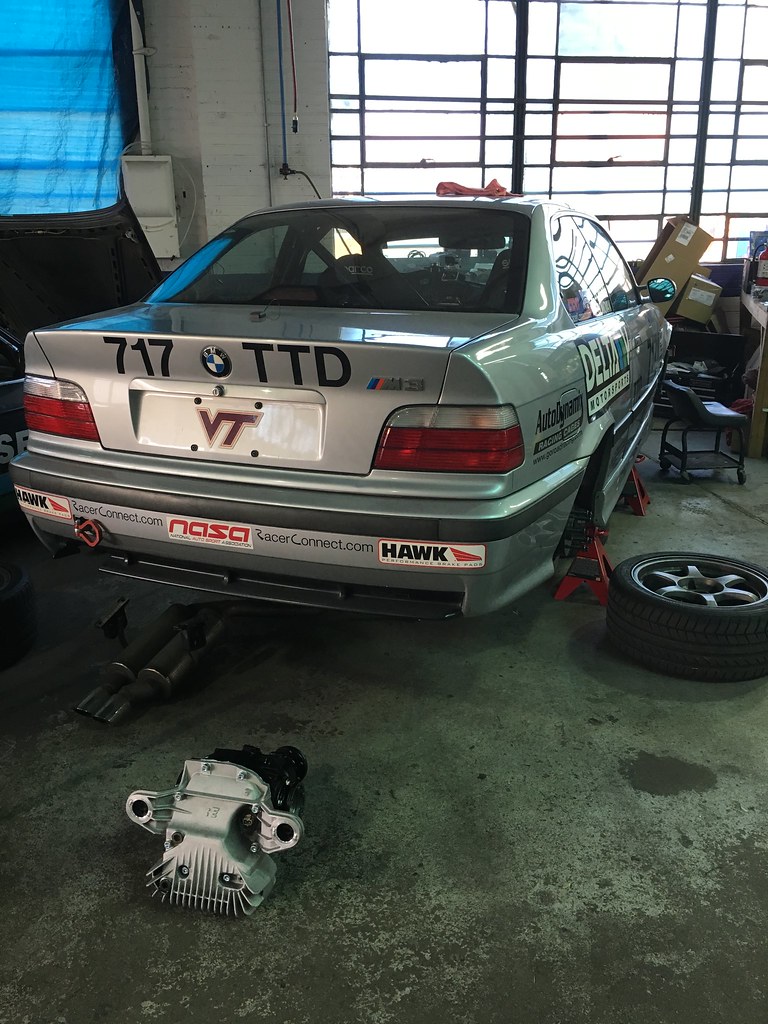
Install was luckily uneventful besides having to figure out how to maneuver the diff with the massive RE cover into position.
Done and stickers added
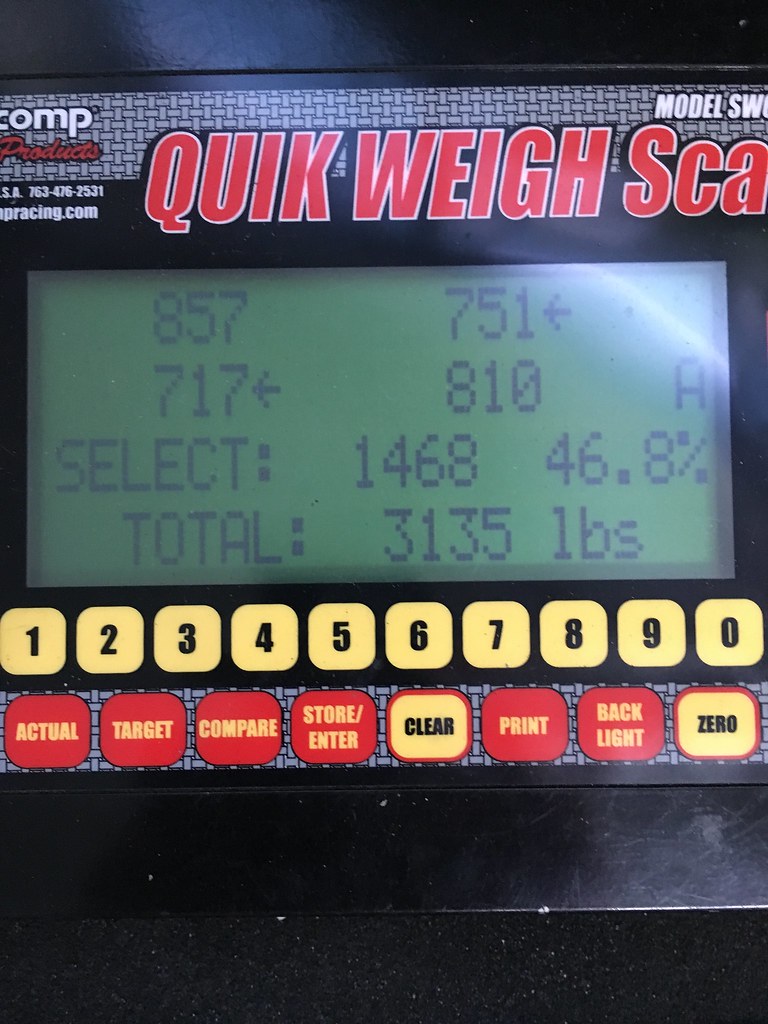
I'm running TTC this weekend due to logistics of getting the car dyno'd before this event. My weight for this event is 3095 so I set weight a little high at 3135. The car has heavier storage wheels and 3/4 tank of gas so the weight so be pretty close to 3095 with 1/2 and race wheels/tires.
Weight with me in it, 3/4 tank of gas, storage wheels/tires, 90 lbs of ballast. Ignore the cross weights as the floor was uneven and this is just to find a total number. True setup and corner balance will happen in a couple weeks after Road Atlanta.
Member
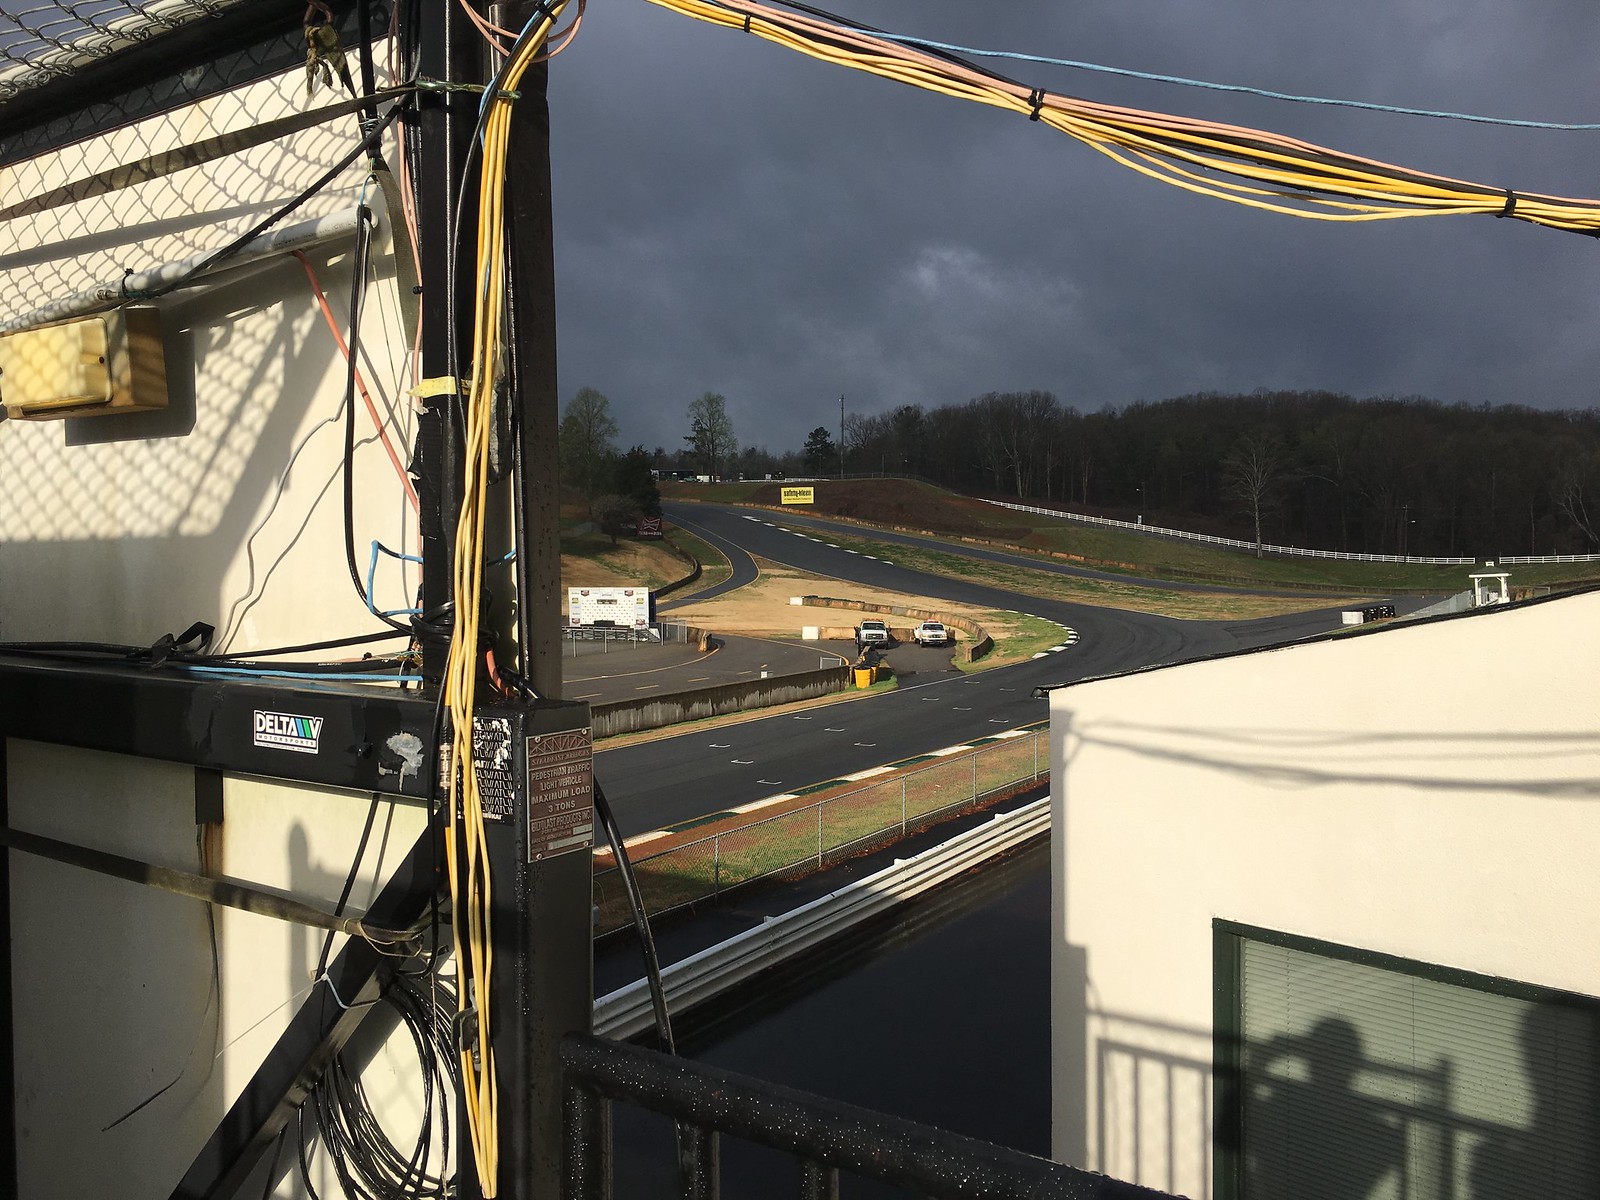
We had a successful trip to Road Atlanta this weekend! We had a minor delay on the way down thanks to a blown trailer tire but that was quickly fixed and we didn't lose much time. Saturday was busy but successful and fun. At the end of the day I turned a 1:41.023 and got 3rd place in TTC. Not too shabby for my first day on the track. Sunday morning was pretty wet so I only ran the noon session on street tires before packing up and getting an early jump on the drive home.
The car ran perfectly all weekend. The intake/headers/tune make the car pull really hard all the way to redline. The new diff was a very welcome change and the shorting gearing is so much better on track than stock. The coolant tank swap proved to be perfectly reliable all weekend also. Overall I was really happy with how the car performed which was a sigh of relief after another round of winter work.
Here's a couple pictures and video from the weekend.
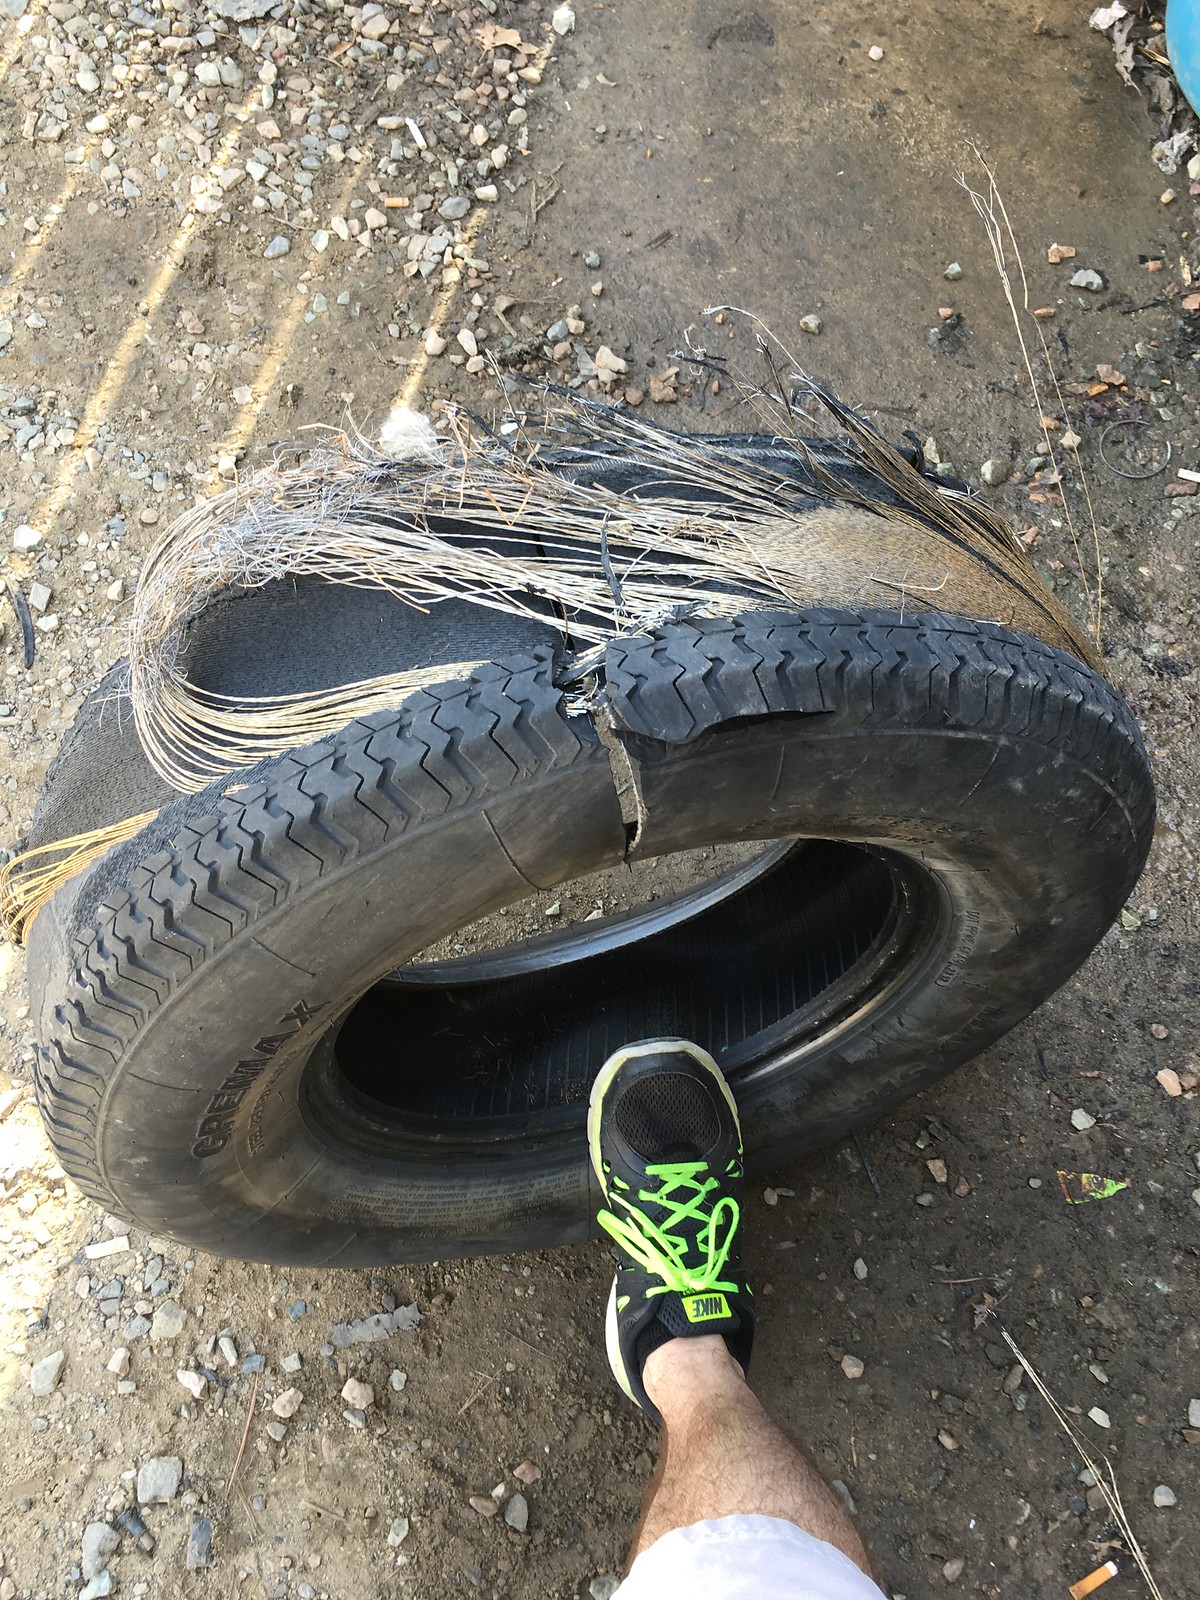
This tire decided to destroy itself somewhere in NC
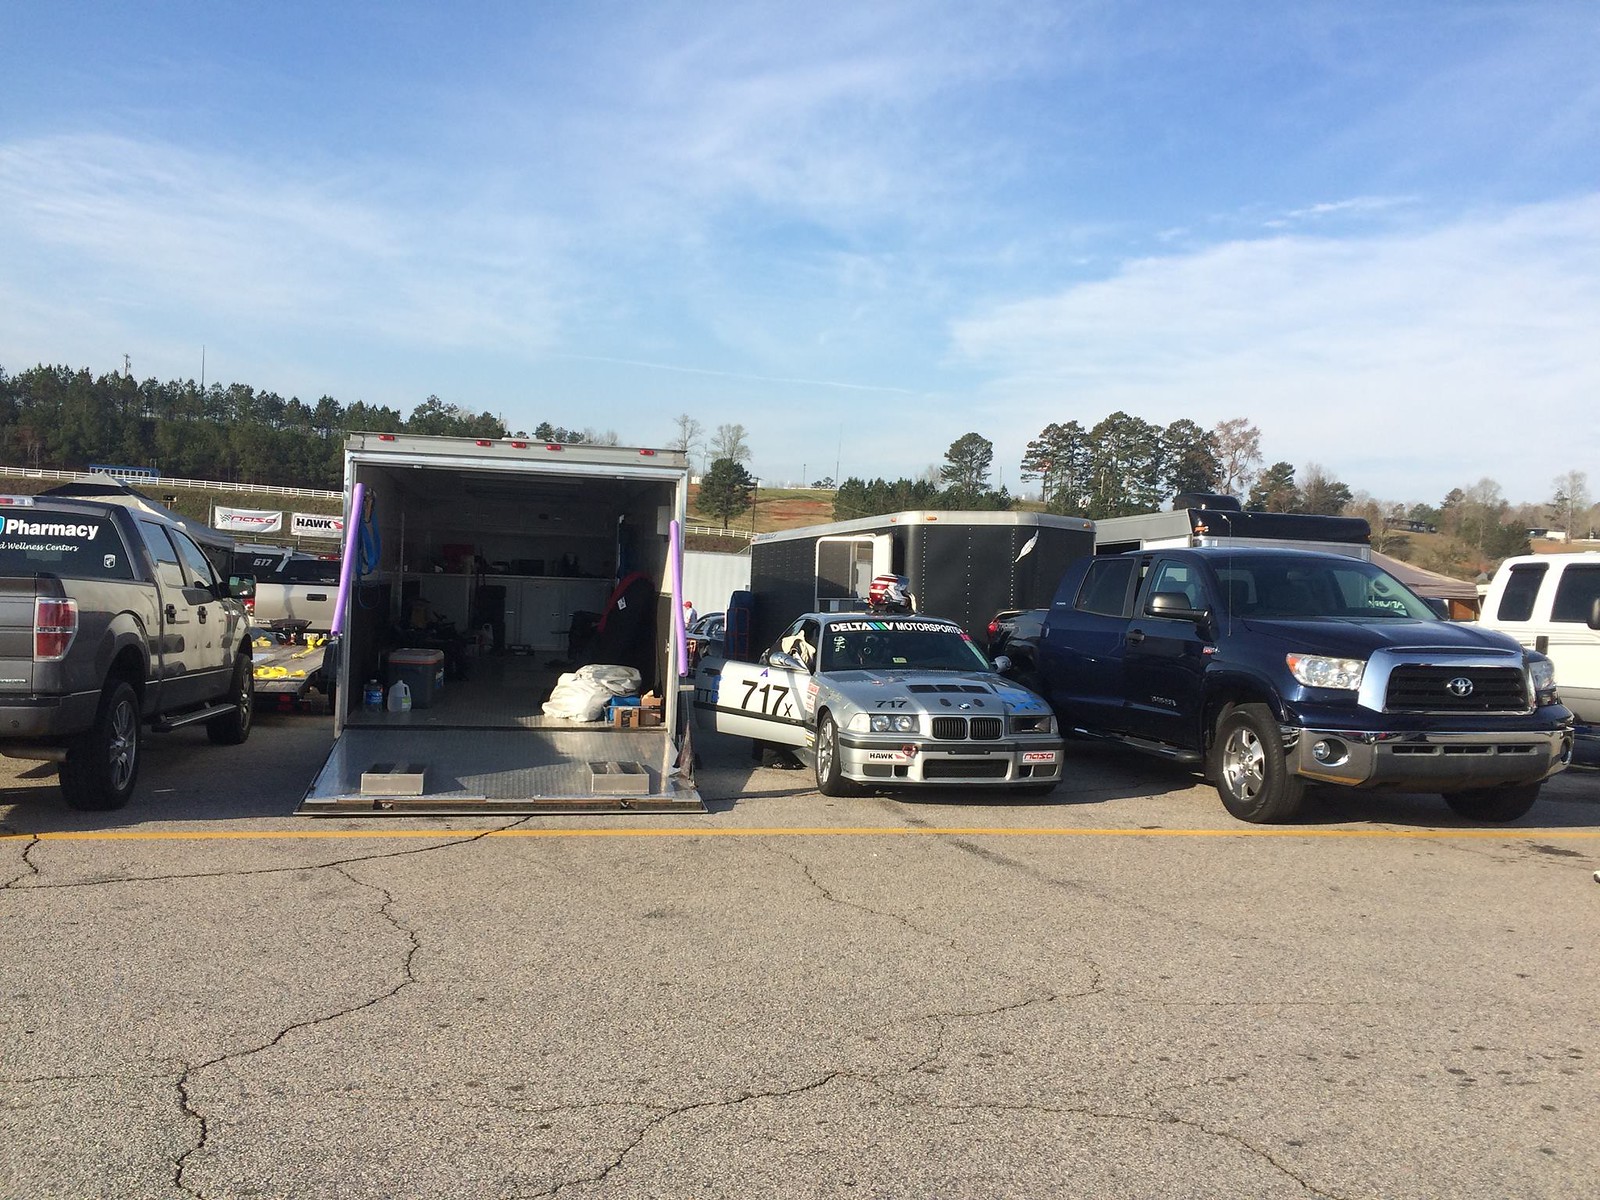
Our spot in the paddock
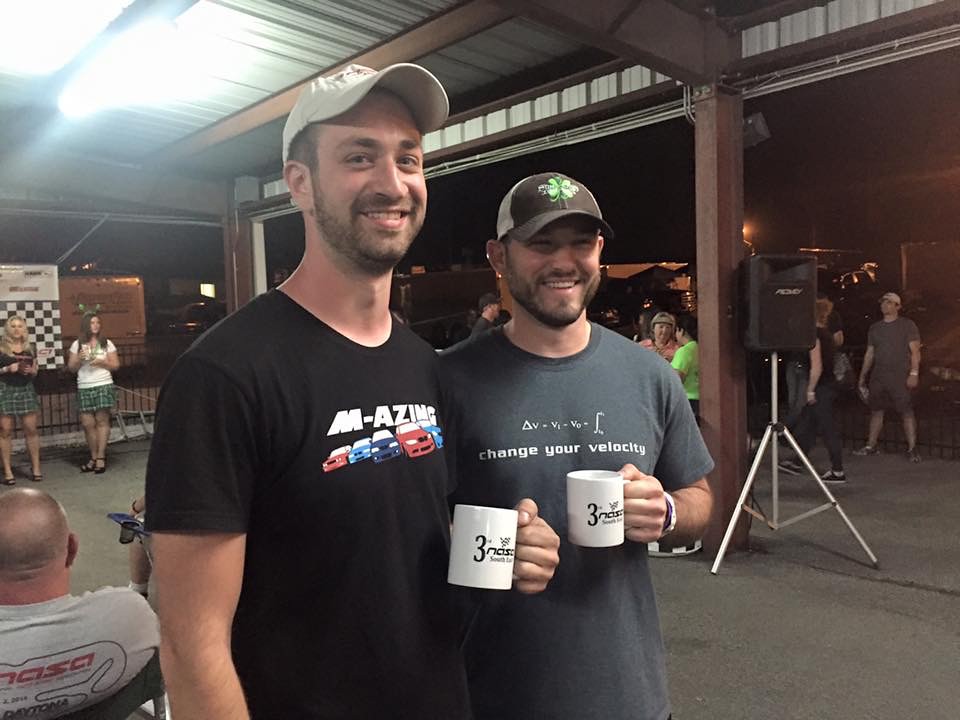
NASA MA TTers taking 3rd in TTC and TTD
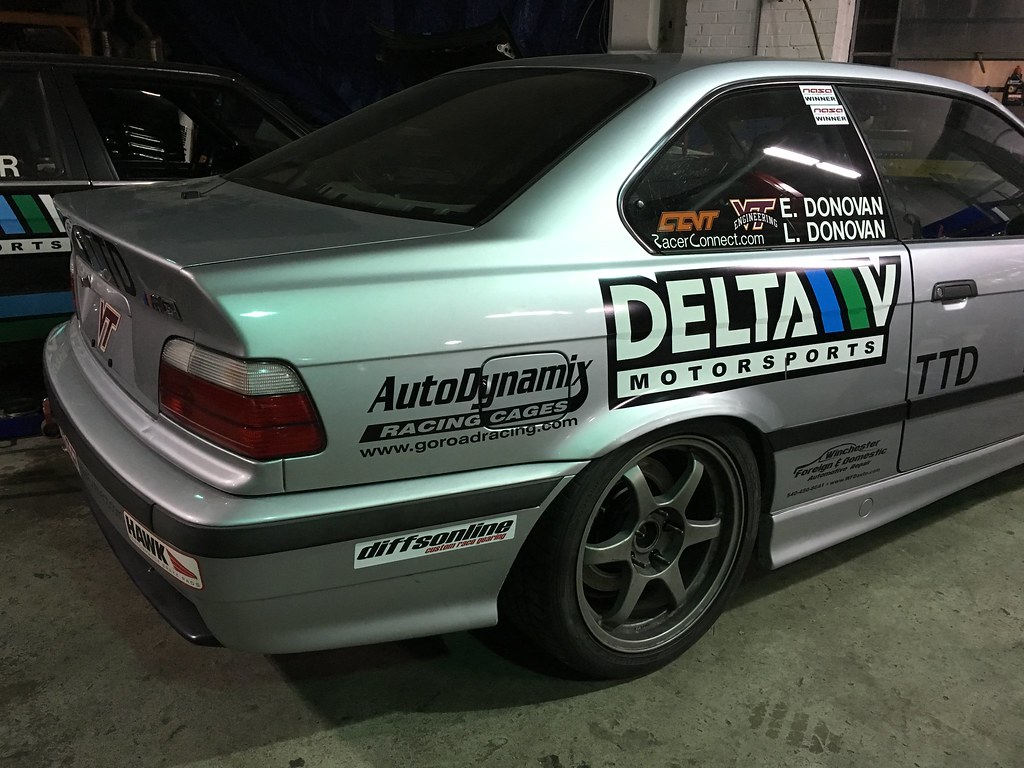
I had to leave some Delta V love on the bridge
And here's my video from the 2nd timed session on Saturday. I had GoPro issues later in the day so no video of my fastest laps
https://www.youtube.com/embed/xft9Qnk3acg
Member
Hey man, great build. I am about to embark on my own build journey.
curious as to how the car felt different with the 35/65 ramps versus stock. Do you mind describing.
Member
My initial impressions are that it drives very similar to stock but with much more lockup. I was told by someone with a 30/90 diff that you need to be more aggressive than with the stock diff but I didn't find that to be the case with my 35/65 ramping. Braking, turn in, track out, off-throttle to induce oversteer, etc. all felt very similar to the stock diff from what I could tell this past weekend.
It's somewhat difficult to compare right now because I've only driven it at RA which was a new track to begin with. I think I'll be able to give a more comprehensive review after my next event at Summit Point which is my home track. I'll really be able to see if there are any major differences then.
Member
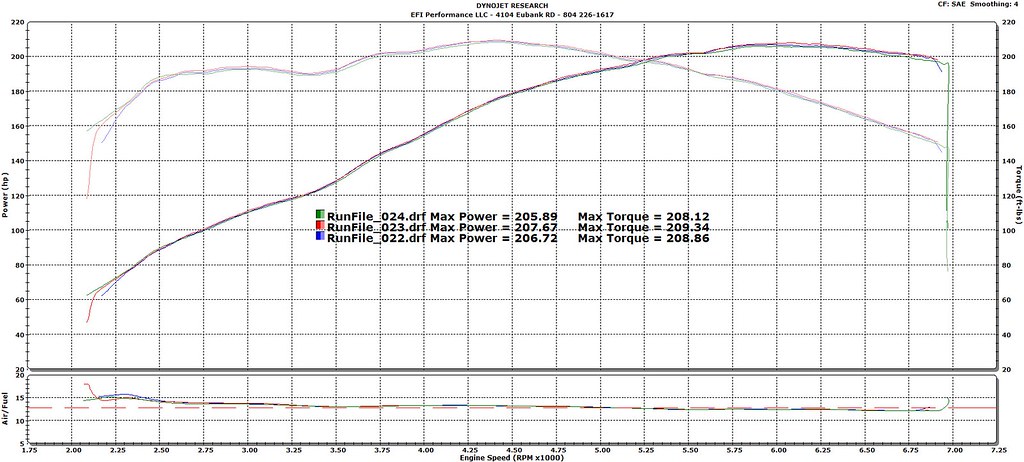
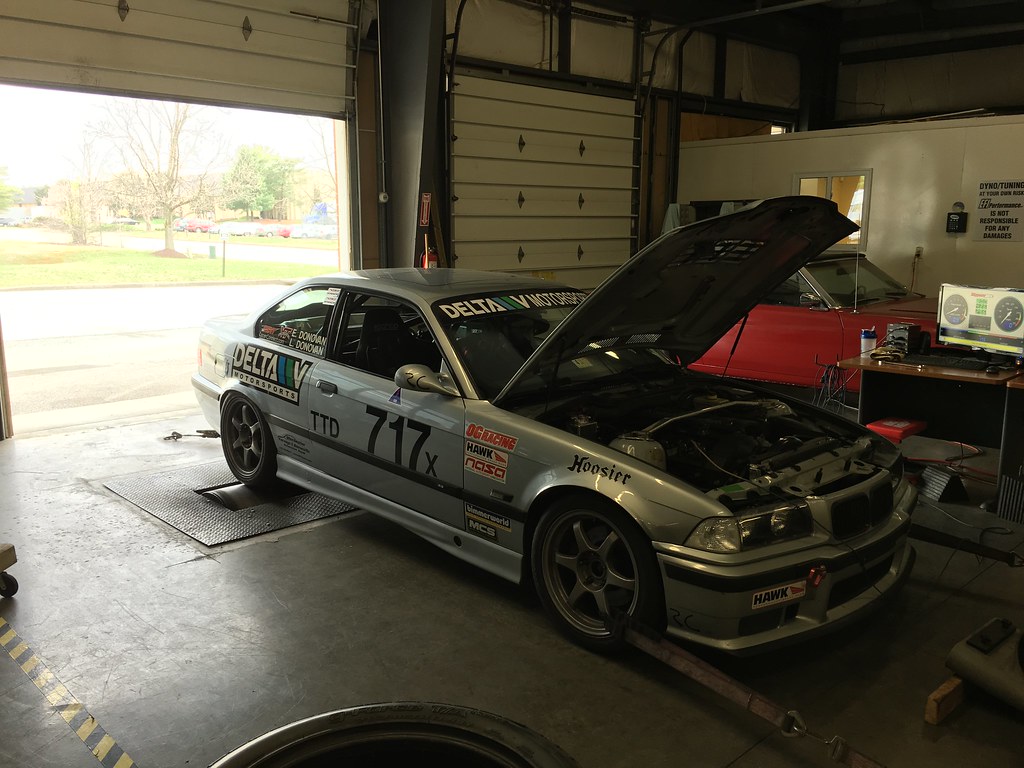
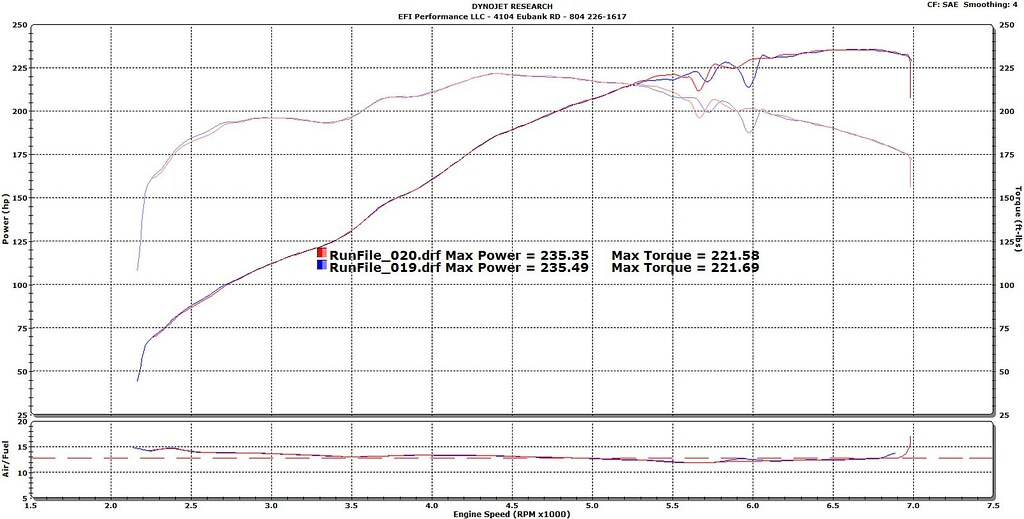
I put the car on the dyno to see where it sits after the M50 manifold/headers/tune and then to dial in power with Bimmerworld restrictor plates for GTS2/TTD. It made 235 hp unrestricted and had a little blip you can see. The AFR at that blip is a little rich which probably caused the little "misfire". The tune is one from another local racer so our best guess is the tune was originally done with restrictor plates installed so when it's unrestricted, the extra air at those RPMs causes excess fuel to be dumped in at those times causing the blip. With restrictor plates installed the graph looks fantastic and smooth. A friend with the exact same tune saw the same things in restricted/unrestricted graphs on the same dyno last week.
Next items on the list are to install the fire system and have it inspected for racing. Then alignment and corner balance at Delta V before heading to Summit Point for comp school and my first racing weekend April 15-17.
Unrestricted
Smallest BW restrictor plate
Ambitious But Rubbish
Looks good, Eric! Did the power/torque curve change much vs. pre-M50 manifold? I still haven't thrown mine on as I don't want to spend the time and money goofing around with it if it won't be too beneficial.
2011 F-150 FX4 | 1997 BMW M3 #404 GTS2 | 2006 BMW M3 Convertible
Out Motorsports
Member
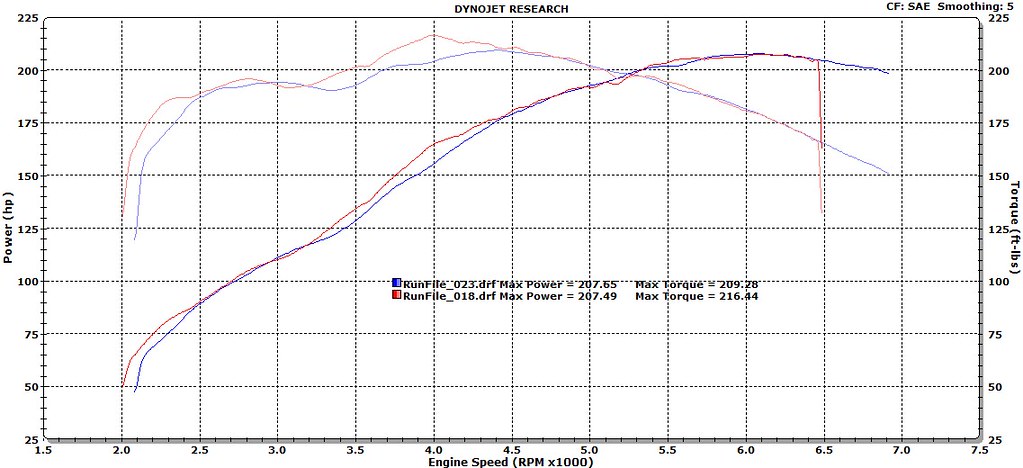
Honestly, it didn't do that much besides reduce the peak torque by about 10-12 ft-lbs and smooth out the curves. I'll post up a comparison graph once I get back to my personal laptop.
Was it worth it? I think so because in the end I got rid of the cats, SAP, and I can pull the restrictor and have 235 whp at 2900 lbs if I feel like having some fun during a non-competition session. All in all it cost around $500 which is pretty cheap for gaining 20 hp (unrestricted obviously).
Member
For those curious, here's the 2015 vs 2016 dyno graphs. As you can see, same hp but I lost about 7 ft-lbs at 4,000 RPM which is expected for the M50 intake swap. Keep in mind the blue line uses a smaller restrictor plate and overall the new setup makes about 20 more hp with simlar tq unrestricted.
Red line: completely bone stock ~150k mile S52 except for a UUC muffler (tune, intake, headers, cats, etc) with the mid-size Bimmerworld restrictor
Blue line: same ~150k mile S52 except aFe air intake, M50 intake manifold, eBay headers, custom catless midsection with resonator, same UUC muffler, 3.64 DiffsOnline diff, smallest Bimmerworld restrictor (42mm I believe)
Member
To me that plot looks like you wasted your time/money on mods.
Member
I wouldn't go that far. It might look that way from those graphs but these mods give me more flexibility to run other classes if I want to.
There is a new ST/TT4 class for NASA in 2017 that would in the 12:1 or 13:1 ratio which would be near perfect for running unrestricted and 2900-3000 lbs depends on the final ratio they decide on. Or I can run unrestricted in TTC like I did last weekend. Or I can run TTB at some point too. Lots of options now.
Member
That's a good point.
Member
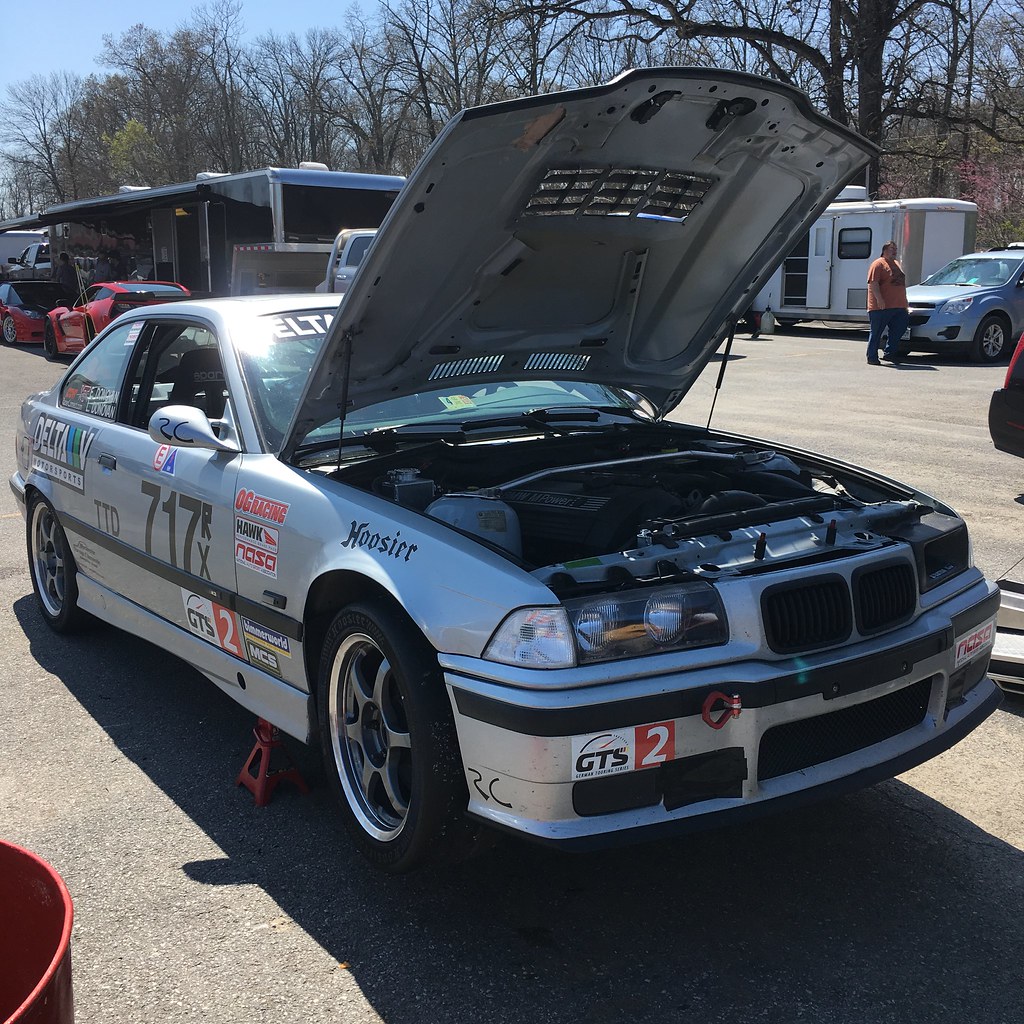
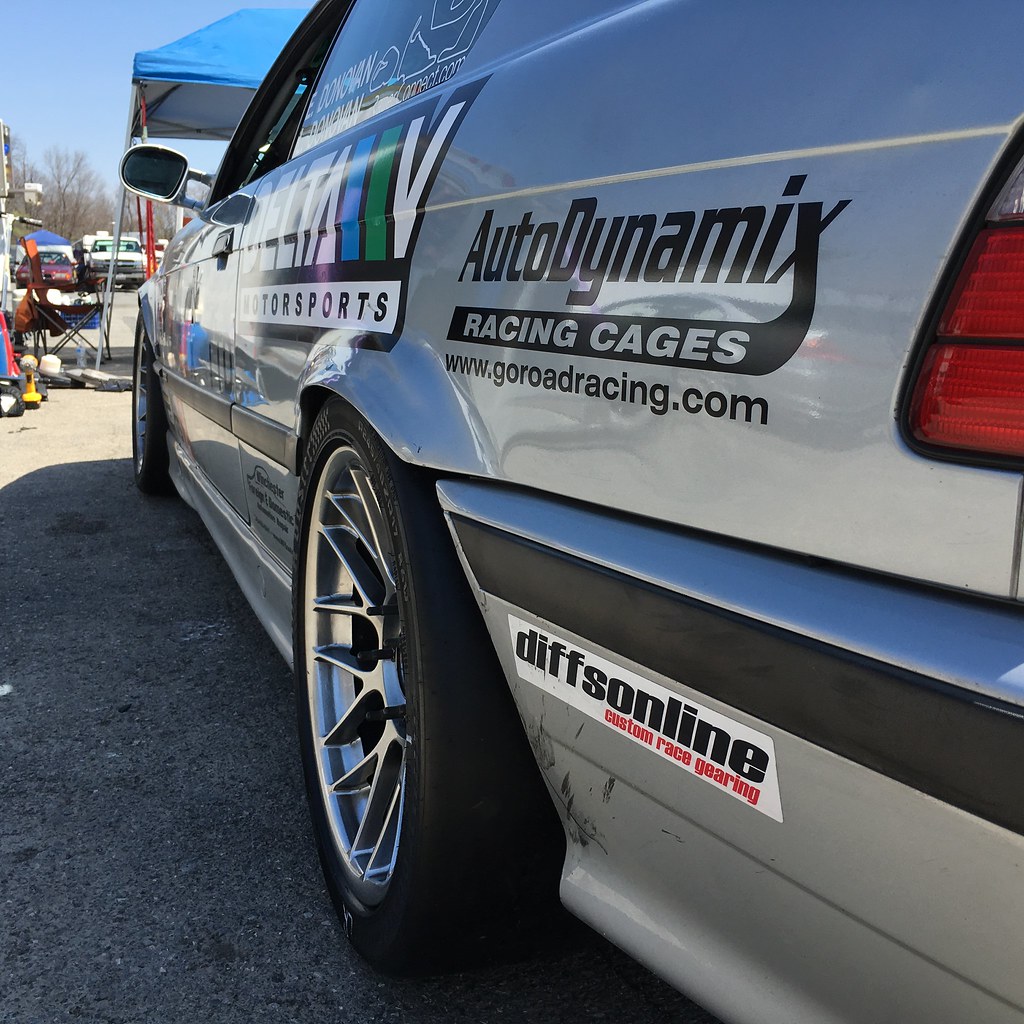
Update after the first NASA-MA event of the year: I passed comp school and raced in GTS2
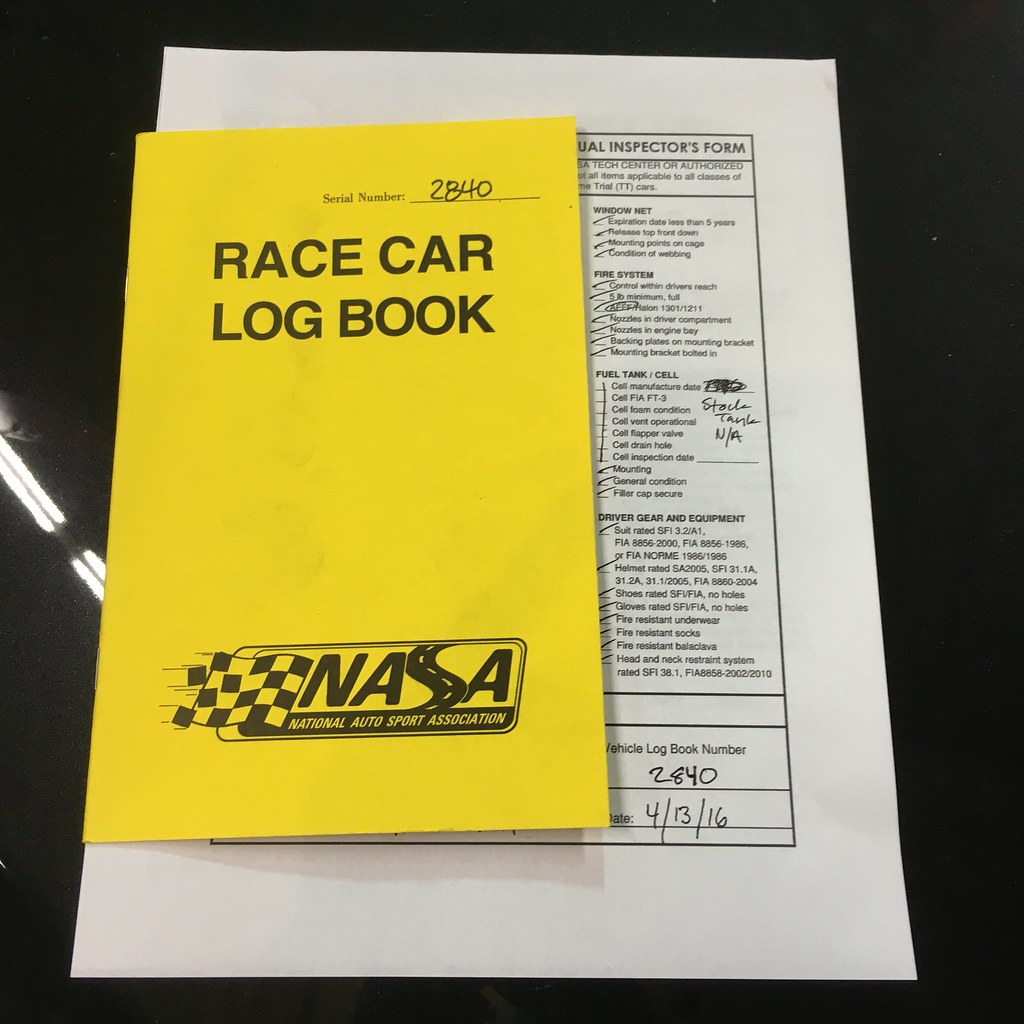
The week leading up to the event was very hectic and busy. It started by catching a cold Saturday which hung around through Tuesday. I was able to get the fire system installed and get the car fully tech inspected and received a logbook from Delta V Motorsports. I got to the track later than anticipated Thursday night but I still got the car through tech and got one major monkey off my back.
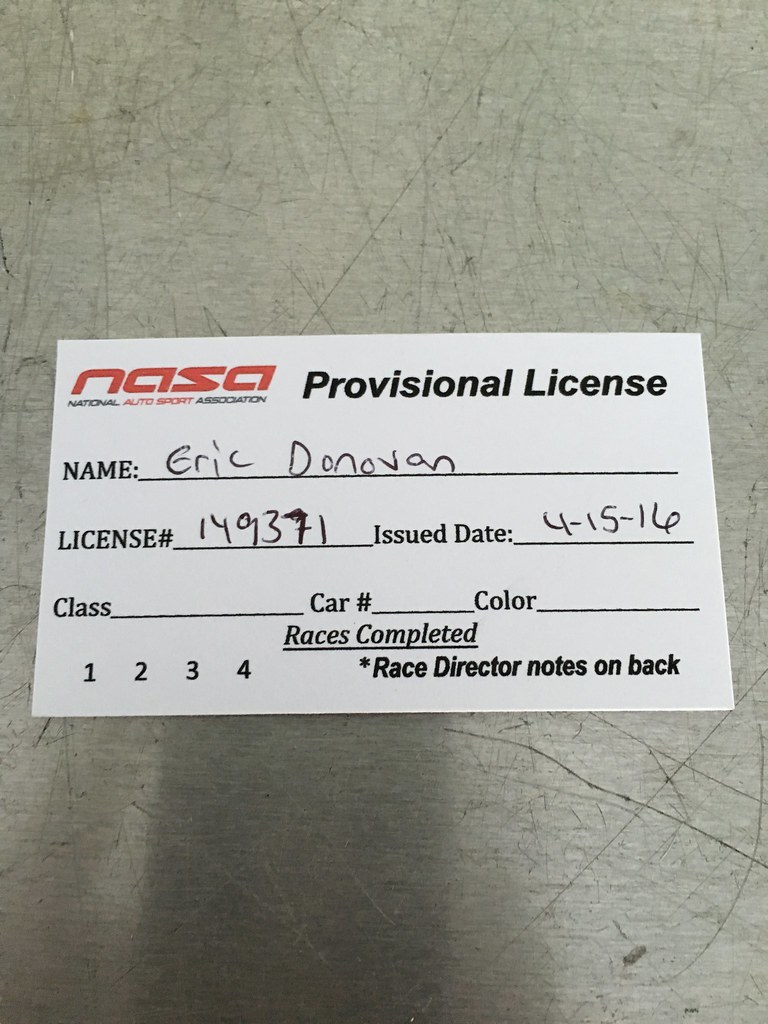
Friday was a very, very long day with the NASA-MA comp school. It's purposefully long and stressful and they certainly accomplished their goal in that respect. We had a huge class of 17 and everyone did great. The school was lead by Chris Cobetto who was fantastic as expected and I could feel a huge difference in my driving and thought process by the end of the day. Getting this little card after a 12 hour day made it all worth it! Monkey number 2 off my back.
The car did well but development a vibration during the day which I thought was coming from the rear somewhere. I didn't find anything when inspecting so we kept running it as is and it didn't get worse. Dad went to leave for a TT session late Saturday morning and the car made an awful noise when he turned the steering wheel. Upon investigation, the power steering fluid was dark gray and sparkly so we determined the pump died. It has whined some over the past couple years so it's not a huge surprise. We scrambled Saturday afternoon and I sourced a 6 rib, 56" belt from a local parts store to delete the PS pump. Zack from Delta V helped remove the PS pulley, one of the mounting bolts, and installed the belt. We finished 20 minutes before the last TT session so I rushed and took it out at the back of the pack. As expected, the steering was HEAVY and every bit of feedback to the wheel was amplified. I found myself holding on tight with both hands to control the car but I still managed to turn a couple 1:24 laps and win TTD for the day despite missing my first qualifying and race. It felt like I had just finished a shoulder workout when I got out of the car.
On jack stands fixing the steering
Sunday morning went much better than Saturday. I turned a 1:24.2 in qualifying and placed 6th in a very quick GTS2 field. I had a 40 minute race which I wasn't fully looking forward to doing without power steering. I'll have race video up soon but I was a typical rookie and left way too much room at the start and several out of class cars passed me quickly. I fought for 5th in GTS2 for a couple laps before I got passed and began to get tired. I settled in behind a Spec E46 and tried to run consistent times and hopefully catch someone. I ended up getting back into 5th on lap 11 or 12 after a car spun which gave me hope for not finishing dead last. On lap 18, the car developed a second vibration in addition to the one that had been there all weekend. The next lap it became very loud and worrisome so I decided to head in and not risk damage by flying off track because of a failure. I did 19 of what would have been 24 laps. Not the way I wanted to end the weekend but at least I have my license now.
We ran 17x9 ET30 Apex wheels with 245 R7s for the race and I couldn't resist a picture
It turns out that the left front wheel bearing was TOAST. I'm glad I came in when I did! As we prep for Hyperfest we'll be replacing front wheel bearings and the power steering pump. We're going to do some other items such as a Stewart water pump, BW dual fuel pumps, FCABs, and some other minor maintenance items. Hopefully the car will be back to it's normal reliable state!
Here's the two 1:24 laps in TTD trim on Saturday evening. Notice the steering wheel feedback and my white knuckle grip!
https://www.youtube.com/watch?v=d5kMfiv5f2k
Member
Awesome! I can't wait for that day some day.
Member
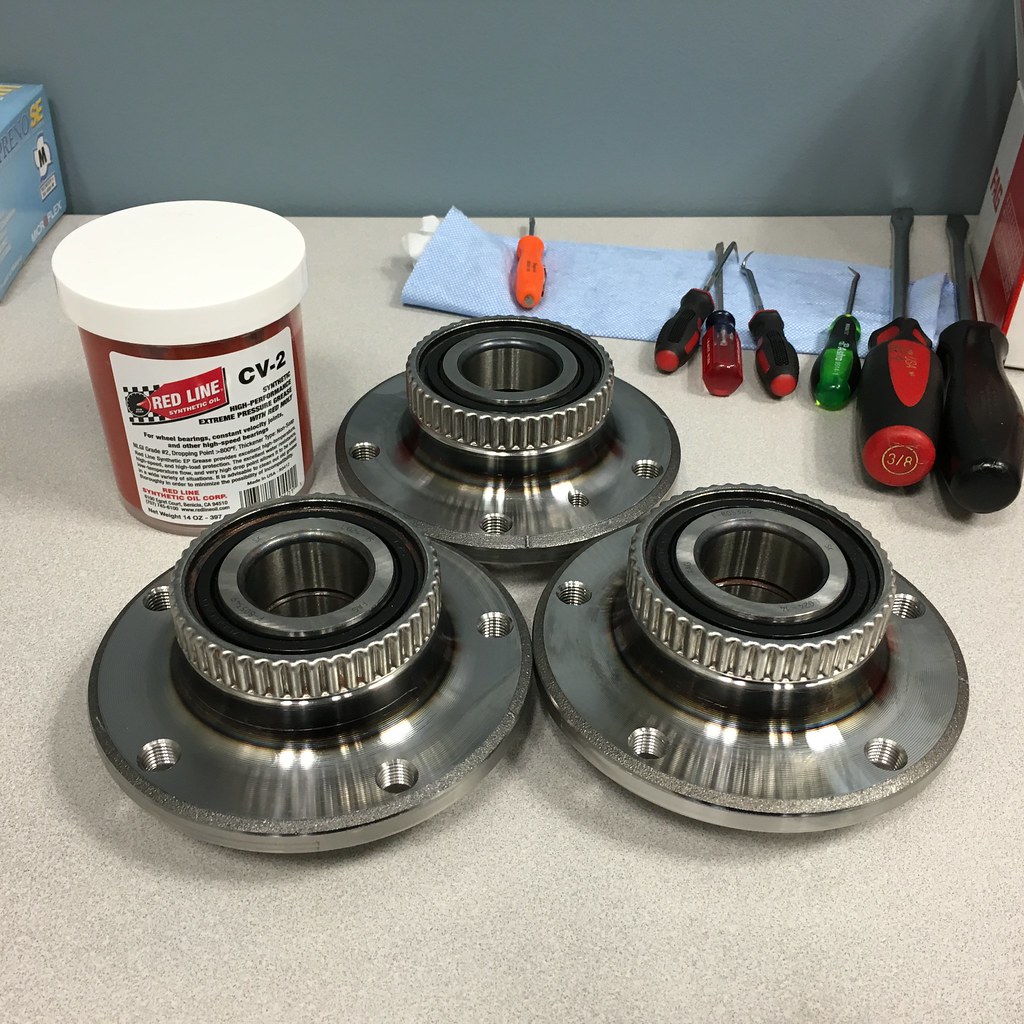
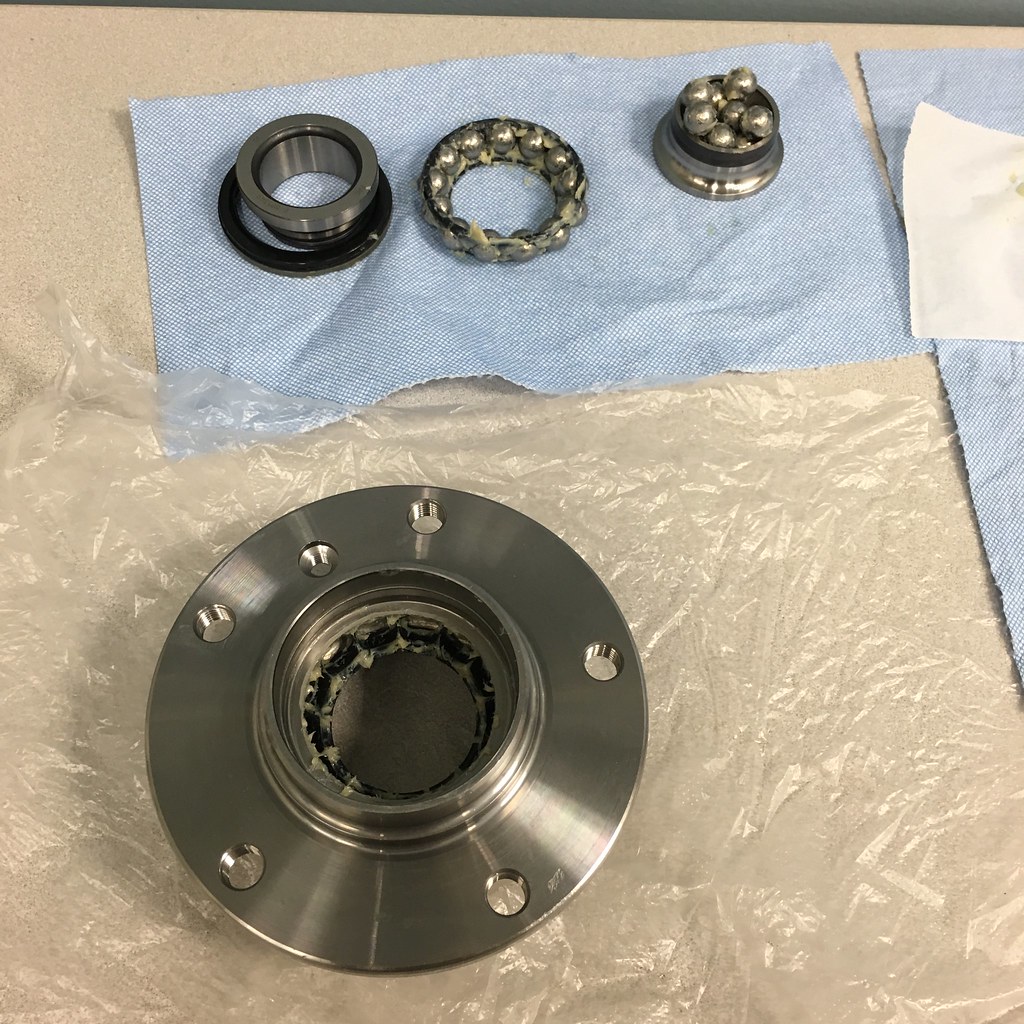
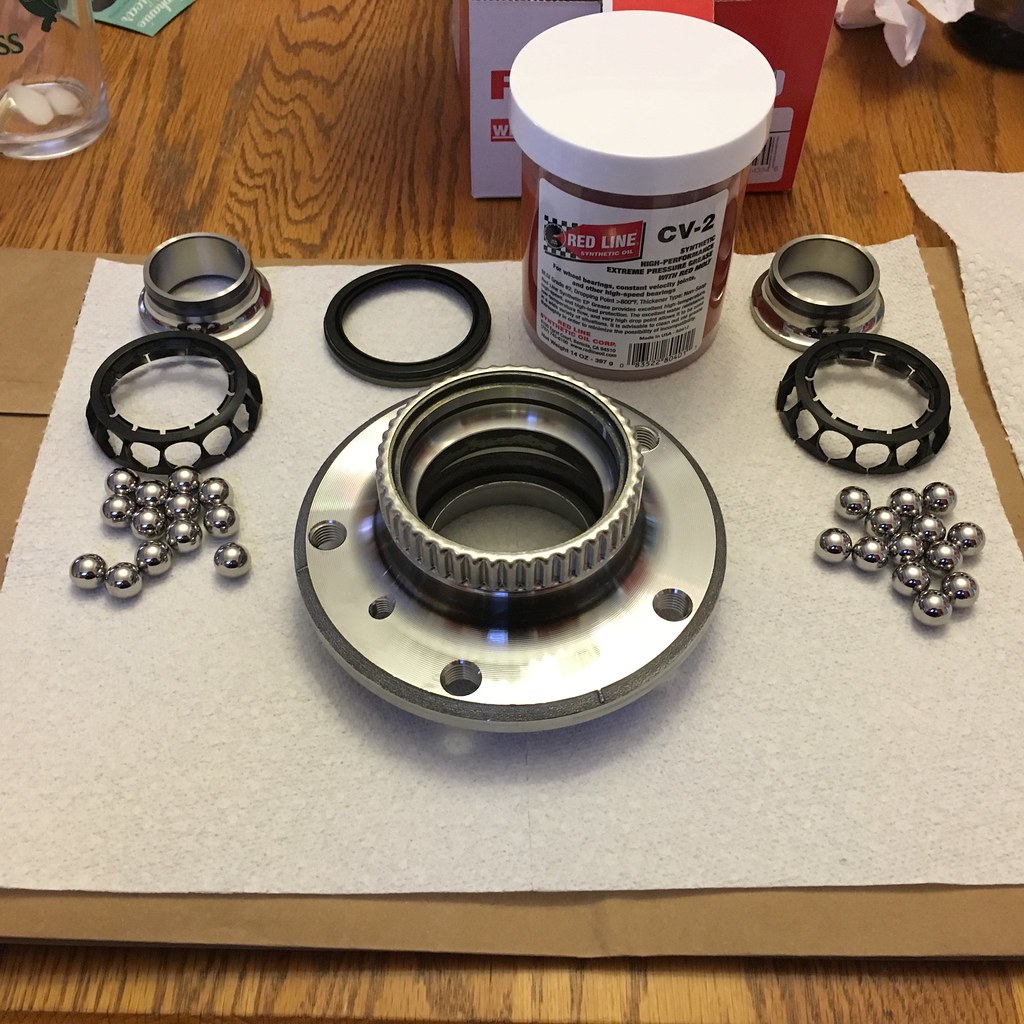
In an effort to extend our wheel bearing life, I disassembled the brand new FAG hub/bearing assemblies to pack them with Red Line CV-2 grease per the recommendation of some friends. I wanted to take more pictures during the process but that would have involved multiple more pairs of gloves as its a messy job. I used these two links to help me take them apart.
http://www.bimmerforums.com/forum/sh...4#post16344144
http://www.bimmerforums.com/forum/sh...8#post17438498
Overall it was a little tricky to but not too bad once I figured out how to do it. I bought 3 bearings to have one as a spare. The first one I took apart and greased with Red Line will be my spare as the 2nd and 3rd bearing went much more smoothly.
All done!
Last edited by hoki06; 04-21-2016 at 09:33 PM.
Member
Interesting, I may be replacing my wheel bearings soon also, may consider this upgrade.
Member
After seeing the grease inside the new bearings I'm very glad I did it. It's worth the $11 for the grease and couple hours of work.
 Posting Permissions


 Reply With Quote
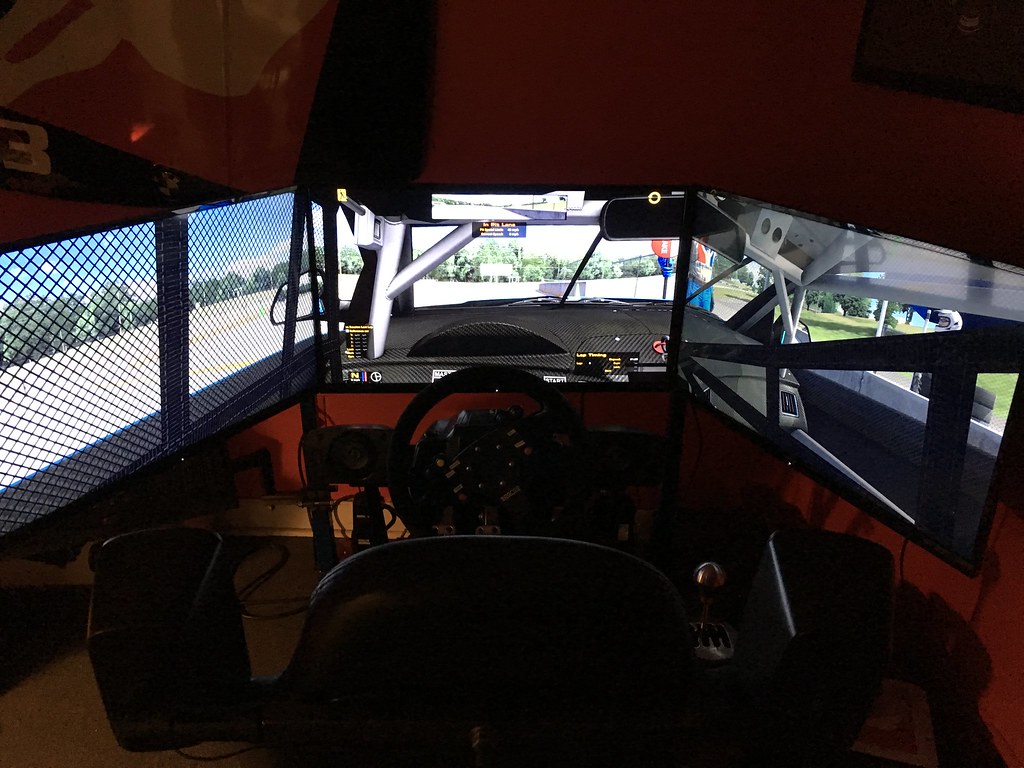

Bookmarks