
 Member
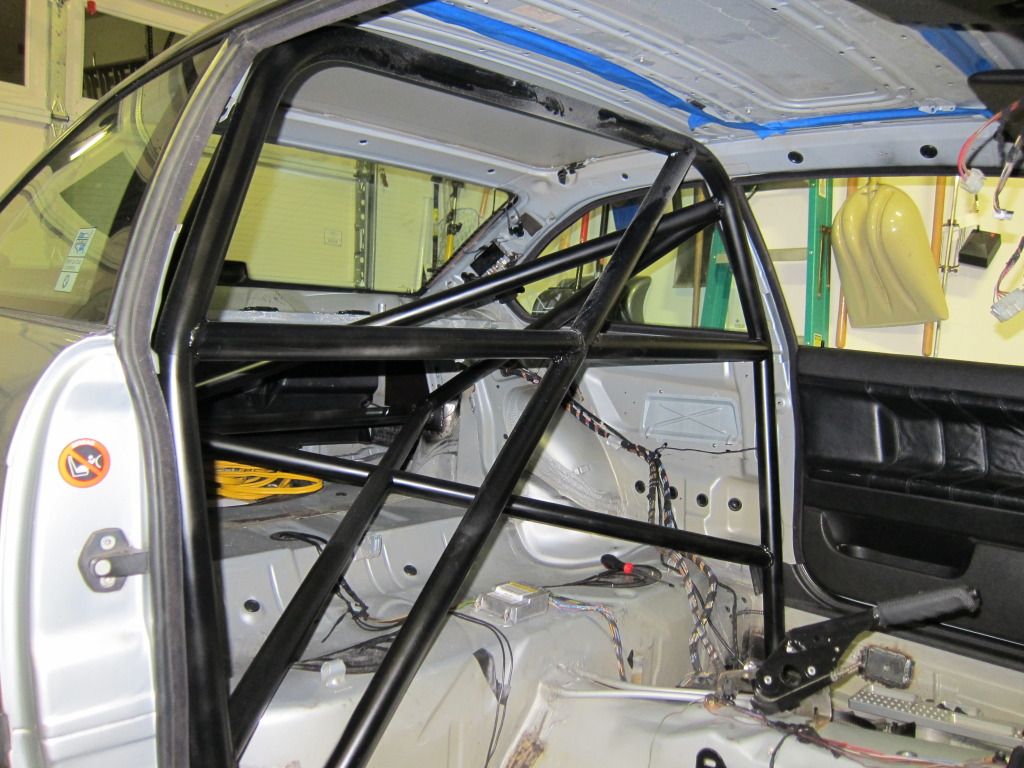
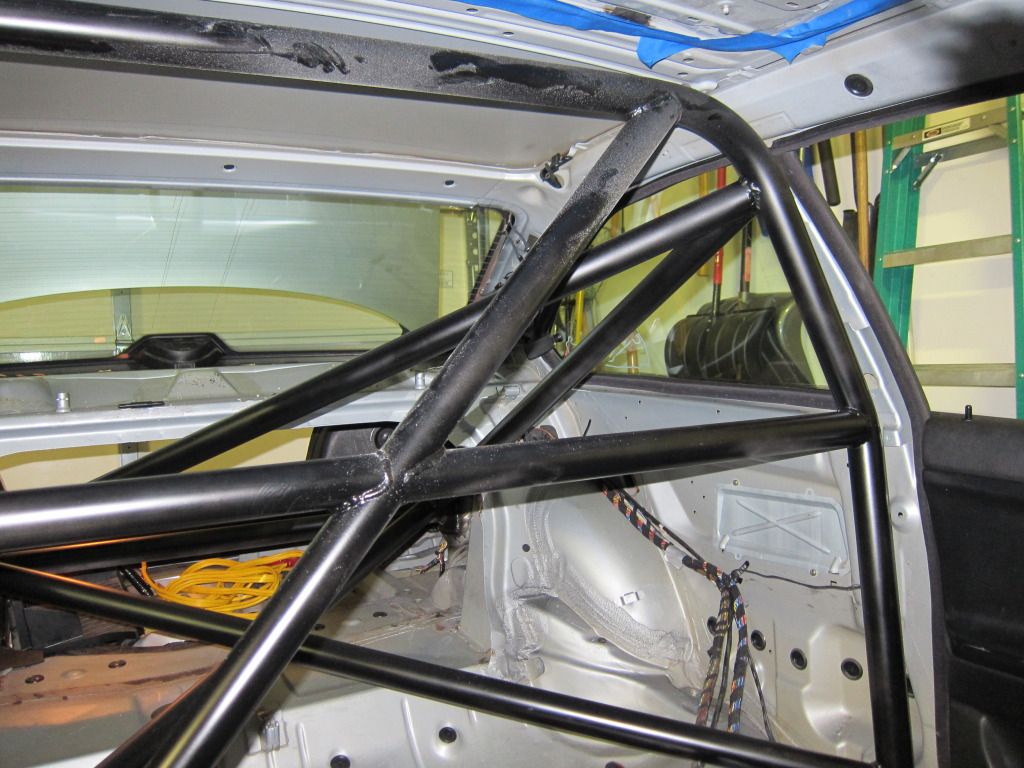
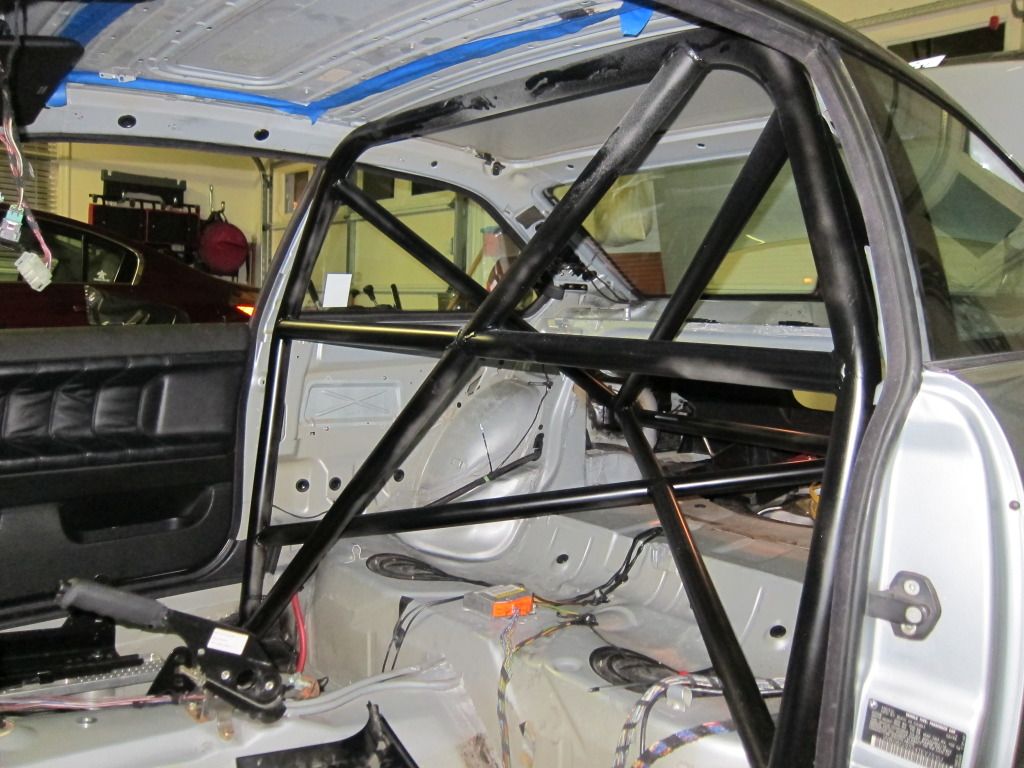
That bar is there to PROTECT your ankles. Stops protrusion in a side impact collision.
Member
Thanks!Originally Posted by MDGearhead

Thanks! SFI rated roll bar padding will be added to any roll cage pieces that body parts could come in contact with in the event of a wreck.
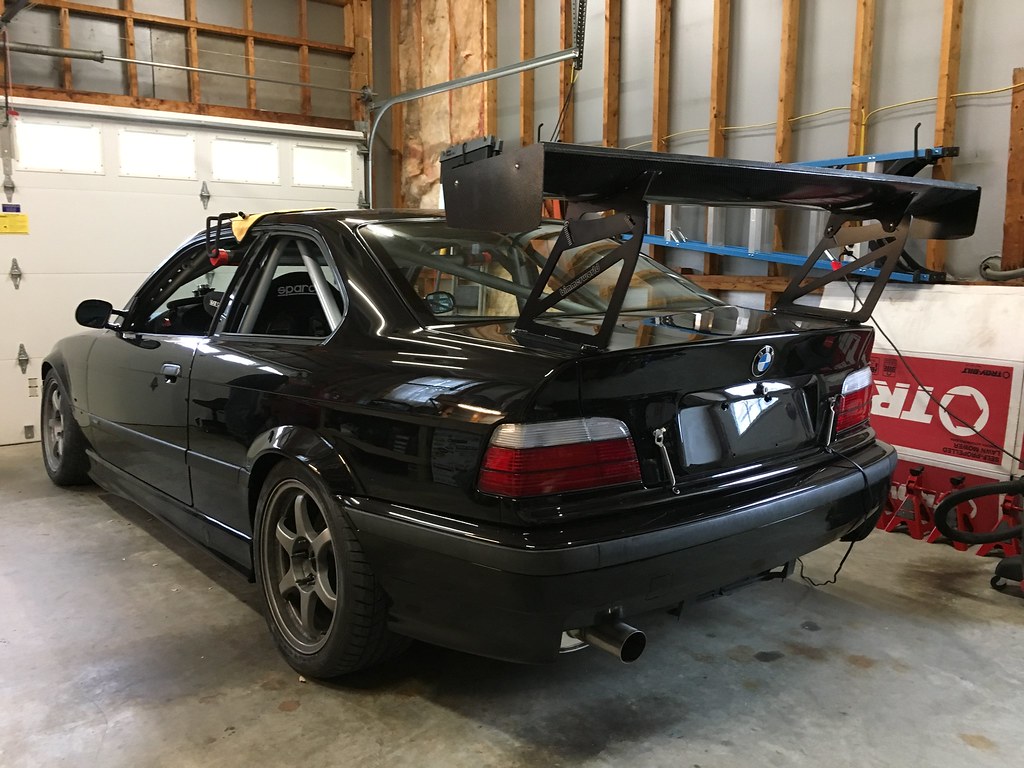
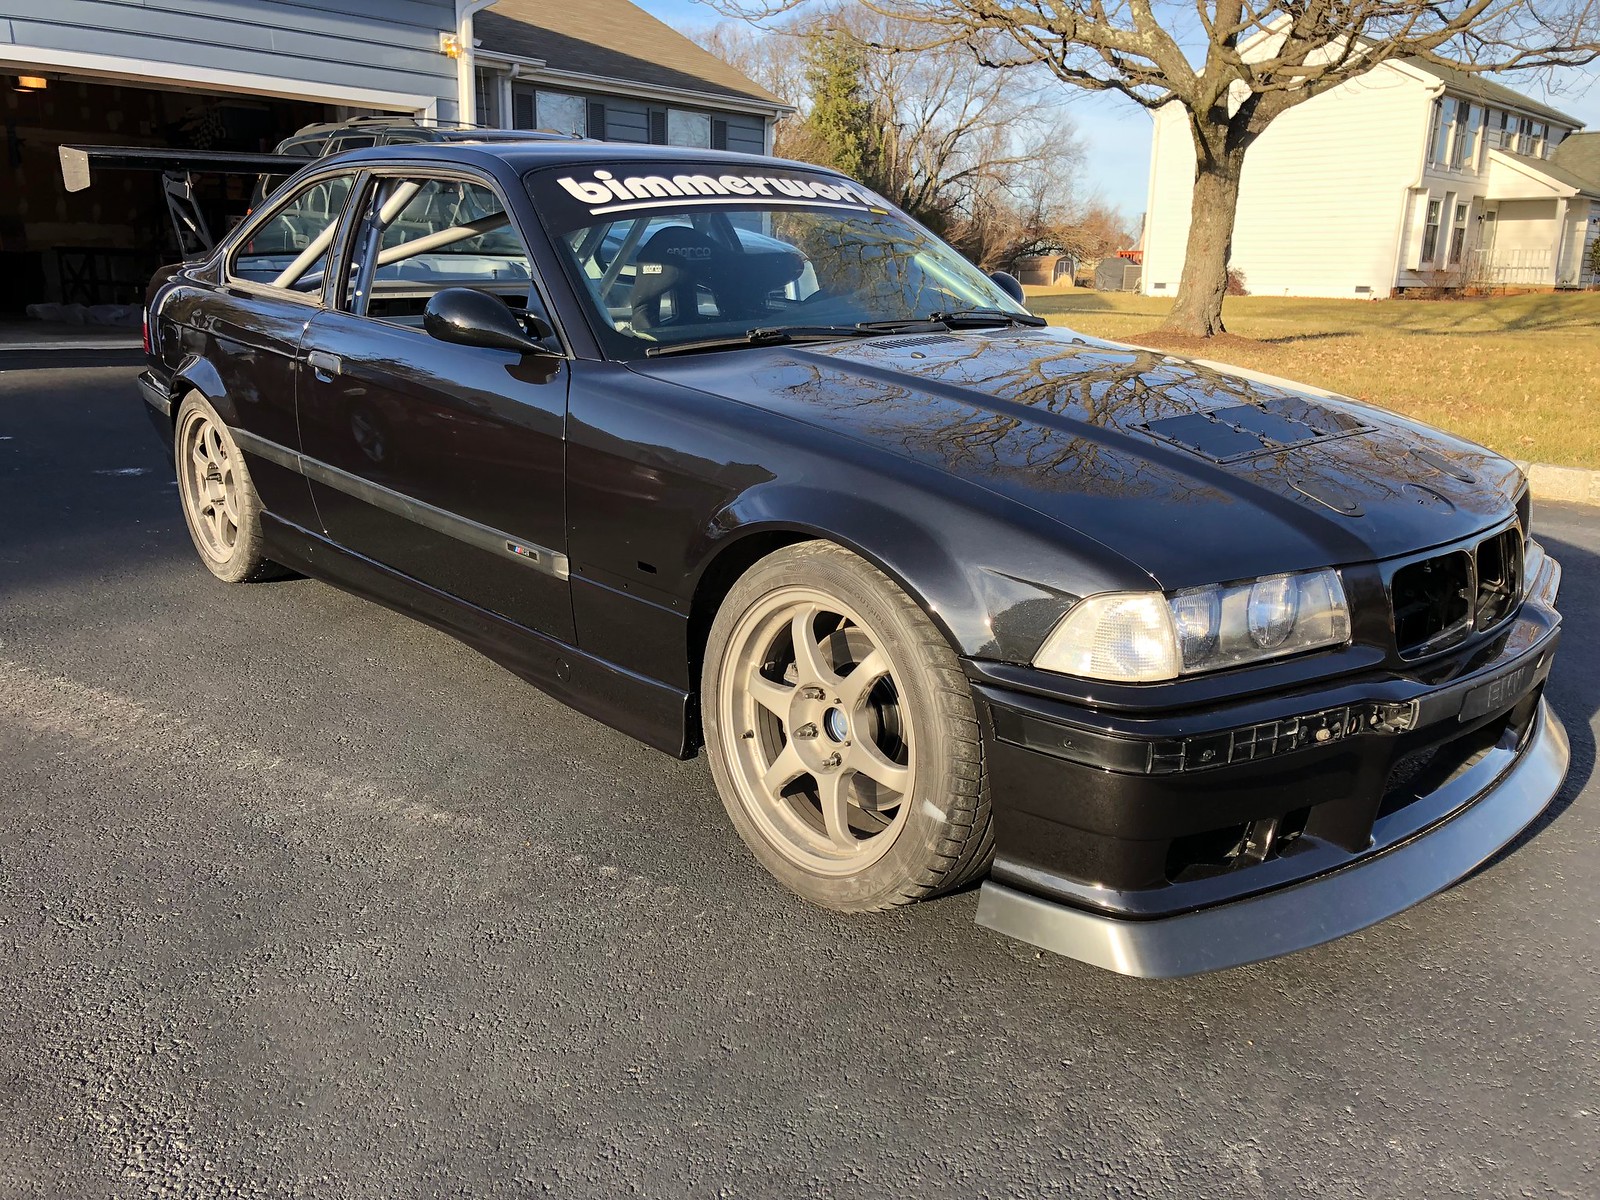
Dad is in town this weekend so we spent a little time in the garage and mounted the wing. One more item marked off the list!
Member
Can’t wait to see this thing at the track
Is that the tall v3 wing?
Member
Yes, these are the tall mounts.
Member
Nice. makes my STU wing look like a little toy
99 M3 STU/ GTS3 Project
Member
Will you be testing for aerodynamic flow around the wing? I'd be curious if vortex generators along the back roof line would be helpful with that wing. Couldn't hurt to help setting it up height wise, assuming height is adjustable.
Wondering bout the end plates being all to the downside of the wing too. Trying to understand how it helps create/maintain downforce. First thought is to steer and maintain the air on the low pressure side.
Member
I hope to do that one day but the goal right now is just to get back on track. I have long term visions of doing various testing and wool tuft testing in several spots is one thing I'd love to do.
Member
Need a favor. Could you measure the distance from the back of the emblem to the front of the vent?
I am trying to jump ahead on my mashaw hood and think I got the spacing from the radiator to the vent right but I can't be sure since my car is all apart.
TIA
99 M3 STU/ GTS3 Project
Member
I can tell you that the trackspec instructions tell you to put the forward edge of their vents 14" from the tip of the hood. I have measured that underneath and it's in a prime spot to put the vents aft of the radiator (allowing all the air to pass through the radiator and out the vents).
Hope that helps.
Member
That does help. Thanks man.
99 M3 STU/ GTS3 Project
Member
Back of the emblem to the back of my radiator (Mishimoto Z3 X Line) is 8.5. Front edge of the hood to front of the vent is 12. I can see about an inch or so if my radiator. 14 looks about right for front of the hood to back of the radiator. My vent is probably an inch or two forward than optimal but not a big deal. Hope that helps!
Last edited by hoki06; 12-12-2017 at 10:59 PM.
Member
Yep. Thanks guys
99 M3 STU/ GTS3 Project
Member
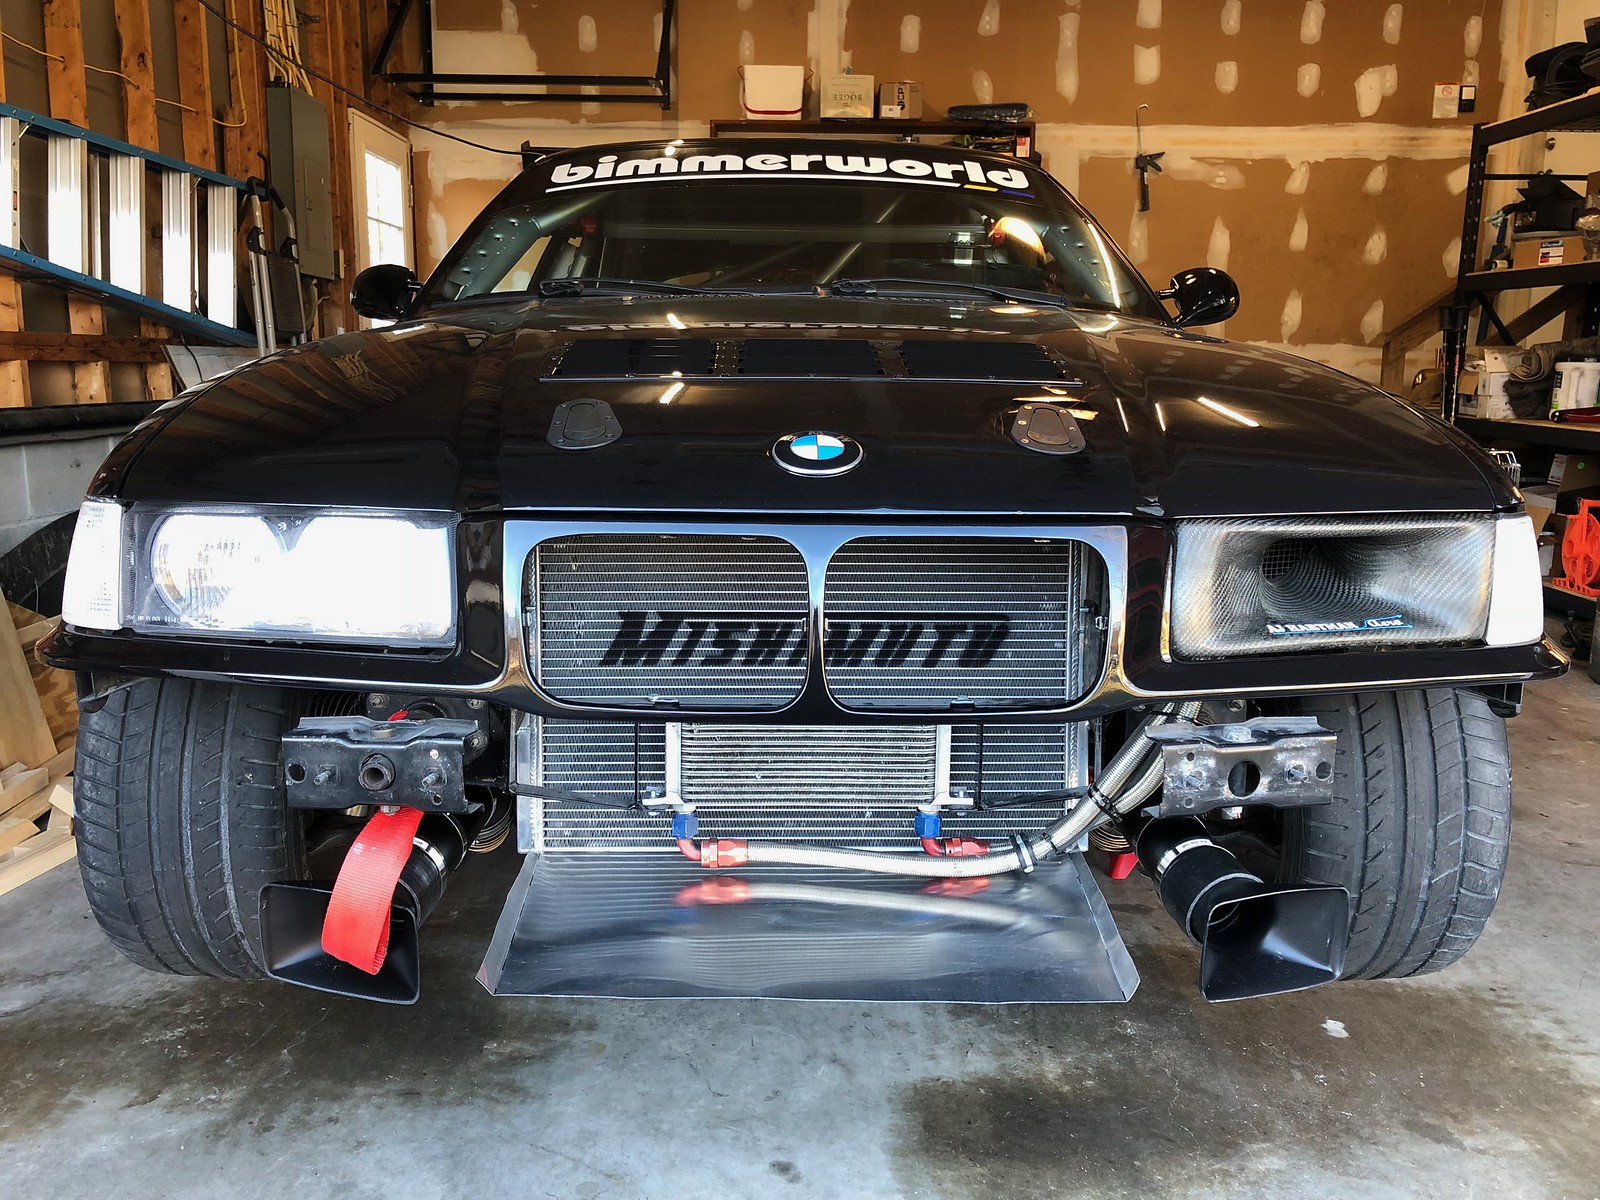
Will also add that I shrouded my radiator to the front bumper (lower opening only) ensuring the air that came in the front went through the radiator and passed to the vents. I also blocked off my kidney grills. When I did this, I picked up 3MPH on the front straight at NOLA Motorsports park. I am guessing from the overall reduced drag of the air going under the car and/or getting stuck under the hood.
Member
Correct, those are both critical to aero and cooling efficiency. Ill be doing radiator ducting and making kidney block off plates this winter.
Cone Killer
I need to do the radiator ducting as well.
'03 911 Turbo 6MT fun car
'18 Toyota Land Cruiser Daily driver/Ski Machine/Off Roader
'15 Cayenne Diesel Wife's DD
'17 KTM 690 "Adv" 2 wheeled Adventurer
Member
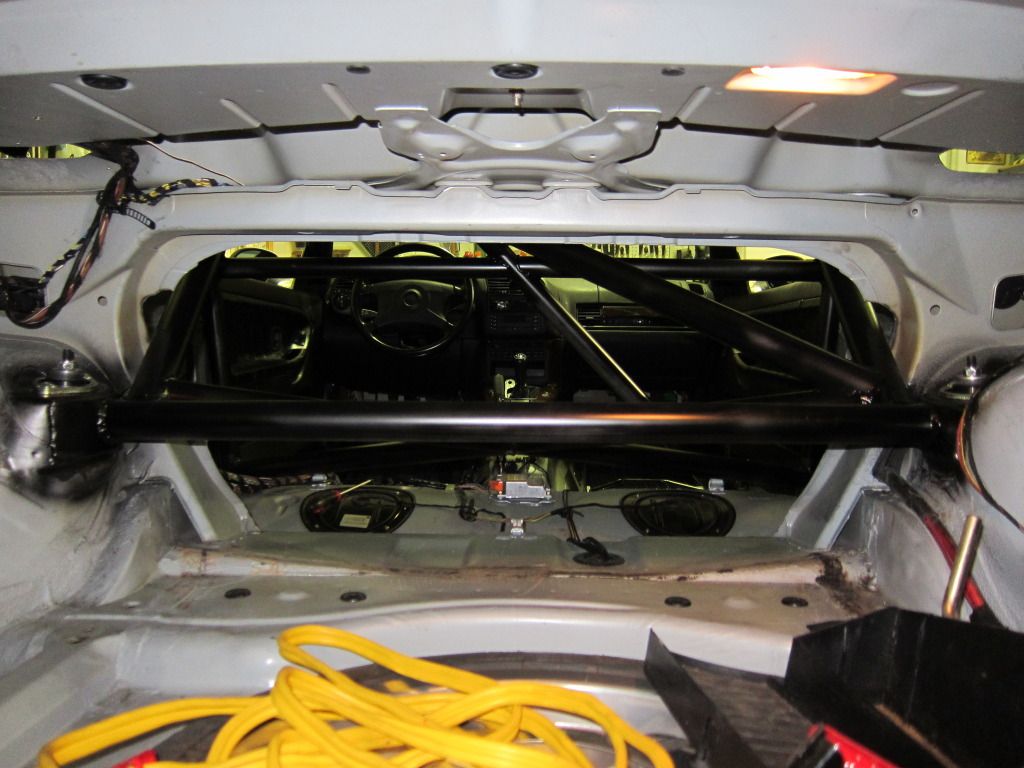
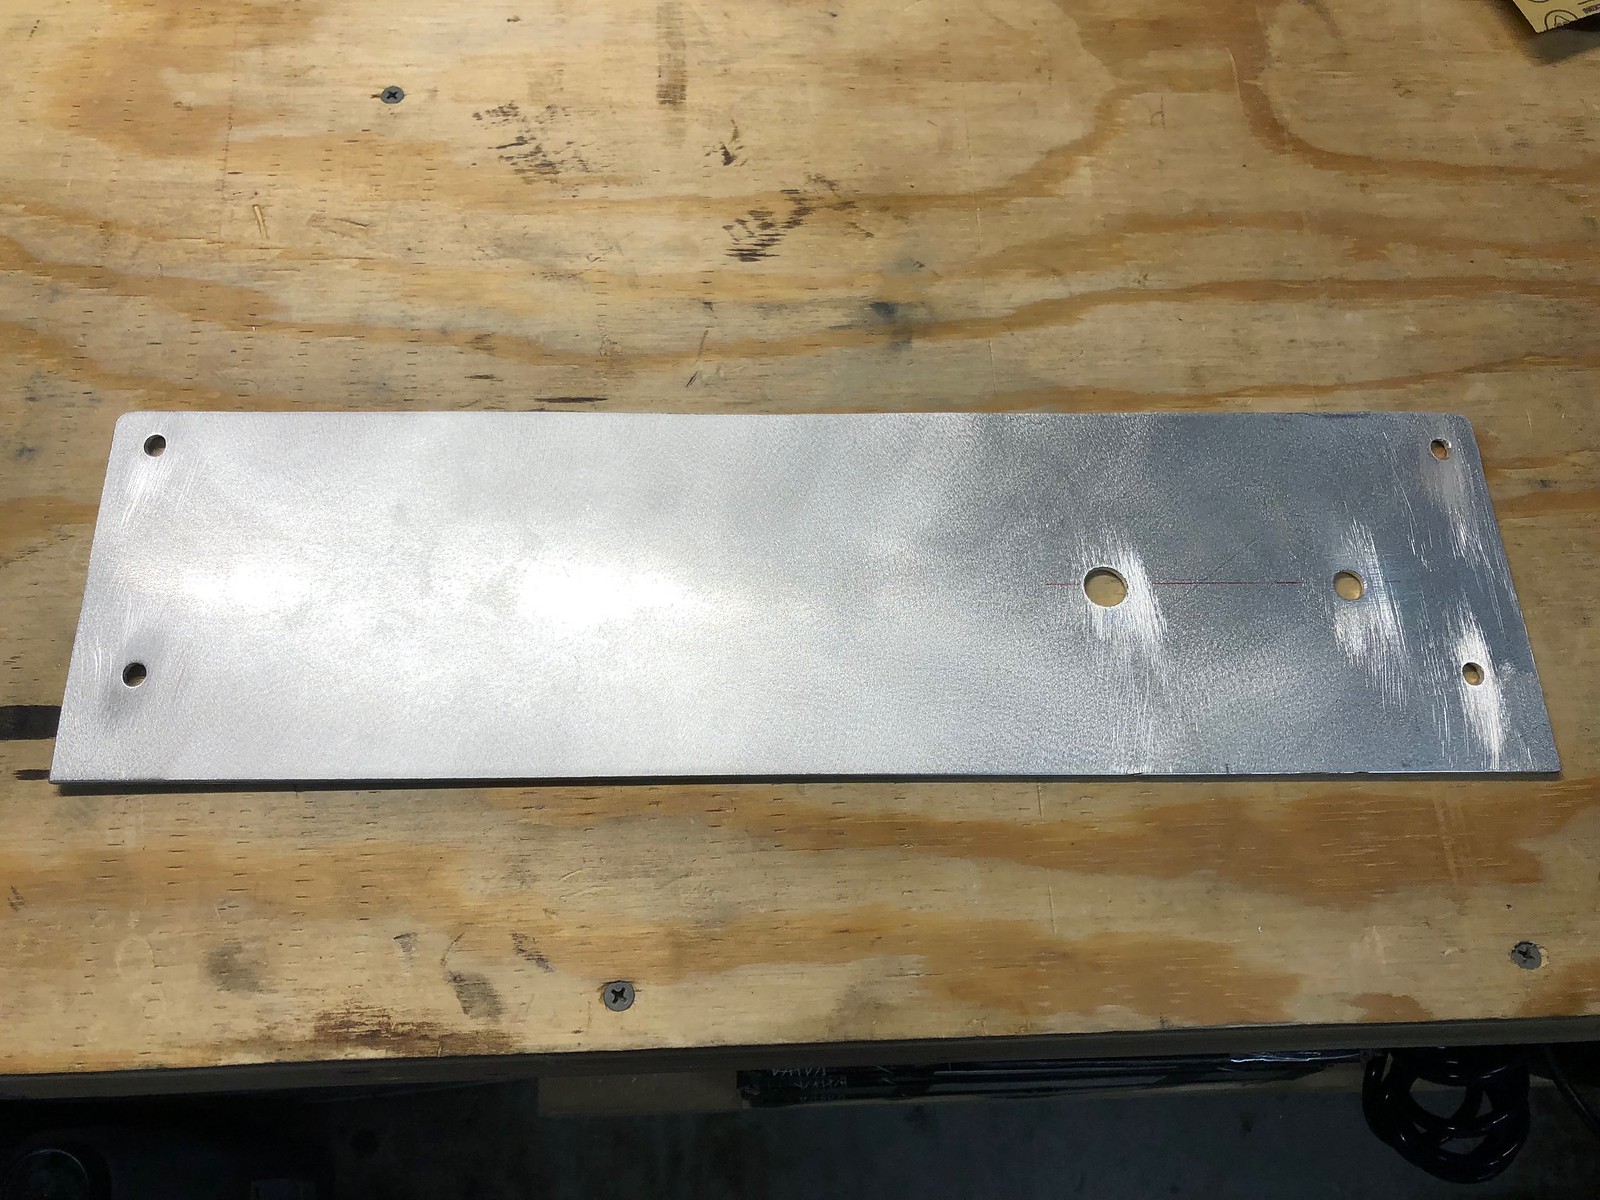
It's been pretty cold here lately and my garage isn't insulated nor do I have heat so progress has been limited. I finished up the fire bottle mounting with a spacer under one side so it sits level. I just need to run and mount the cable pulls to finish the fire system install.
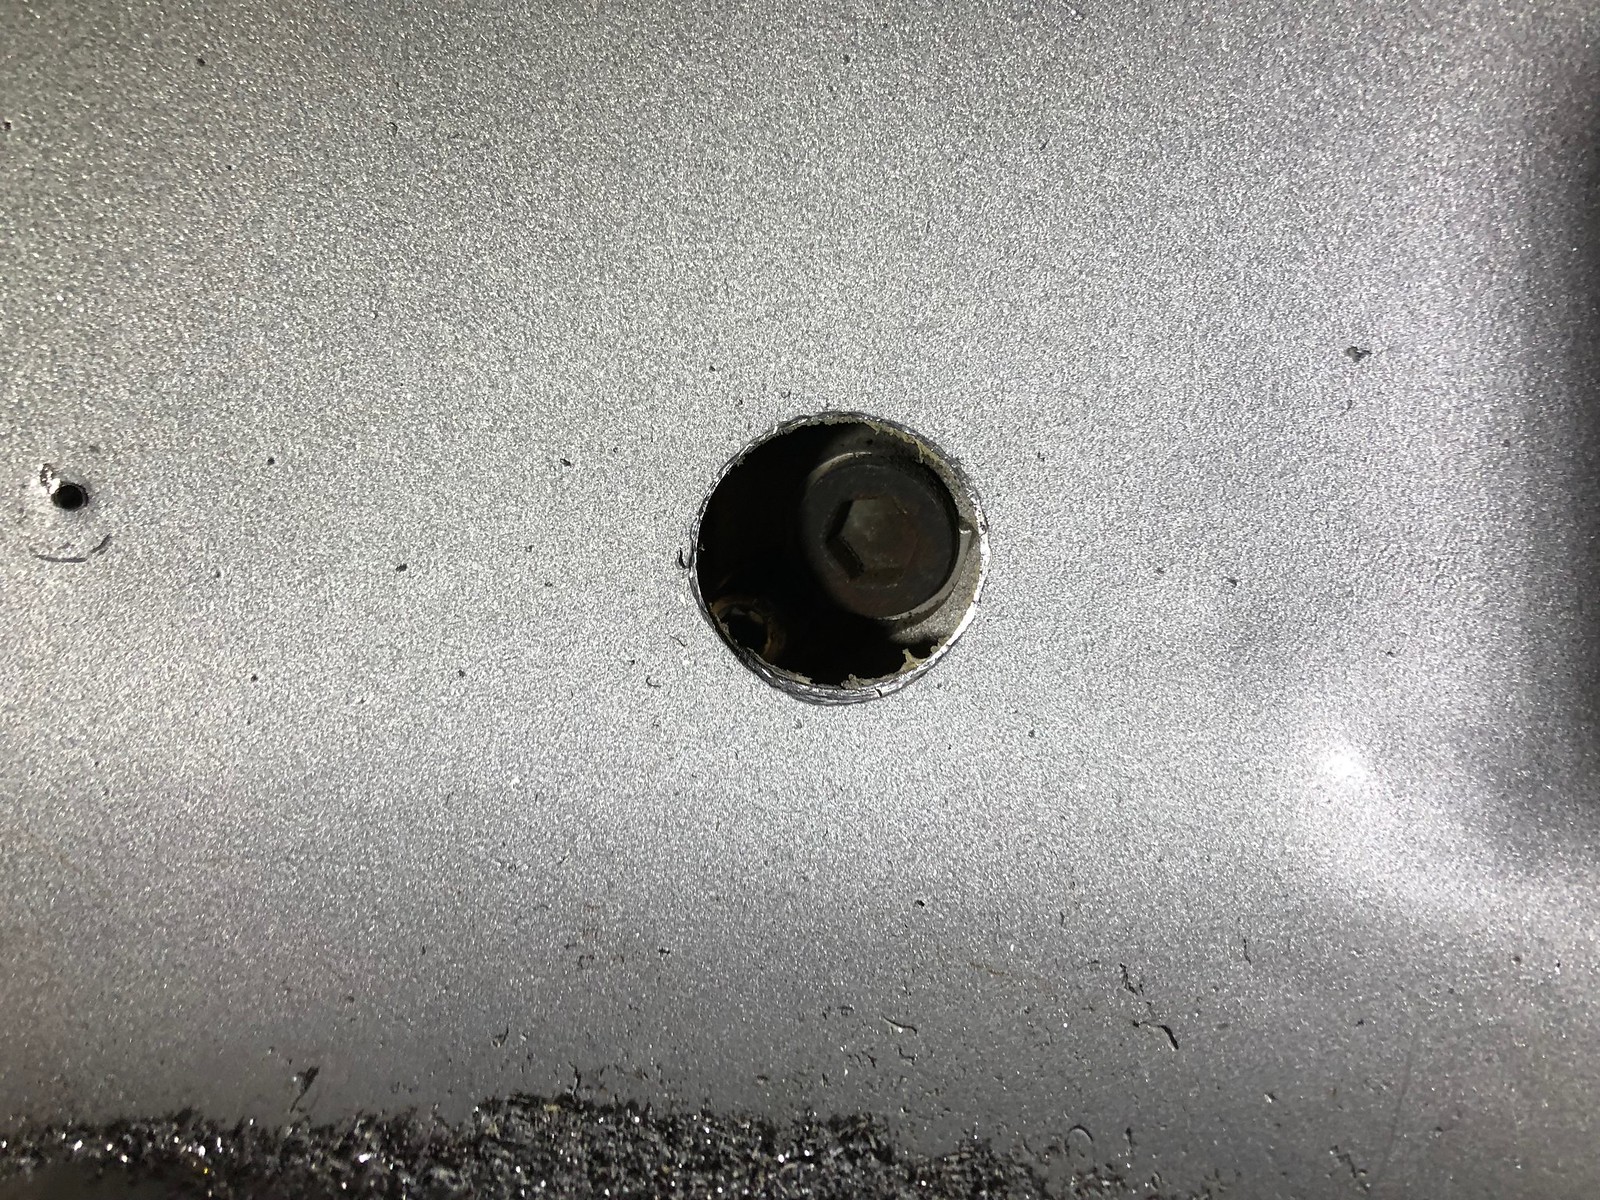
In the old car we used the Hard Motorsports kill switch and mounting plate which I had to customize a little so I left it in the car. I like the plate idea to clean up the interior look so I made a template for cutting my own plate out of aluminum. This plate will serve as a mounting location for the externally accessible fire cable pull and kill switch. I'll mount them close to the door so corner workers can easily reach both in the event of an emergency.
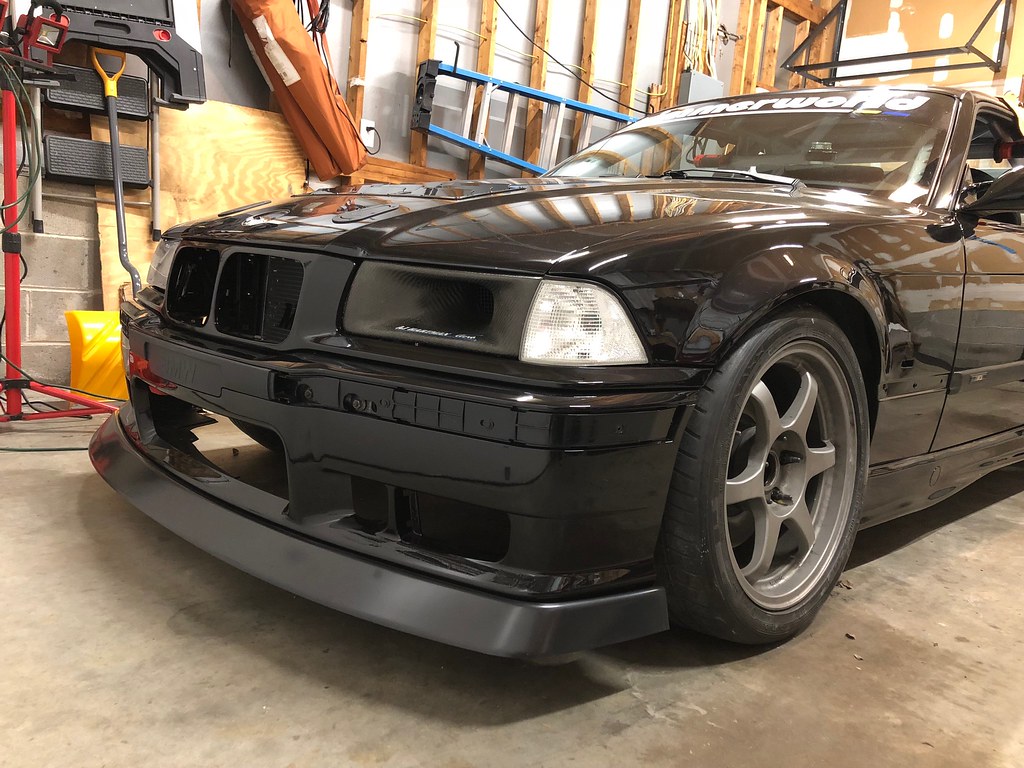
I also got around to mounting the MaxVelocity GTR lip on the front bumper. This will serve as an air dam between the bumper and splitter. Ultimately I'd like to make my own air dam that's lower and allows for a lower splitter but I'll save that for another day after the car has some races under it's belt. Now I need to get the car in the air again so I can design/make splitter mounts as well as add ducting for the radiator.
Member
Looking good
99 M3 STU/ GTS3 Project
Member
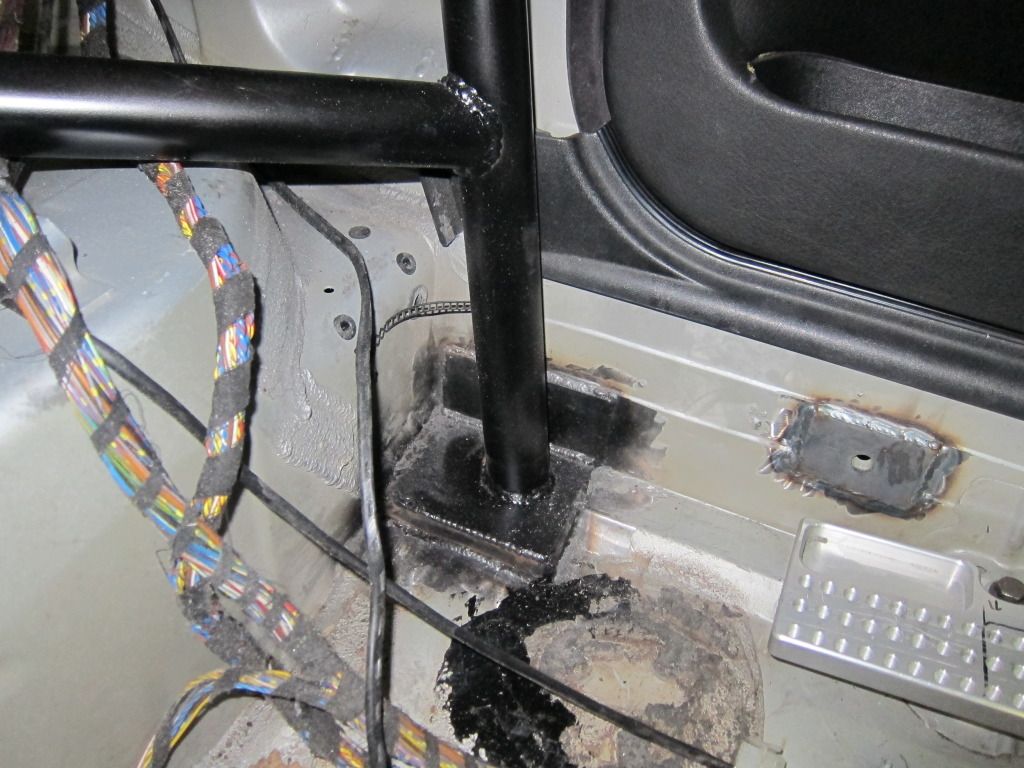
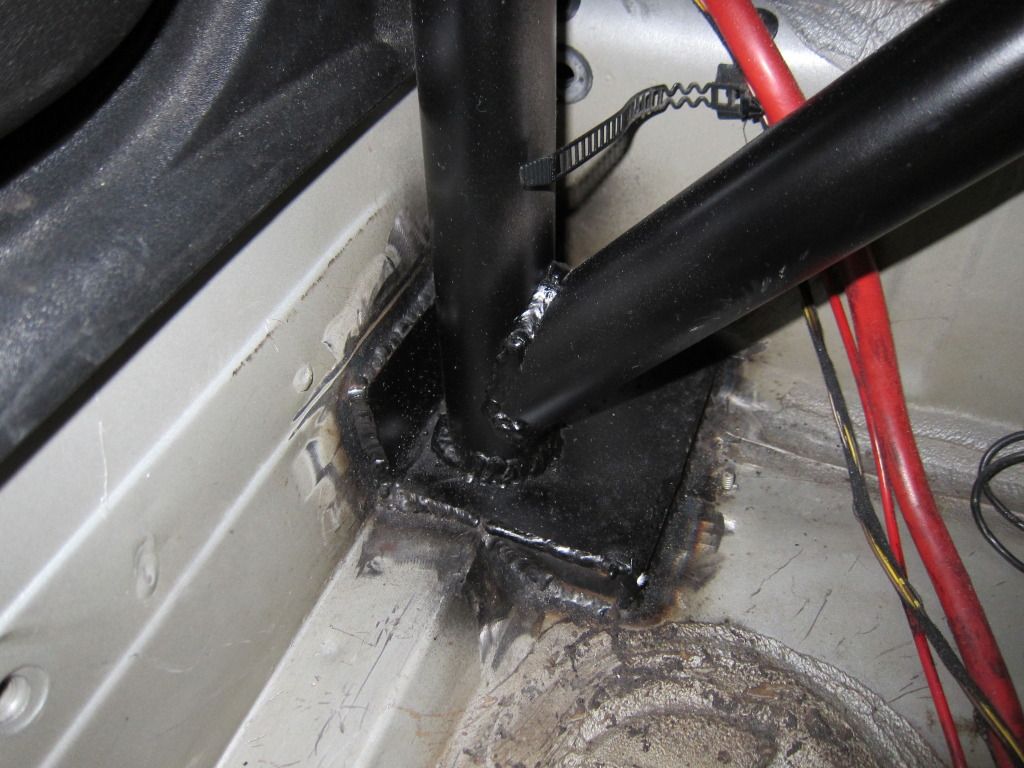
Any chance you remember how much you paid for your roll bar?
Member
I don't remember exactly but I think it was in the 1300-1500 range
Member
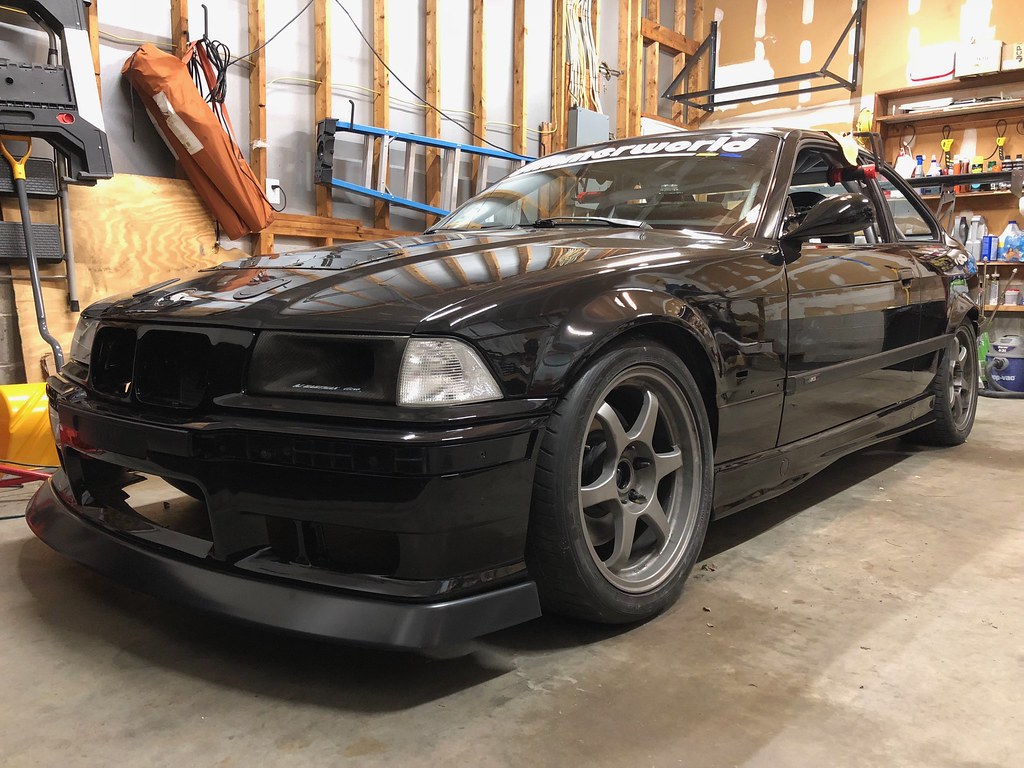
Update time! I took some time off around the holidays and then we had a bitter cold streak that made working in my non-insulated garage miserable. I slowly started to get back into it a couple weeks ago and I'll be making a big push this week to get most of the things done on my to do list. The next couple days will be in the 70s and I plan to take advantage of it!
We had an unseasonably warm weekend day in January so I pulled the car out, let it run for a while, and took it for a spin around the neighborhood. The exhaust sounds so good and I can't wait to rip around on track next month!
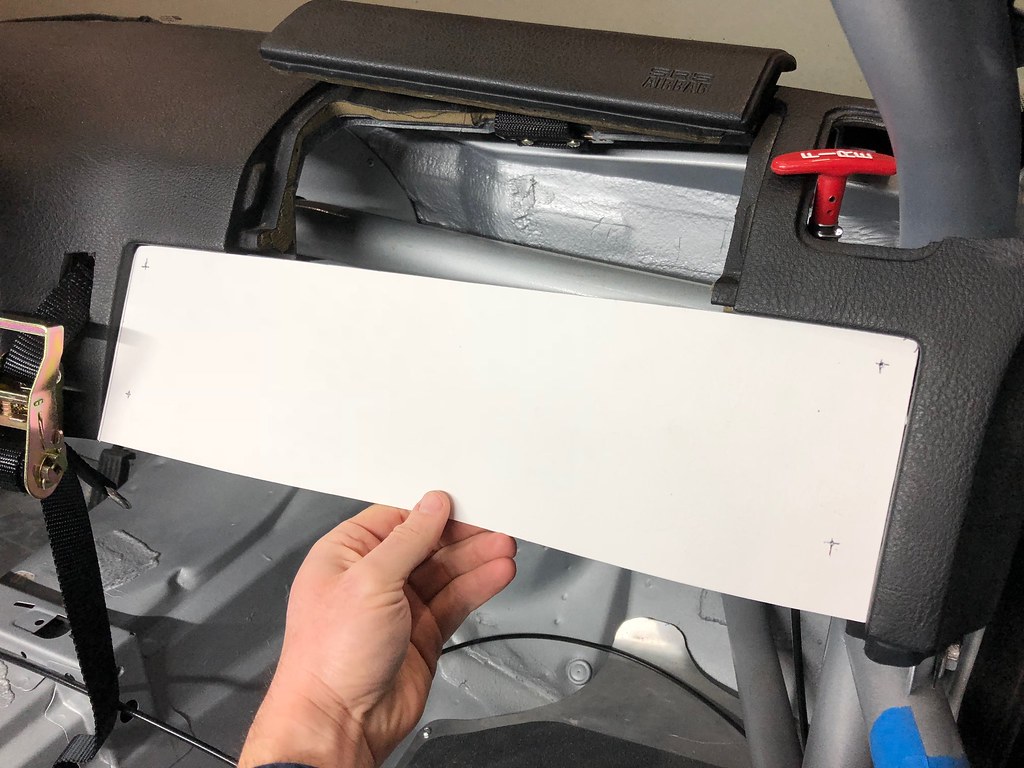
Finished up my glove box block off plate with fire pull and kill switch mounts. I may come back and remake it out of carbon later this year, we'll see. Final product shown with both fire cable pulls finished and routed.
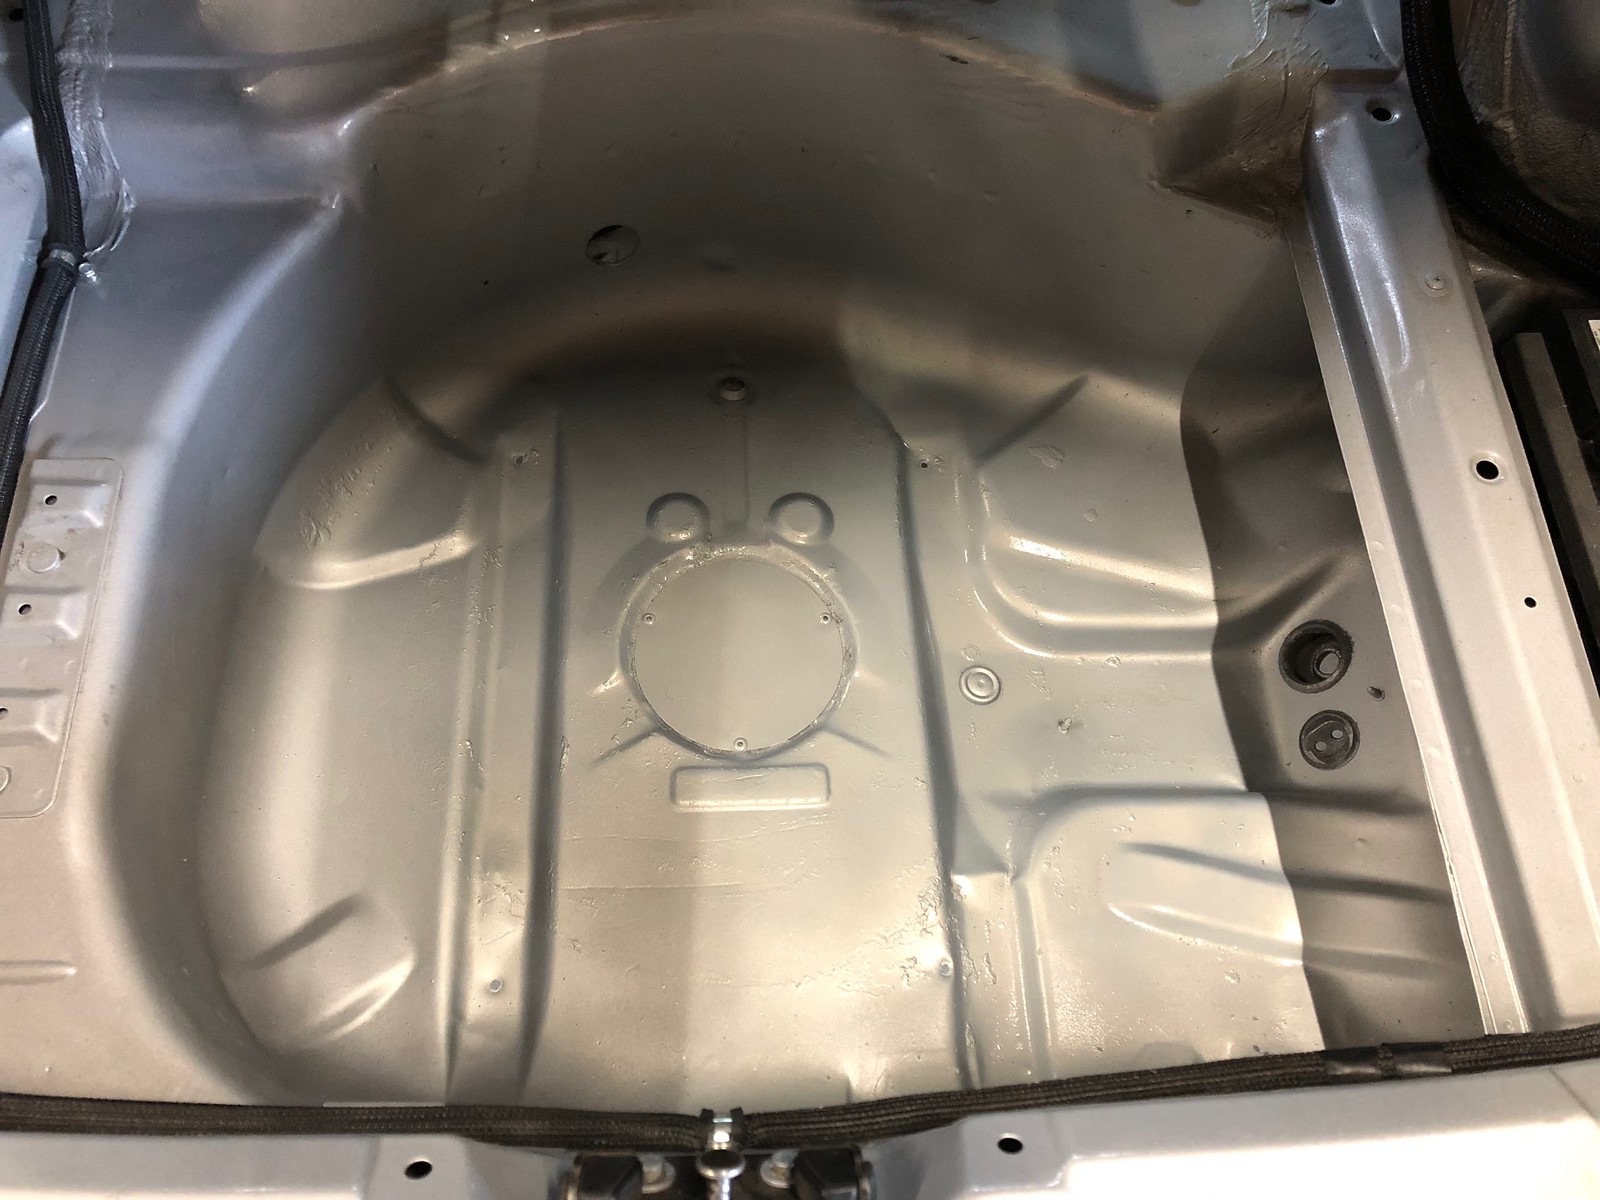
Drilled an access hole for the diff fill plug. This makes fluid changes a quick and easy task.
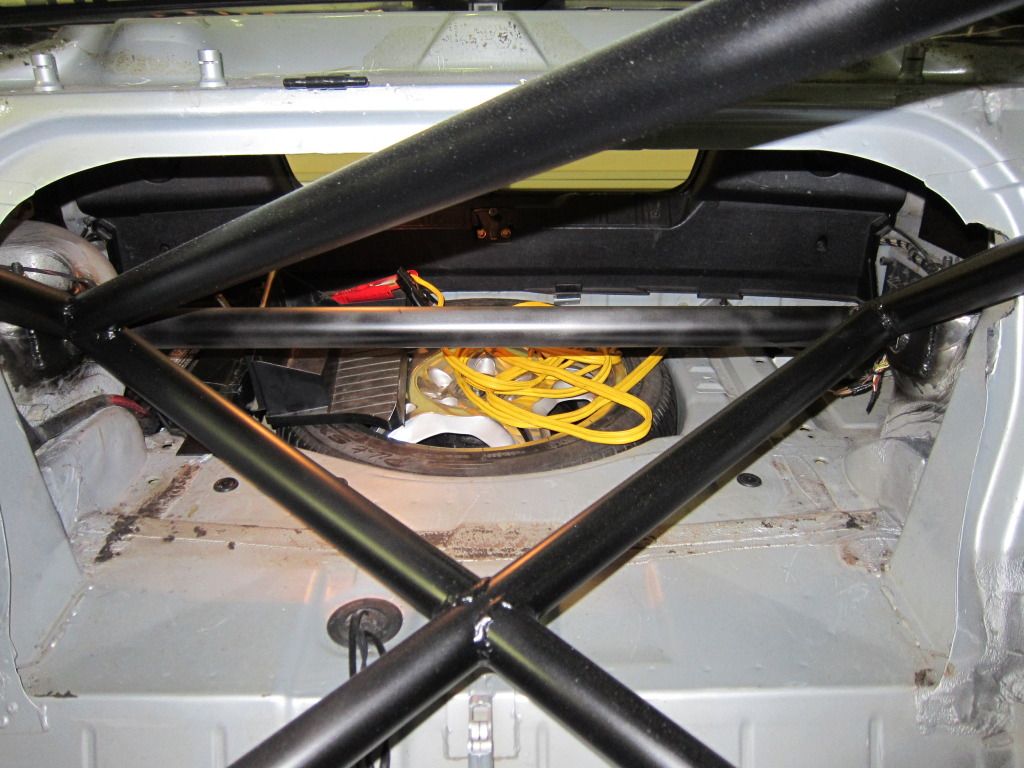
Cut a thin piece of aluminum sheet to fill the empty hole where the spare tire mount used to be and riveted it in place. I finished up the trunk with some old artic silver spray paint I had mixed up for the old car a while back and some clear coat. Not pictured are fresh grommets for the diff fill hole and the two holes near the battery.
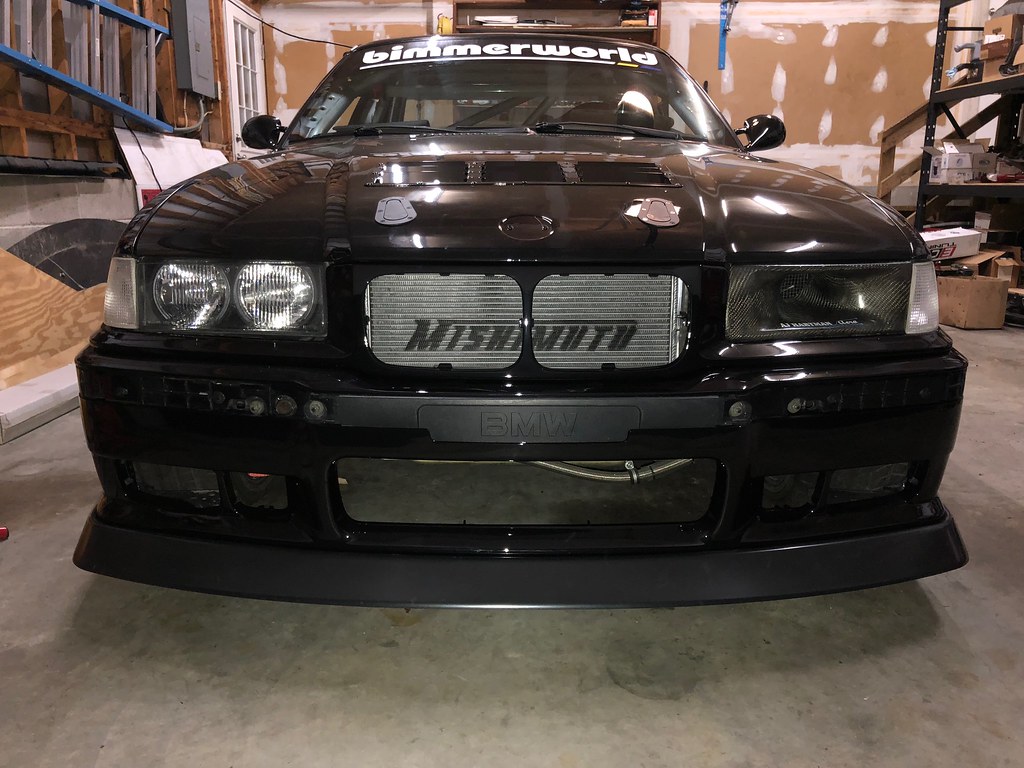
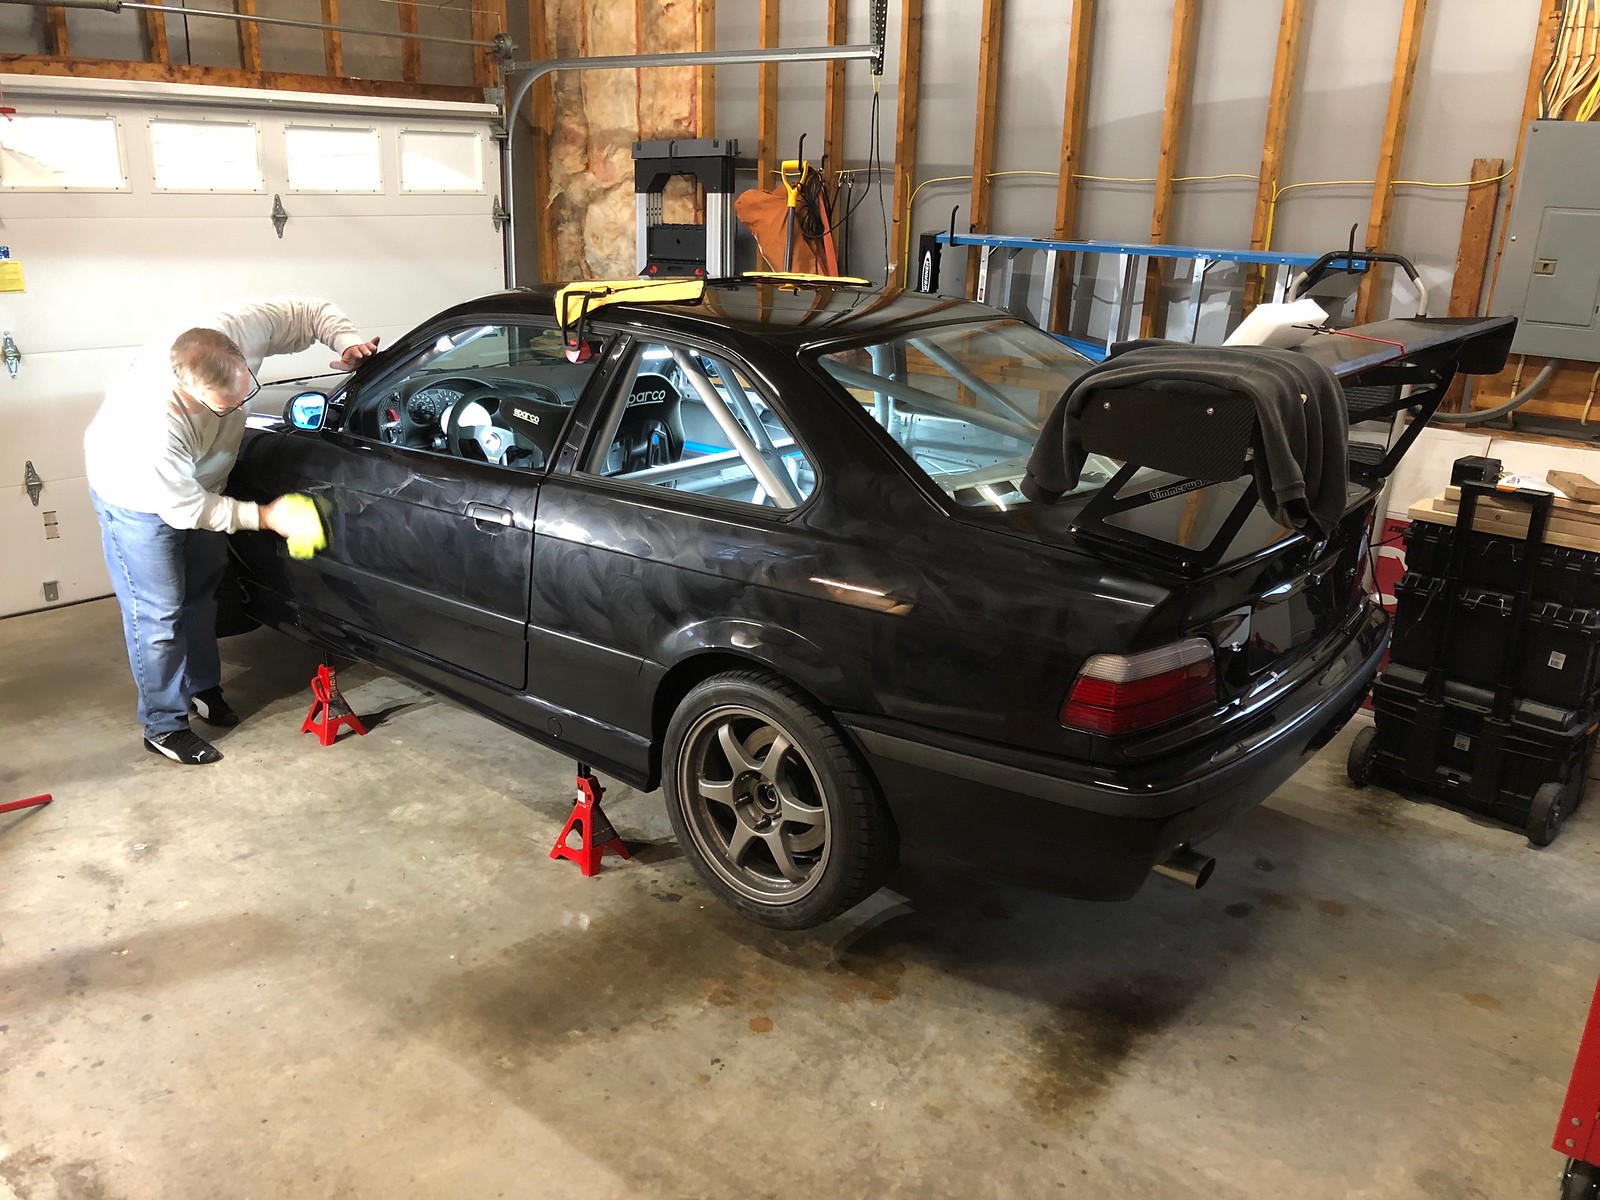
Dad came down last weekend and tackled something he's been wanting to do for a while now.... waxing the fresh paint!
Cut a slot in the bumper for the tow strap
Started on the radiator ducting yesterday evening. I'll wrap it up tomorrow night then move on to some new splitter mounts.
Member
This may be over thinking things but when I first saw that tow strap hanging in front of your brake intake duct, First impression was that it will disturb/limit the air going in to cool that rotor. I may be way off base and pics may be misleading my mind. I'd be curious to measure the air pressure on both side at the same time to see if the tow strap has an effect. Could the strap be pushed in to leave a clear path in? Brain overheated now. End of thoughts. Keep on prepping the car.
Member
The tow strap will have to go through the bumper and won't hang that low in the end.
Member
As said above, it goes through the bumper and doesn't really hang down far enough to worry about impeding air flow. The next to last picture shows the fitment with the bumper. I might tuck the strap but I'm not overly worried about it.
Senior Member
Supporting Vendor
Absolutely love this build. The attention to detail is great! Cannot wait to see photos of this thing out on track!
- Max
925-245-0773 /// info@apexwheels.com
Wheels /// Accessories /// Black Friday /// Vehicle-Specific Fitment Guides
Member
Thanks! One month until it makes its track debut at VIR.
 Posting Permissions


 Reply With Quote
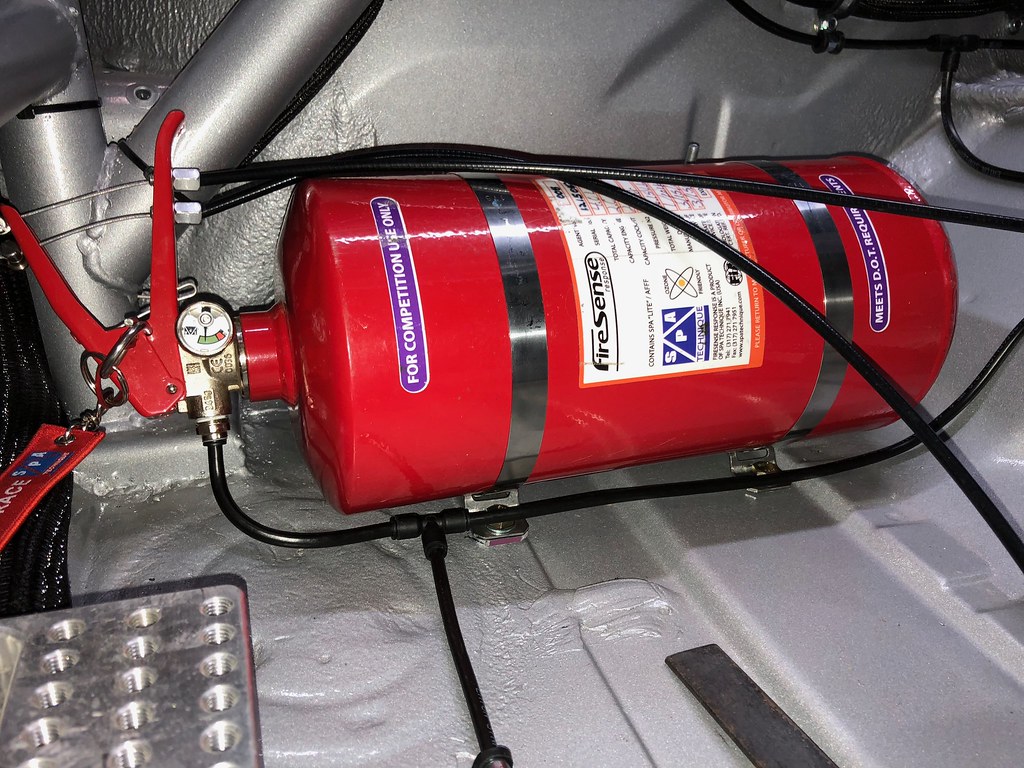


Bookmarks