
 Member
So, major major updates since my last posting.
I installed a catch can to properly route the crank case gasses, rather than venting to the atmosphere as it was previously. At the same time, I added some brass vacuum fittings to the manifold, JB welded them and the goose neck into the manifold (doing some boost sealing for some items to come).
I installed the UCC corsa RSC36 exhaust on the car, IT IS AWESOME!! I did a lot of research beforehand on which exhaust to go with, and every single review I read regarding this one was overwhelmingly positive, so I bit the bullet and went with a slightly more expensive product, but man was it worth it!! The install was a little tricky. It was bolt in, except where the pipes connect to the cats, where one pipe fits over the other, it was too tight. Wound up using a little barrel sander attachment to a drill to sand out the inside of the corsa pipe so it would slide onto the cat piping. This is a quality product. Visually stunning and perfect. And the sound!!! I dont think it can get any better.
All new hardware! (although the midpipe hangars seemed to be non oem, they both broke a 2 months later.. was a little surprised since the kit was from turner)
Side by side, what a difference!!
Almost in .
Participated in my first autocross event!! It was a lot of fun. Everyone was very friendly and helpful. I had an experienced member ride with me the first couple of runs to give me some tips, and then I drove by myself. Ate a lot of cones but I put out some pretty quick times which impressed the other guys, considering it was my first racing experience. I actually wound up placing 3rd in my class (got a certificate in the mail!), although I was probably only one of 3 in that class haha J But all in all it was a ton of fun and something I will absolutely revisit sometime in the near future.
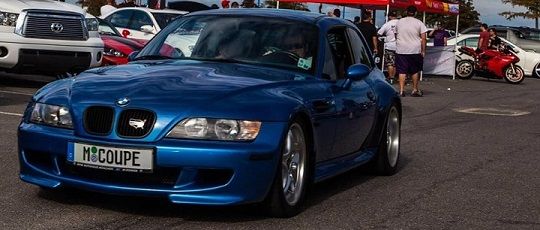
Attended bimmerfest east, as I could have predicted, driving to and from the event was by far the most enjoyable part of the day. There were some pretty cool cars there; I think I enjoyed the VAC tent and their RIDICULOUS built engines on display more than anything else.
That was an authentic LTW next to me, pretty sweet
I love these wheels, so beautiful after the refinishing
Here you see the fruits of my labor, polishing and sealant the night before. It was so deep and glossy it looked unnatural
Something I always regretted not doing when I had the chance was a lightweight flywheel and e34 M5 clutch. I had the clutch replaced about 8 months after I bought the car, way before I had the experience, let alone the tools to do the job myself. Anyway, it cost me dearly, I had everything replaced with new OEM parts. So, in light of some coming plans I had to go FI, I decided to do the UUC lightweight flywheel and M5 clutch kit. Put the car on 4 jack stands and 2 days later it was done! Not such an easy task, and not one I would care to do again anytime soon without a lift and transmission jack J But I am glad I did it, and could do it again if necessary. Also ripped out all of that stupid noise/heat shielding on top of the trans it was completely rotted and was making the job a real PITA. To note on that, it does seem to cause the transmission tunnel to become a little warmer than normal from inside the cabin, but nothing uncomfortable, and hardly noticeable unless you were looking for it.
The blue anodized UUC flywheel, I wanted to hang it on the wall for decoration, its a shame you dont see it after it is installed into the trans
All the tools are ready
Trans out
old OEM parts (they actually only have about 5000 miles on them they are for sale)
Also did the transmission mounts, engine mounts, shifter linkages and bushings and some seals while I was in there. Went with the UUC poly trans mounts with the deflector cups (forget what the technical name was). Engine mounts were M3 OEM if I remember correctly.
And since the entire exhaust was off, I took the opportunity to spray everything except the tips satin black. I hate seeing any of that shiny piping when looking at the car from the side or rear. I think it takes away from the look of the exhaust tips.
- - - Updated - - -
Time to upgrade those brakes!! The willwood 4 piston front and rear brake kit was pretty straight forward. It did require a bit of modification to the heat shielding, but nothing that a grinder couldnt handle with ease. I actually did the first 2 with metal snips, then switched to the grinder because it was faster. The only 2 issues I ran into were that after spacing the rear caliper brackets, the provided monting bolts were only threading about a quarter of an inch into their brackets. That made me uncomfortable, but I didnt have a choice but to move on. Secondly the required parking brake ring adaptors were not included even though they should have been@%!#@$% When I received the adaptor rings in the mail, I exchanged the bolts for slightly longer grade 8 ones from home depot. Problem solved, I am happy. The kit is pretty awesome. Besides the look, which I think is outrageous, especially behind those beautiful and newly refinished BBS RKs, they provide quite a considerable amount of stopping power. Anything was better than the stock brakes; the disks in the front I measured to be 4-5 mm out of spec, so they needed to be replaced anyway.
Parking brake rings to keep the functionality of my parking brake.
First picture of the wheel and brake, DAMN I think it looks good!!
Cutting the shielding to make space of the larger disks and calipers
Front wheel
Rear wheel
And here is a teaser shot of the next update as soon as I get all of the pictures and the story organized


Member
Yup love it! Keep at it
Member
I love this, car is looking really good and I love that you're doing the work yourself. Keep it up
Member
Thanks!Originally Posted by Jman23

Thank you. Yea, ever since I paid the first time to do the clutch (half the bill was labor) I decided never again is my car going to a shop. I can buy all the specialty tools and do it myself and still save. Much more fun too.
Last edited by cpalella; 11-14-2013 at 05:19 PM.
I don't even
wow incredible work, keep it going
Member
very nice car. I like that you are using the right parts and nothing flashy
Member
Nice build man. Car keeps getting better.
Member
The car looks amazing! I remember looking at it at Bimmerfest.... Loved it.
Member
awesome!
1996 328i (m52B28US) OBD1 euro ZF 5spd. 3.23LSD conversion / Chem. PnP Head/ DINAN stg.2 CHIP/ VAC race valves/ S52 cams/ A/C delete/ fan delete/ Washer Fluid resv delete/ ARP head studs/ Cometic 140MLS / VAC Solid Engine/trans Mounts/ CAI / 2.5"Borla race exahaust/ NGK R spark plugs, M50 Mani, S50 Oil Res, Riot Racing HFTB, SAMCO Hoses, JBR FW, X-Brace, Mtech Front Bumper, RE RSMs, stoptech SS lines, Bilstein sports, H&R Race Springs, S52 Reinforcement plates, Kosei K1 w/ bridgestone RE960as, Brembo/stoptech slotted rotors, M3 Trailing arms, M3 Calipers, M3 Axles, ACS strut brace, weight reduction.
http://mbuild.blogspot.com/
Member
Man how have i missed this thread? Awesome work man! Keep at it
 e39 2001 540i 142,xxx miles - CAI, Redline MTL, Bilstein Sport w/H&R Sport, m60 manifold, 10w AA, Hankook ventus v12, and maintenance
Member
They don't get much nicer than this...
Member
This was a little unexpected so soon, but I had my mind on it for a long time. I know there are many routes one can go for more power, be it a turbo, s54, LSX etc. But I wanted something which I felt would be easy for me to install as well as reliable in the long run (not to say that the other options arent, or cant be). Basically my main concern was that anything other than a bolt on supercharger would be out of my technical ability at the time. So I was presented with a great opportunity to have the AA stage 2 kit, and I jumped on it. The install was quite involved, not necessarily difficult, just very time consuming. I am sure someone with more experience could do it faster, but I like to work thoroughly (especially with something unfamiliar) so I think this took me roughly 5 days. There was a bit of modification required here and there, and I took the opportunity to cut out some random unused brackets in the bay at the same time. At first the kit appears to be impossible to fit, but with a lot of wiggling and fine tuning, it all fits, albeit very tightly. Kudos to AA for building a kit witch fits like this does. I also felt that their instructions where pretty thorough. I deviated a little from their design as I have a catch can with the cyclone oil separator deleted. I also went back and removed the manifold again as the goose neck came loose and wound up JB welding a brass fitting instead. That sucker is going nowhere now.
I did the whole install without removing the front clip.
I think I was most excited about installing the intercooler and the oil cooler since those are the parts you see from the outside, also the telltale evidence that there is something a lot more sinister occurring within the engine bay!
Took the opportunity to remove some unneeded brackets (cruise control goodbye forever)
The BOV was a bit of a pita due to the tight location nothing that a custom sixed allen key wont solve. Always frustrating though when you have air tools, every ratchet etc and you still have to go back to the stone age and make 1/8 of a turn at a time while lying on your back with a flashlight in your mouth and both hands squished into a stupid small location trying to stabilize a tiny bolt, tiny wrench and a big ungainly part
SC oil reservoir mounted
Bumper modified to fit intercooler
Installing the fuel pump
I dont do butt connectors it has to be soldered for peace of mind
Injectors going in
The car felt insane after the supercharger went in. LOADS of power from about 3500 rpms when the SC starts making boost. It is an absolute BLAST to drive the car holding the RPMs between 3500 and 7000. The sound is fantastic. Its like cocaine, you just cant stop doing it. Unfortunately the enjoyment was short lived .
So, officially I do not know for sure what happened, but I have a pretty good idea. The problem originated from a combination of inexperience and a missing part. Basically, I was driving the car with the supercharger, but without a tune. How could this happen you might wonder? Well, there was supposed to be an adapter included with the simon software which came with the supercharger which allows the customer to upload the tune to the ECU him/herself, rather than sending the ECU to AA to have them do it. The adapter would allow the device to be plugged into the OBD hub under the hood. Since the adapter wasnt included, I plugged it in under the dash (unaware that I was missing a part). I followed the procedure and according to the device, the software was uploaded successfully. What I didnt know is that you cannot write to the ECU with the OBD port under the dash, you can only do that with the port under the hood. So I drove the car, hard, for about a week, maybe more, without a tune. I was having random codes popping up, but I thought it was all just due to the SC causing an unbalance (as well as various vacuum/boost leaks that I was finding) so I was not too concerned. Bottom line was the car was driving damn well. Anyway, the tip off was that my redline was back to 6500 rpms, although it should have been 7020 according to the tune (I though the car was running in some limp mode and limiting the rpms to 6500 due to the various codes I was pulling.. this was a suggestion offered by an AA rep). Finally I was able to clear the codes and determine that there was nothing physically or electronically wrong with the car, and another AA rep concluded that the tune wasnt loaded. To make a long story short, the car had begun misfiring on cylinder 6 a day earlier. I loaded the tune successfully this time, but the damage was done. I had basically zero compression on 6 and was blowing smoke from the crank case, oil dipstick tube and blowing oil from the crank case into the SC piping pre blower (this was the AA kits routing for CCV.. should have installed the catch can back earlier). So I concluded with input from the FI section that this was ringland failure (again not 100% sure).
To say the least, I was depressed. To make matters worse, I was scheduled to move to CA to start a job in a week. So I was in quite a desperate situation. But I was not going to give up that easily. I was able to delay the starting date for my job a week to give me time to work on a solution. Luck was in my favor and there was an M52 from a 328 convertible 3 hours north of me with only 50k miles on it! Car was an automatic, so I concluded that the low mileage combined with an automatic transmission would probably equal a pretty healthy motor. I was correct, and so commenced my frantic first time engine swap. Took me a week, put the SC back in (of course) and she fired up on the first try. Thought everything was running well, so I was driving it for its first official test drive and BAM!! The plastic neck on the radiator blew off while I was under WOT and just SPRAYED coolant all over the just cleaned engine compartment. It basically shot straight into the SC first even sucked it up the intake *@&^%#*&$# Luckily there was enough lip left to put the tube back on and fill it with distilled water from a nearby CVS. Got lucky again and picked up a used rad locally planning on doing an aluminum radiator, euro expansion tank (mine is also broken) and samco hoses in the very near future. I only got the car to 100% literally hours before I got on a plane to CA. Unfortunately I spent all the money I saved for shipping the car on the repairs, so, nearly a month and a half later the car still isnt here. PICTURES!!
Borrowed a pickup truck from a friend and loaded the motor
Motor in the driveway.. now I have 2!!!
Cant believe how many parts fit in such a tiny space truly unbelieveable.
Cleaned it up
Wire wheeled all of the rust off the block and sprayed it with engine block enamel just hoping to keep it looking clean and rust free as long as possible.
Cleaned up the rear of the block
Old, original engine out!!
UUC lightweight flywheel and e34 M5 clutch back on
They are eyeing each other!!
Had a slight hiccup the exhaust piping was cut off before the connection to the headers. I was able to impact off all the nuts except one which snapped the stud off. Since I didnt want to swap headers with my old engine, I just grinded the stud off to make a smooth surface and drilled it out after everything was back into the car and used a nut and bolt to put it back. No problems to date. But it was a pita.
New engine going in
Almost there!
Drilling out the exhaust header stud
Of course every part is cleaned before reinstalling
A little refurbishment of my x brace. Just killing the rust.
SC bracket is back! So much easier to do the SC installation without the front clip in the way.
And mechanically, the car is back together. I drove it like this for a day while I was troubleshooting and checking for problems the looks I got from passers were priceless. Not sure if it looks menacing or just horribly broken haha
Did the valve cover gasket on the new engine just in case I certainly do not want to have to reopen that area anytime soon . . . . . . . . . . . . . . . unless I have s52 cams waiting to go in!!!!!!!!!!!!!!!!!!!!! (next project)
Poor old motor outside. I feel bad to treat it like that after all of the loyal service it has given me.
Finally some pictures of the car as she sits now (these were pre SC, but you cant tell)
As always, comments and criticism are welcome. But please be nice to my baby. And sorry for the massive post, I have been putting it off for too long!
And someone who deserves some serious recognition in every single project listed above is my friend Ray. He gave me a hand on all of this and without him, I would not have been able to do all of this work, or at the least, it would have taken me a lot longer to do by myself. I also have some pictures of his stunning e30 M3 which I will upload as soon as I find them!
Here are the beautiful bonus pictures!!!
Enjoy!!!
Member
Wow man that is some serious work. I wish I could do all that. I can't wait to start tearing into mine.
Member
Nice work man! Glad u resolved the issue
1996 328i (m52B28US) OBD1 euro ZF 5spd. 3.23LSD conversion / Chem. PnP Head/ DINAN stg.2 CHIP/ VAC race valves/ S52 cams/ A/C delete/ fan delete/ Washer Fluid resv delete/ ARP head studs/ Cometic 140MLS / VAC Solid Engine/trans Mounts/ CAI / 2.5"Borla race exahaust/ NGK R spark plugs, M50 Mani, S50 Oil Res, Riot Racing HFTB, SAMCO Hoses, JBR FW, X-Brace, Mtech Front Bumper, RE RSMs, stoptech SS lines, Bilstein sports, H&R Race Springs, S52 Reinforcement plates, Kosei K1 w/ bridgestone RE960as, Brembo/stoptech slotted rotors, M3 Trailing arms, M3 Calipers, M3 Axles, ACS strut brace, weight reduction.
http://mbuild.blogspot.com/
Member
Awesome build! Keep up the good work, get some headers and open up that exhaust!
Infiniti G35S Turbo BMW M3/4/5 Ninja ZX6R 636
Penn State University '08...better than your school since 1855
Sigma Lambda Beta International Fraternity Incorporated
UTI Class of '10, BMW "STEPchild"
Acurazine.com Mod Squad
Member
Jesus that's a ton of work for your first car.
Member
Thanks! That is exactly my aim, to keep it looking as OEM as possible
Thanks
Thank you
Thanks
Haha I update it pretty irregularly, thank you
Thanks
Thank you! Well I hope you get yours resolved soon, I hate to see any car as nice as that sitting
Thanks
Thank you, yea I am kinda planning on that, might go catless (considering the car is already entirely violating California law, where I live now). I would like a place to mount a wideband sensor for the SC and was thinking this might be a good way to accomplish that. Long tube headers, cat delete and x pipe?
Hahaha well ,it started out slow, 4 years ago when i bought it I didn't know anything about the car, but now I am pretty comfortable to tear into any part of it. I bought it for two reasons, because I love the style and driving the convertible, but also because I love working on it and taking it apart!
Member
Changed the name of the thread since this has really become a build, not just some newb posting pictures of his riced out e36 :P
Sooooo this has been quite a long time in coming. I have been collecting photos of all the work I did in recent months, but have been lazy uploading them. I will try to be better about this. Progress on the car has been moving very quickly recently.
First, I moved to California and I got a job. I live with family until I make enough money to rent/buy a house. Didnt have the car right away since I spent all my saved money for moving it on a new motor etc.
Built a garage for when it arrives
This is the SUV tent from shelterlogic. Pretty robust. Makes a nice temporary garage.
Here is the view from the driveway. Not exactly roughing it .
My baby is back!! Here is the truck she arrived in. Intercity lines, forum sponsor. Cant say enough about their great service. It was worth every single penny. I would HIGHLY recommend them. Apparently the car was transported along with 3 brand new corvettes and a Ferrari F40 :O :O :O That makes me feel safe.
///M stripes on the valve cover. From a fellow forum member ///Mposter. Sweet product, I like it a lot. Also purchased white BMW lettering and black striping for the fuel rail. All pretty sweet stuff.
Blacked out emblems. Looks much better than faux carbon fiber and flows with the car much better imo.
Time to tackle cooling, for once and for all (or so I thought )
Started building a much need workbench and shelves.
///M stripes are done, and ghetto tubing for the catch can is visible shortly ditched that.
Got some cubby shelves from work plus an entire selection of metric nuts and bolts. PRETTY AWESOME.
Drove Angeles Forest Highway. The road looks like a toddlers scribbles on a map = AWESOME DRIVING. I highly recommend it if you have the chance.
Aanddddddd SAD NEWS. DEATH to the reiger front splitter. Cant believe I drove for nearly two years in Jersey without so much as a scratch only to pulverize it within two weeks in California.
Doesnt look half bad without it.
Gone but not forgotten. Decoration now. I will be replacing this piece. I like it too much.
Added ///M striping to my workbench. LOVE IT. Great deal at homedepot. It was about 3 bucks per little tester paint samples. Perfect for the stripes.
Still waiting to get all of my tools and stuff from NJ, I have been just getting by with some stuff I was able to stuff in my suitcases.
Thats all for now. But not for long. I have like 100 more pictures and wayyyyyyyyy more stuff to upload. Coming soon
Plus a new edition to the garage!!!!!
Enjoy!!!
Member
so much respect for the amount of work you are doing to the car and for the car, as well as not giving up when it does. keep it up.
Member
Thanks, I appreciate it. I will never give upI love it too much!!
- - - Updated - - -
So I decided I had enough of the oil seeping from my pan and went ahead and replaced the gasket. Not fun. At all. Least favorite project so far. (worst is I had to do it again a couple months later )
Anyway, word of wisdom for anyone else, just drop the front subframe, power steering pump and reservoir (so you dont have to flush PS system) and disconnect the steering linkage. Much easier and lots of space to work with rather than trying to maneuver around to get the pan out.
Basically I think my catch can and CCV plumbing was too restrictive for the supercharger and I wound up pushing oil out of a lot of seals. Hence the oil pan gasket, valve cover gasket needing replacement. To remedy the issue I drilled out the valve cover vent so it is directly open to the interior of the motor. And vented the valve cover to atmosphere. I have a kit to plumb the CCV to the exhaust, just havent installed it yet.
And I bought a present for myself. Got a good price on them, brand new. Raceland supersprint rep euro headers. 60mm collectors hehehe this will be fun.
NEW CARRRRRR 1989 325i 216,000 miles on it. Bone stock. Champagne with tan interior. 5 speed obviously. It will do the DD duty since the vert is just too nice to beat up every day on the highways. Plus now I dont have to worry if I want to do serious work on one car I can drive the other.
Her name is Ophelia and I will create another build thread for her.
Driving back from work I had this epic view. Sunlight and clouds were just perfect.
Hung them on the wall for decoration until I install them J
Washed and waxed
Installed a Z3M shift lever to make an oem short shift kit. With the UUC DSSR it does scrape the driveshaft ever so slightly. I ground a bit off the DSSR so I wouldnt feel/hear it scrape anymore. Now it is fine (pictures later). You can see the difference in layout.
Lots more to come.
I don't even
Dang mega update awesome stuff. your garage intrigues me, I may have to get one for myself
My car has been garage-less for nearly 2-years and it is super sad lol
Member
Thanks! The garage is pretty sweet for a cheap/temporary/quick setup. It's the "suv" tent, 13'x20' if I remember correctly. I used reclaimed railroad ties to form the foundation (I also did this to gain more vertical clearance since my uncle will use this tent to store his massive offroading camper van after I am gone). The floor is 3/4 plywood on a frame of 4x4s leveled off with dirt to provide extra support (I wanted a very firm and sturdy floor so I could jack the car up without buckling the plywood). There is tons of space even with shelves and workbench on both sides. I also have my other (broken?) motor, a cherry picker, and a couple boxes of parts on the back wall. Still have like 3-4 feet clearance on the front and back of the car. Its awesome. DO IT.
Nice wheels btw.
Last edited by cpalella; 05-12-2014 at 11:50 AM.
Member
So I got into a bit of trouble. Agreed to help out a fellow BMW enthusiast by driving with him to sell his car (I would drive him home). We met at my place and then headed out to the coast and north on PCH. We both know how many cops cruise the Malibu stretch on a Saturday morning, not to mention the traffic. That being said, its almost physically impossible to be speeding or whatever...
Cops pulled us over, took our keys, impounded our cars and dropped us at a gas station a couple miles down PCH and charged us with "speed contest" aka street racing. Most ridiculous day of my life. Hired a lawyer of course. Several months later, got the police report. It states that the cop's attention was drawn due to the loud exhausts (fair enough), then it states he saw us "stop at a red light and then accelerate with traffic" and that "as our speed increased he heard the rpms of our engines grow louder and get higher and higher" and then he states he saw us "weave traffic". There was no "speed" listed on our ticket. Essentially we were accused of street racing because a cop saw us "weave" traffic. We weren't speeding. And for what it's worth we weren't weaving traffic either. Maybe changed lanes a couple times, using my turn signal and driving like a normal person.
Anyway. It all got settled... wound up with a $50 fine and a 1 point infraction for which I have traffic school.
The car was in good company with 3 GTR's in the impound lot. They were all clocked doing 130mph+ on PCH racing with an M3 chasing and filming....... sooooo what did I do wrong again??????
The rest of my tools arrived from NJ WOOOHOOOOO
Went to cars and coffee woodland hills
READ THE SIGN
Test fitting the headers on the old motor... they needed to be drilled out to fit
I have too much stuff.....
Finally modded the DSSR to clear the guibo with the Z3M short shifter
Not sure if this is normal, but the clutch fan was rubbing the rad overflow line with the mishimoto radiator, so I trimmed it a little
Finally started working on the exhaust. All the parts arrived!
The vibrant resonators were quite pretty.
Headers installed
Midsection completed. It was my first time ever welding. I think I did pretty well, wound up taking it to a coworker who tig welded a couple pinholes I couldn't fix. I used an arc welder... some parts were easy, some were a pain. I will get a decent mig welder for the next time I weld exhaust.
DAMN THIS THING IS LOUD!!!!! Much louder than I anticipated... oh well. I'll build another midsection sometime to quiet it down. So I can swap between them depending on my mood(everything is v banded, so its easy to switch/swap)
Some more goodies... some nice lug nuts finally

Member
Great thread man. Loved reading it. Loved what you did to your car. Unfortunate on some things that happened to you but happy you kept at it. Great looking vert man. love the garage you built. always nice having one. Keep up the great work man.
Member
Thanks for the kind words. It all comes with the territory. Good and bad.
 Posting Permissions


 Shadetree30
 Reply With Quote


Bookmarks