
 I <3 My Sharpie e36
Okay, winter is upon us, and I had only two issues left over from my rebuild. One was the A/C and one was the rear window defroster. Go figure. Now there are plenty of threads on A/C issues, parts and diagnosing, but almost nothing on repairing the rear window defroster.
Normally there are two issues when the rear window defroster is not working. Assuming there is power to it - either one/some of the lines are interrupted/broken, or the tabs that connect the element and the grid on the window are broken off. Repairing grid lines is very easy, all you need is some masking tape, and conductive epoxy. The previous owner of my donor car had somehow yanked off all the tabs to the defroster grid as well as the AM/FM antenna. Repairing the snapped off tab was a bit more confusing since the AM/FM antenna runs through the rear window as well. (I should also state, just in case, that I am not repairing the AM/FM tabs since I don't listen to the radio. However, the process is the exact same for those.)
On to the DIY:
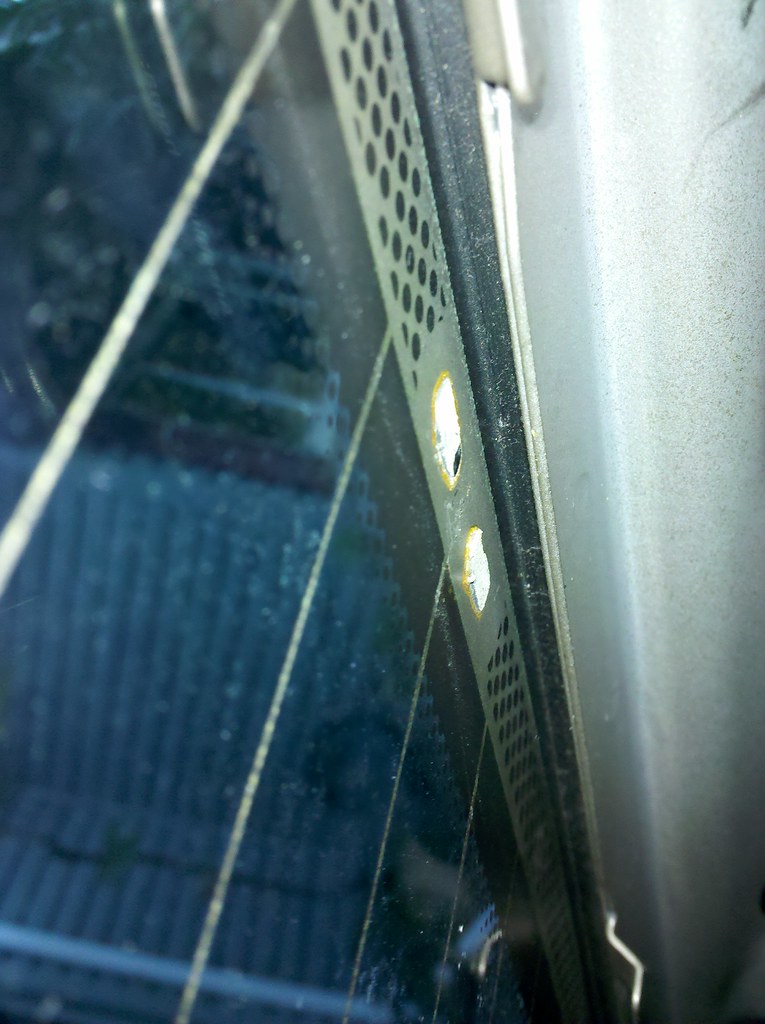
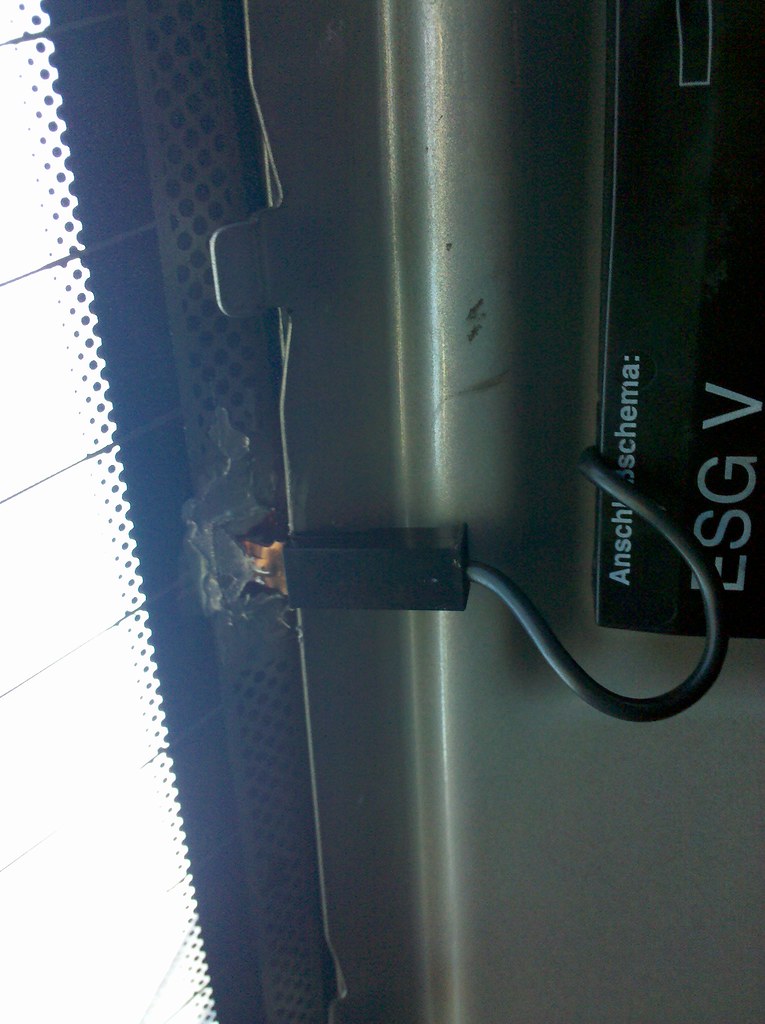
The problem: Snapped off defroster tab
R.W.D. The problem by greggdrake, on Flickr
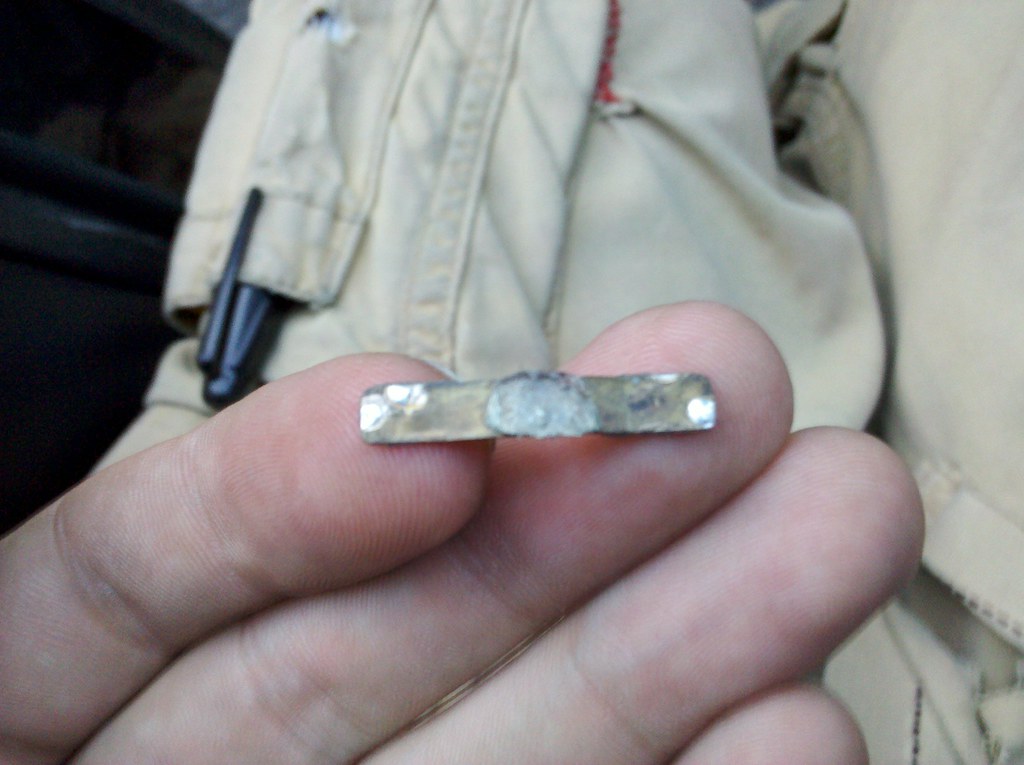
If this little piece is still on the glass, go ahead and grab the smallest standard screwdriver you have, and gently pry it off.
R.W.D. Snapped off tab by greggdrake, on Flickr
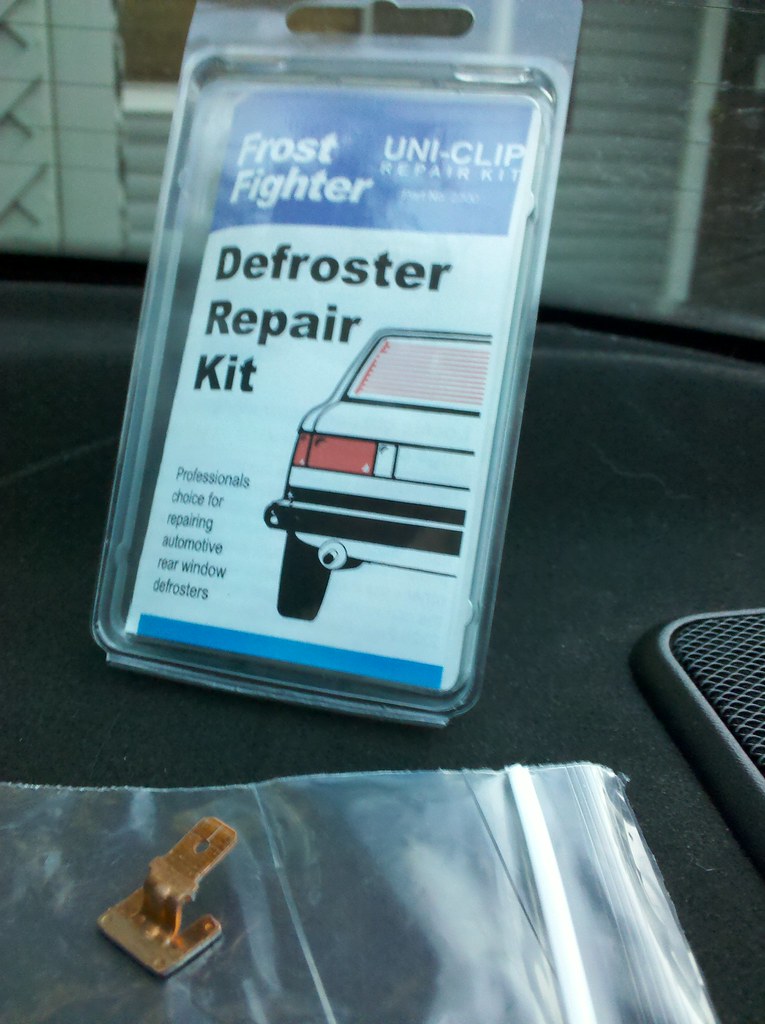
My weapon of choice:
R.W.D. Repair kit by greggdrake, on Flickr
The guys at FrostFighter.com really know their stuff, and their kit is a direct fit for our connectors. I used two parts for this job;
-2000 Tab Bonding Kit: Includes sandpaper, mixing/applicating sticks, little cardboard squeegee, and most importantly, a very high quality two-part silver conductive epoxy
-2300 Uni-clip replacement kit: Includes one tab (not really a kit)
-(Also available is a connector, if that happens to be missing - lucky for me, mine was not missing or damaged.)
-500w halogen work light or hair dryer. You will need to cure the two-part silver conductive epoxy with heat at about 150 degrees F. Anything more will be detrimental to your work here.
*SPECIAL NOTE: Follow the directions in the package you receive, or the ones posted here. Not the ones online. They are be conflicting, and will end up a waste of your time and product.
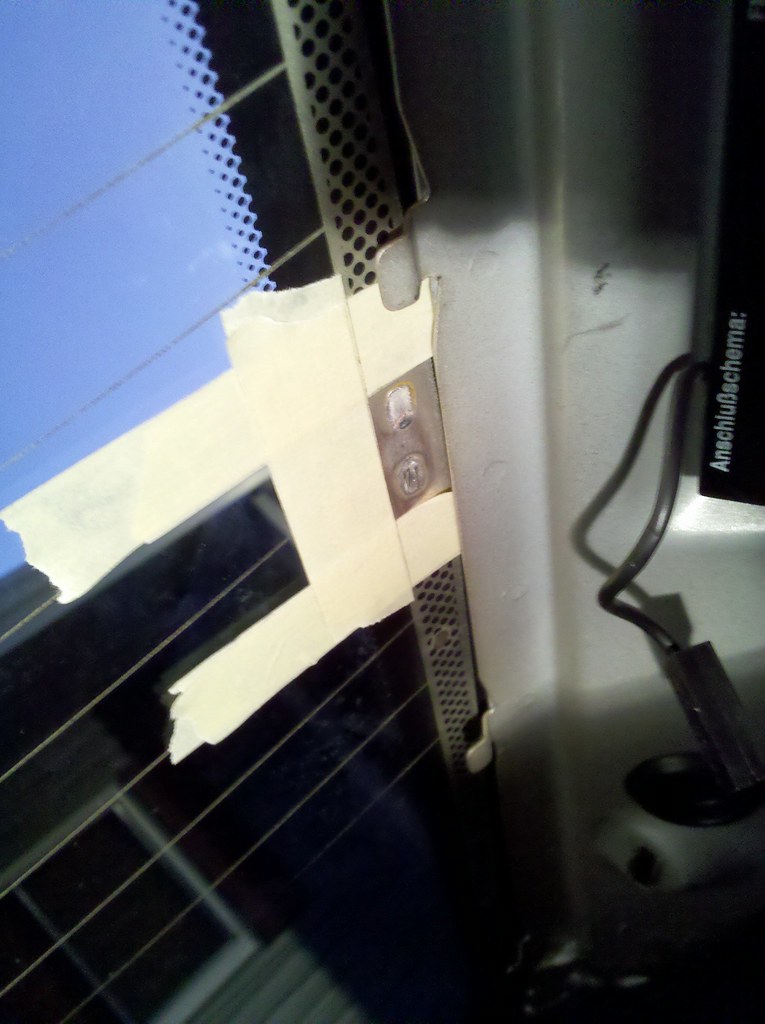
Mask off the area with two layers of masking tape. Lightly sand the damaged area. Clean lightly with denatured alcohol.
R.W.D. Area masked off and sanded by greggdrake, on Flickr
Test fit the tab, if it needs to be bent slightly, do it now before you start. Mix equal parts of the two-part silver conductive epoxy in the plastic container the kit comes in, with one of the sticks. Mix for 45 seconds, then apply within the masked off area. You have 2 minutes working time once mixed. Take one of the cardboard squeegees and smooth the epoxy out. Next, take one of the tabs, and dip it in the remaining silver epoxy. Apply the tab (I also took the remainder of the epoxy and filled in the areas around the edges of the tab, since this is expensive stuff and I don't want it to come undone later on) and secure with a piece of masking tape. Let this sit for 10 minutes before applying heat, this is crucial.
Hairdryer in action:
R.W.D. Heating curing by greggdrake, on Flickr
After 60 seconds, I set the 500w halogen in front of it so I could go do something else. This needs to be at approx 150 degrees F for 30 minutes to cure properly. I didn't trust a hair dryer propped up and unattended for half an hour.
End result:
R.W.D. Fixed by greggdrake, on Flickr
You will notice on the defroster elements that there are 2 leads on the passenger side, and 3 leads on the driver side. Only the bottom leads on each element are needed. They are labeled "Heizung" which translates to "Heater" of course. The top leads are for the AM/FM antenna only, and so not affect the defroster element itself. The whole window will still defrost. If you wish to repair those, the process will be the exact same, although mine are coated in a silicone or something which would have to be removed before the repair takes place.
This is where the AM/FM tabs attach (Notice they are above the defroster grid and not inter-connected):
R.W.D. AM FM leads by greggdrake, on Flickr
That's all, you're done!
Member
Nice DIY. Especially cool that the defroster repair kit has a picture of an e21 on the package.
I <3 My Sharpie e36
I thought that was pretty sweet too! Thanks man, I figured if it's something nobody had documented yet, it was worthy.Originally Posted by joey79

*Attachments added, just in case links expire.
If there's any questions, let me know guys.
I <3 My Sharpie e36
Member
nice product and DIY, thanks
E36 DICE MediaBridge BT and iPod support Photo location of the cabrio drain holes. Custom heated seats and lumbar support retrofit. Glovebox charging sockets and cupholders. E36 PDF Schematics UK Aftermarket E36 OBC bulbs Convert rear lights from non check-control to check-control DIY BMW E36 MFSW retrofit pictoral DIY All BMWs UK cheaper source for electrical connectors, Farnell, RS BMW INPA success E46/E39 onwards E36 vert mood lighting DIY BMW E36 puddle light and inner handle illumination DIY. E36 convertible flat bungee tension strap fix DIY BMW E36 PDF manualBMW E36 vert water in motor of tonneau area fix.
Member
nicely done. I love the defrost on my E36. Totally clear screen in like 7 minutes.
I <3 My Sharpie e36
You're welcome!
Thanks, I did notice it took much less time with new contacts, 1.5 minutes!!!
Last edited by Spyke; 10-18-2011 at 03:55 PM. Reason: Automerged Doublepost
Member
Nice DIY
If the girl in your Avatar sat in your back seat it would never frost up HAHAHA
A hundred years from now it will not matter what my bank account was, the sort of house I lived in, or the kind of car I drove. But the world may be different, because I was important in the life of a child.
for Zach, Everett, and Lilly
I <3 My Sharpie e36
I <3 My Sharpie e36
Member
Do you have any experience fixing the strips themselves? I've got a couple broken ones. One of the antenna strips is also broken which pretty much rapes my radio quality.
Member
I have experience with that. If its only a few tiny spots the repair kits you can get will work. I removed some tint on my 325coupe rear window and managed to take some of that grid with it. I tried using one of those paint on repair kits and it worked. The down side is that those lines are Sooooo thin that you'll never get the repair to blend in. It will always be pretty visible.
In the end I found it was much easier just to go to a junk yard and get a complete rear window that had never been tinted and I installed it myself. This was another mistake. I should have paid the $50 and had a shop install it. The glass didn't leak but it never sat correctly and I could never refit the trim pieces to it.
Also be aware that certain years do not have the same connectors as later years. If I recall correctly the 92 and 93 cars have one less connector for the defroster or maybe it was the antenna. I did a DIY on the process of replacing it and I explained it all in that.
Bleed your cooling system http://forums.bimmerforums.com/forum....php?t=1709482The ULTIMATE OEM Alarm/Keyless thread http://forums.bimmerforums.com/forum....php?t=1792200
Member
Okay, thanks. I still have some goo left over from the previous tint job, too, which doesn't come off with acetone or anything else I've tried, so I'm going to just get a rear window from a junkyard and get a shop to install it. Two birds with one stone.
 Posting Permissions


 Reply With Quote
Bookmarks