
 ____ as in Apple
I've been reading as many swap threads as I could find and watching as other people made mistakes and conquered their challenges. I’ll be honest that I don’t have access to the same fancy tools and lifts that many of you have so I’ll be trying to do this with as many hand tools that I have. I also don’t have the welding and fabricating skills that many of you have, but I’m going to do my best.
I was planning to finish this swap sometime before the end of 2011 when it starts to really get cold where I am. I wouldn’t want to be wrenching at night when temperatures can reach as low as 60 degrees F. Just playing with you guys.
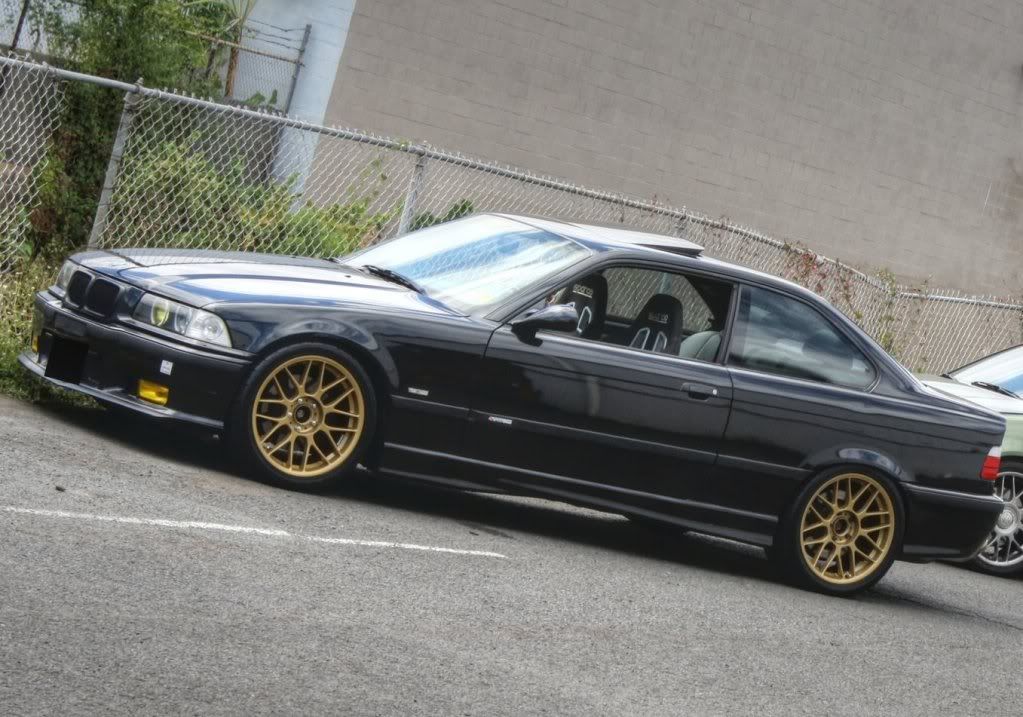
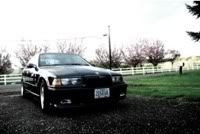
The car is a 1998 M3 Cosmos black with a dove interior.
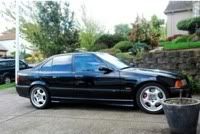
The front dove Vaders were swapped with Sparco Milano 2’s that I got used for a really good deal.
The wheels are BBS RC303’s in 18x8.5 ET38. The tires are Federal SS 595 performance summer tires with a tread wear of around 240. Size is 255/35, and it barely clears the slightly rolled rear fenders. I’m running a 15mm spacer up front to clear the TRM coilovers. The wheels were powder coated a nice gold since I need to remain somewhat true to my JDM roots.
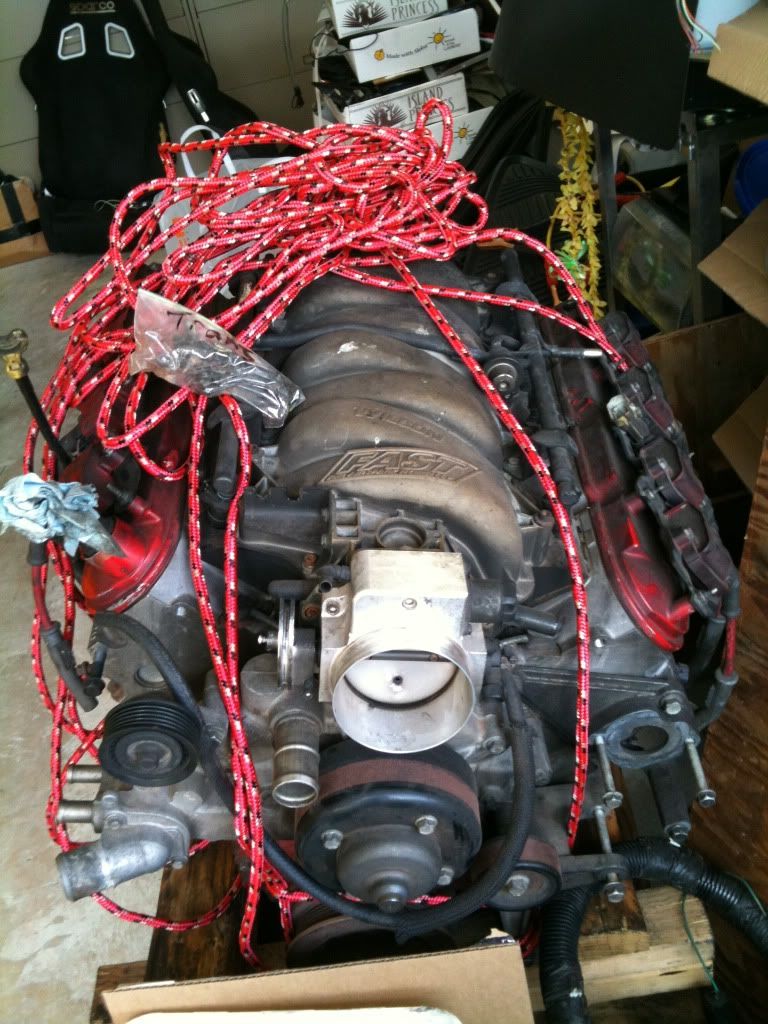
I picked up an LS6 from a friend of a friend. The package included a T56 out of an f-body, a PCM, and an unknown wiring harness, among a few other acessories. The engine was in a small engine fire in which the fuel rail may have come loose and dripped some gas onto the headers. One of the valve covers is a little toasty as well as a few coil packs. The main thing I’m worrying about is sourcing some connectors for the coil pack harness, and a few other connectors that were slightly melted in the fire.
There are actually quite a few upgrades to the motor that was already done including:
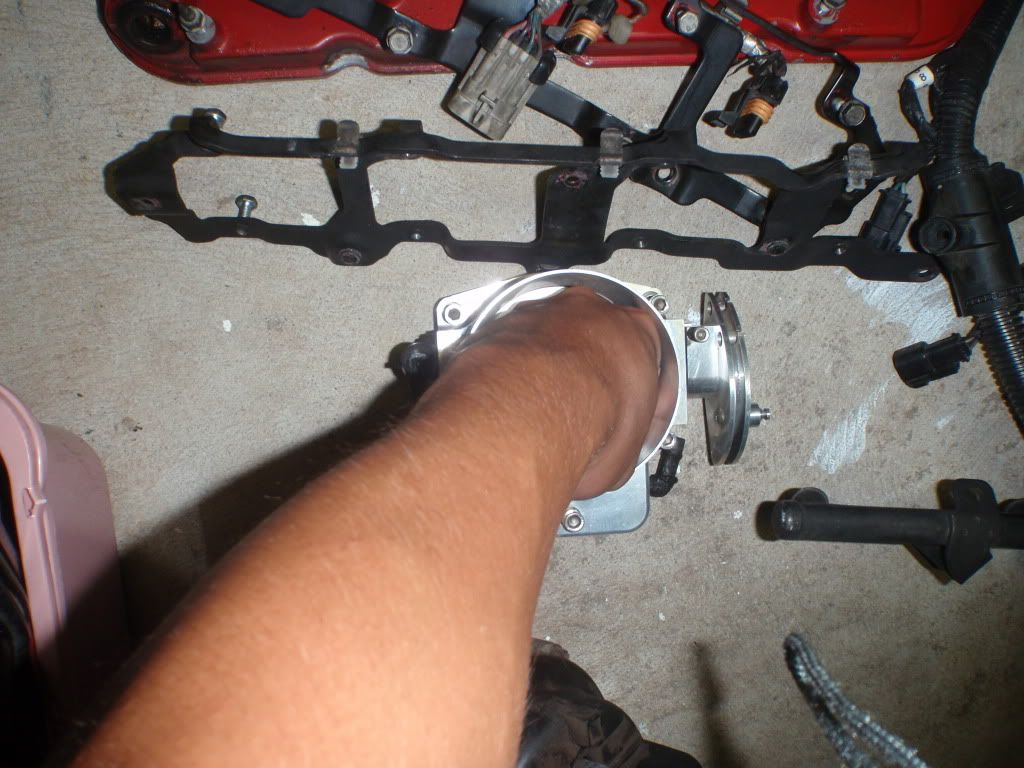
slightly burnt FAST 92mm intake manifold (the runners are still OK)
- a Nick Williams 92mm throttle body
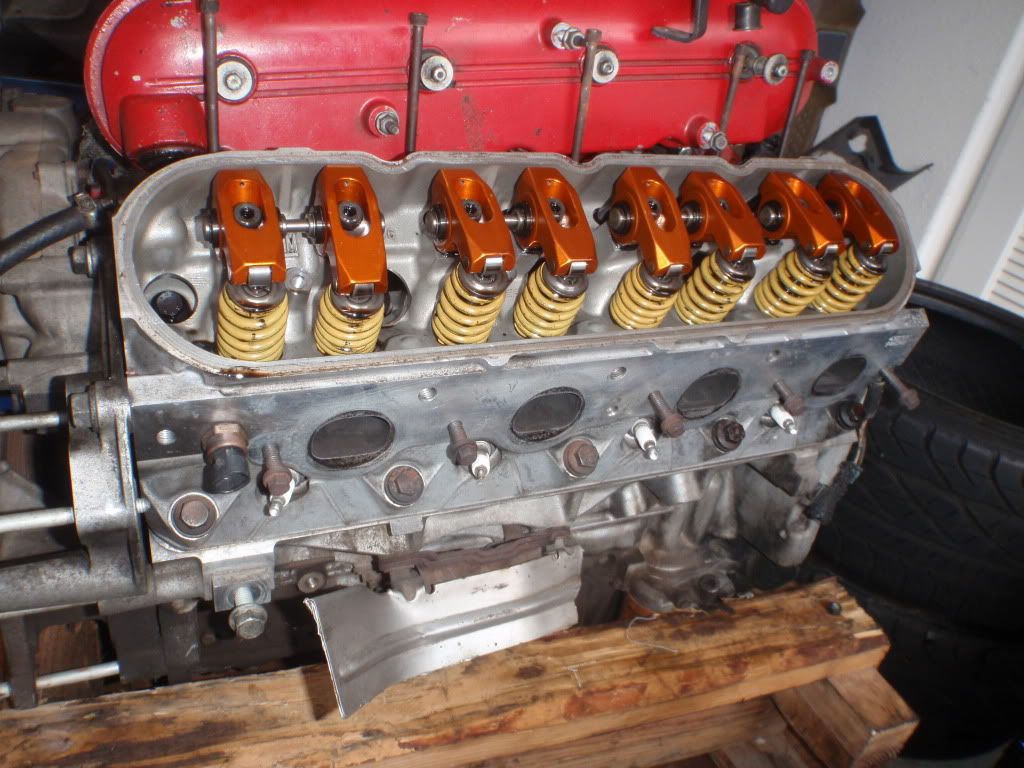
- a set of Harland Sharp rocker arms (oh man, they are pretty)
- LS6 valve springs (I guess these came stock on the 243 heads)
- trick flow push rods
- LS7 hydraulic lifters
- ARP head bolts
- MSD wires
- stock Denso coil packs
- a SPEC clutch kit (which might be on its last leg)
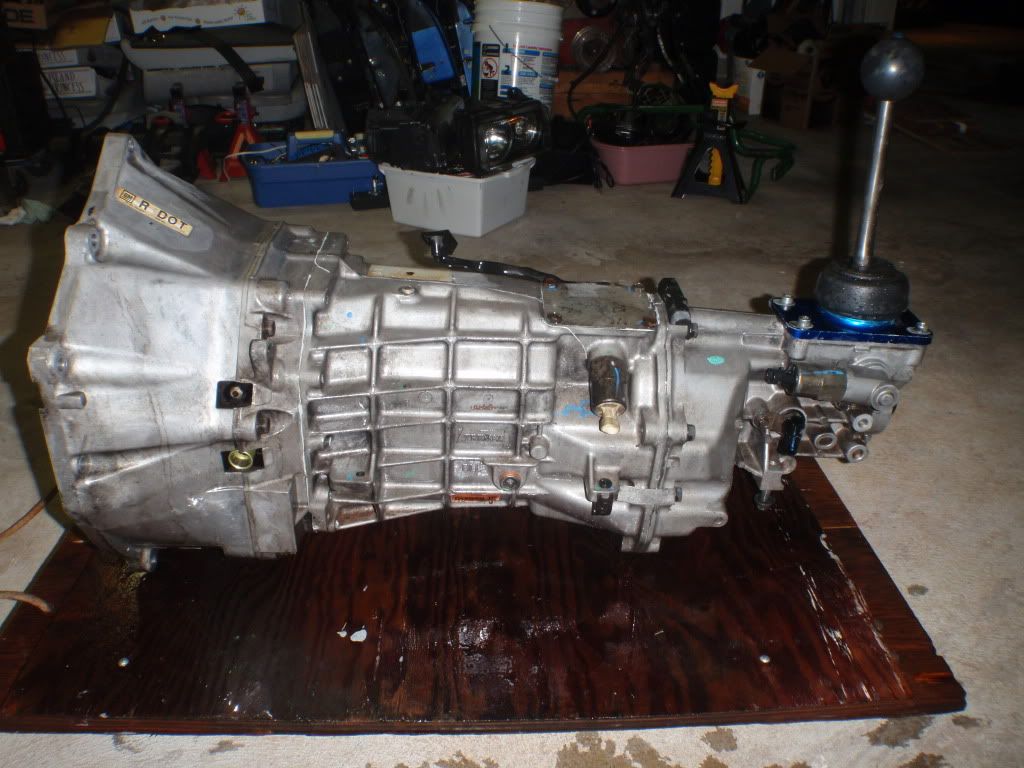
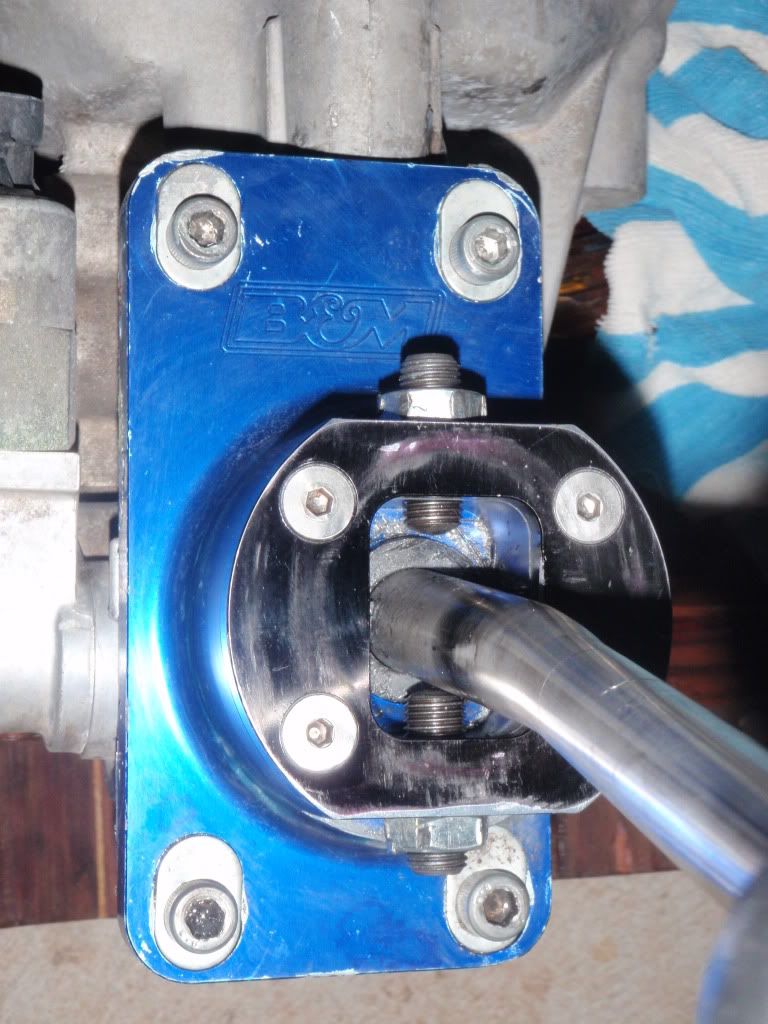
- a B&M ripper shifter on the t56
- and a GM performance parts (ASA) cam
Duration @ 0.050" (I/E): 226 deg/ 236 deg
Lift (I/E): 0.525"/0.525"
Lobe Separation: 110 deg
RPM Range: 2500 – 6500
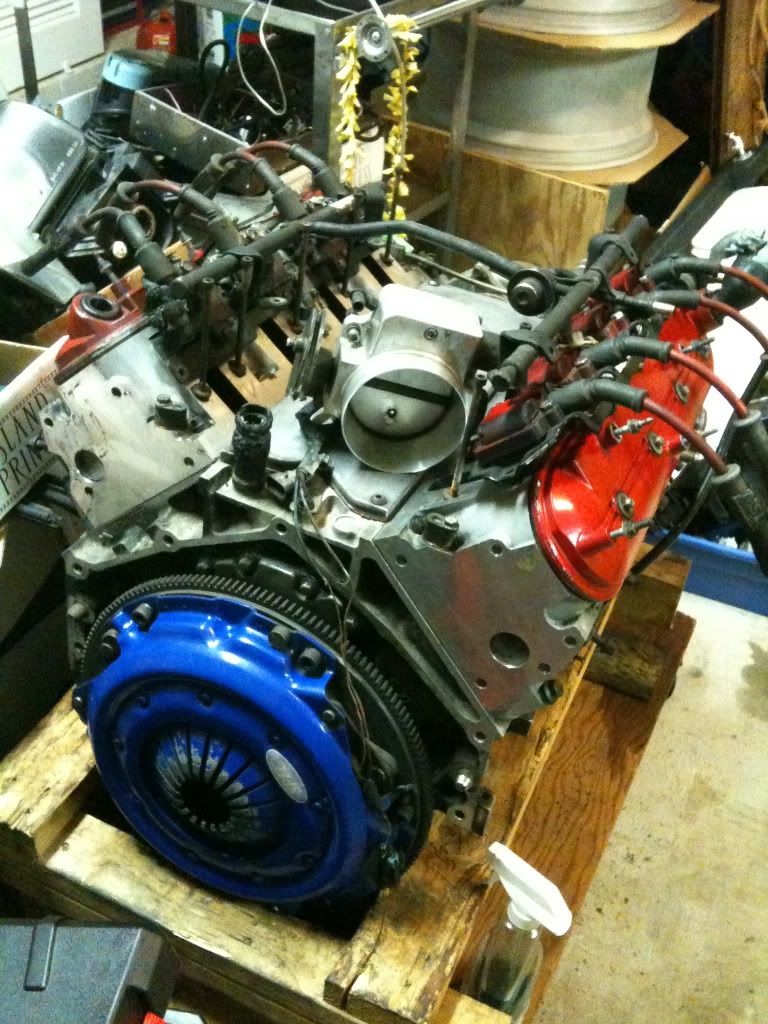
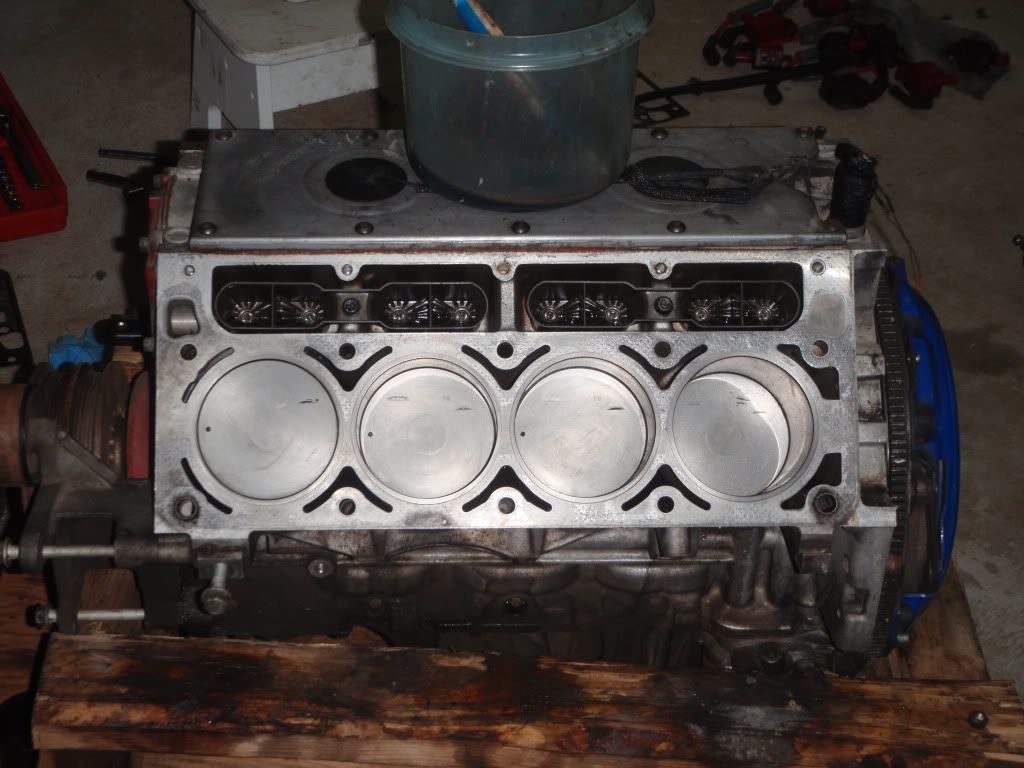
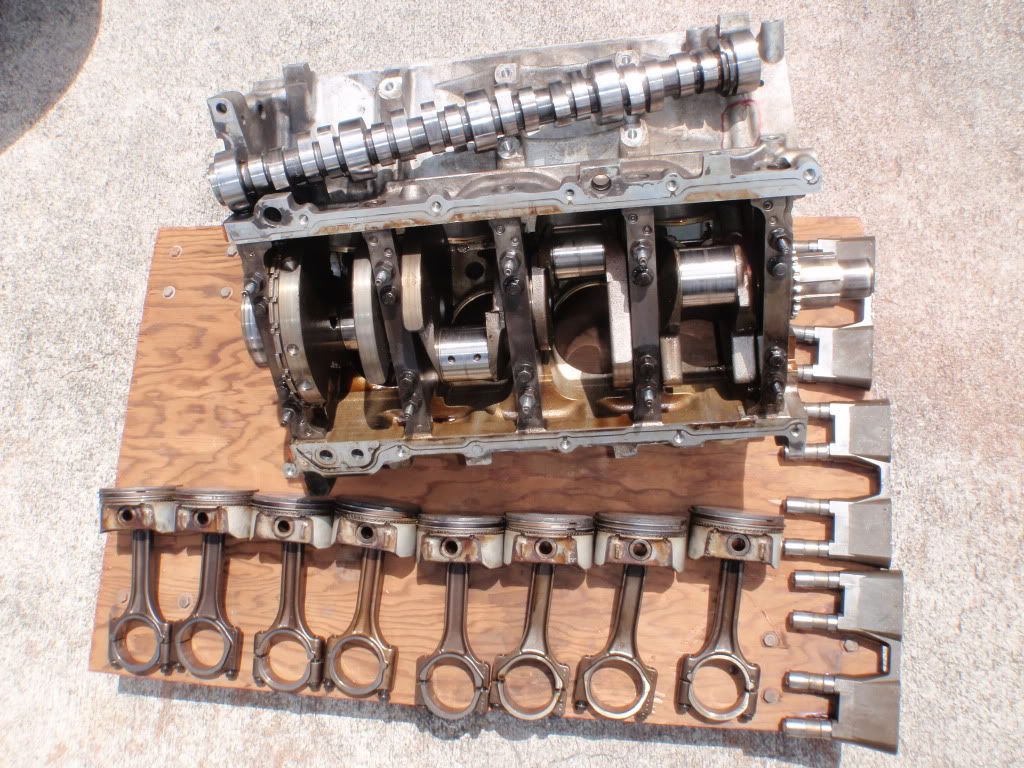
Most of the engine is currently at the machine shop awaiting some work. I found out that the block that I bought wasn’t in the best shape. There was a slight crack in the block near one of the head bolt shafts, one of the motor mount bolts had broken off in the block (the head snapped off the shaft), and there was some minor scoring in the cylinders. Also, if you look closely at the pics, you’ll notice that the pistons have indentations from where the valves hit the pistons. The guy at the machine shop said that it could have been from an earlier build, but he would check the condition of the valves to make sure that they weren’t bent. They were pitted however, so I gave him the ok to reseat the valves. Sadly, they said they don’t do port and polish work anymore because it would be cheaper for me to just buy a brand new set of stage whatever heads.
I thought that the easiest thing to do was to buy another short block. I found an LS6 short block on craigslist for $650 that was in great condition. I'm going with this block and selling the other. Sadly that block is in the shop right now, so you'll only see pics of the original block for now.
I ordered some parts from Vorshlag including headers, motor mounts, and tranny mount. They should be here anytime this week with the headers taking a little longer. I’ll post pics when I get them in.
The idea was to spend most of my time planning and acquiring parts so that the actual swap can take place in just a couple of weeks. The car is my daily driver, but I have access to another car if necessary, but I’d like to avoid that at all costs since the xterra isn’t as fun to drive as the M.
Feel free to post comments, thoughts, whatever in this thread. All of you have been so damn helpful so far, and I wouldn’t have even thought about doing this swap if it were for all of your journal-like build threads.
I guess it applies more to me than it does to you guys, but here are the rules to my thread.
- I plan on posting all of my for sale items in the first post at the bottom (if I have any) and all my Want To Buy items there as well.
- I hope I don’t get lazy, but I’ll try to link all of my build posts with pictures into the bottom of the first thread so that way someone can easily follow my progress without having to read through a whole thread.
- I love taking pics, so I’ll try to get them on here whenever I can. Keep in mind that I'm only using a Olympus point and shoot or my iphone, so I'm not fancy schmancy like you guys.
Wants and Needs:
- ARP head studs
- Timing set dampener
Here is the information i've been compiling about this swap:
https://docs.google.com/document/d/1...xffcDXV8c/edit
Here are my posts regarding my progress:
http://forums.bimmerforums.com/forum...21&postcount=5
http://forums.bimmerforums.com/forum...04&postcount=7
Last edited by asinapple8805; 07-18-2012 at 09:05 AM.
Member
Good luckThese builds are fun.
Member
Very nice! Good Luck! I hope it doesn't take you as long as it has been taking me!
Bimerok has a nice steering shaft, PM him.
I'll have my drive shaft made up in a few days - get the JTR differential adapter to a 1310 Ujoint that will save you a lot of headache.
LS1 Wiring - dive into it - it's not hard! If you need harness stuff let me know - I think you are getting a clutch line from Braap? If so I can send it to him and ship it together. HI is expensive on shipping!
Last edited by Pzary3233; 09-13-2011 at 10:06 AM.
Member
looks like a fun project. If you have all of your parts and complete motor then it should take you about 60 hrs to finish the job. Looks like you are in Hawaii, must be nice to not have smog. Hawaii is my 2nd home.
____ as in Apple
I was really thinking of going the JTR route. So with that adapter, i'd only need to get a cut down f-body drive shaft, and have the drive shaft maker throw a Ujoint on the end?Originally Posted by Pzary3233

also, if you have another LS1 harness, that'd be great. the harness i have isn't useful.
yes, it's nice not to have smog, but we have a whole bunch of other things to deal with. for example, on Oahu, i almost want to say that we have the highest police officers per capita than any other state in the US. Normally this can be a good thing if the cops are fighting the drug trade, but most of the officers here enjoy just giving out speeding tickets and other traffic citations.
also, the rules here are pretty strict when it comes to what kinds of modifications you can do to your car. tint needs to be 35% or higher, car's can't be lowered unless it comes from the factory, certain light retrofits are illegal, stuff like that.
other than that, it's a nice place because there's no snow in the winter so i can wrench in my driveway all year long.
Member
Any progress updates?
____ as in Apple
Yes there are updates, but I’ve been too lazy to update things on bimmerforums so I’ve only updated the progress on my facebook album instead.
Anyway, this is what happened since my last post.
I’m still waiting on my BRAAAP modified clutch line which was sent over to Pzary3233 to be boxed and sent over to me. I guess we ran into some problems with shipping and the first package got lost in the mail.
I’m still looking into a new clutch, flywheel, pressure plate combo for the swap and I was really thinking of going with a Monster Level 2 or Monster Level 3. I’m a little torn because I currently have a perfectly good SPEC 13 lb aluminum flywheel that I’d like to sell, or use, but I really don’t want to go with a SPEC clutch if possible.
Does anyone want to buy my SPEC aluminum flywheel? Replacement steel friction plate surfaces are only about $80 or so.
My Vorshlag stuff came in the mail.
Ordered one of these from JTR. Anyone have any idea how long the driveshaft should be with the Vorshlag mounting kit and the JTR flange?
Borrowed one of these
Got my Vorshlag headers ceramic powder coated. The powdercoater told me that he did the inside and out and the powder coat polishes up to a nice shiny finish with 0000 steel wool.
Got my heads back from the machine shop where they recut the valves and the seats, and checked the guide tolerances.
Found out that I had ARP flywheel and pressure plate bolts. I’ll probably be reusing them.
Found a buyer for the engine and started pulling it after collecting a deposit.
Removing the remaining pieces of the front clip
My buddy Rich dropped by to help pull the engine and trans.
Engine pulled
Rolled the shell out into the driveway and wrapped everything important in plastic baggies in preparation for pressure washing.
Everything is all nice and clean.
BMW wiring harness. After selling the wiring harness with my S52, I managed to get the wiring harness back from the buyer. He didn't need it anyway since he already had an Auto wiring harness.

Last edited by asinapple8805; 02-07-2012 at 08:45 PM.
Member
You should have your stuff this coming week!
I will NEVER EVER send anything USPS. Still waiting on the insurance claim from that one.
Member
subscribed
Member
This is the same combination I used. Its very near 4' but I will measure tonight and let you know. I took the JTR flange and the Camaro driveline to a driveline shop here in Portland. I gave them the measurements between the face of the diff input shaft and the face of the T-56 output and they calculated the rest. It came out great! I had a quarter inch of clearance to get everything together. Don't go with a diameter larger than 2.75" it will rub on the tunnel.
Last edited by lovnbmws; 02-10-2012 at 11:55 AM.
____ as in Apple
thanks for the info man. That's great. Now i just need to source myself a camaro drive shaft from somewhere.
Can anyone recommend a good clutch other than the LS7 clutch?
I think this car will be putting out around 400 to the wheels based on dyno graphs of f-bodys with similar engine mods. I was thinking of throwing a 100-125 shot of nitrous at it later if i have the funds to buy a direct port kit.
I was thinking of Monster Level 2 or Level 3 (and sell the aluminum flyhweel I have)
or
Spec 2+ or 3 (since I already have a SPEC 13lb flywheel)
Member
I did 2.5" and used a stock automatic v6 camaro driveshaft for parts, worked out to about 150 bucks.
____ as in Apple
are the yokes all the same for the F-bodies?
could i just put a camaro yoke on my old BMW driveshaft to make use of the two piece design with the CSB?
Member
For my driveshaft it was... Double check yours...
That Guy
Just get your motor & trans installed, and when they're in their final position, take a few measurements and take your stock driveshaft to a good driveshaft shop. They can shorten the front half and weld on the appropriate slip-yoke. Just make ABSOLUTELY certain that they're familiar with doing euro 2-piece driveshafts and can balance it properly - not many can. I had mine in my Volvo done for ~$400, and they completely rebuilt it too - new CSB, u-joints, rebuild the rear cv joint at the diff, everything.
Member
do you still have this flywheel? and a part number, and would you ship to canada? price to please, thanks
____ as in Apple
yes i still have this flywheel and yes i'd be willing to ship to canada. get enough posts to unlock the private message function of this forum, and lets talk through there.
____ as in Apple
I forgot to mention it earlier, but i've been putting together a document on google docs that's supposed to help me with this swap. Mainly, i've been compiling all of the information from all of the other swap threads and selectively pasting it for my own personal use. I'm sorry if i haven't been citing my sources, but i'm sure you can figure out who said what.
https://docs.google.com/document/d/1...xffcDXV8c/edit
Pzary, weren't you putting together some kind of wiki for this swap? if so, a lot of the information you'd need to put it together is in the doc.
let me know if the link doesn't work for you. It's a work in progress so i'll be constantly updating it. i'll post it at the bottom of my first post.
regarding the swap, so far my block is still at the machine shop and i'm waiting for a whole bunch of parts including a huge order i made to tick performance.
I'm also still waiting on some parts that i ordered used from a couple of people on different forums.
Last edited by asinapple8805; 02-27-2012 at 08:02 PM.
____ as in Apple
I'm sorry that i haven't been really updating this thread all that much. I've been pretty good about posting pics on my facebook album, but I'm too lazy to link them onto BF.C.
Anyway...
here's the obligatory first startup video.
[ame="http://www.youtube.com/watch?v=-0BkmBVE46g&feature=plcp"]http://www.youtube.com/watch?v=-0BkmBVE46g&feature=plcp[/ame]
and here's a second video:
http://www.youtube.com/watch?v=fOTmJ...ature=youtu.be
THANKS TO EVERYONE WHO HAS HELPED ME WITH THIS PROJECT BOTH NEAR AND FAR!
Last edited by asinapple8805; 07-25-2012 at 01:55 AM.
16 valve E36 M3 :-0
Congratulations, you must be stoked?
Not far off from first drive...
____ as in Apple
Thanks Paul. I am really really stoked. You've been extremely helpful and an inspiration to me.
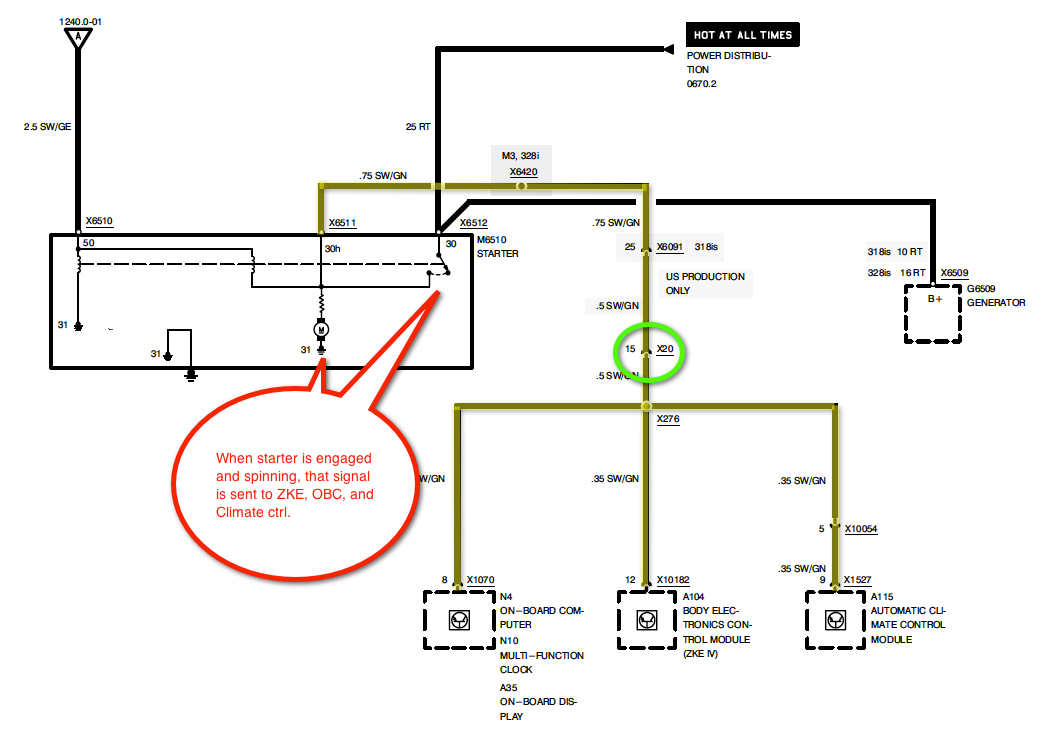
so what does x20 pin #15 do exactly?
Member
That's a mystery for sure! (X20 pin 15)
Congrats on the first start!
____ as in Apple
Here's a few things that i've learned from the swap that may have been mentioned before or may not have been mentioned. I'll also include some of the things that i did differently so that others that follow can choose which path to take. maybe later i'll include some things that i would do differently.
- I went to the junk yard to pick up an e30 coolant expansion tank. instead of using the e36 radiator mounted one, i put the e30 tank in front of my driver side shock tower. from there i ran the main outlet on the bottom to the heater return on the LS1 water pump. for the steam tubes off of the LS1 heads, i routed them to the steam tube inlet in the top of the e30 tank. for the radiator steam/overflow nipple, i capped it off.
- i completely bypassed my heater core and heater lines. i thought that since i'm in hawaii, i wouldn't need them. I capped them off at the firewall and at the LS1 water pump
- i made my own fuse box by going to the junk yard and pulling a fuse box block off of an e36 that was there. from there i ran the fan 1, fan 2, fuel pump relay (i think this was redudant since there might already be a fuel pump fuse), PCM/sensor power, coil power, and injector power. I have a few slots open that i might use to run my HIDs or angel eyes later.
- after buying the lokar univeral throttle cable as many of the people here have recommended, i went to a local motorcycle shop and picked up the thing that crimps onto the throttle cable and goes into the hole in the throttle body. i couldn't find it anywhere else, but it seems that the motorcycle shop guys had a bunch of them.
- for the relays, i noticed that bmw set it up where one relay fires the other two. i used one relay to fire 3 relays, one relay is for PCM/sensors, another is for coil power, and the last is for injector power. i triggered the three relays off of the green/white wire from the x20. i guess i could use the solid green one too, but the green/white one looked thicker.
- most of the people on here used the bmw fuel pump relay to keep its function. the harness that i got already had a fuel pump relay in it that was triggered by the PCM. I went with the PCM controlling the relay instead of using the bmw method. i mounted my PCM controlled relays directly onto the DME cubby hole cover.
- for the high pressure power steering line i put an -AN fitting on the GM pump and an AN fitting that replaced the BMW banjo fitting at the rack. i then ran a braided line between the two points. for the low pressure return, i had the hydraulics shop weld on a barb so that i could run a power steering fluid rated hose from the rack's cooling line to the camaro reservoir. one of the other members said that they could simply rebend their line. it didn't work for my car.
- i think i purchased my LS1 head gaskets from tick performance. it was less than $40 for a pair of GM MLS gaskets.
- ABS relocation
for the two main lines coming out of the master cylinder, one is for the front wheels, and the other is for the rear wheels. you’ll need to extend these to the ABS controller which you will have relocated to the area in front of the shock tower. i went around the top inner side of the shock tower making nice angled bends instead of just wrapping it around. the lines that you’ll need are metric m10 x 1.0 flare nuts on both ends with ISO bubble flares on both ends of a 30 inch tube. you’ll need two of these lines to make it to the ABS controller.
Hydra Air Pacific located near the air port on Koapaka Street sells pre-made lines with the flares and the flare nuts already on. it’s like $10 a line, but it’s pretty impossible to find the metric bubble flare tool on island for rent so this might be a viable option. bending the lines is pretty straightforward, my preferred method was to take a 16mm deep socket and a pair of pliers. you use the pliers and clamp down the brake line onto the 16mm socket, and use your strength to bend the line around the circumference of the socket.
in addition to the two lines off the master cylinder, you’ll be bending 3 or 4 more lines depending on whether or not you have a 3 channel ABS controller or a 4 channel (later cars). for these lines, the best option is the purchase more of the lines from hydra air. for these, it might make sense to buy two 40 inchers since you’ll eventually cut them in half. even 40 inches might be too much. i made the mistake of buying four 20 inch lines, but ended up having to cut off one of the flared ends and not even using half of the flare nuts. some of the guys on the mainland made their own lines and joined them to the existing lines through the use of male to male unions in either m10 x 1.0 or m12 x 1.0. instead of using unions, i went to Napa auto parts. there are a couple of Napa or Redlines on the island that carry DOT approved 3/16” compression unions (O’Reilly, Car Quest, Autozone, and Pep Boys might have them too). I used 4 of them. You’ll want to run the two lines from the front brakes over the top of the frame rail, and the two lines from the back brakes under the frame rail. Supposedly the headers from vorshlag come very close to the frame rail so you’ll want to keep the brake lines as far away from that as possible.
the ABS controller should be mounted in a homemade bracket. This bracket will need to be just high enough that it clears over the top of the threaded stud coming out of the frame rail. ideally, you want to line up the threaded stud between the middle two of the 4 brake line outlets (there should be 4 in a row, two that are 10mm x 1.0 and two that are 12mm x 1.0). use that threaded stud to hold the ABS controller down to the frame rail.
to make the bracket, i just went to home depot or lowes and picked up a piece of 1 inch wide steel. I measured the piece and cut it enough so that the two mounting points on the rear of the ABS controller sat on a T-ed piece of steel and the front sat on an L-bracket perpendicular cross. there’s two ways that you can get the cups for the rubber vibration isolator mounts: 1) go to the junk yard and steal just the front mount off of two or three different e36s (that’s what I did), or 2) you can cut your old bracket off and weld it onto the custom abs relocation bracket. I prefer the first method because it means that I could potentially reverse the swap later however the swap might require you to cut the rear shifter carrier bushing mount which is not necessarily reversible. Also, i was lucky to find enough e36s in the junk yard because they are becoming more and more scarce.
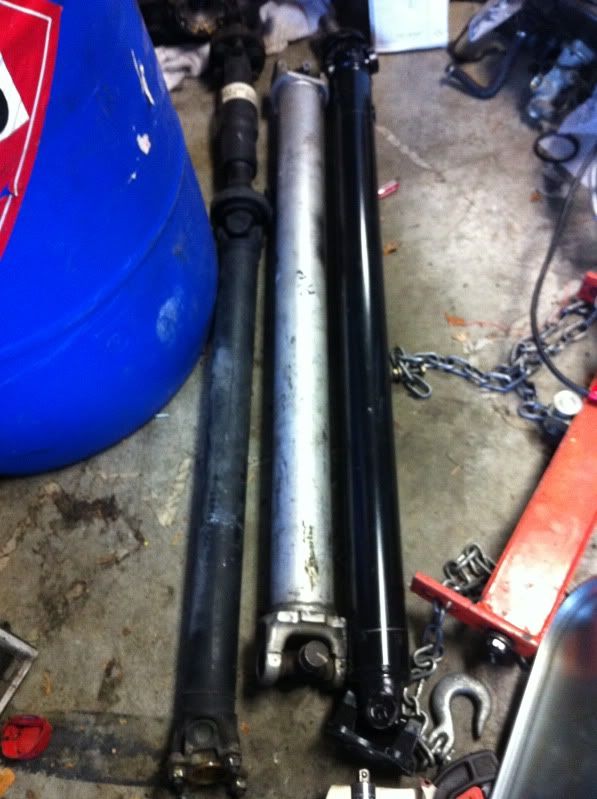
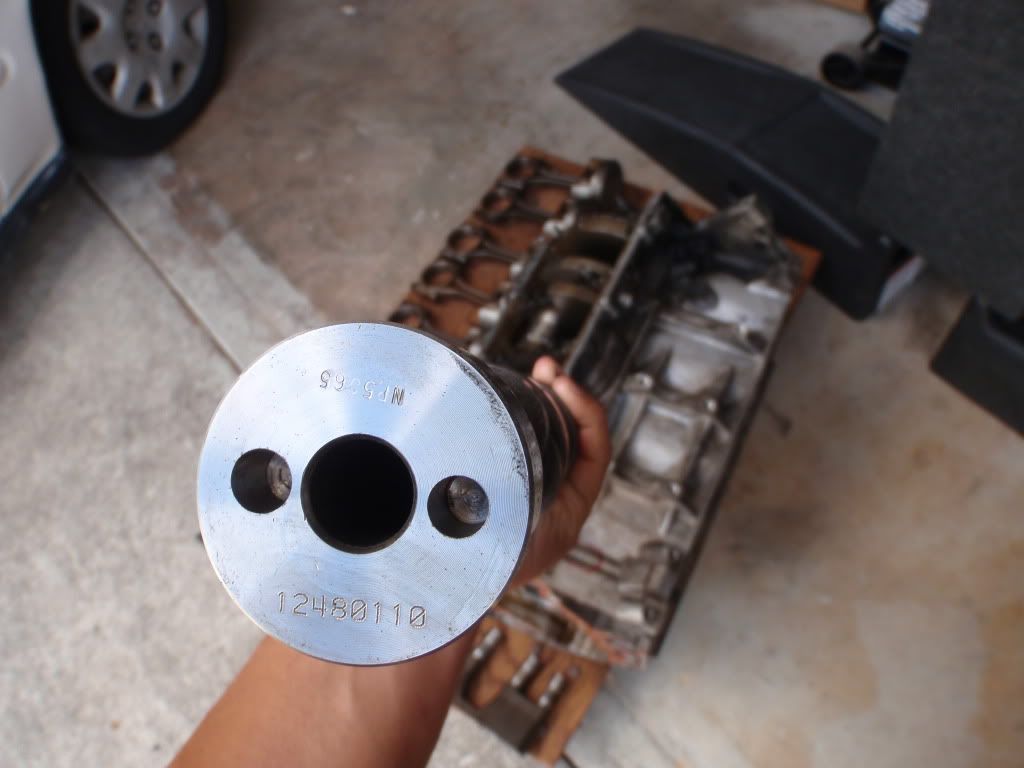
- The distance between the t56 output shaft and the BMW differential input shaft is roughly 48 inches (almost 48 inches on the dot).
- the brake hardline distance between the master and the ABS controller after relocation is roughly around 30 inches. I was able to find two premade 3/16th brake line for this that was already bubble flared and had the m10 flare nuts on it.
The driveshaft needs to be made where the U-joint are no longer than 44.5 inches measured center of the U-joint to center of the other U-joint.
As a starting point, I used a used camaro driveshaft and lengthened it by about 3 inches. The transmission yoke is 27 splines. If i could do it over again, i’d buy just a yoke and the JTR piece and have the driveshaft shop custom the entire shaft.
keep in mind that going larger than 2.5 inches may cause some rubbing in the driveshaft tunnel on the saddle style fuel tank. This can cause problems in the long run if not taken care of.
- for cooling, i picked up a 16 inch SPAL high performance puller. it fit right below the snout of the water pump. i aligned it to the bottom edge of radiator fins. the guy at spal said the curved blade was quieter so i went with that even though its only slightly fewer cfm.
Thanks Pzary, you've been super helpful with all of the parts. I couldn't have done it without you, man.
Last edited by asinapple8805; 07-29-2012 at 10:25 PM.
16 valve E36 M3 :-0
Thank you, glad I could help, I enjoy following your progress.
X20 pin 15, I can only guess based on where the wire goes. I do believe its importance to us swappers is low overall.
My best guess is that the ZKE, OBC, and climate ctrl use that signal to be notified that the starter has indeed been engaged. Beyond that I have no idea what it is doing with that signal. It is definitely a signal from the starter to those items, not those items controlling the starter directly, (possibly indirectly through EWS-II but not sure). Omitting that wire will have no affect on the LSx PCM or drivability, but may have some impact on calculations within the OBC, climate control, how the ZKE deals with the other body functions such as interior light dimming when the engine is running vs off, etc. Again, that is my best guess, I have nothing to back it up. I connected it on my car just as BMW had it per the ETM below just to be sure that the items receiving that signal would be satisfied and hopefully operate just as they did when the S52 was in the car, I have not noticed any changes in any of the M3 nuances since the conversion other than a substantial increase in available passing power.
If anyone knows for sure its purpose, please share.
I posted a rough schedule here of the X20, X6031 and X69 connectors if that helps;
http://forums.bimmerforums.com/forum...&postcount=116
Love the start up Video.
Last edited by BRAAP; 07-25-2012 at 07:27 PM.
____ as in Apple
Alright, I got the exhaust done at the exhaust shop. I think it was Braap that used the spintech setup. I copied that but, instead of using the stock m3 muffler, i went with my old Supersprint.
(that's not me doing the welding, btw)
anyway, I'm having problems with fuel pressure right now.
I can't seem to regulate the fuel pressure to the psi that i want it at. correct me if i'm wrong, but the blue line in this picture is coming from the return outlet of the FPR, and the black line goes to the incoming pressure inlet on the FPR.
I took this pic when i had originally set up the FPR, but i have since added an inline regulator on the blue hose.
without the regulator i'm getting only 10 psi at the rail when the pump is priming the rail.

 Posting Permissions


 Reply With Quote
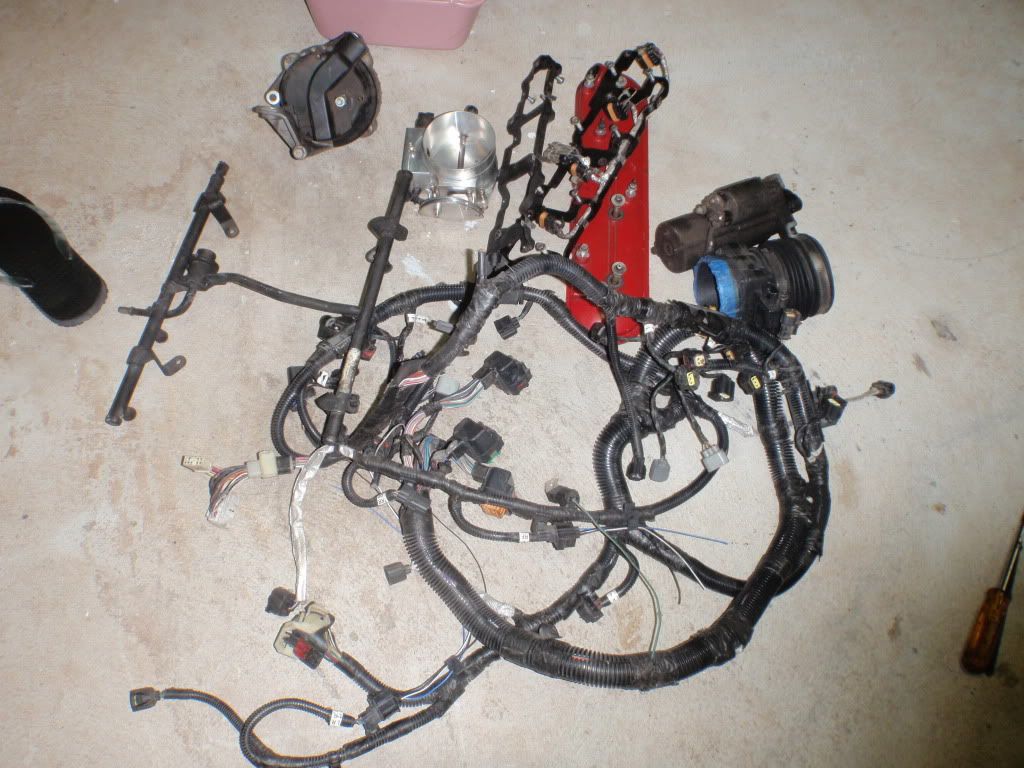


Bookmarks