
 Member
So I've been doing tons of research lately on building diffs for the E36. I got hooked after helping to build a Ford 10.5 inch diff, so I started my search. There is a lot of obscurity out there because no true published DIY exists for BMW diffs, other than the few TIS sources for the stealership mechs.
The E36 came with three different differentials. All E36 318i/is/ic came with a "small case" diff. This featured a 168mm ring gear. These diffs can hold up to anywhere between 200 and 300 ft-lbs of torque (specific to ratio). The E36 323i/is/ic, 325i/is/ic, 328i/is/ic, and M3 (U.S.) came with "medium case" diffs. This had a 188mm ring gear and was capable of holding anywhere from 350 ft-lbs of torque on up to 500 ft-lbs (specific to ratio). The E36 M3 (Euro) features a "large case" diff with a 210mm ring gear. These could hold from 500 ft-lbs to 675 ft-lbs of torque (specific to ratio).
Now to avoid confusion and provide clarity too, a lot of people seem to get the definitions of high and low ratio gears mixed up. A low ratio gear means that the pinion has fewer teeth than the ring gear. A high ratio gear means that the pinion has more teeth than the ring gear. In terms of our cars, all of our gears are considered to be low ratio because the ring gear has more teeth than the pinion. The ratio is always the number of teeth on the ring gear divided by the number of teeth on the pinion. However, even though all gears in our differentials are low ratio, the high and low terminology still exists. Low is used to refer to gear sets in which the ring gear has more teeth, and high is used to refer to gear sets in which the ring gear has fewer teeth. For example, 2.93 is a higher ratio than 3.07 and 3.64 is a lower ratio than 3.46. Higher ratio gears are great for top speed and gas mileage, while lower ratio gears are great for acceleration and torque. Generally naturally aspirated cars want to run lower ratio gears because it increases acceleration. Forced induction cars want to stick with higher ratios because they already have the acceleration, and the higher ratio gears can handle greater amounts of torque because the teeth are thicker on the ring gear.
Some building basics
The big things that need to be considered when building a diff are pinion preload, pinion gear teeth contact on the ring gear, and backlash. Here's a simple definition of each:
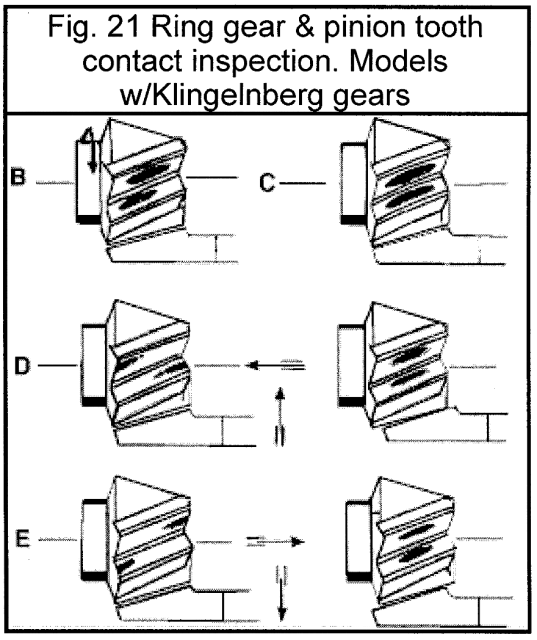
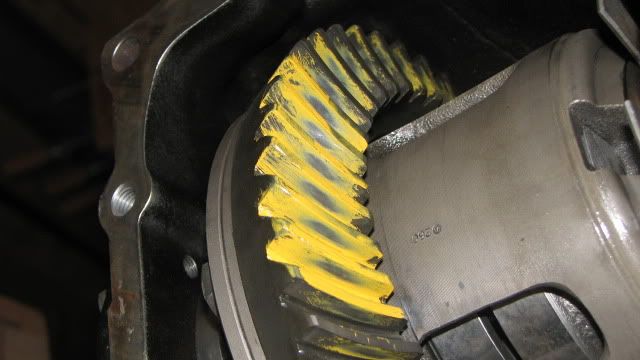
Tooth Pattern on Ring Gear and Pinion: You will need gear marking compound to do this. Paint up a few sections of the ring gear with the marking compound. While give resistance to the ring gear with one hand, turn the pinion with the other hand. This will give nice impressions of the pinion teeth onto the ring gear allowing you to see the contact pattern. Be sure to turn the pinion in both the drive and coast directions. Both are important. You want the pattern to be fairly centered on each tooth in the coast and drive directions, and neither to high or low. There should still be marking compound left between the worn area and the top of each tooth. For used gear sets, concentrate on the pattern on the coast side of the gear only. The gear marking compound is safe to leave on the gears and does not have to be cleaned off prior to reassembly.
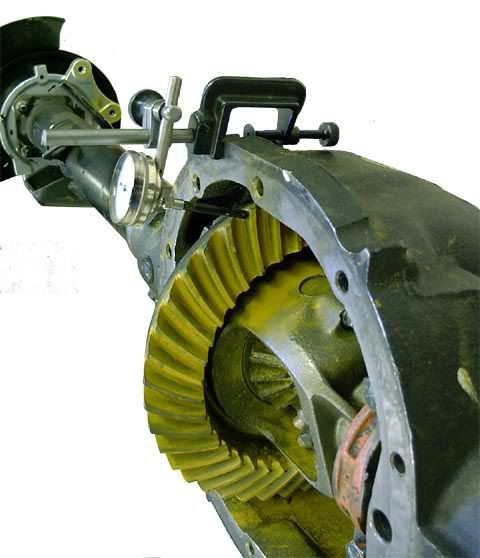
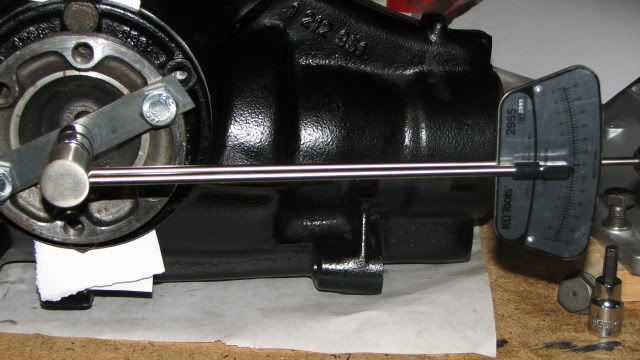
Backlash: This is the slop between the ring gear teeth contacting the drive and coast sides of the ring gear. It has a small acceptable range, usually in the thousandths of an inch and must be measured using a dial indicator. To measure, the pinion must be held from rotating at the flange. The dial indicator is placed onto the diff, touching one tooth of the ring gear. It must be zeroed. Take one hand and try to rotate ring gear. You will notice slop in the gear. The reading on the dial indicator is your backlash.
Measuring backlash using a dial indicator
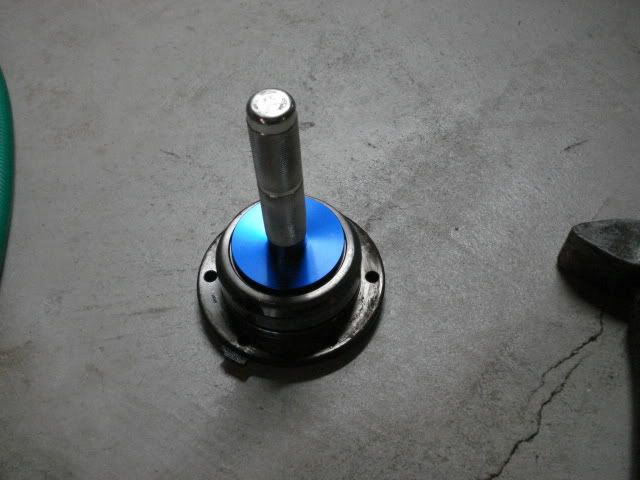
Pinion Preload: This is the rolling resistance of the pinion gear alone. It is advisable to set the backlash and contact pattern on the ring gear before continuing to this. To find this you assemble the pinion gear with associated bearings, crush sleeve, and any shims. The carrier (LSD unit or open unit) is removed temporarily. The pinion collar nut is slowly tightened and then the pinion is rotated using a needle type inch pound torque wrench. There is a small window of acceptable values for this. Going too tight on the pinion collar nut will raise the preload. This can lead to destruction of the forward roller bearing on the pinion, creating metal shards that will slowly impregnate themselves into the other bearings, eventually destroying the rest of the differential.
Pinion Preload Measurement
Typical Pinion
Though this video isn't a BMW, it explains the idea of pinion preload:
[ame="http://www.youtube.com/watch?v=8APYO2sZyJU"]http://www.youtube.com/watch?v=8APYO2sZyJU[/ame]
BMWs use the same crush sleeve concept with shims behind the roller bearing races to set the pinion depth. Though the guy in the video used a dial inch pound torque wrench, you can use the old beam style torque wrench just as effectively:
Important to the E36
Here are some important specs for E36 188mm differentials (others similar):
Ring and Pinion Backlash = 0.06mm to 0.14mm (0.0024in to 0.0055in - Metric Mechanic believes ideal backlash is 0.003in to 0.0035in, which falls well within the BMW TIS limits)
Pinion Preload = ~12in-lbs to 23in-lbs according to TIS (Metric Mechanic claims 14in-lbs to 16in-lbs)
Carrier Preload = ~11in-lbs to 23in-lbs according to TIS (Metric Mechanic claims 9in-lbs to 11in-lbs)
Axle Cap Bolts = 10ft-lbs + 40 degrees angle torque (with Loctite 242)
Rear Cover Bolts = 34ft-lbs
Limited Slip Carrier Cover Bolts = 25ft-lbs
Ring Gear Bolts = 110ft-lbs (with Loctite 271)
Here are some very informative links that I have stumbled across:
http://www.metricmechanic.com/pdfs/m...al-booklet.pdf
http://www.r3vlimited.com/board/showthread.php?t=92714
http://www.bmwtechinfo.com/repair/main/941en/index.htm
http://tis.spaghetticoder.org/e36/M3_(S52)_COUPE/
http://www.e36-tech.com/forum/rebuil...tial-4264.html
Part Numbers:
**Asterik denotes a non-BMW part number. It is specific to the part in general, but not brand, e.g. Timken HM88542 or SKF HM88542. Once you have the bearing and race part numbers, the sky is the limit. I refuse to pay $73 per bearing through the stealership for an SKF bearing, the same one I can find for $22 with the generic number.
**HM88510 Pinion Race x1 **
**HM88542 Pinion Bearing x1 **
**LM503310 Carrier Race x2 **
**LM503349A Carrier Bearing x2 **
**HM89410 Pinion Race x1 **
**HM89449 Pinion Bearing x1 **
33107505602 Axle Shaft Seal x2
33111214144 Axle Cap O-Ring x2
33139065734 or 33139065735 Shim Sets for Carrier
33101214099 Pinion Shaft Seal x1
33121744368 Pinion Crush Sleeve x? (Depends how experienced you are. If you've done it before, you can suffice with one. If not, I'd have at least two on hand.)
33129065179 or 33129065180 Shim Sets for Pinion
23211490120 Securing Plate for Pinion Nut x1
33121200258 Pinion Collar Nut x1
Brands for roller bearings and races:
Timken
SKF
FAG
National
BCA
Fafnir
Koyo
Tools Needed:
Shop press
Race/Seal driver kit
Dial indicator with clamp or magnetic base
MAPP gas torch
Small cut-off wheel (air powered)
Bearing puller
Metric sockets up to 30mm
Ratchet
Impact
Assortment of screwdrivers
A few punches and chisels
Hammer
Large brass drift
I'm putting this out here as a feeler so that more people have an understanding of what goes into building a diff, and that IT IS POSSIBLE TO BUILD ONE!
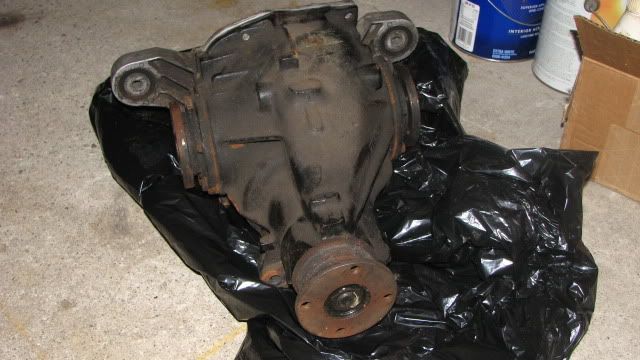
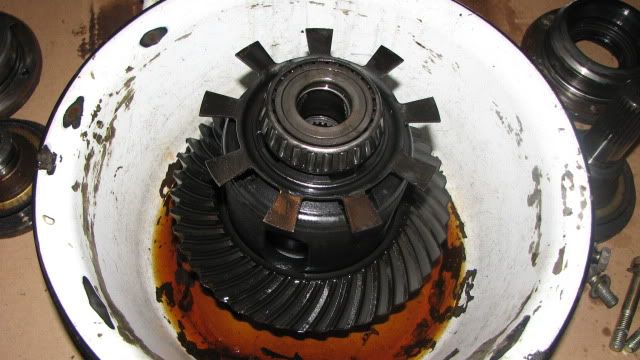
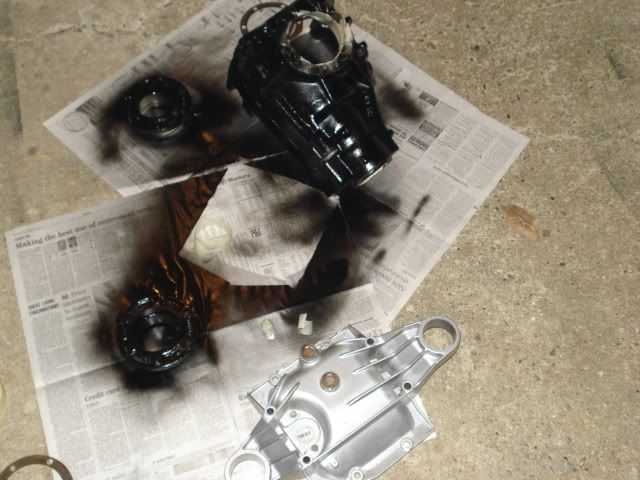
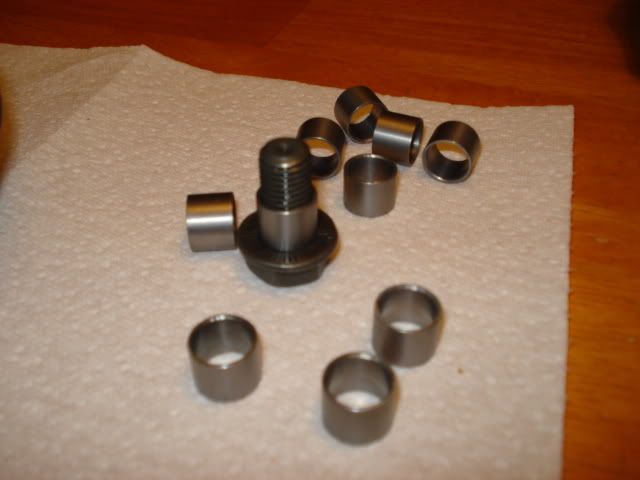
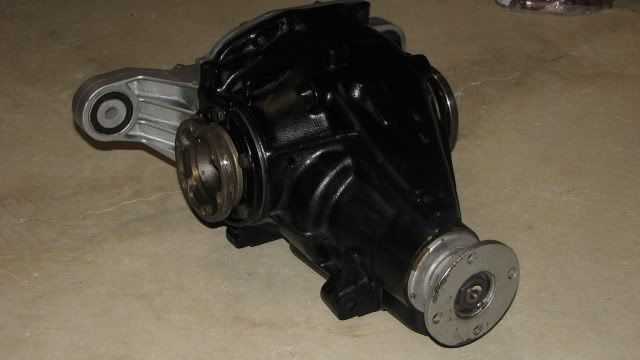
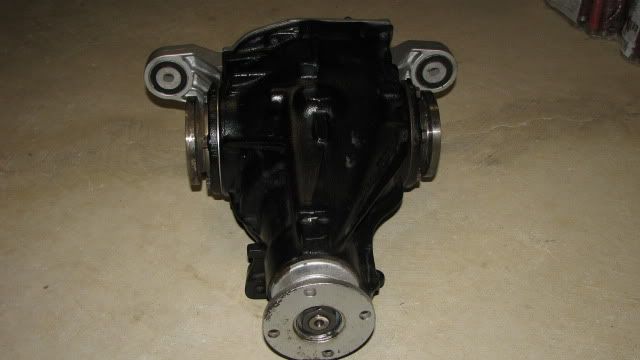
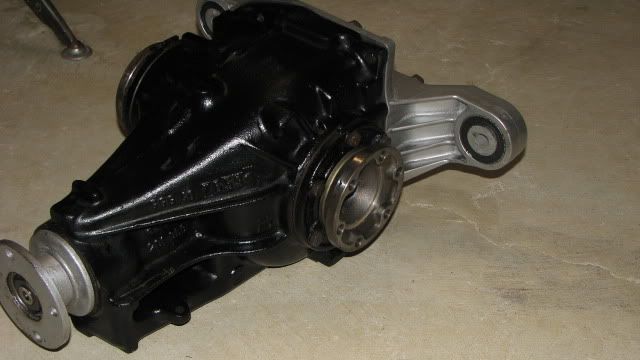
What I started from:
A pinion roller bearing failed on this one...
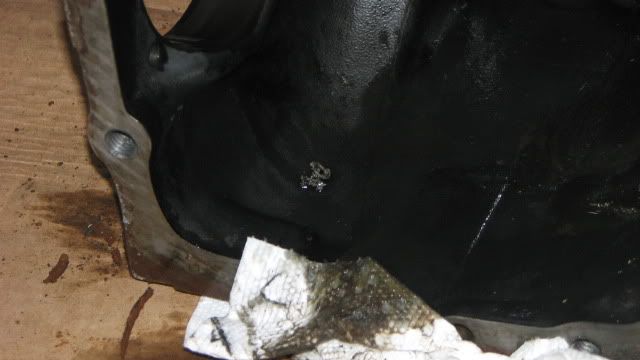
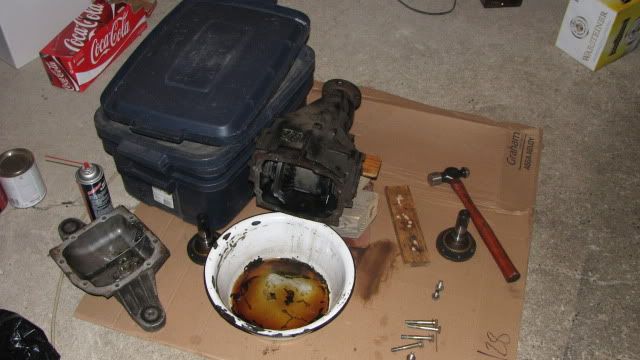
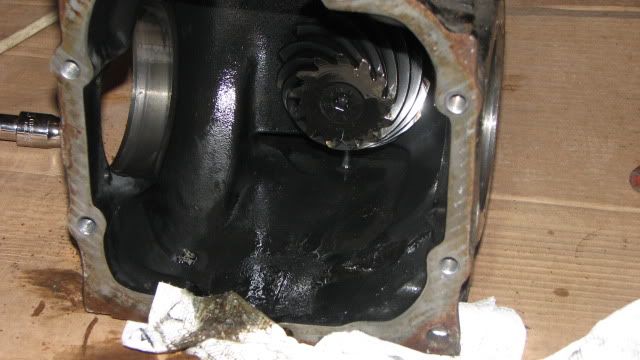
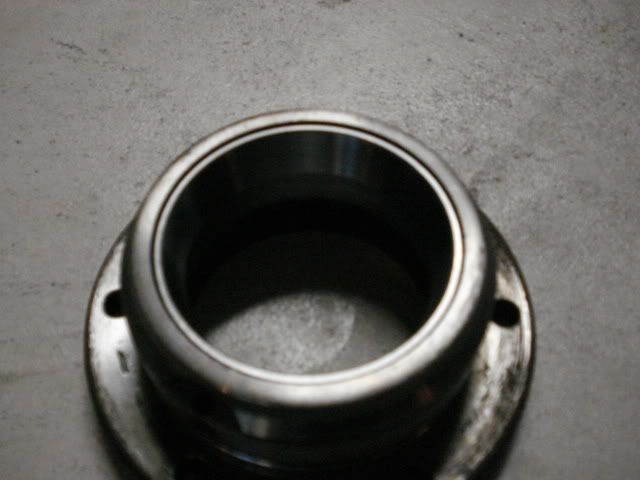
Rear cover removed:
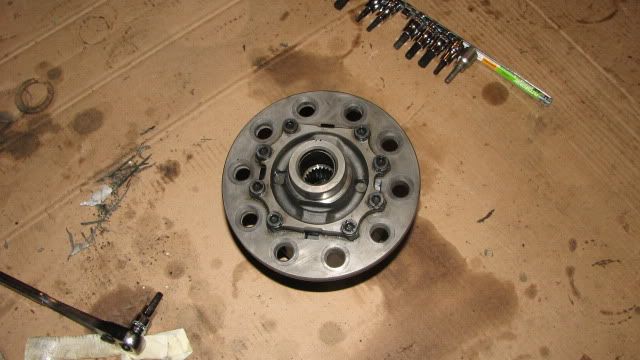
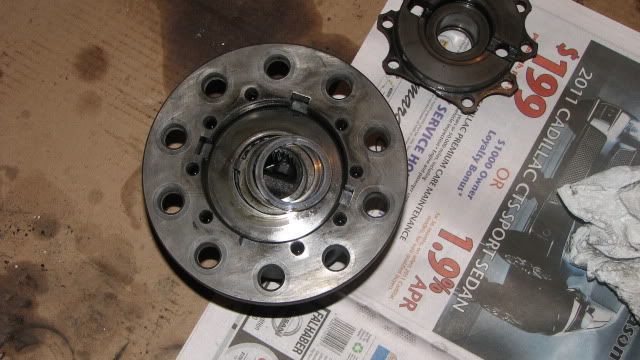
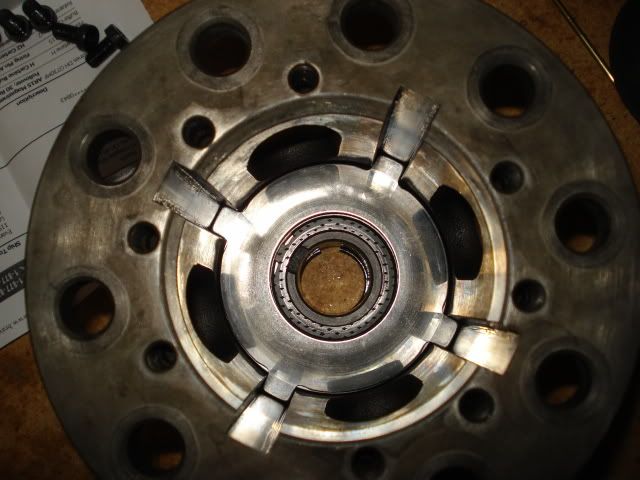
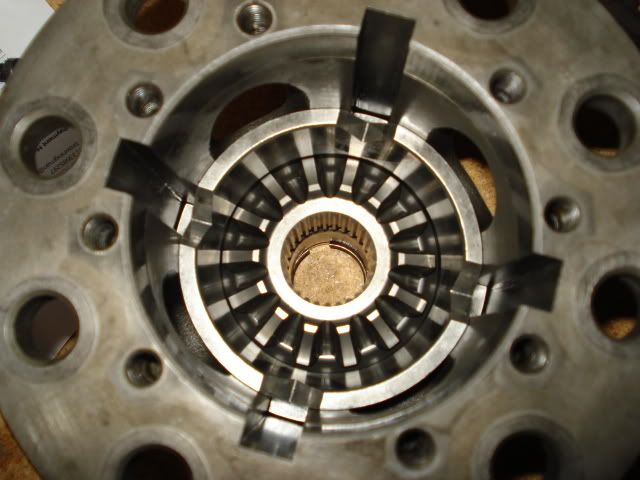
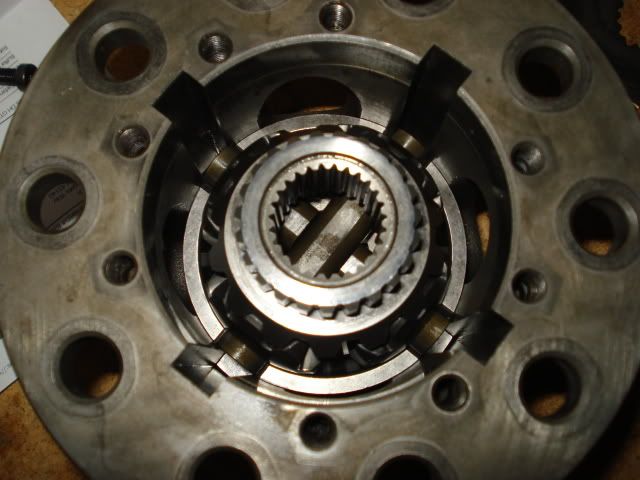
Carrier removed:
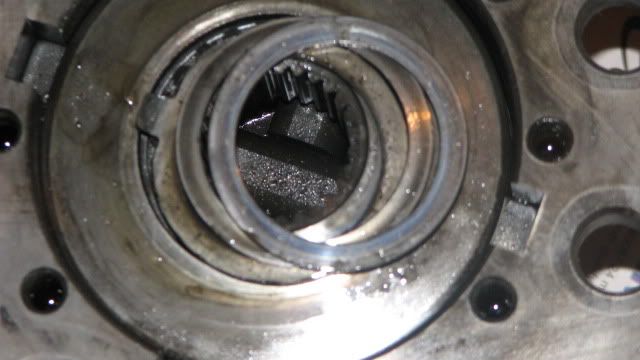
Inside:
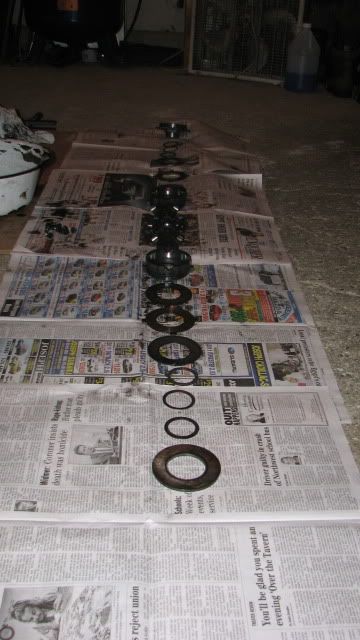
Remnants:
Member
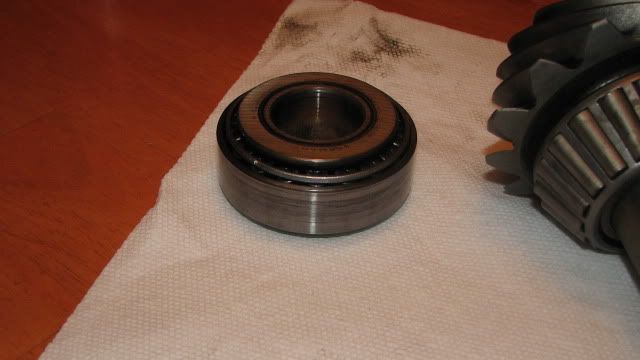
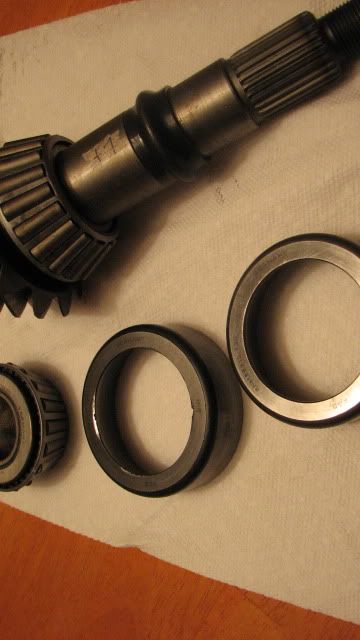
All apart...apparently the rear pinion bearing got pulled down too tight and started to destroy itself. Noticed some pitting in the rollers, but it's kind of hard to tell in the photos because of bad lighting:
The bearing was definitely on its way out.
NOTE: The races in the picture may look beat, but that's because I beat them out with a hammer and a punch.
Now onto the building part:
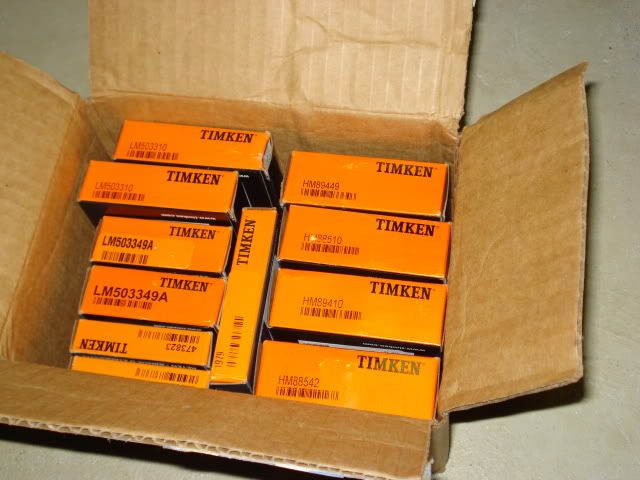
Part numbers:
HM88542 - Forward pinion bearing
HM88510 - Forward pinion race
HM89449 - Rear pinion bearing
HM89410 - Rear pinion race
And for those of you wondering, here's what a roller bearing looks like against a race:
Member
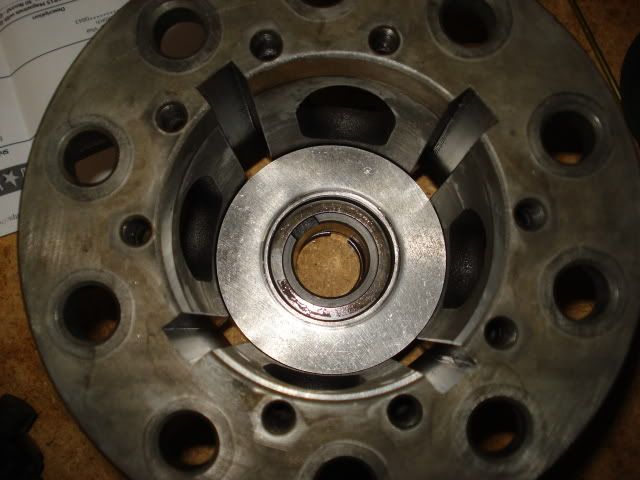
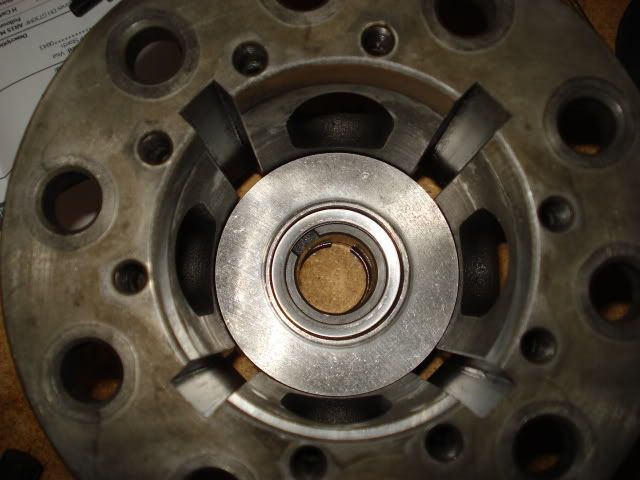
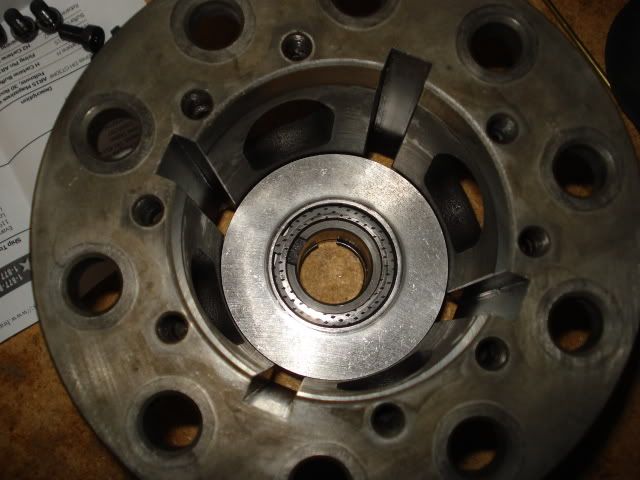
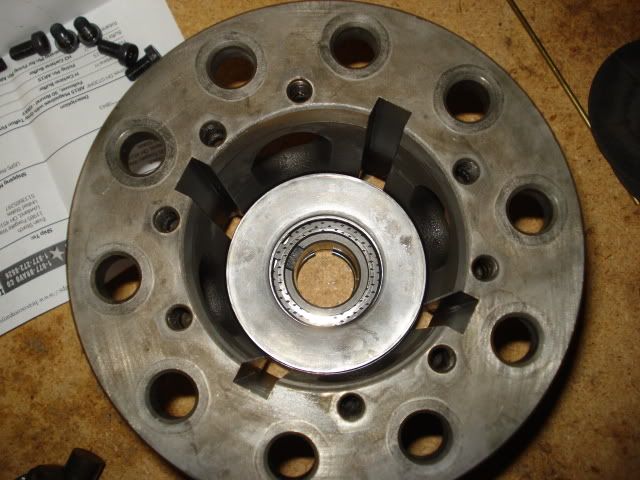
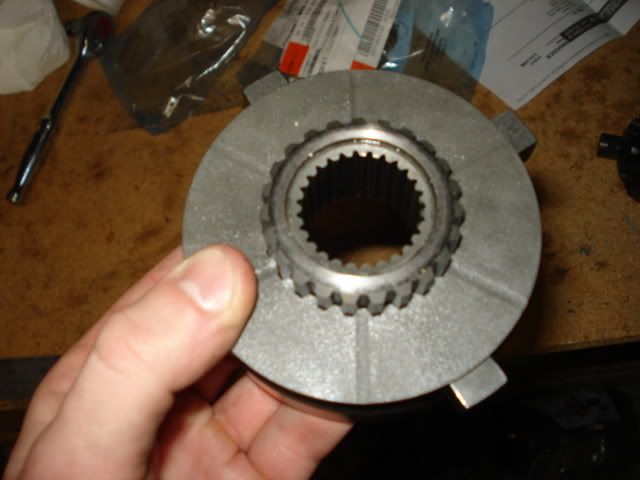
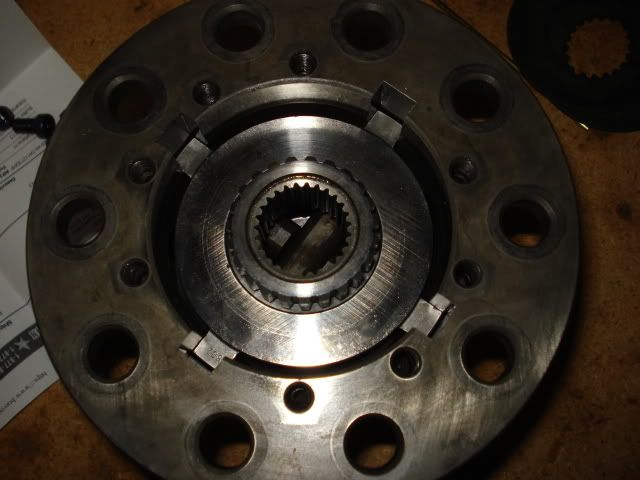
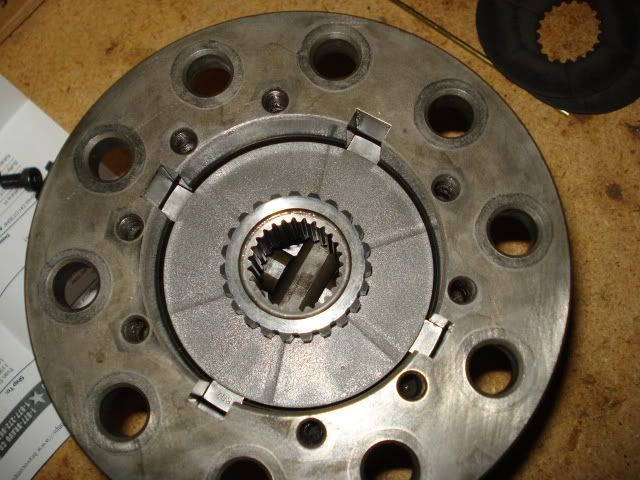
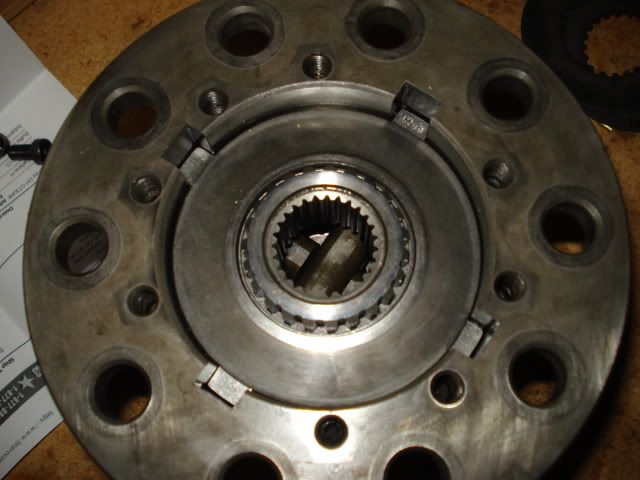
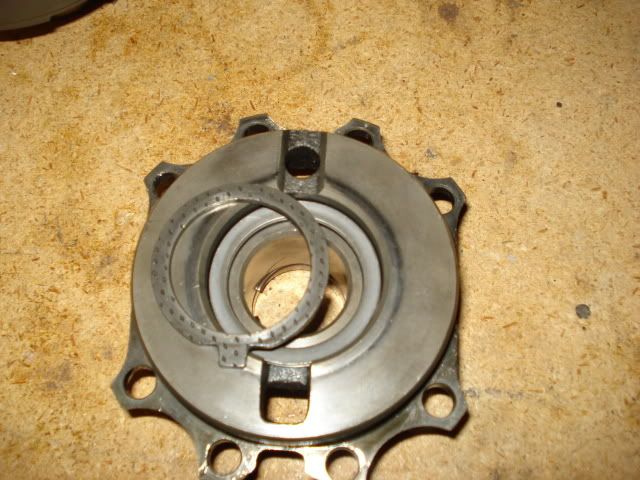
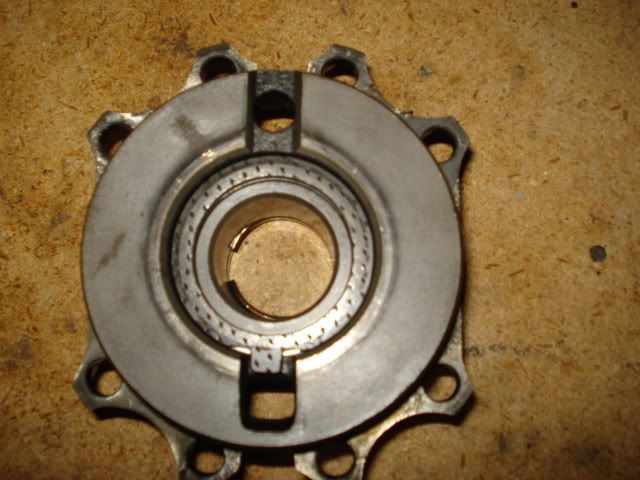
Cracking into the limited slip:
Reassembly and replacing the old clutches (this is where I lol at the people who buy into the Bimmerworld clutches...)
The cover bolts on the limited slip carrier get torqued to 25ft-lbs with Loctite 242.
Also a parts breakdown for the limited slip carrier:
01 33141209653
Differential, LIMITED SLIP DIFFERENTIAL UNIT. 25%
01 33141209652
Differential, LIMITED SLIP DIFFERENTIAL UNIT. 25%
02 33141210615
Differential housing
03 33141210616
Housing cover
04 33147740005
Screw, Fillister-head. M8X16
05 33141201939
Stop disk. 1,80MM
05 33141201938
Stop disk. 1,85MM
05 33141201937
Stop disk. 1,90MM
05 33141201936
Stop disk. 1,95MM
05 33141201935
Stop disk. 2,00MM
05 33141201934
Stop disk. 2,05MM
05 33141201933
Stop disk. 2,10MM
05 33141201932
Stop disk. 2,15MM
05 33141201931
Stop disk. 2,20MM
05 33141203791
Stop disk. 2,25MM
05 33141203792
Stop disk. 2,30MM
06 33141206919
Stop disk
07 33141204367
DIAPHRAGM SPRING
08 33141203795
OUTER DISC. 1,90MM
08 33141203796
OUTER DISC. 2,00MM
08 33141203797
OUTER DISC. 2,10MM
09 33141210626
INNER DISC
10 33141206909
COMPRESSION RING
11 33141210623
SIDE GEAR
12 33141210624
BEVEL GEAR
13 33141203801
BEVEL MATE SHAFT
.....
Also for those of you that have purchased Bimmerworld "Motorsport" limited slip clutches...
And...Originally Posted by Me to Bimmerworld
There you have it. The clutch discs that Bimmerworld sells are nothing more than the same OEM discs that you can find through Tischer, Germain, or The BMW Part Store for half the price.
The BMW part number is 33141210626. I got them for $37.56 each through The BMW Part Store (Mike Kent @ The BMW Store in Cincinnati)
Last edited by orangehatter; 05-09-2011 at 07:34 AM.
Member
Got bored...
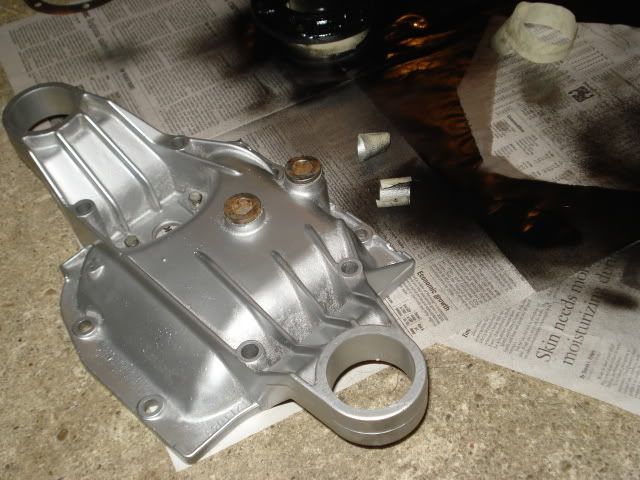
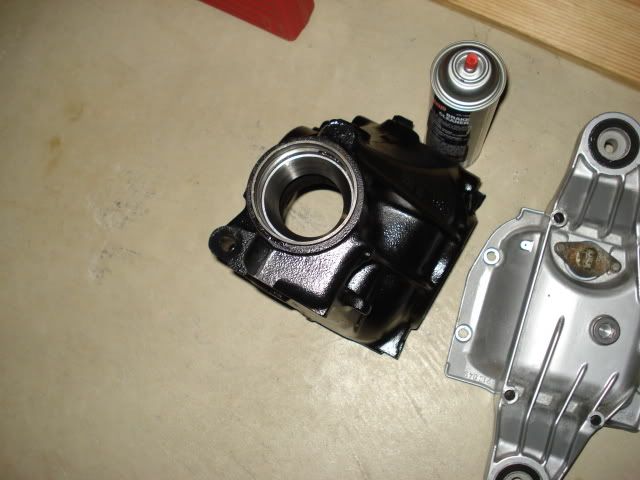
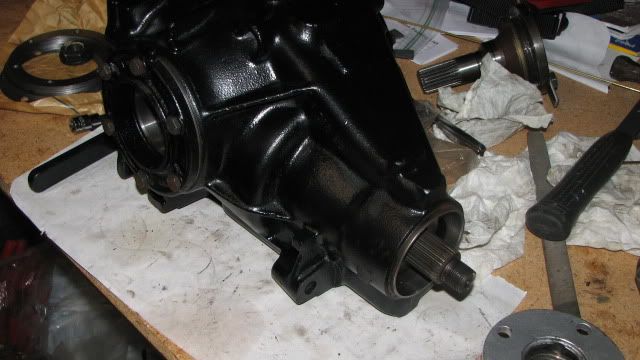
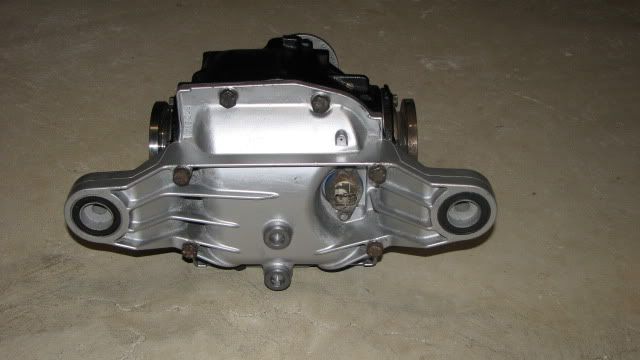
Freshly painted diff and cover:
Last edited by orangehatter; 05-08-2011 at 09:05 AM.
Member
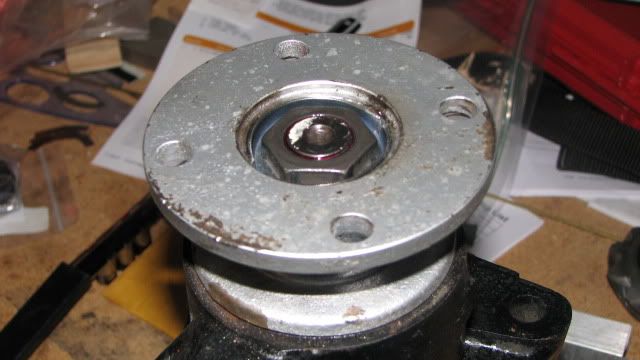
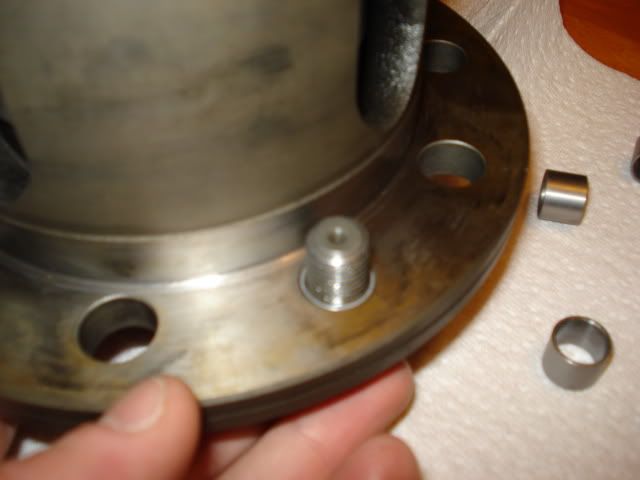
My solution to adapt the 14mm ring gear bolt holes down to 12mm for the holes on my 3.46 ring gear:
Custom machined by Blue Chip Tool in Blue Ash, OH from 4140 preheat treated steel. Cost me $110 + tax.
I torqued my ring gear bolts to 110ft-lbs with Loctite 271.
Last edited by orangehatter; 05-09-2011 at 07:38 AM.
Member
Got this from RockAuto:
Then these:
Which resulted in this:
Races driven in.
Last edited by orangehatter; 05-09-2011 at 07:36 AM.
Member
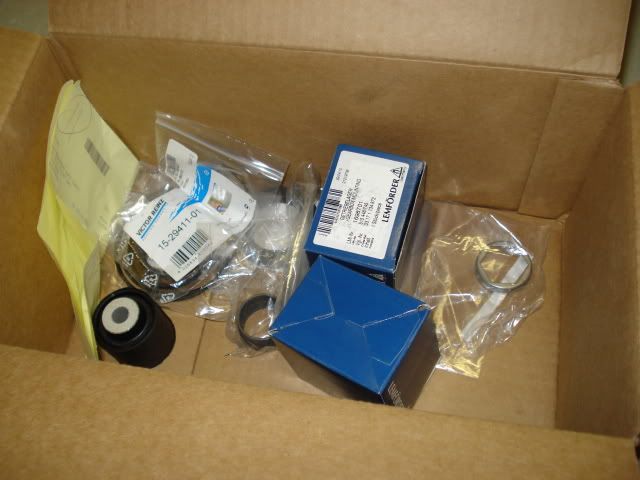
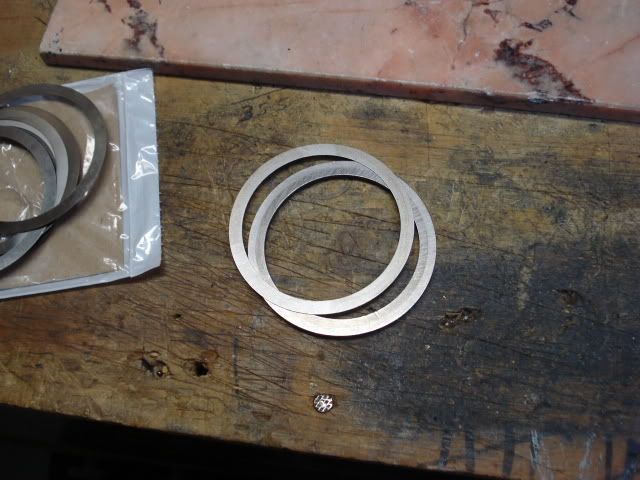
Then I got these puppies from Sam at Kelly BMW:
My solution for pinion shims:
The shims are from a Mercury boat, but the choice of thickness is awesome enough to make some fine adjustments. Also the OD is 3" just like the BMW shim, ID is 2.5" which is slightly more than the BMW shim..
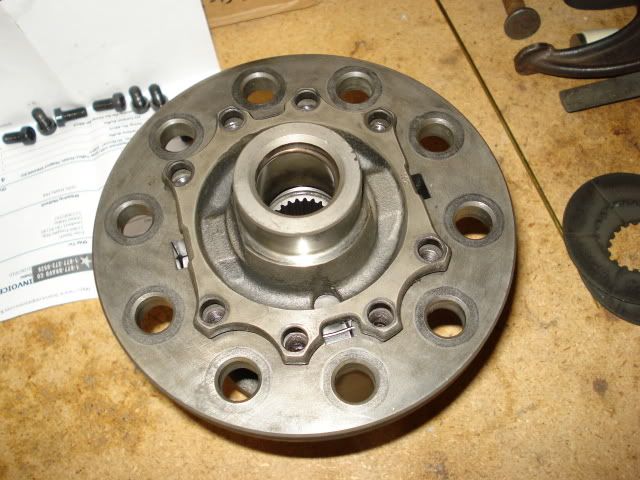
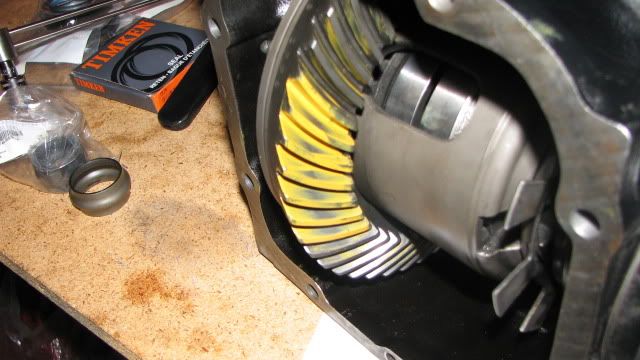
Now that I had the shims and my ring gear bolted to the carrier, it was time to check my carrier preload:
Came in at 22in-lbs
Temporarily installed the pinion and carrier to check backlash:
Came in at 0.004in
Then my wear pattern came to this with the original pinion shim:
I was happy with that...
So I went for the final install on the pinion. I precrushed the new crush sleeve down close to the old. A few small blips with the impact and I was at 21in-lbs of rolling resistance. I used Loctite 271 on the new pinion nut and installed a new retaining collar:
Last edited by orangehatter; 05-08-2011 at 11:43 AM.
Member
Reinstalled the carrier, double checked my backlash (still at 0.004in), torqued down the side covers (10ft-lbs + 40 degrees angle torque), knocked in my axle seals, sealed and installed the rear cover, and torqued down the rear cover (34ft-lbs). Here's the finished product:
Discuss.
Last edited by orangehatter; 05-09-2011 at 07:37 AM.
Member
first
I wanted to rebuild my LSD when I had the rear subframe down, but didn't have the know-how on how to do it. I'll re-read this thread and see if it gives me a better idea, thanks!
-Chris
Member
I'll add to it so stay tuned. I left a lot of the tiny details out because I was in a hurry to get everything posted in succession.
Member
Mods - sticky this please! Awesome post and thanks for sharing! Great read so far...
Member
This is AMAZING INFO
Plenty of us others have talked about how rebuilds aren't rocket science - the issue has always been having the torque & preload values spelled out - You've done that - this thread is GOLD.
THANK YOU
What did it cost in parts for you to do the total rebuild? I've looked at the various parts on a per piece basis but what about all said and done with all the shim kits and what not?
it looks like the only "non-common" tool you really make use of is an inch-pound torque wrench and potentially the dial indicator
HUGE KUDOS to you sir
Member
I still haven't tallied up my costs completely, but I need to sit down and do that. I may do that tonight if I get some time.
The inch pound torque wrench (KD Tools 2955) wasn't a terribly hard find (found it at a local autoparts store). The dial indicator (Westward) I ended up borrowing from someone else...It's not so cost effective unless you rebuild all the time, but it's one of those things that you need so you can properly read the backlash.
Member
Here's the price breakdown:
Custom adapter sleeves for ring gear bolts $110.00
2x Timken LM503349A $20.10
Timken HM89449 $14.11
Timken HM88542 $12.62
2x Timken LM503310 $9.88
Timken HM89410 $7.04
Timken HM88510 $6.59
Pinion Seal $5.18
2x Differential Bushings $21.76
2x Axle Seals $15.82
Crush Sleeve $9.14
2x Drain/Fill Plugs $8.10
Pinion Nut Lock Plate $1.44
2x Axle Cap O-Rings $2.98
Differential Front Mount $18.32
2x Limited Slip Clutch Discs $75.12 ($37.56 each)
Carrier Shim Kit $39.00
10x Ring Gear Bolts $24.30
Pinion Nut $6.50
3.46 Ring and Pinion (used) $120.00
Mercury 3" OD/2.5" ID Shim Pack (my custom pinion shim idea) $5.00
Limited Slip Carrier FREE
Case and Associated Parts FREE
TOTAL: $533.00
You can count on the total being lower if you can eliminate the gear swap and the custom spacers. Any E23, E24, E28, or E30 limited slip carrier would eliminate the need for the custom spacers because the holes are bored out for 12mm ring gear bolts.
Member
so about 300 bucks + the few odd tools for a complete rebuild? that's a whole lot better than dropping 1200 bucks for a rebuild...
Are you going to tackle increased LSD lockup via stock parts? becuase that's the other place people spend a lot of money that seems could be done for a lot less...
Bear Motorsports
what happened with the original diff you put together? I've been following your "other" thread very closely and I'm following in your footsteps and putting together a 3.64 diff myself
"Torque is like cowbell... you can never have too much." - Michael Cervi
Member
I thought about doing that, but my first time through I decided to just rebuild it to stock. I've got an idea of what needs to be done, but I'll save it for a project at another time. I'm ok with the stock 25%...this is my daily driver.
Which one are we talking about, the 3.45 LTC set?
Last edited by orangehatter; 05-09-2011 at 07:24 AM.
Resist
BMW CCA Member
well done OP.
Semper Fi
Senior Moment Member
BMW E36 M3 Expert
Ok, so now that you've done this, how much would you charge to rebuild a diff? (stock ring and pinion) I COULD do it, I just DON'T WANT too. I hate gear oil...
My 3.38 is starting to get a bit loud. (I'm pretty sure it's because I had to swap the input flange from the 4 bolt to the 6 bolt when I installed it about 30K miles ago.
No matter where you go, there you are...
Member
Send me a PM and we'll talk.
Senior Moment Member
BMW E36 M3 Expert
kewl...lol
No matter where you go, there you are...
Member
BMW E36 M3 Expert
Nice work, and truly excellent parts research!
Neil
96 M3 — homebuilt 3.73 final drive using E30 diff guts.
Member
Diff is installed, subframe and trailing arms pockets reinforced, and AKG 95A poly subframe bushings installed. Only another 470 miles until I can consider this diff "broken in"...
Member
I may be tackling this myself - I have a limited slip unit I need to Replace the clutches on, and am considering adding two more while I'm in there. Do you know the orientation of the extra clutches if you add them?
Great Thread!
Brendan
'90 E30 M3
Boston, MA
Rational Primate
Holyshitandthankyousir!
You have just put a goldmine in the BF.c archives and should be highly praised for the work you've done! I'm gushing with anticipation of going back over this in detail.
Again, latitudes of gratitude,
 Posting Permissions


 Reply With Quote
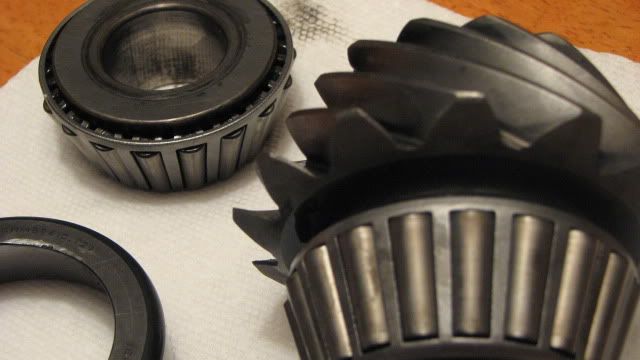


Bookmarks