
 You've got red on you.
Originally Posted by bennyfizzle
 is that a no? lol
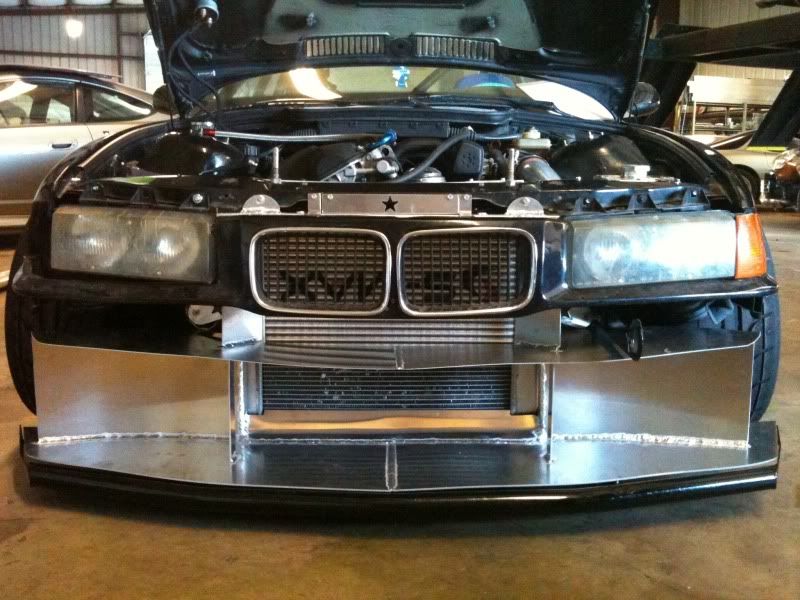
Left subframe at turn 3
Missed you, Ill take some pictures when I get to the shop tomorrow. Its fairly basic. All you need is some 1 to 1.5 inch decent walled pipe bent to fit around the bumper. Then make a bracket that attaches it to the frame of the car and the sway bar mounts.
Longstanding Member
been waiting for pics of that for a while myself, it looks really good, but i bet its low huh?
-Andrew Mensah
Left subframe at turn 3
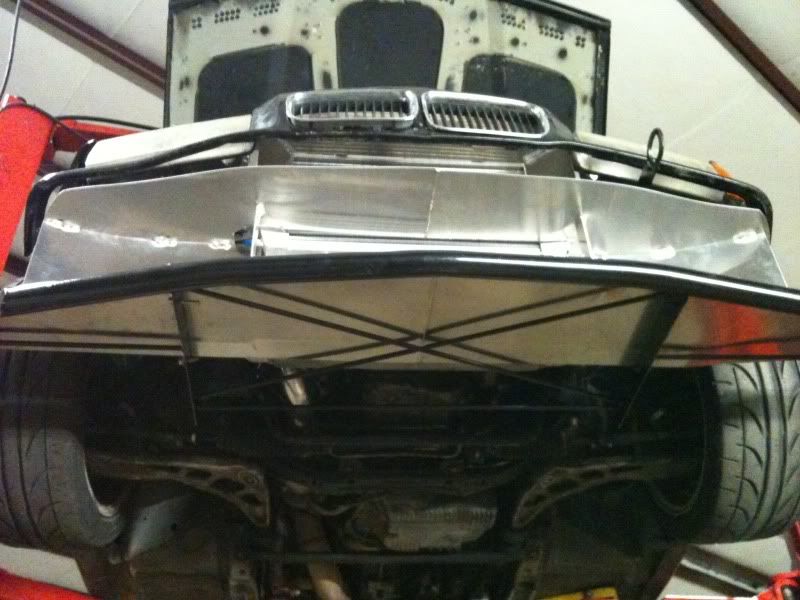
Car is actually a monster truck. It's only 2 inches lower then factory at the jack up points. Bash bar sits about 4.5 inches off the ground.
You've got red on you.
Yeah I really just want to see how you have the bracket set up, does it bolt right to the end of the rails? like sandwiched between the bumper and rail? That's what I was thinking.
Member
Rad build! Your driving is very impressive along with the car..
Longstanding Member
nice, i dont plan on going any lower either, but i really wanna see this bash bar so i can set one up on my car before i start trusting people in tandem.
-Andrew Mensah
You've got red on you.
I don't see how a bash bar will help much in tandem lol
Longstanding Member
getting close and touching people... no?
-Andrew Mensah
You've got red on you.
the bash bar's a little low for that, that's what your bumper support is there for.
the bash bar is to protect fragile bits like intercoolers/radiators/oil coolers/ducting int he event you whack a cone, clipping point, etc. I suppose if it was a full on crash bar it would help for tandem, but usually bash bars mounted low, like r/c car bumpers.
Member
^ Yup, im about to make one tomorrow i already bought everything i need to do it so im gona weld it and install and try to make it bolt on, just in case i want to remove something or whatever will post pics of the process.
You've got red on you.
please do!
Left subframe at turn 3
taking pictures now benny, sorry for the delay. Clutches in the diff decided to go bye bye in Cali.
Left subframe at turn 3
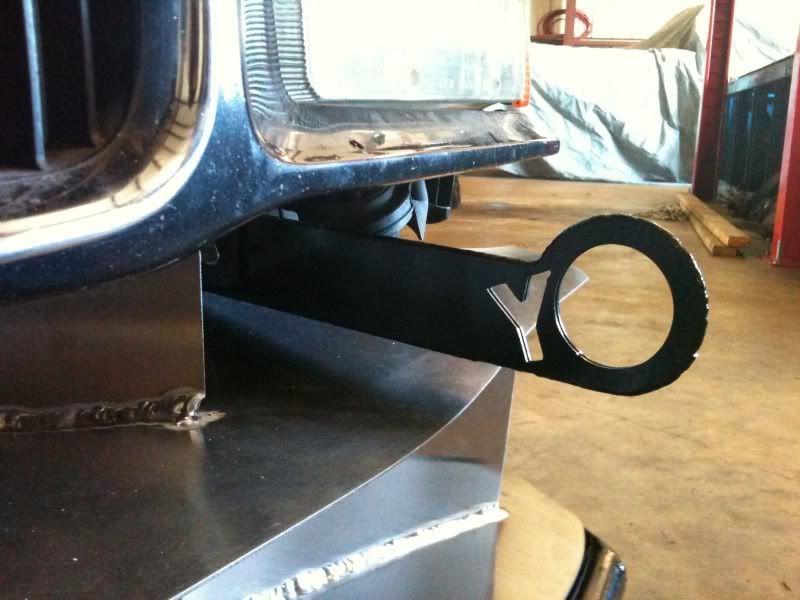
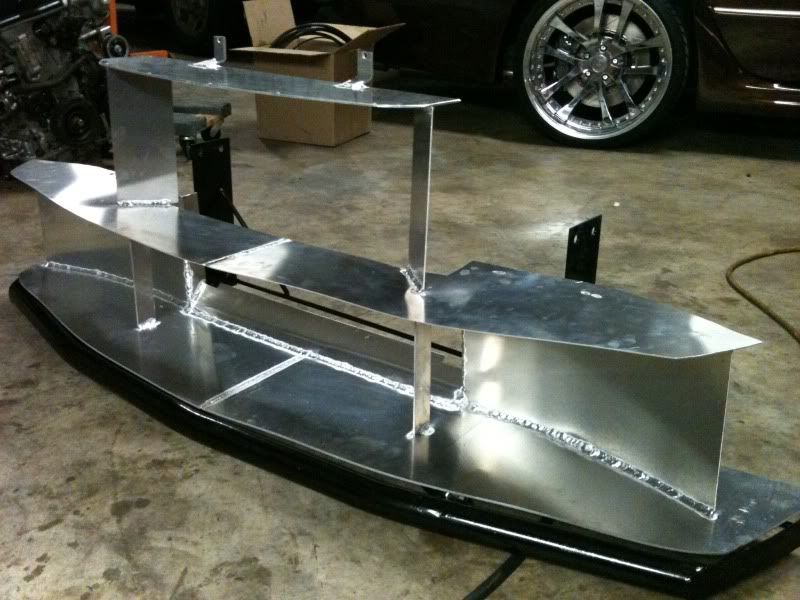
Here are some pics from when we built the bash bar
The 4 holes in the mounting arms have bolts that go right through the frame rails. Then we have a lower pair of braces that go to the sway bar mounting bolts
Last edited by ienjoydrifting; 03-25-2011 at 01:06 AM.
Stock.
That's soooo sexy!
Member
Beautiful car/build... question, where is level7tune based out of? It seems like they make a ton of drift parts for our cars
Member
Keep up the good work! Love the car!
Left subframe at turn 3
Houston, TX. I know the guy really well!
Member
very nice build allways like your car and your insane drifting good luck in xdc
Left subframe at turn 3
Just swapped in a welded diff, and put my rear bar back on for a couple slower local events and phoenix. Ill report back with how I feel about it.
Doing a test day this weekend to dial the cars exit speeds and mid drift stability on decel. Car is becoming a monster... O and the boost is back to 1.1 bar.
Vibrant also just sent me a bunch of products to redo my exhaust, 4 inch oval stainless with an expansion chamber for sound. Also a 4 inch aluminum intake. So if anyone has a bottom mount turbo e36 and wants an aluminum exhaust that weighs 7.5lbs, Ill take $400 for it.
Member
Hey man what thickness Lexan did you use? I couldn't find in the FD rule book where it said the required thickness of side/back windows. The rule book said that the front window had to be 3/16 but that seems kinda thick for the sides and back.
Thanks
You've got red on you.
such a sick bar.
Member
love at first sight does exist.
this car is so perfect. the bash bar is sick. good stuff man. amazing fab work too! im so stoked on that bash bar. you should make them and sell them. i would buy. just cut and bend the bars and ship them unwelded and have the purchaser weld them up. man that's sonnice! mad props to you man.
Last edited by MauiM3Mania; 04-20-2011 at 02:18 PM. Reason: profanity
Left subframe at turn 3
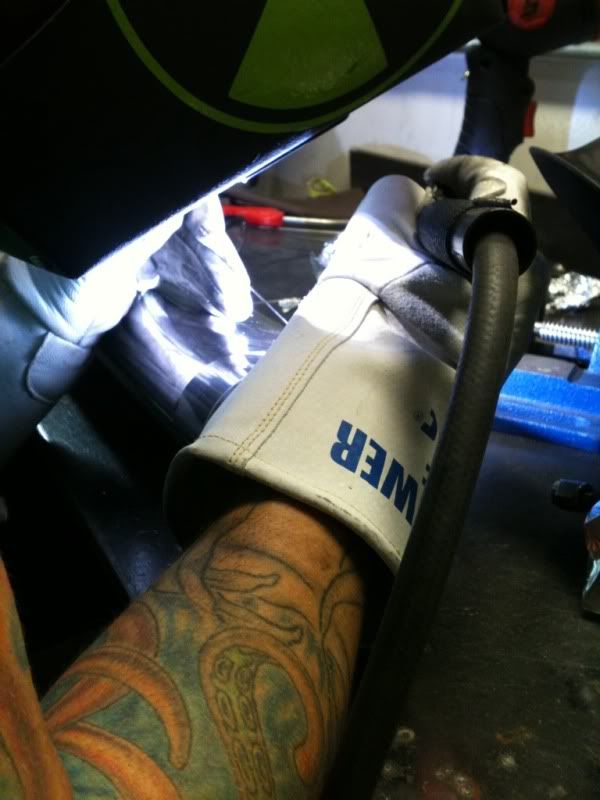
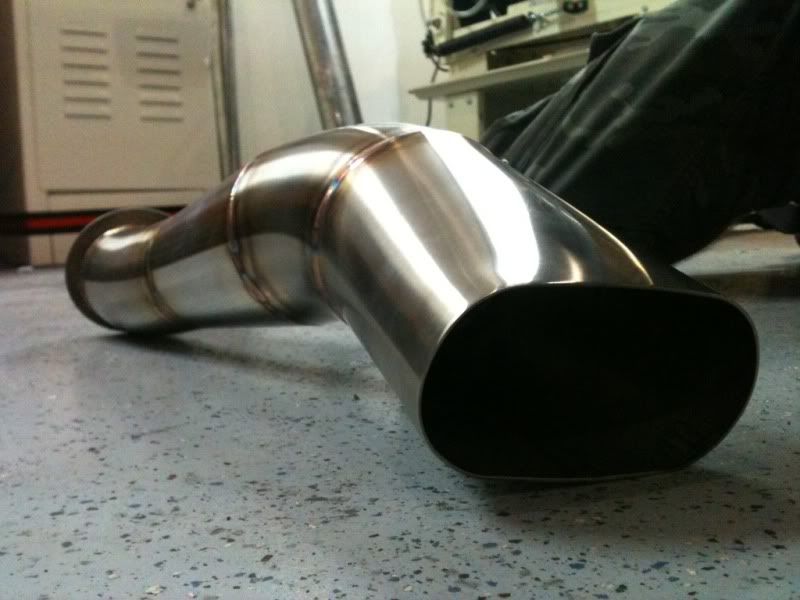
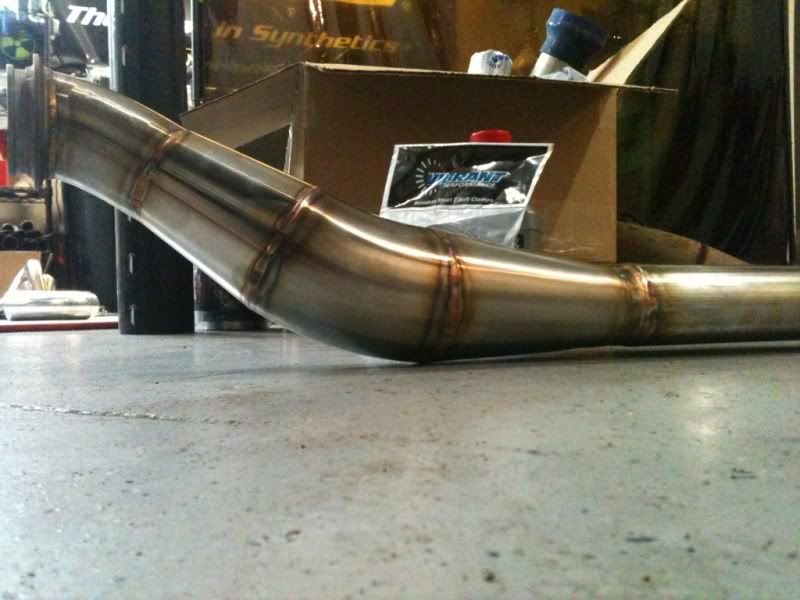
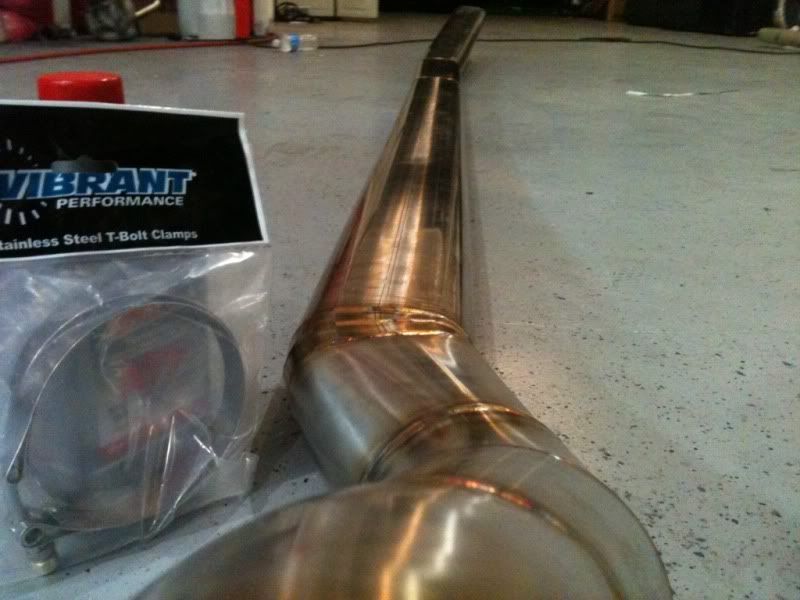
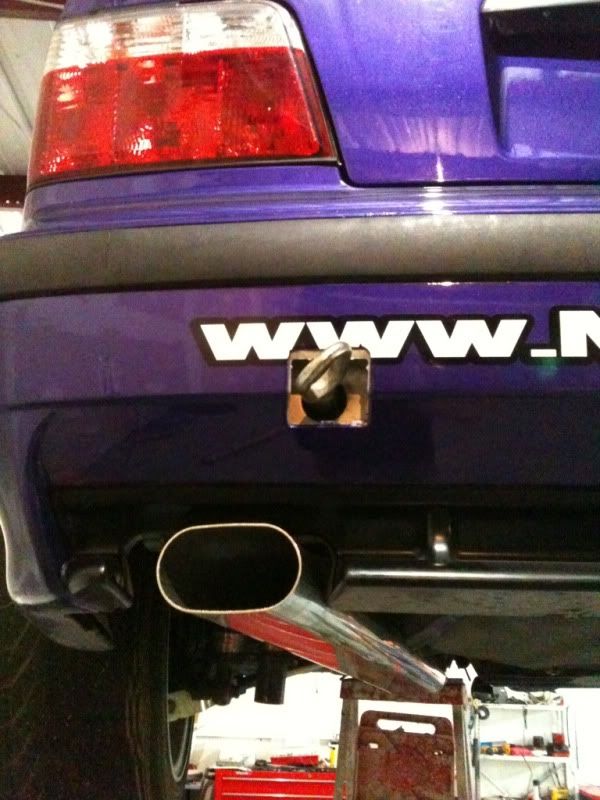
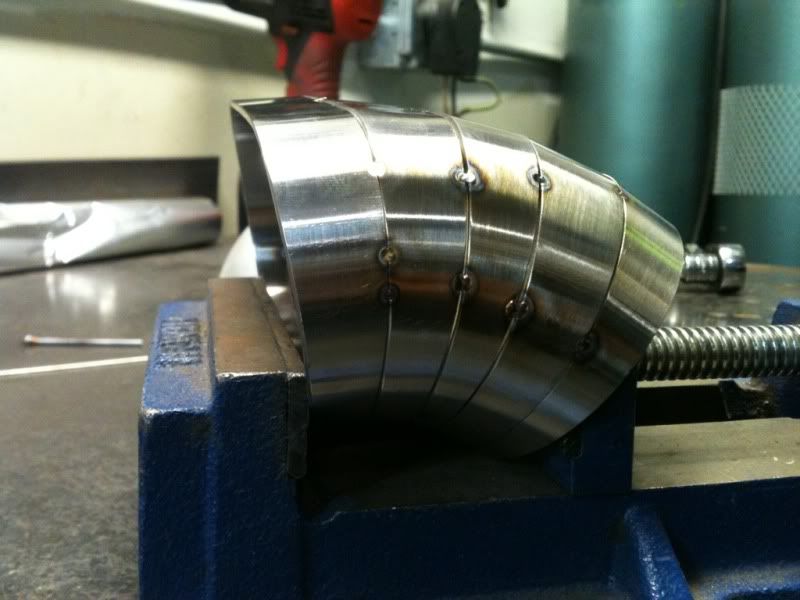
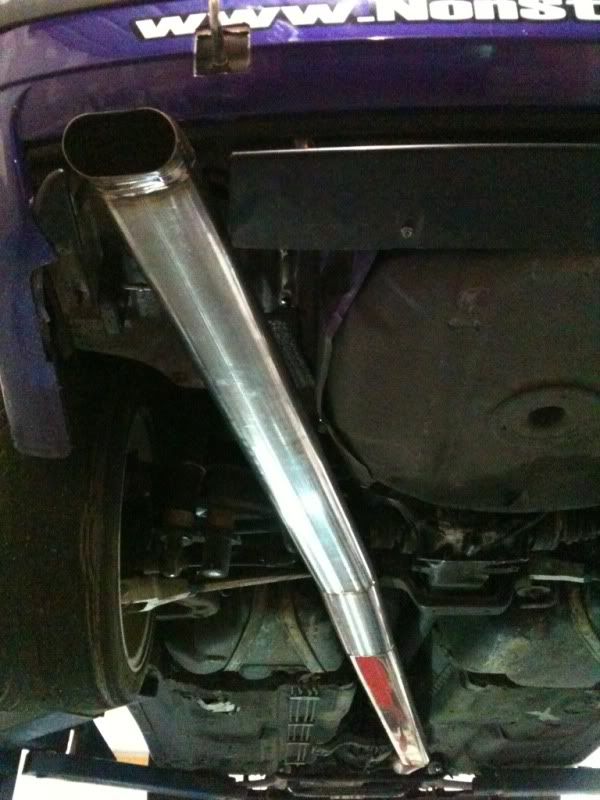
We built a rad new exhaust!
Just finished up testing our new Vibrant exhaust in Phoenix for XDC. The setup that was on the car had seen better days. It was a mild steel 3 inch down pipe mated to a 2.75" inner diameter aluminum exhaust that was light, but restrictive.
We knew we wanted to go 4 inch, but how? I mean that is a massive diameter, try fitting a grapefruit under a drift car... Although my car is a monster truck, it still would not fit well and would lead to clearance difficulties. Vibrant gave us the answer with their rad new T304 Stainless Steel Oval exhaust tubing. Full 4 inch piping, but only just over 2 inches of vertical height! Plus is looks like it belongs on a Big Tymers car, "I like loud pipes, Big rims, White Ice!"
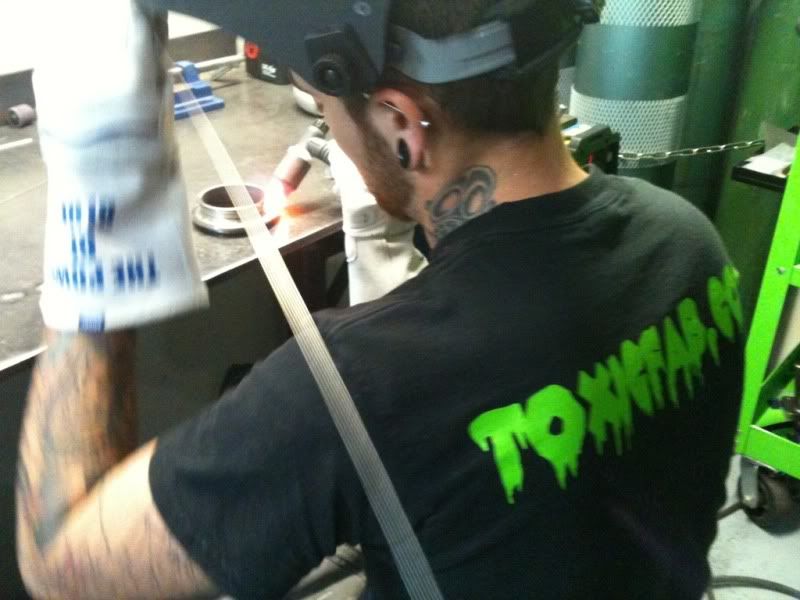
Getting my roll on, I headed over to Toxic Fabrication. The owner Collin Meyers is a gnarly fabricator and knew just want needed to be done.
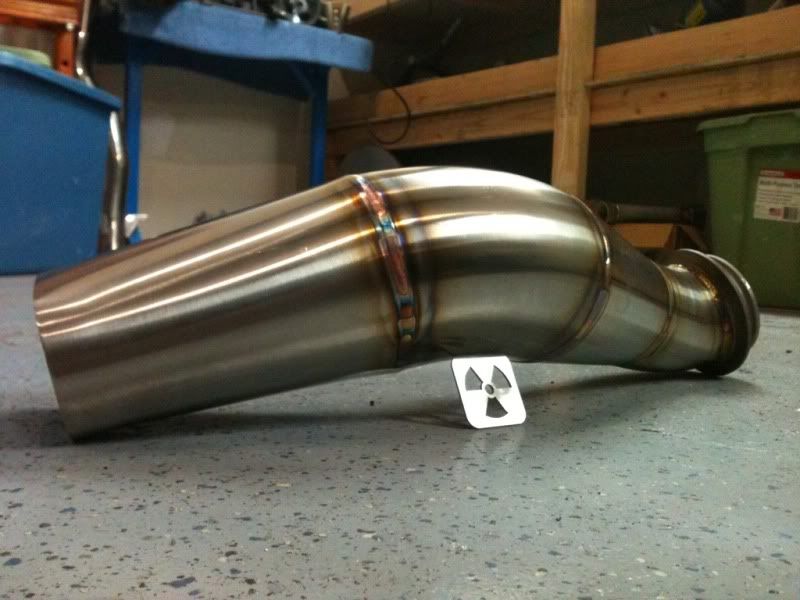
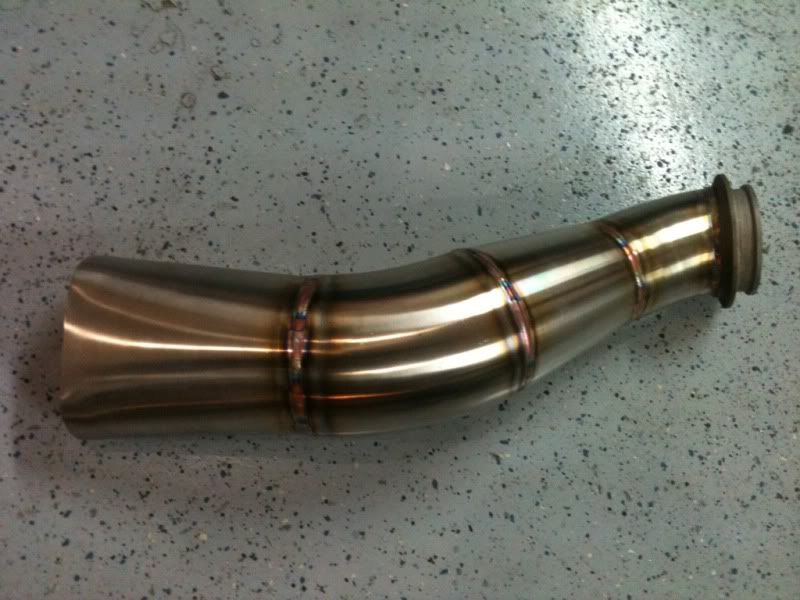
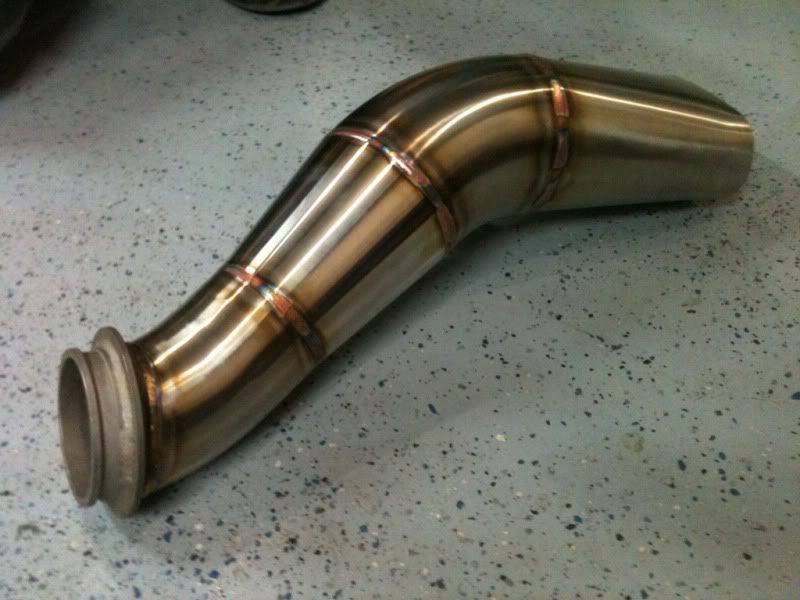
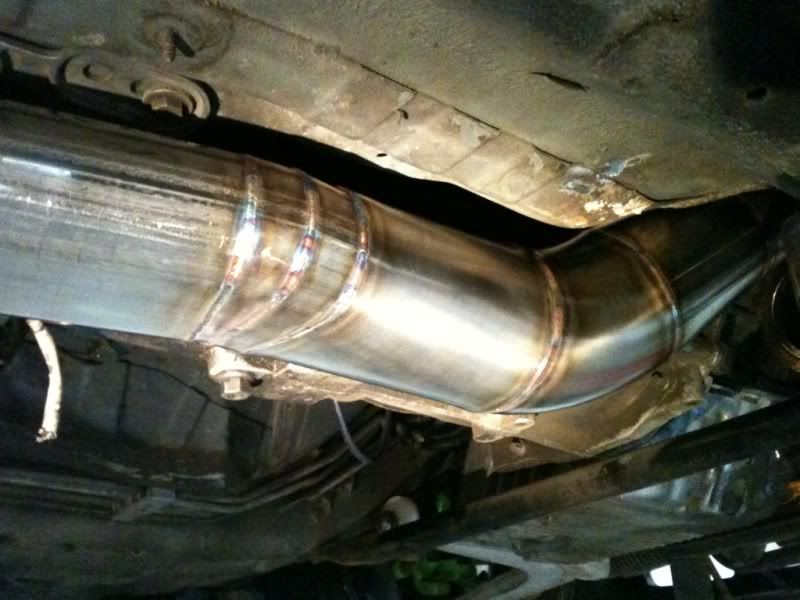
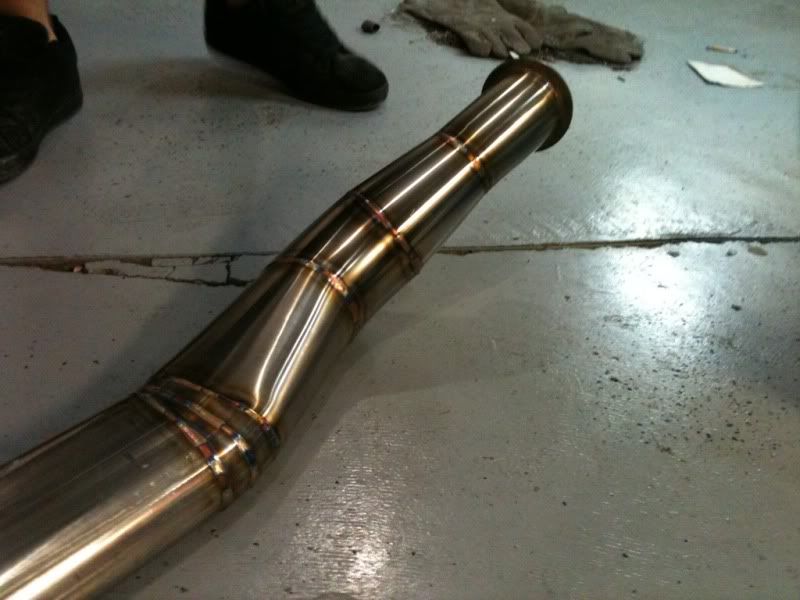
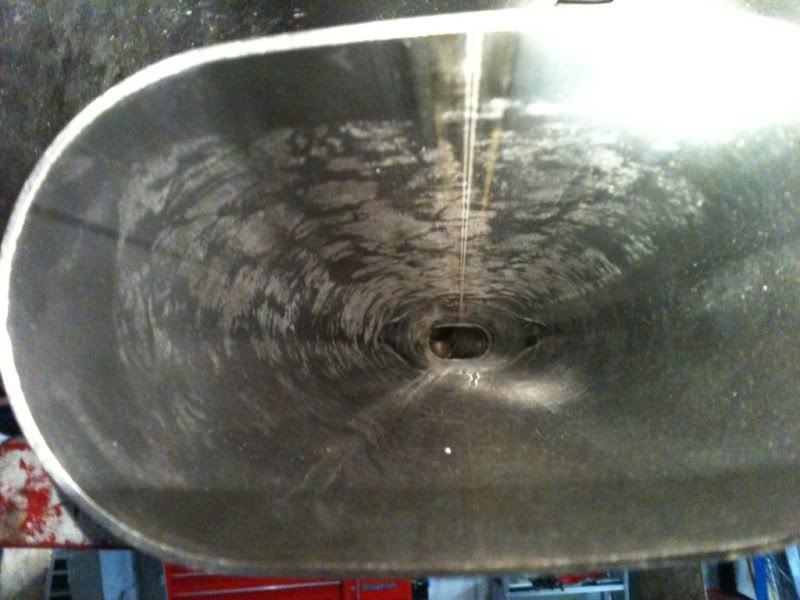
Here is the downpipe. We wanted to go to 4 inch as soon as the car gave us the clearance to, so we utilized a Vibrant 3 inch stainless mandrel bend then immediately coupled it to a 3 to 4 inch expander. Attached to the expander is the start of the 4 inch with a 45 degree mandrel bend, that is welded to the 4 inch round to oval transition with welds that speak for themselves. This piece looks like a 2 stroke snowmobile exhaust! Totally ill'! Collin and I were amped to see the finished product. Fully back purged!
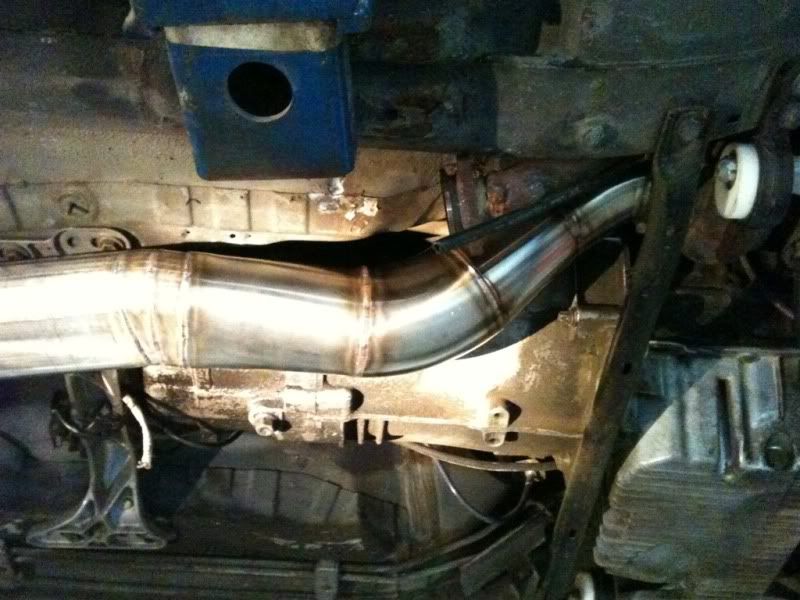
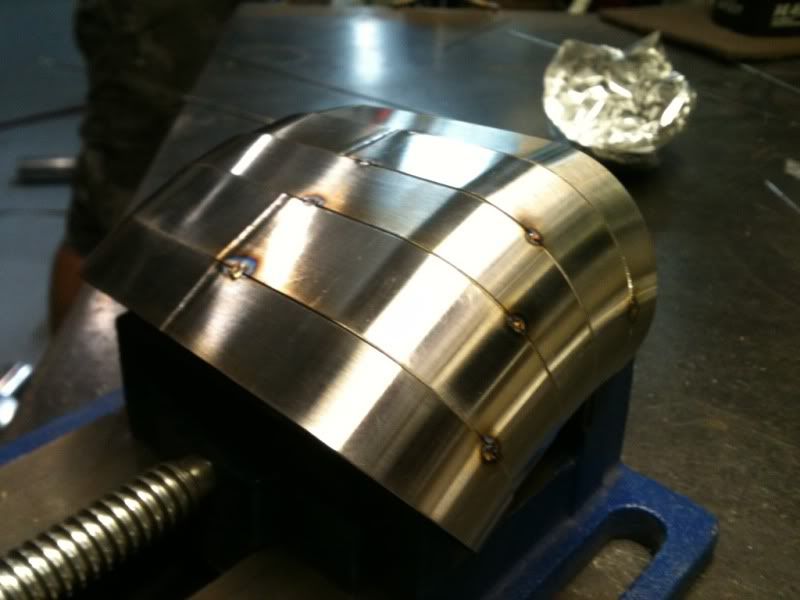
Then we moved onto the fun part. Since we knew there would be less then 10 degrees of bend from the downpipe to the bumper, we decided to have some fun pie cutting the oval tube. This is neat because you can cut the oval tube so that it not only bends left to right but up and down at the same time. Here are some pictures of the exhaust being fitted.
Downpipe is on the car and the first bends are in place.
Back off the car for a few more fitment needs.
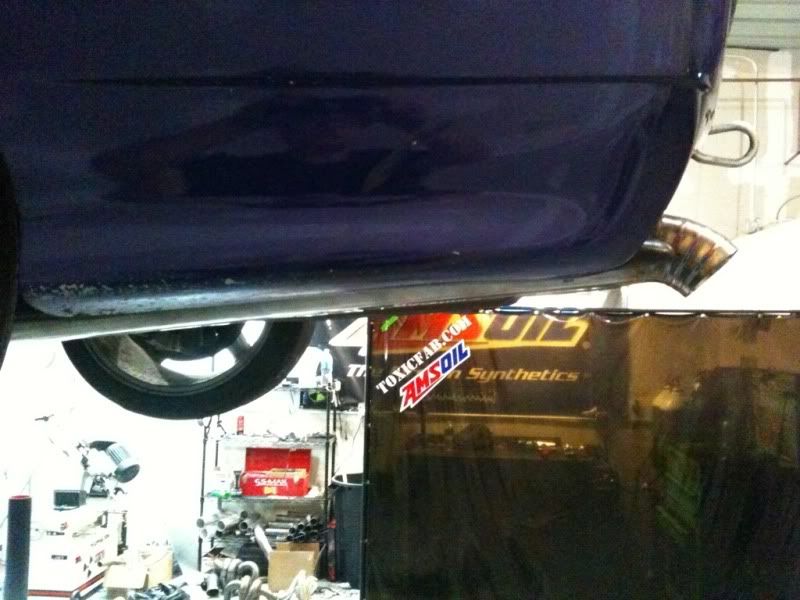
Exhaust piping all the way to the bumper with minimal bends and no clearance issues!
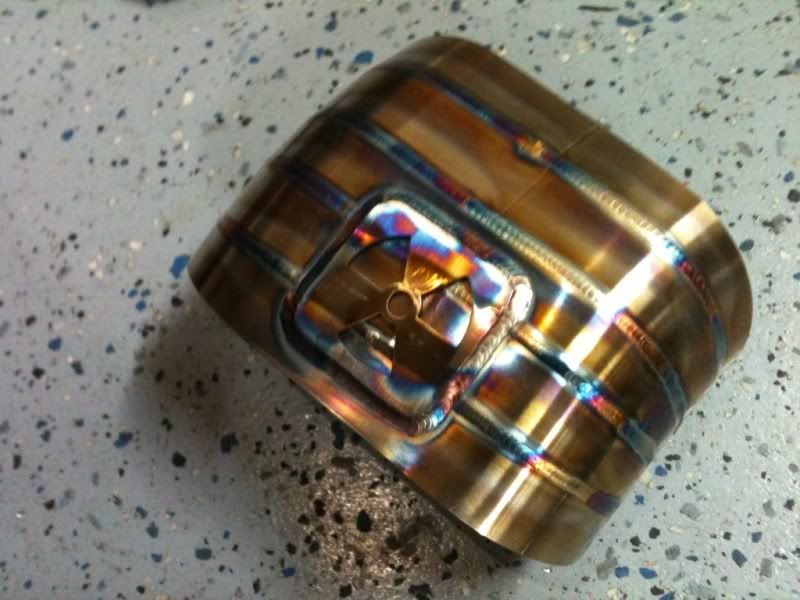
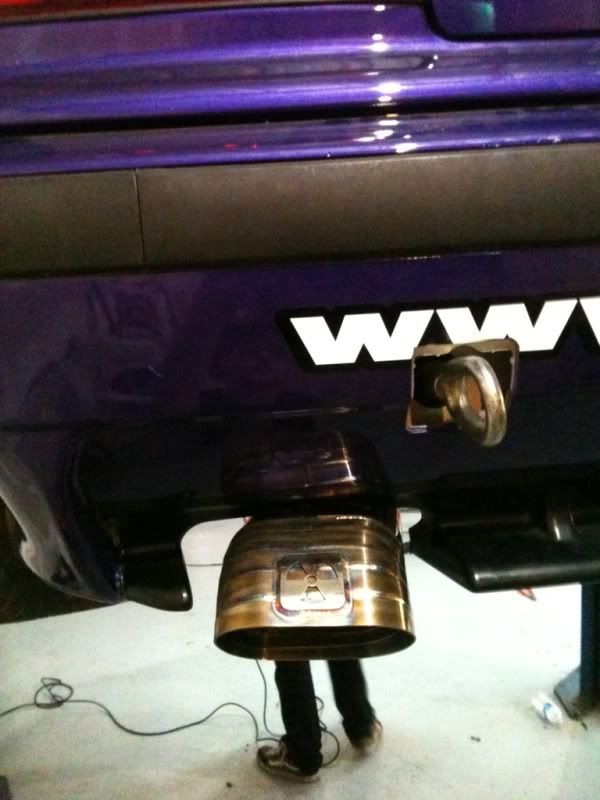
You can almost see the turbo!
On the car
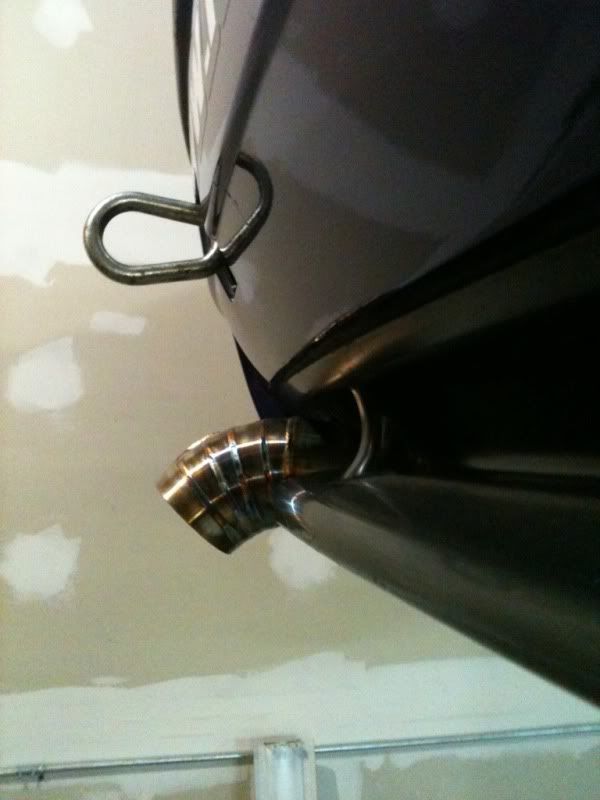
We had decided that the exhaust needed a special touch. These 3 words will only come out of my mouth when talking about exhausts "TURN IT DOWN"
Pie cuts!
Toxic FAB
Overall the exhaust turned out awesome! Sound is great! It's about 30% louder then the old 3 inch, and has a much more aggressive tone. The real difference was spool time and the power throughout the band. Boost comes in faster and 300 RPM earlier! We are headed to the dyno next week, but in AZ heat it felt like it had another 40+ Horsepower at the wheels. Maybe this is exhaust is the reason I was trapping 5-8 mph faster then everyone at the entry point...
Stiff Member
looks like a droopy pee pee
Status: Someone put glitter in my oil. Wait. Why's all my oil outside the engine? What's that knocking?
 Posting Permissions


 Reply With Quote
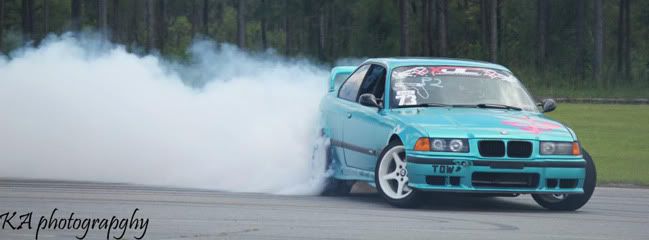


Bookmarks