
 Member
Rebuilding a differential is not as complex as one would think and with a little patience and the proper tools/techniques, it's something most can accomplish on their own. The diff I'm doing here belongs to Crusty320. It's an LSD unit from an 83 IS, but I won't be getting into the clutch packs or replacing the gears on this one, it'll be a bearing & seal rebuild only. The steps are essentially the same whether it's an open diff or LSD.
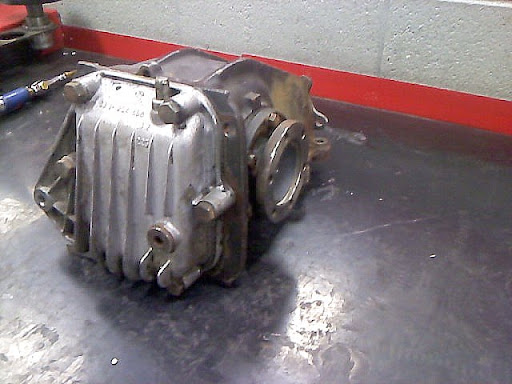
The diff in question
First order on business is to drain the old oil and remove the cover. If possible, before you pull the diff out drain & refill with ATF and drive it around the neighborhood for a couple of laps, keeping it under 25 MPH and then drain out the fluid. This will help flush out some of the crud that has built up over the years and make for a cleaner teardown. This one came from a donor vehicle, so the ATF wasn't an option.
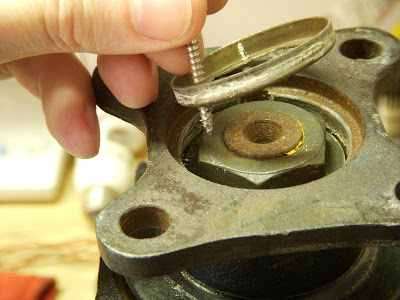
Next step is to pop the drive flanges out. Use one of the bearing cap bolts as the fulcrum for the prybar and give a little pressure. The flanges are held into place by circlips insinde the carrier assembly. If you find yourself struggling, get a second prybar for the opposite side.
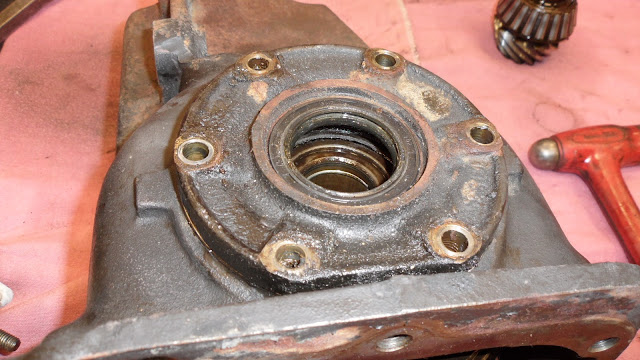
Next step is to remove the 6 bearing cap bolts on each side
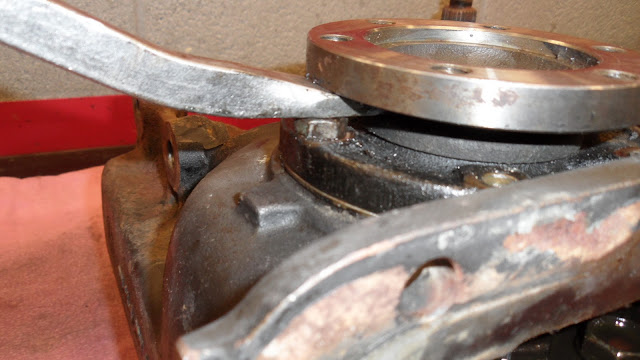
Now is where finesse comes into play. Using a hammer & chisel, coerse the bearing cap away from the housing buy working it a little on each side, just enough to get the tip of your prybar into. If you look closely, you'll see 2 chisel marks on the bearing cap and 2 on the case. The opposite side has 1 mark each, this way they go back to their respective sides.
This is where you'll probably need 2 prybars. The best method I found is to hold even pressure with one prybar and then sort of bounce the other one to remove the cap.
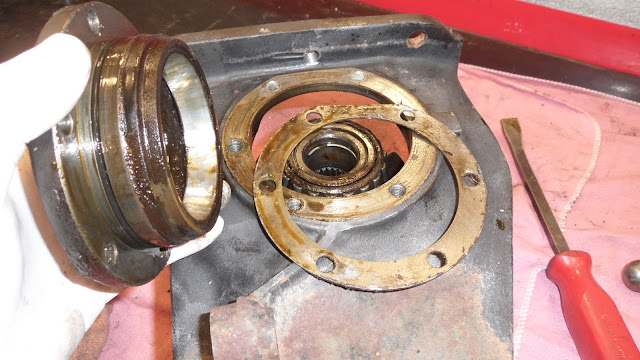
With the cap removed, you can see bearing shim.
KEEP THE SHIM WITH THE MATCHING CAP!!!! I used mechanic's wire here because I didn't have any zip ties handy.
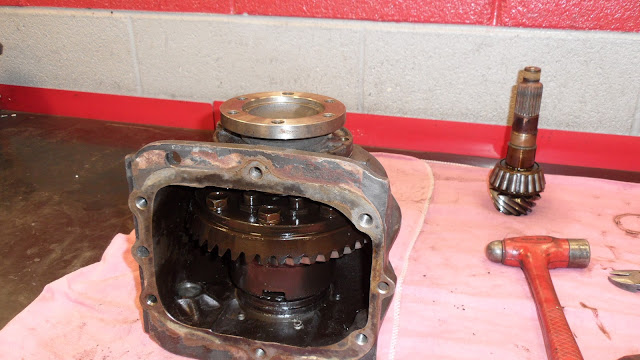
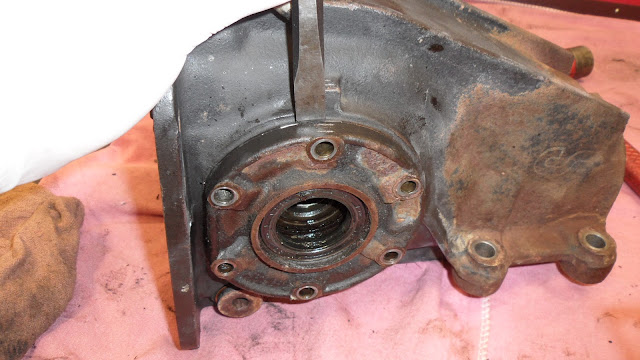
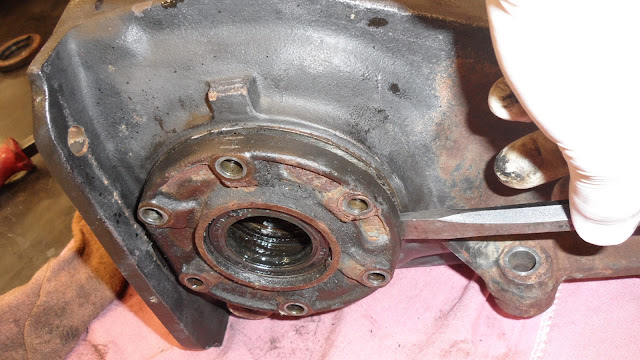
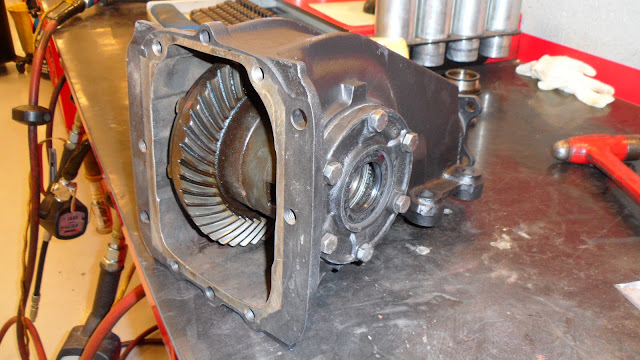
Once both caps are off, the carrier assembly falls right out.
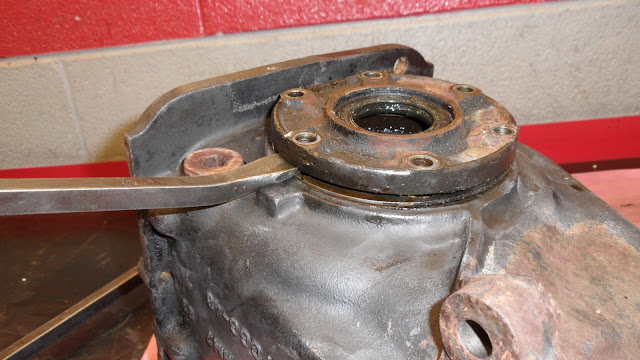
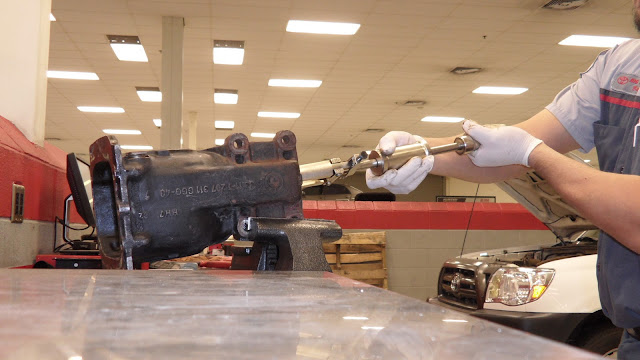
Now remove the lock plate and pinion nut. A flat blade screwdriver or thin chisel works to remove the lock plate if it's not too rusted.
This is where you need access to a press. It can also be done with an air hammer using a punch bit. DO NOT use a flat hammer bit, you WILL mushroom the threads and then you'll need to replace the ring & pinion as well $$$$$$. If you have a large brass hammer, you can use that without the risk of thread damage as brass is softer than hardened steel.
Chuck the housing up into a vise and remove the input seal.
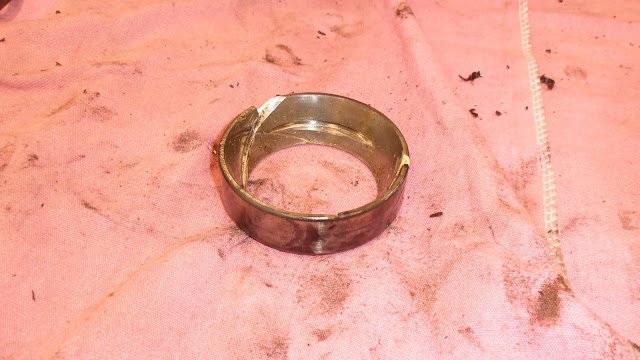
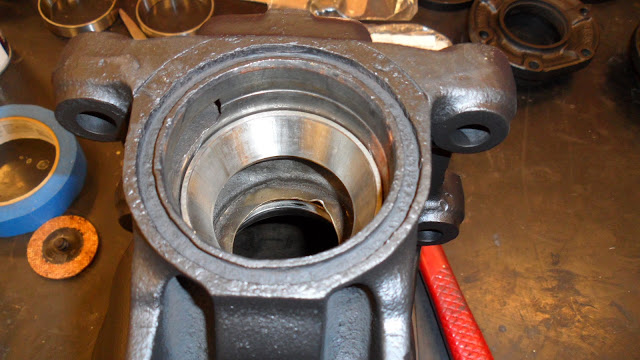
If you don't already have one, you can rent a slide hammer from your local parts store to remove the inner races.
After 30+ years, the races don't want to go easy. This one practically took an act of God to get out. I ended up have to cut slots into the races with a cut-off wheel, heating it in the parts washer and then hitting the races with ice to get them to free up enough to move with the slide hammer.
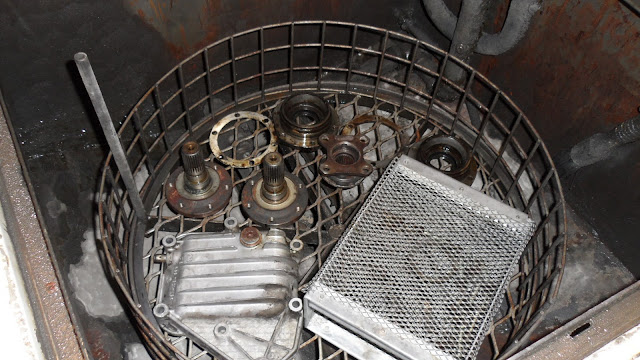
Finally, the parts are ready for a good, long spin in the parts washer.
The basket holds the hardware so they don't go all over when the jets hit them.
Next update will be in a few days when I get the gaskets, seals & bearings. That's when the real fun begins. Stay tuned!
He who dies with the most unfinished projects winsOriginally Posted by Tom D

Member
keep the pics coming, this is really rad!
Member
Staying Tuned!
Smoothe move on that race, I'da probably gone crazy trying to cut all the way through it and goof up the housing
Last edited by epmedia; 01-22-2011 at 02:26 AM.
Tbd
Member
thanks for the guide, i am about to embark on rebuilding an E36 M3 diff and couldnt find a guide anywhere
Legionnaire
how much do all the seals and bearings cost?
Member
these are for the input shaft on an euro E36 M3
http://bmwfans.info/parts/catalog/E3...n_gasket_ring/
and this is for the output shaft on a euro E36 M3
http://bmwfans.info/parts/catalog/E3...ension_gasket/
prices may be a bit higher due to the M tax
S50 Powered 2.9 M20
Cool. I have a 3.91 diff that I was thinking about sending out to Quaife for a rebuild.....but this is inspiring...
"..Horsepower is a measure of work done over time, or the rate at which work is done."
http://www.cardomain.com/ride/579694/1

Member
I can put together a list once completed. I've looked at: Pelican Parts, BavAuto, AutoHausAZ, and the dealer.
The inner pinion bearing (33121206739) is 'dealer only' and looks like it's about $50. I'm also going to order the crush sleeve $3(33121200259), and gasket/seal kit $80(33101203002) through the dealer.
The other 3 bearings can be sourced through the sites above at about $13 each for the output bearings and $19 for the outer pinion bearing.

Member
Thanks! If you're handy with a mig or stick welder, you could run a bead on the wear surface of the race and when it cools, it should coume out without too much fight.
He who dies with the most unfinished projects wins
Member
I busted the tips off two flatheads.
I bought the complete seal kits from bavauto for $81.
Includes input/output seals, carrier O-rings, rear cover gasket and fill/drain crush washers.

Eric P.
Legionnaire
yikes, that's a pretty penny for seals and bearings! cheaper than a new diff though i suppose
Member
Member
^ +1. You might clarify pic 11 though, I'm not sure what the lock plate is. I'm sure I could figure it out if I had it in front of me, but it's not obvious from the pic.
Member
Thanks, that's kinda the goal.
Yeah, I actually had to take that one with my phone as I didn't have my camera with me when I started the teardown on Thursday. I partially reassembled to unit the next morning so I could get some better pictures with my camera and I already had the pinion out. When I do the final re-assembly, I'll change the picture and add a couple others for the teardown part.
He who dies with the most unfinished projects wins
Member
Lock plate: This PITA. I busted two flat-tips trying to pry it out.
So I went this route ...
Last edited by pommeree; 01-22-2011 at 06:56 PM.
Eric P.
Baurspotter
Toyotech, this is a great thread. Thank you. I am not nearly ready to do this, but, if I do, this will be invaluable. I am with jimbo.... I do think it is FAQ-worthy.
Tom
SE Connecticut
1982 323i Baur, 1977 320i (carbed),
1978 320i (parts)
1991 325ix 5 speed, 1989 325ix (winter),
1989 325ic (summer)
1973 2002 Malaga (with frosting)
1975 Mercedes W115 300D (The Departed)
the late 1979 323i Euro (project, Now Departed)
Visit my blog: Baurspotting
http://baurspotting.blogspot.com/
BWR PWR!
Member
wow, great thread. Thanks Toyotech! I'm gearing up for a refresh on my 3.45 open to LSD conversion this spring. I have a seal kit (from bavauto), and new friction plates, clutch disks, and belleville washers for the LSD unit (from Maximillion). This thread will come in handy.
The LSD rebuild parts cost about $250 from Maximillion Importing. I went with the thickest of the 3 friction plate options hoping for a little more lockup. If it were me and I was going to do full rebuild (new bearings, etc) I'd buy the bearings, crush sleeve, and any shims, if needed, from them.
Pinion Components
Output Bearings/shims
LSD Components
I'll add this to the faq.
Member
JR,
Let me know how that goes! I have the '80 with the original 3.45 open and I'd LOVE to rebuild her with an LSD. I have that diff and the one off the '82 to mess with.
I still drive daily with no commute...
The Hazard is All, Praise the Hazard!
Member
Hey, that lockplate is similar to the one on the tranny output flange.
I removed one by holding the flange, and then just unscrewed the nut.
Last edited by epmedia; 01-23-2011 at 05:44 AM.
Tbd
Member
The reassembly stage. This is where all the prepwork and orginization comes into play for a smooth process.
I guess I didn't remove the pinion or diff side bearings in the first part
Basically chuck it up in a bearing plate and press the pinion out of the bearing.
You want to remove the cage and the rollers from the bearing for the next step
Slide the new bearing onto the pinion and then invert the old bearing race and slide it onto the pinion as such. DO NOT apply any pressure on the bearing cage or rollers, you will damage them and will render the bearing usless. To ensure I don't have any issues, I always spin the cage & rollers with my fingers while I'm pressing the bearing on to make sure I'm doing it right.
While you have the cut off wheel fired up, remove the cage and rollers from the carrier side bearings
Set the bearing plate tool onto the ridge and press the races off of the carrier. The other option is to cut a slot into the race and use a chisel to split it.
Press the new bearings onto the carrier just like the pinion by inverting the old race and using it. Once again DO NOT apply pressure to the race.
All painted and ready to put back together
Drive the new races into the housing. If you put them in the freezer for about 30-40 minutes, they'll shrink up just enough to ease the install.
Set the new bearing in and then the new seal
Drive the new races into the side covers
Using one of the old diff side bearing races, install the new seal
New crush sleeve
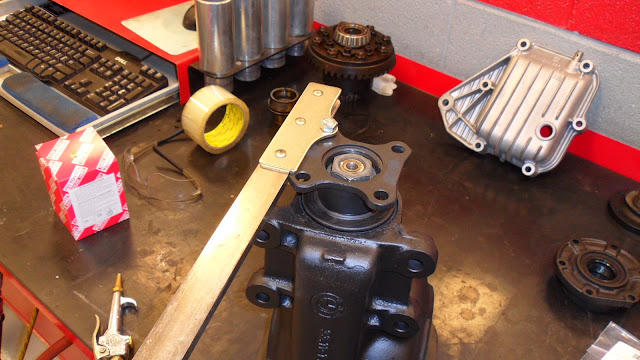
Now is when you get really crafty and build yourself a flange holding tool. Mine is an actual Toyota SST, but you can build your own using some flat bar stock (at least 1/4 in thick) with a couple of holes drilled into it and some bolts.
I hope you ate your Wheaties for the next step! The new crush sleeve is a MAJOR PITA to compress. Get your biggest breaker bar and possibly even a cheater pipe to tighten the nut to compress the sleeve. After the first 3/4 of a turn, it gets easier but you'll definately work for it!
You'll know when you have it compressed and the bearings seated when it goes from sorta easy to very tight all of a sudden. That's when you want to stop and check turning torque.
You'll need a 1/4 drive beam torque wrench for this. BMW spec is 21 in/lbs of "turning friction"
After you do that, install a new lockplate and the pinion side is all set.
A little grease on the housing to help slide the side covers into place
New o-rings on the covers
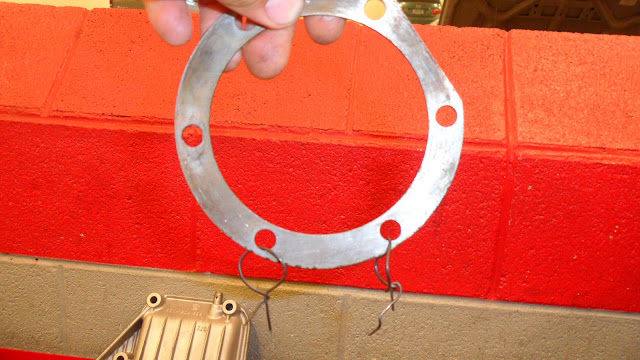
The observant ones are wondering where the shim I had tied onto the covers went to. Remember to always keep things marked somehow.
2 metal wires..
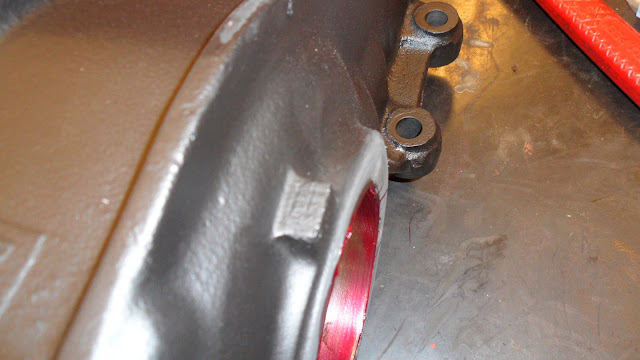
Remember the 2 marks I put in the case?
Ready for the final check
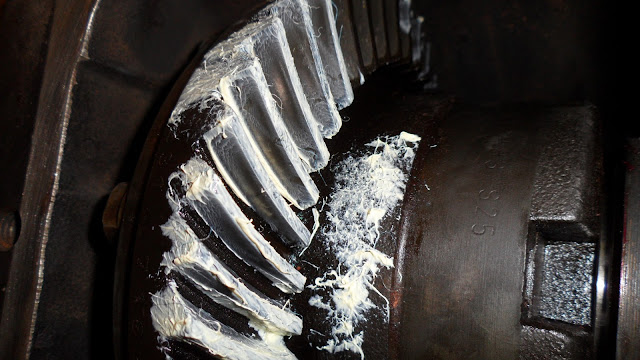
You can go spend $5 on a tube of gear marking compound or reach across your workbench and grab the tub of lithium grease. Paint a section of the ring gear with it, at least 4-6 teeth, getting down into the crevasses. Now, while applying pressure on the ring gear, spin the pinion gear through 1 rotation of the ring gear and then back the other way. Do this a couple of times and check the wear pattern If you've done it right, it should look like this:
Even wear pattern on the drive side as well as the coast side of the gears
Install the output flanges and your nicely painted (or bead blasted in this case) diff cover using a little permatex spray-tack to hold the new gasket into place. Once it's back in, fill it and drive it for 300-500 miles and check for leaks.
Here's a list of parts and prices.
Last edited by Toyotech; 02-23-2011 at 07:09 PM.
He who dies with the most unfinished projects wins
Member
Great write-up! Thank you very much!
S50 Powered 2.9 M20
Excellent pics, thanks.
Question: Do you want to rebuild my LSD? Let me know....
"..Horsepower is a measure of work done over time, or the rate at which work is done."
http://www.cardomain.com/ride/579694/1
Member
great thread, very detailed!
Member
PM sent
He who dies with the most unfinished projects wins
formerly powered by m20
Thanks for posting this. It looks fairly straightforward, but what happens if the turning torque or gear contact pattern aren`t right? If a diff feels like it has excessive slop in the gears, can that be improved by replacing bearings or shims? Or does it mean that the gears are junk?
 Posting Permissions


 Reply With Quote


Bookmarks