
 BMWCCA 484984
Tools Needed
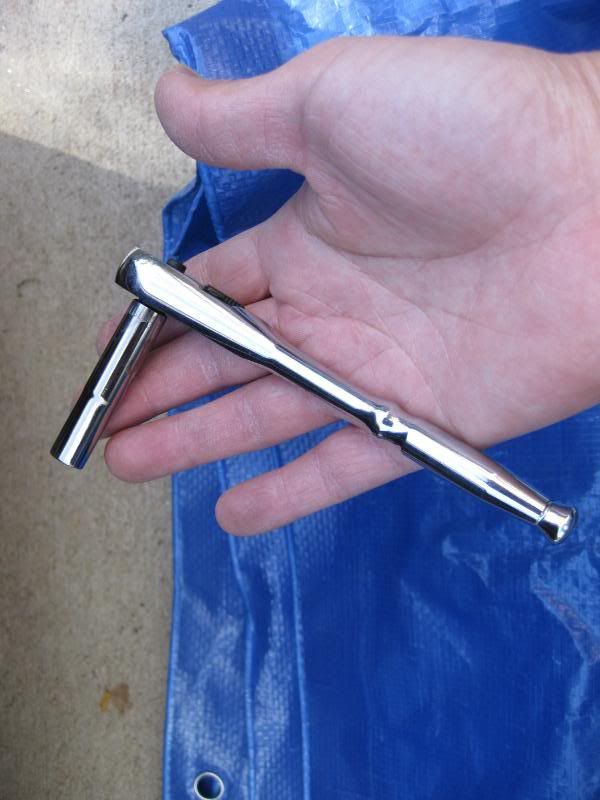
7mm deep socket and wrench
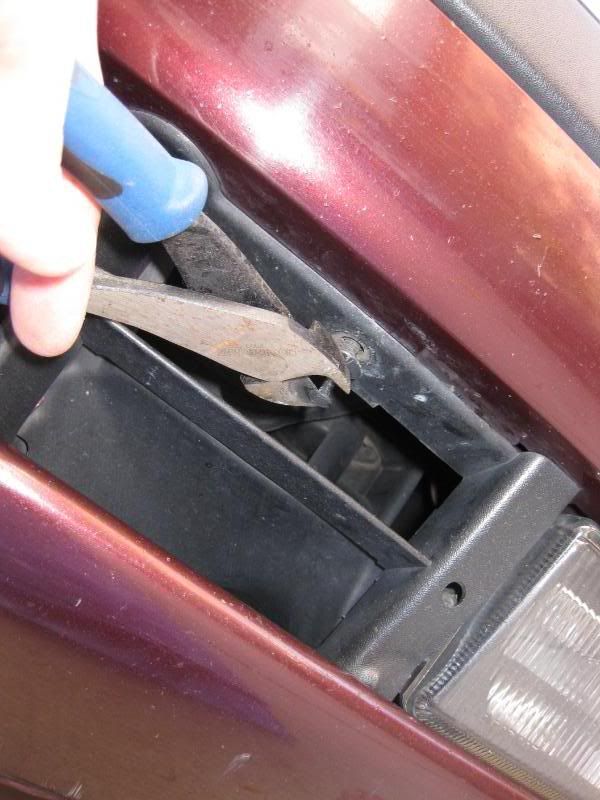
Expansion rivet puller (I gently used wire cutters)
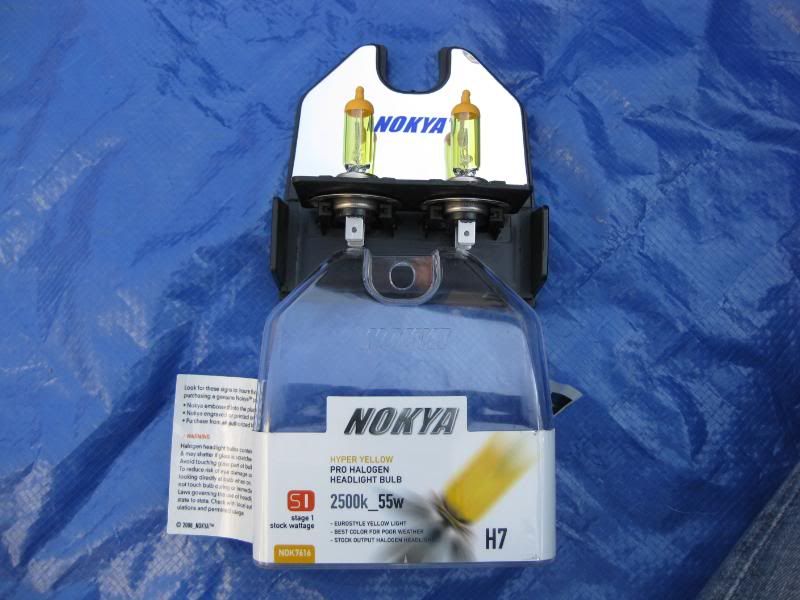
H7 replacement bulbs (2)
Time to completion
Approx. 10 minutes_______________________________________It's recommended to replace bulbs in pairs.
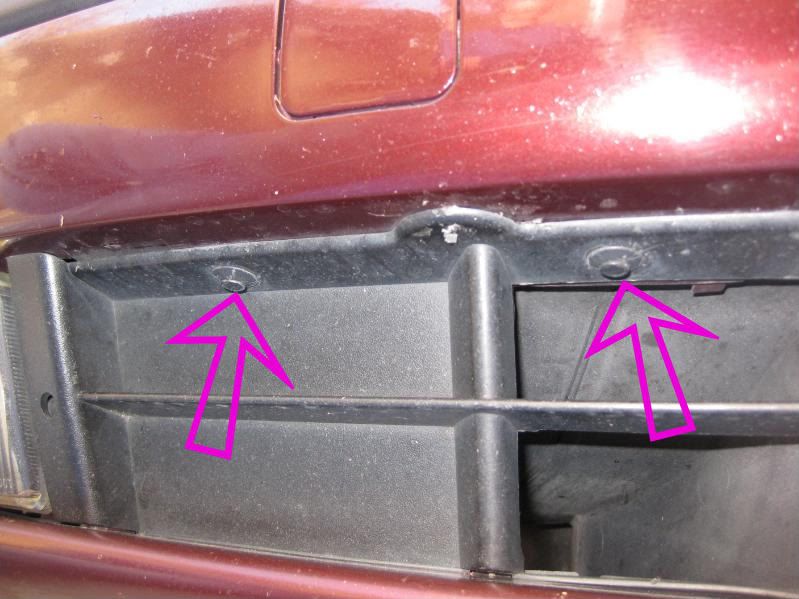
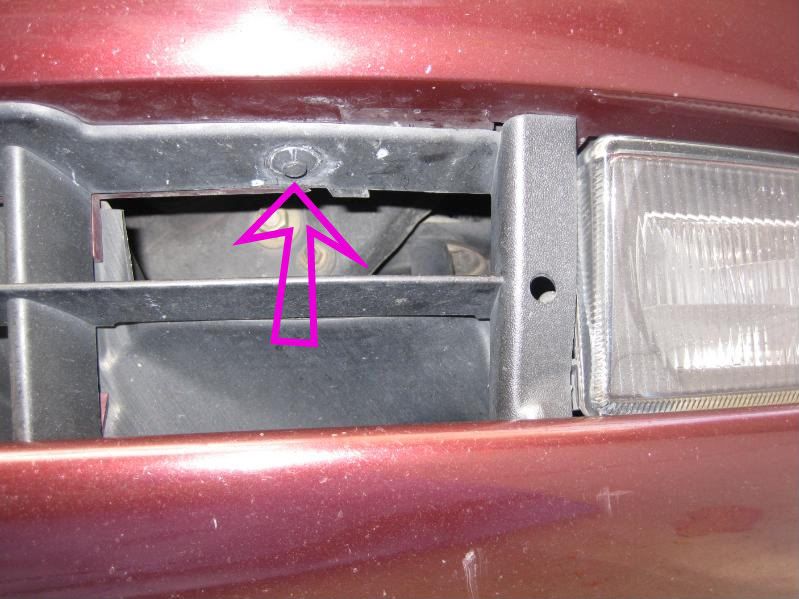
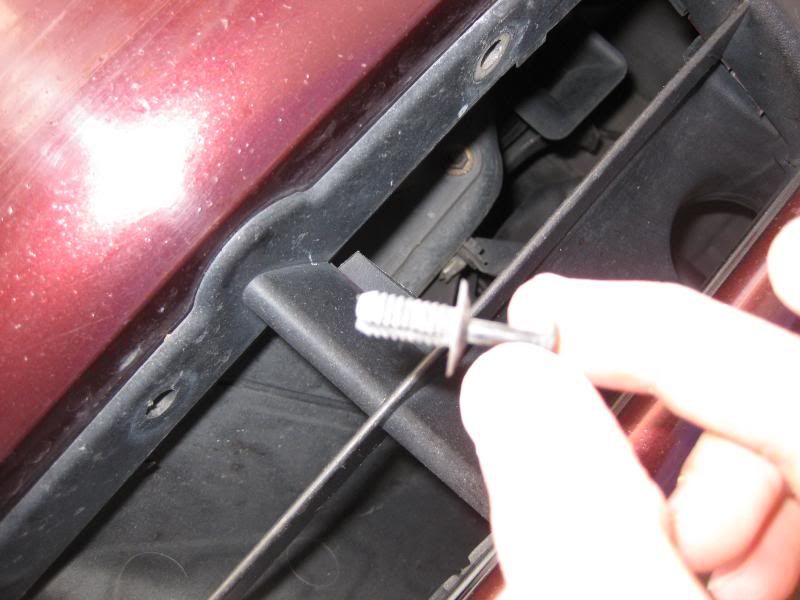
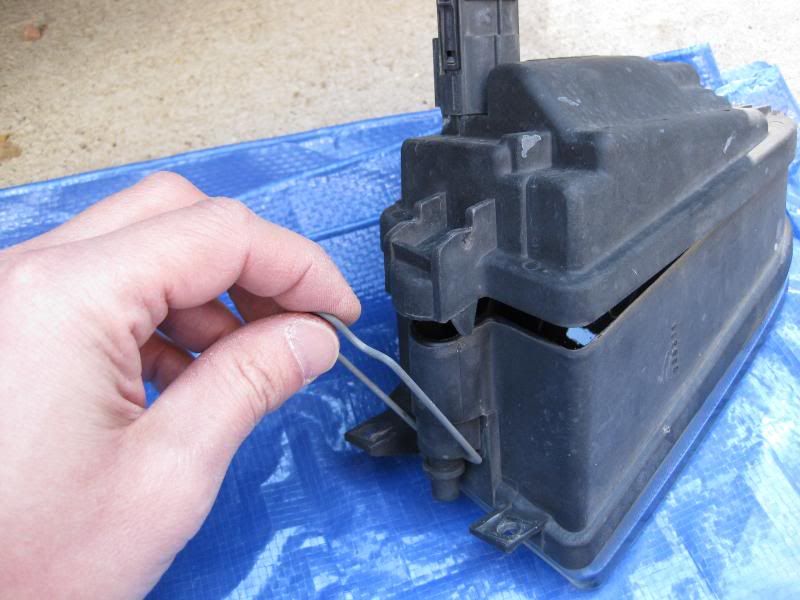
There are two plastic expansion rivets on each side that will need to be removed.
Use the removal tool (I very carefully used wire cutters) to pull the center head out and then pulled the entire rivet by hand.
Passenger side:
One of the rivets on the driver side:
Since I used wire cutters, I was uber careful to not squeeze and cut the center rivet core.
Here's what the expansion rivet looks like pulled:
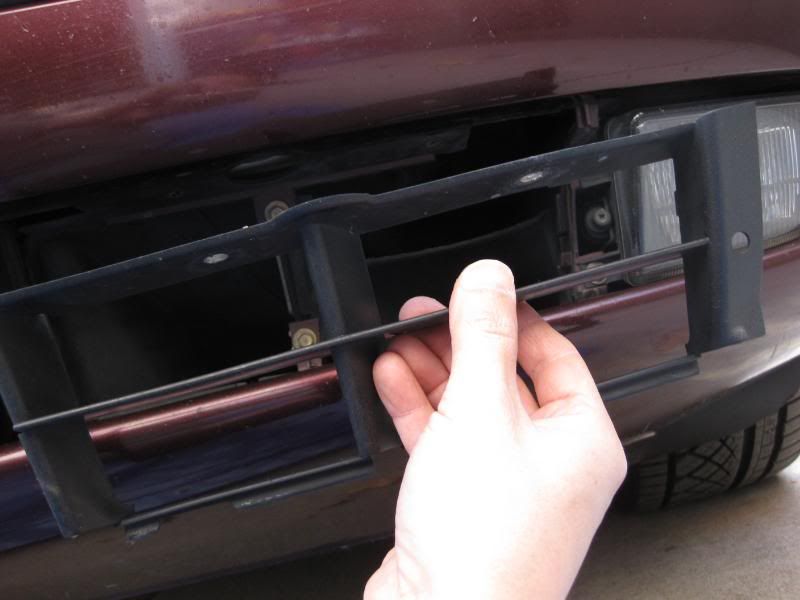
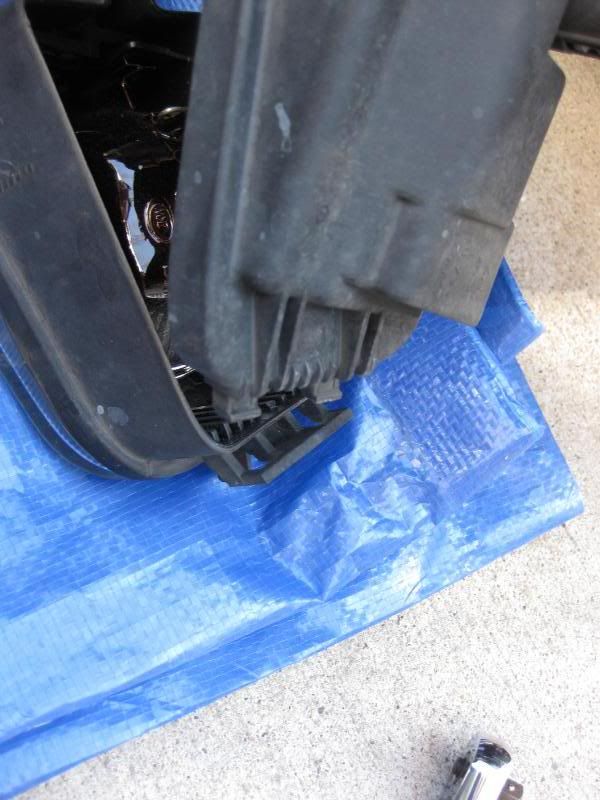
Pull the grill section out by gently pulling down and outward.
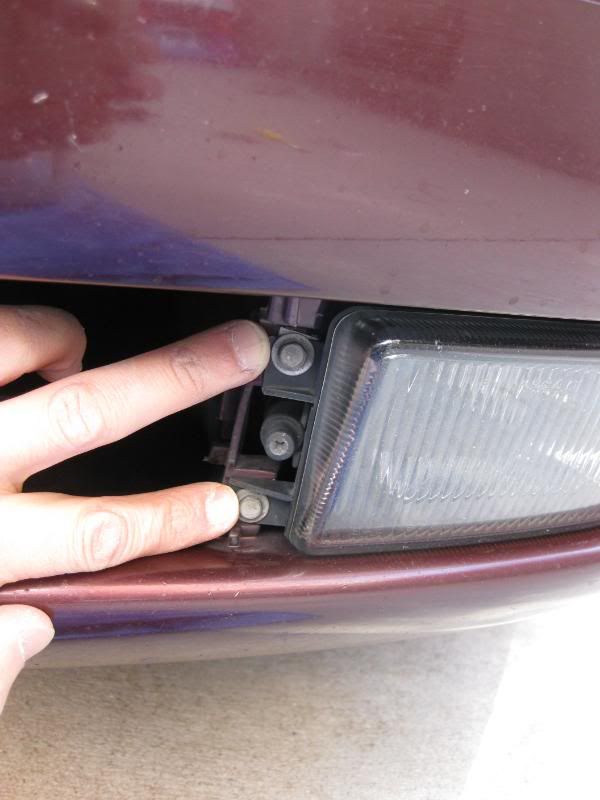
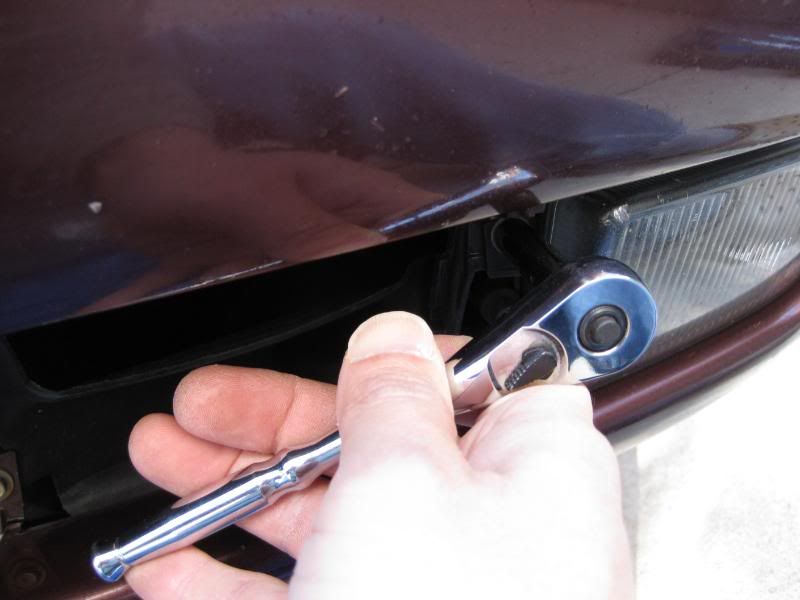
Here are the two 7mm bolts that hold the fog lamp housing in place.
7mm deep socket and wrench.
Remove the 7mm bolts and set them aside in a safe place.
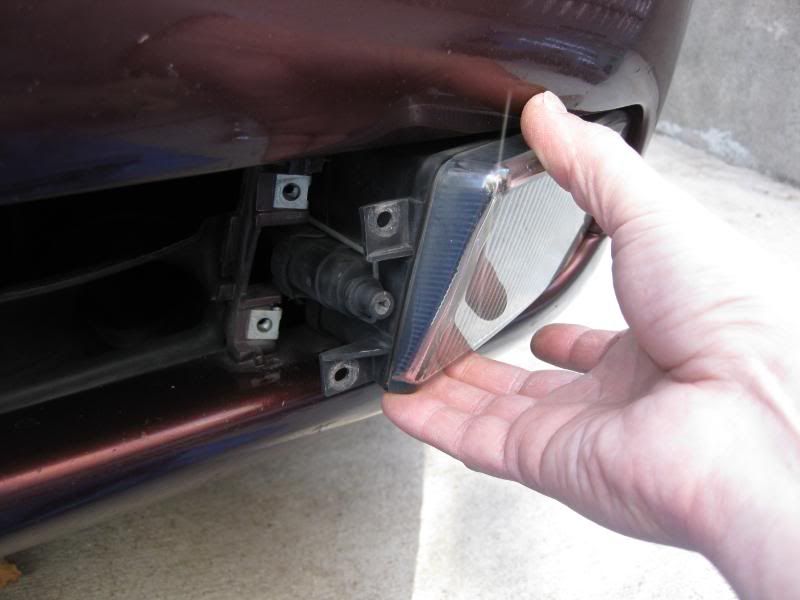
Pull the inner partion of the fog lamp housing out first.
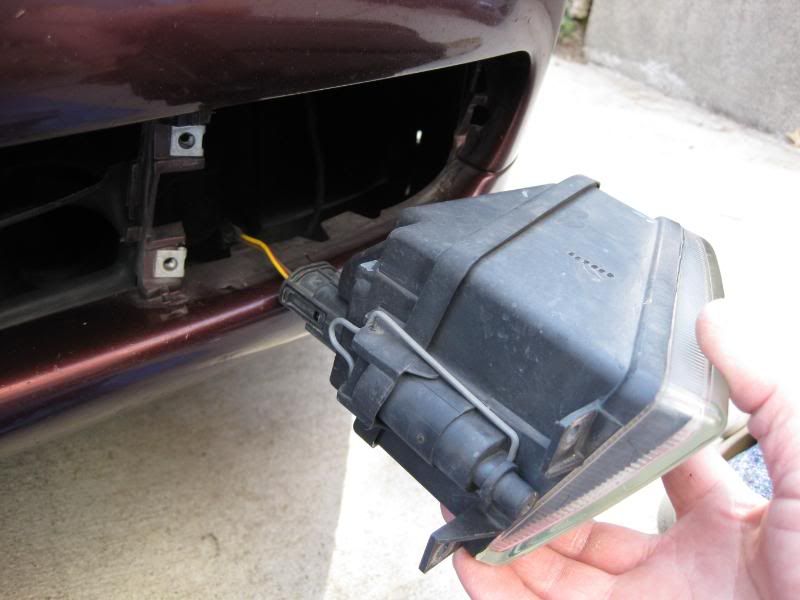
Then remove the entire housing and very carefully set it lense side down on a soft surface.
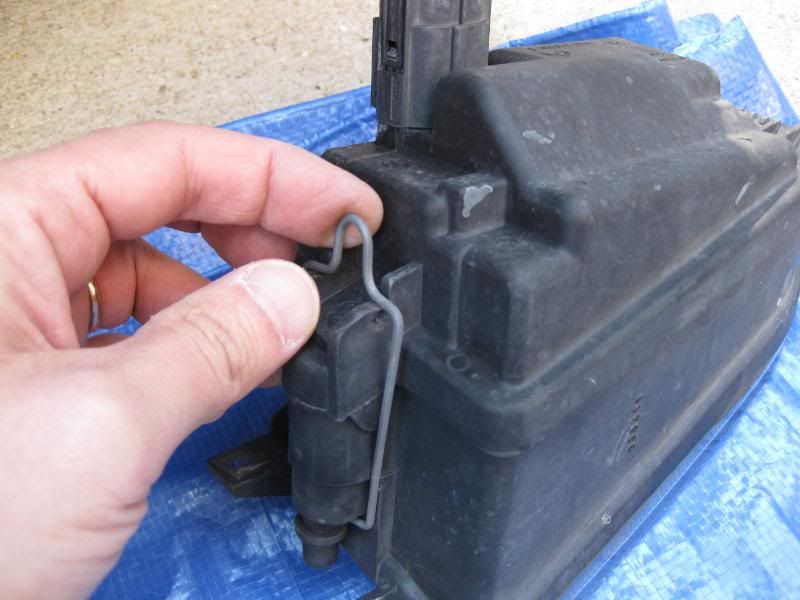
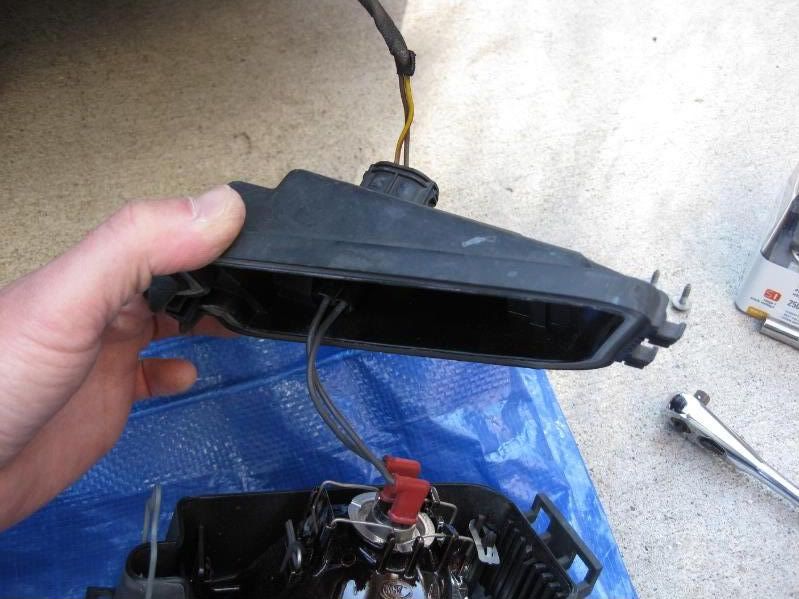
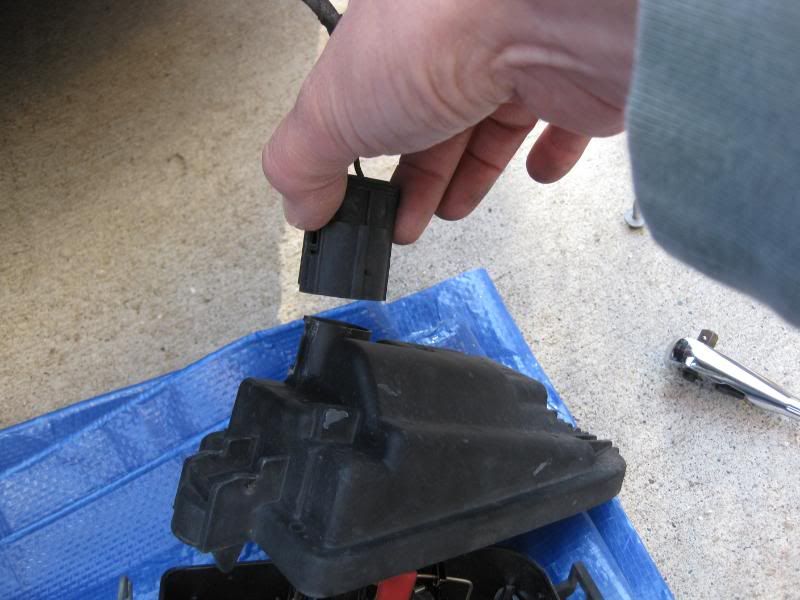
Disengage the clip securing the back cover to the front of the housing.
Pull the back cover out and away. Note the swivel hinges and how they hold the cover on.
Being tethered via the wiring harness made it difficult to work on the housing, so I disconnected it.
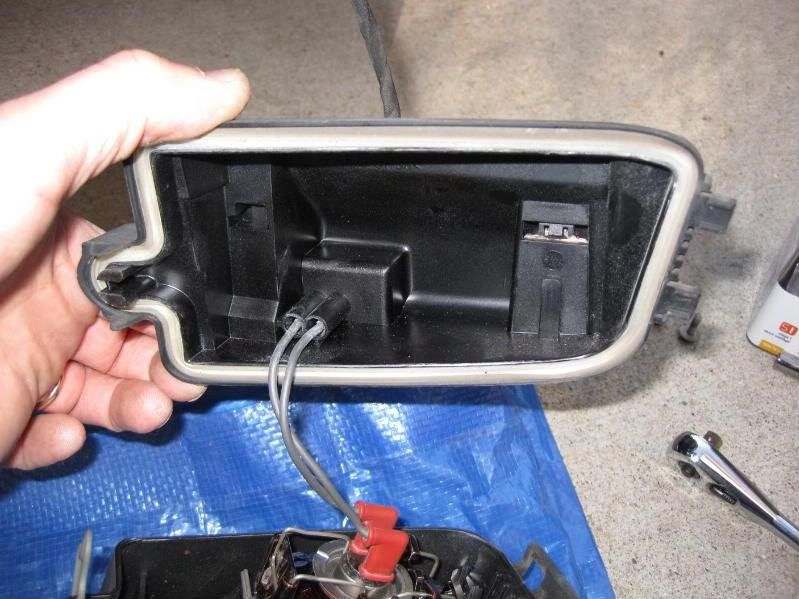
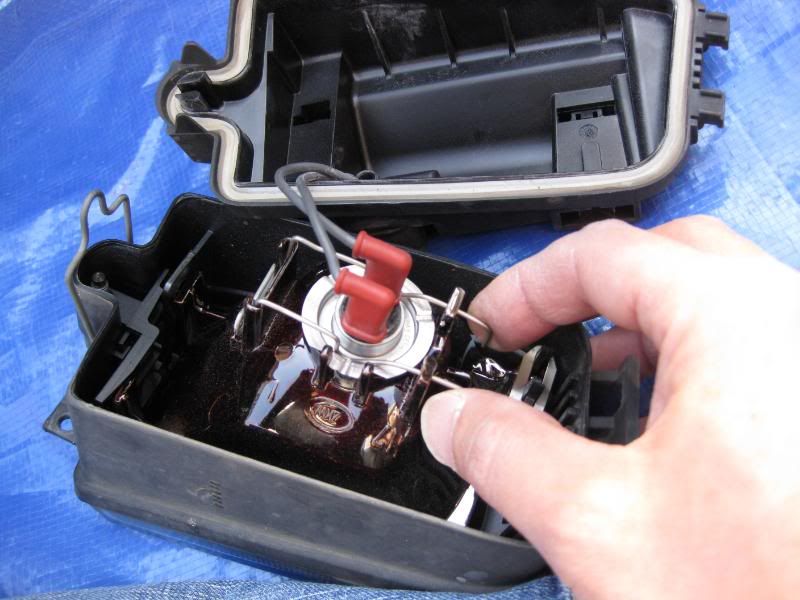
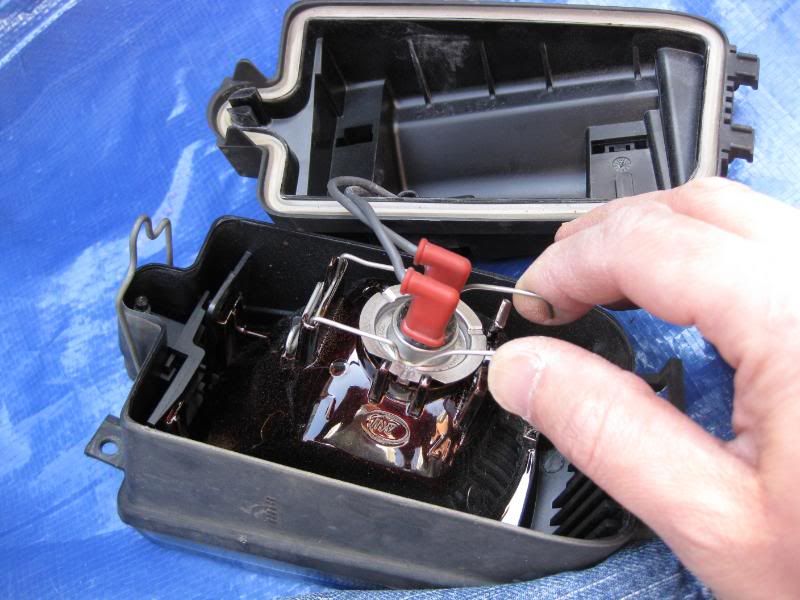
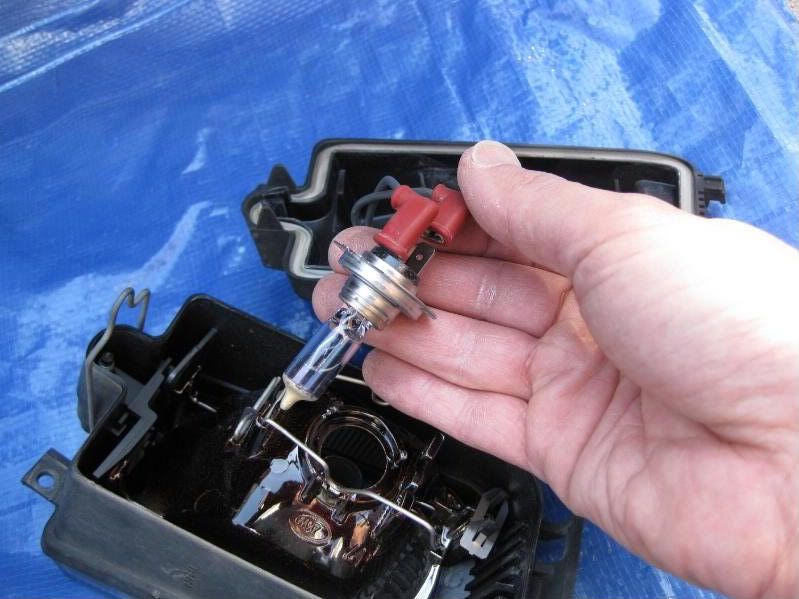
Once the housing is taken apart, you'll see the innards. Push down and pinch the two arms of the clip together. While pinching the two clip arms together, swivel them upwards and this will release the bulb.
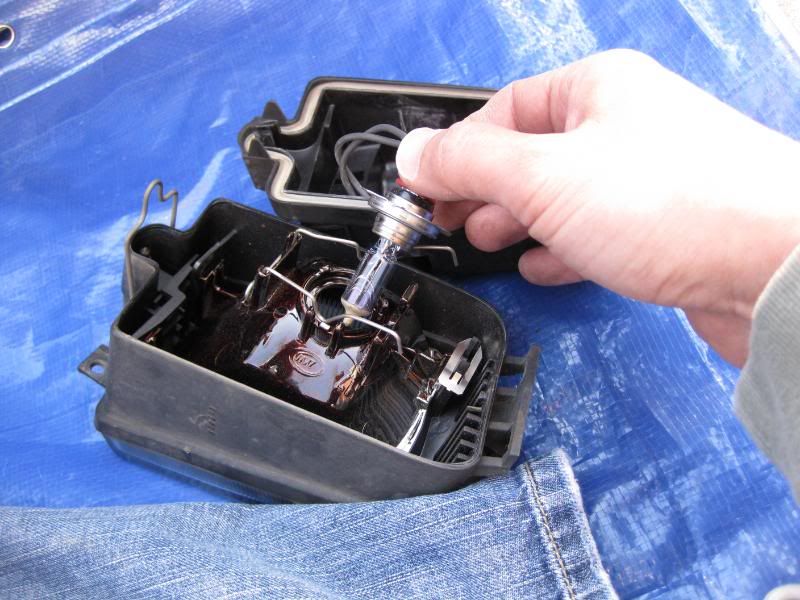
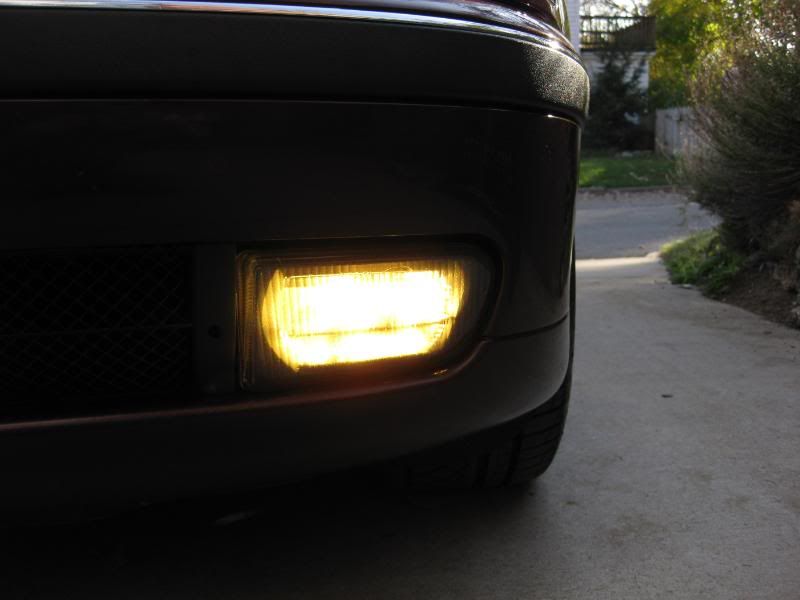
Pull the bulb out. (Since I am replacing good bulbs with 2500k, yellow bulbs, I was careful not to touch the old bulbs so I can reuse them.)
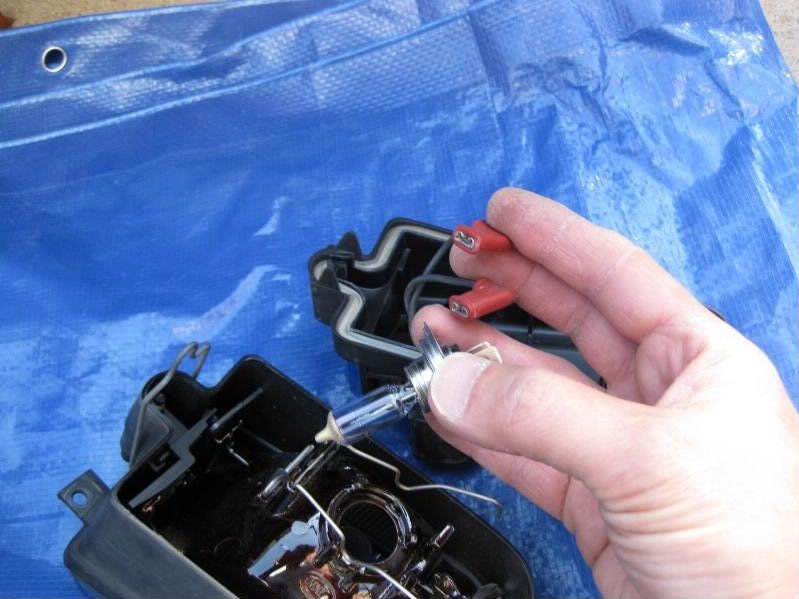
Remove the two connectors from the bulb (doing this prior to the previous step is recommended).
Here are the replacement bulbs.
Installation is the reverse of removal.
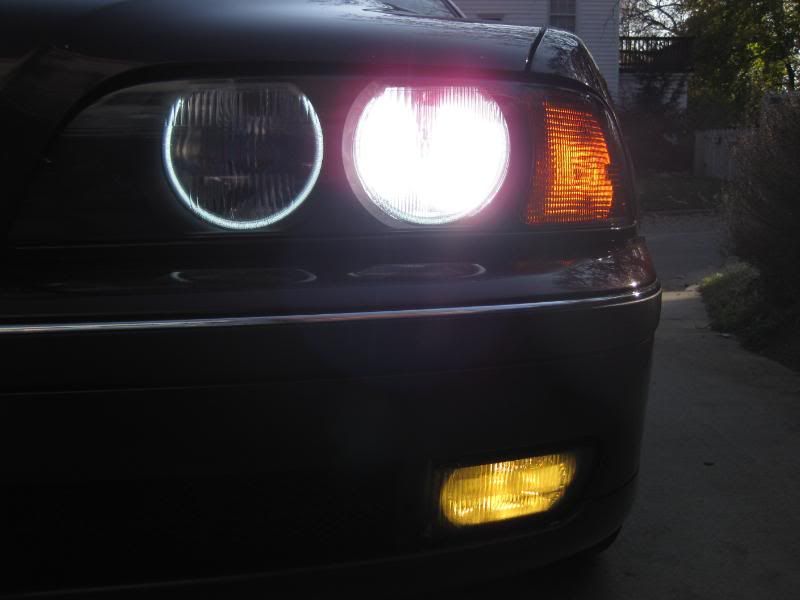
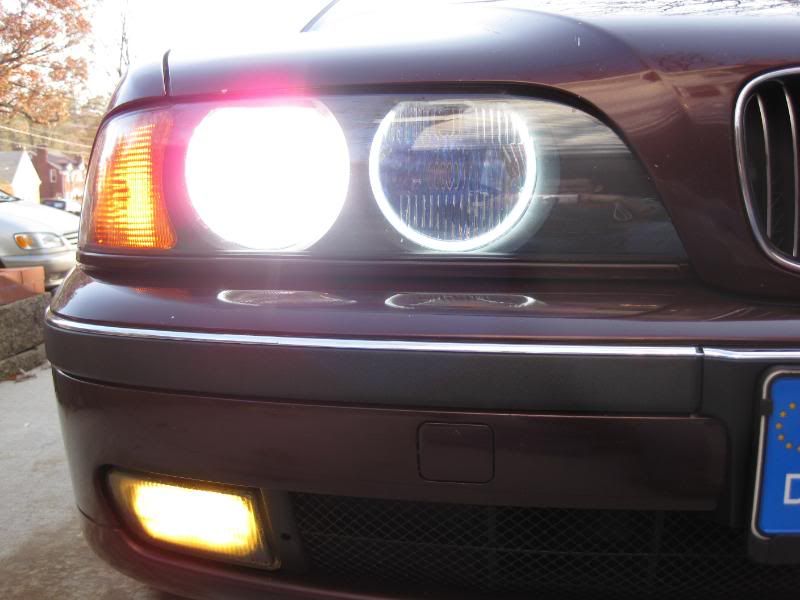
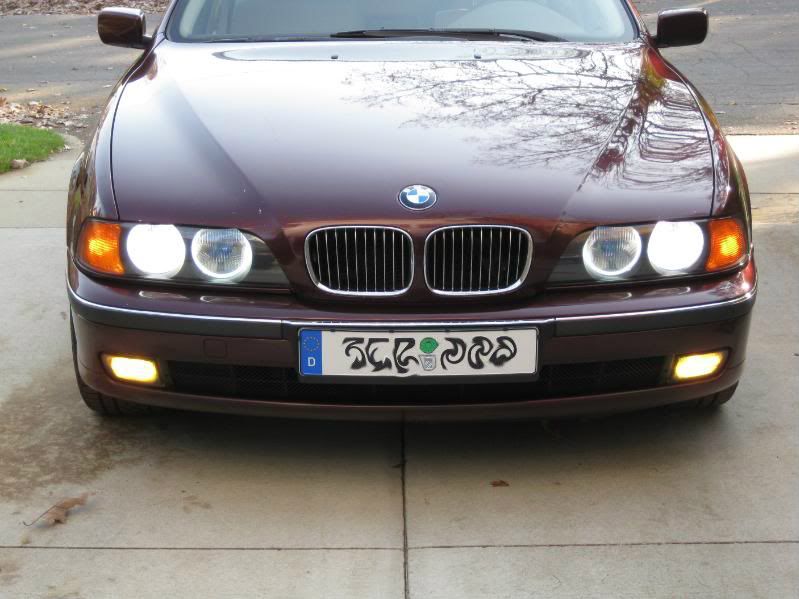
Here's how they look installed.
To celebrate a successful DIY, this is a must...
Last edited by jamesdc4; 11-09-2010 at 10:14 PM.
Sparky
Wait, something that's not a 10mm bolt? Unpossible! j/k
Nice write up. We should get this moved to the FAQ.
540i-sold, 325is-sold, Econo boat 2011 Civic-sold
Car ADD
Current death trap: 08 V6 Malibu
BMWCCA 484984
Originally Posted by carjoe

Thanks.
I'm going to move it into the E39 DIY section after it gets some comments.
Member
so I had a bulb fail a while back. It was crappy, I had like 60 bucks in bulbs all go out for no reason in the same week. but anyway, I kind of figured this part out on my own BUT what is that screw bit inbetween the bolts? my assumption was adjuster screw? if so, what direction does what?
Member
Do you know the size of this fog light? Im trying to hook up HIDs to this cable after getting the new M5 bumper but im not sure was size to get. Thanks
Last edited by Constructo003; 11-09-2010 at 10:46 PM.
Member
That's too funny. When I did VCGs recently, everything was 10mm
2002 BMW M3
IR on IR
BMWCCA 484984
It is the adjuster screw, but I haven't messed with it so I don't what direction does what. If I get a chance, I'll test it out and post up the results.
I'm not sure what you mean.
Edit: If you mean the bulb, it is an H7.
Last edited by jamesdc4; 12-03-2010 at 11:54 AM.
Member
Where'd you get those bulbs? and how much did they cost do you think they'd fit the 03 bmw 530 fog lights?
BMWCCA 484984
I purchased them from Amazon.
http://www.amazon.com/gp/product/B00...rev_prod_title
You may want to check if one of our supporting vendors carries them for less.
You'll have to check your owner's manual for the type bulb you need.
 Posting Permissions


 Reply With Quote

Bookmarks