
 Member
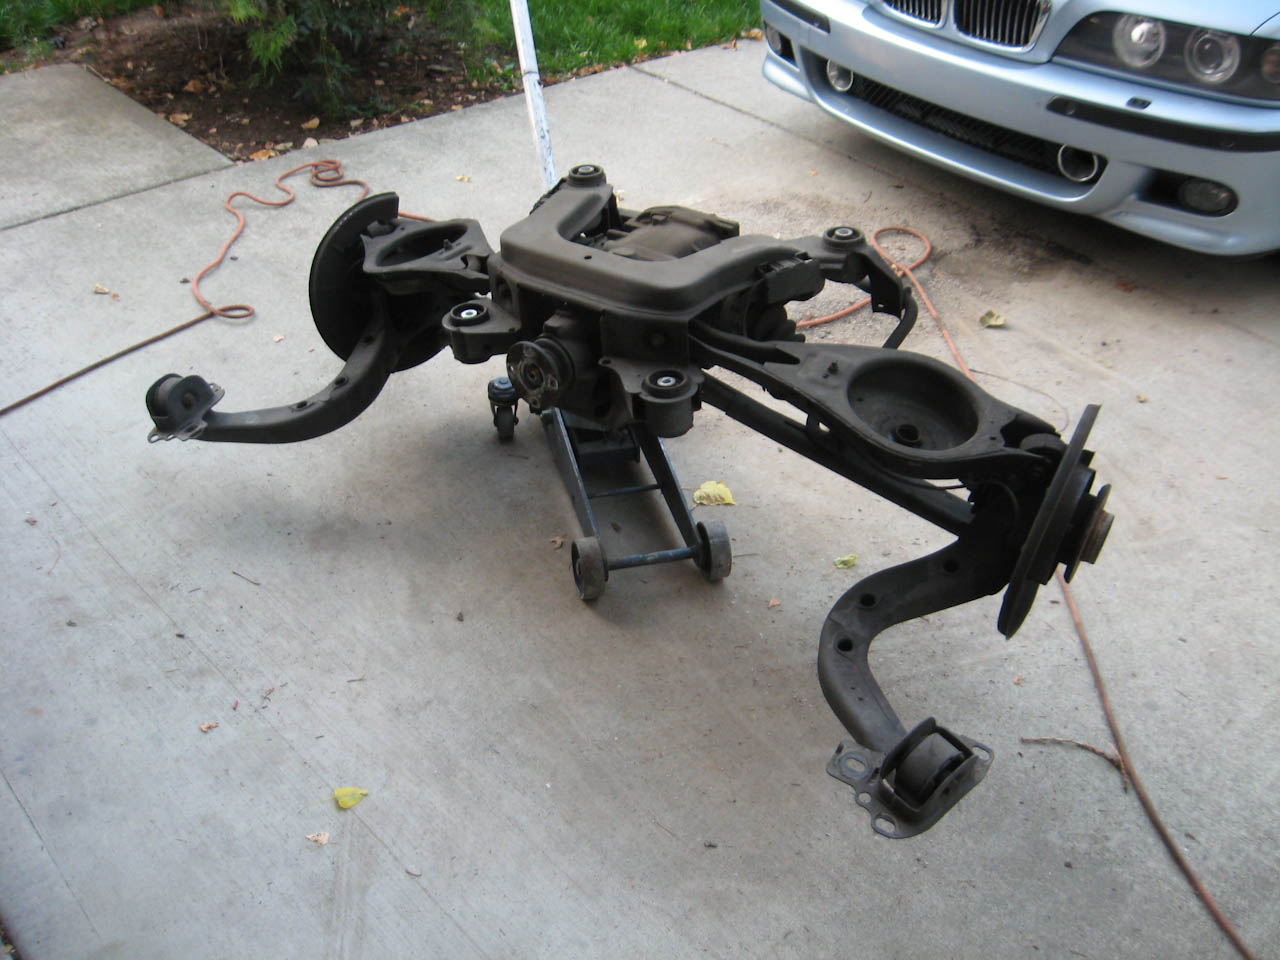
Continuation on the rear subframe work.
I rolled the whole piece outside and pressure washed it down
it got surprisingly clean, I was impressed when I found a lot of paint marks all over everything
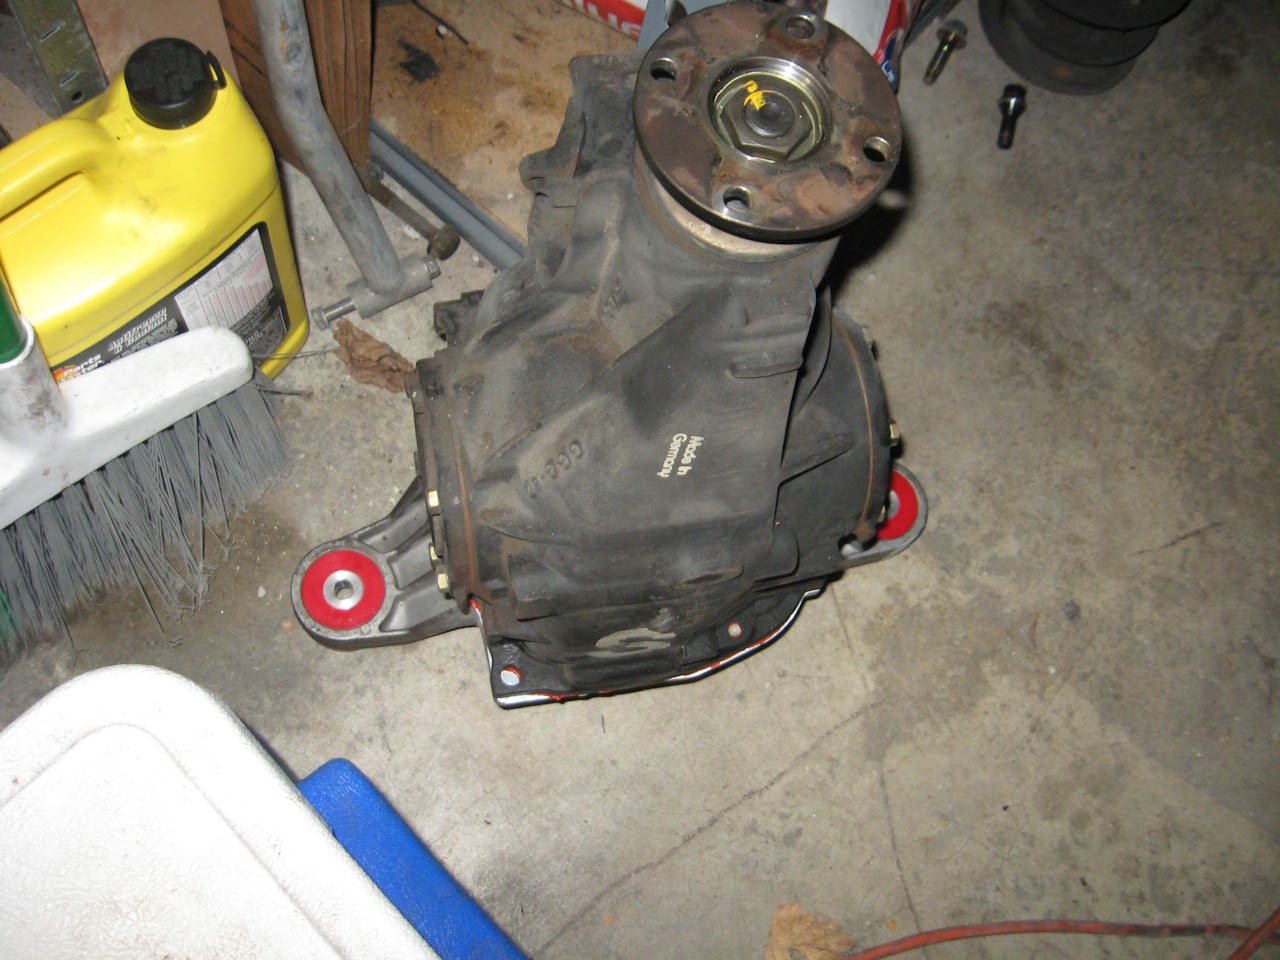
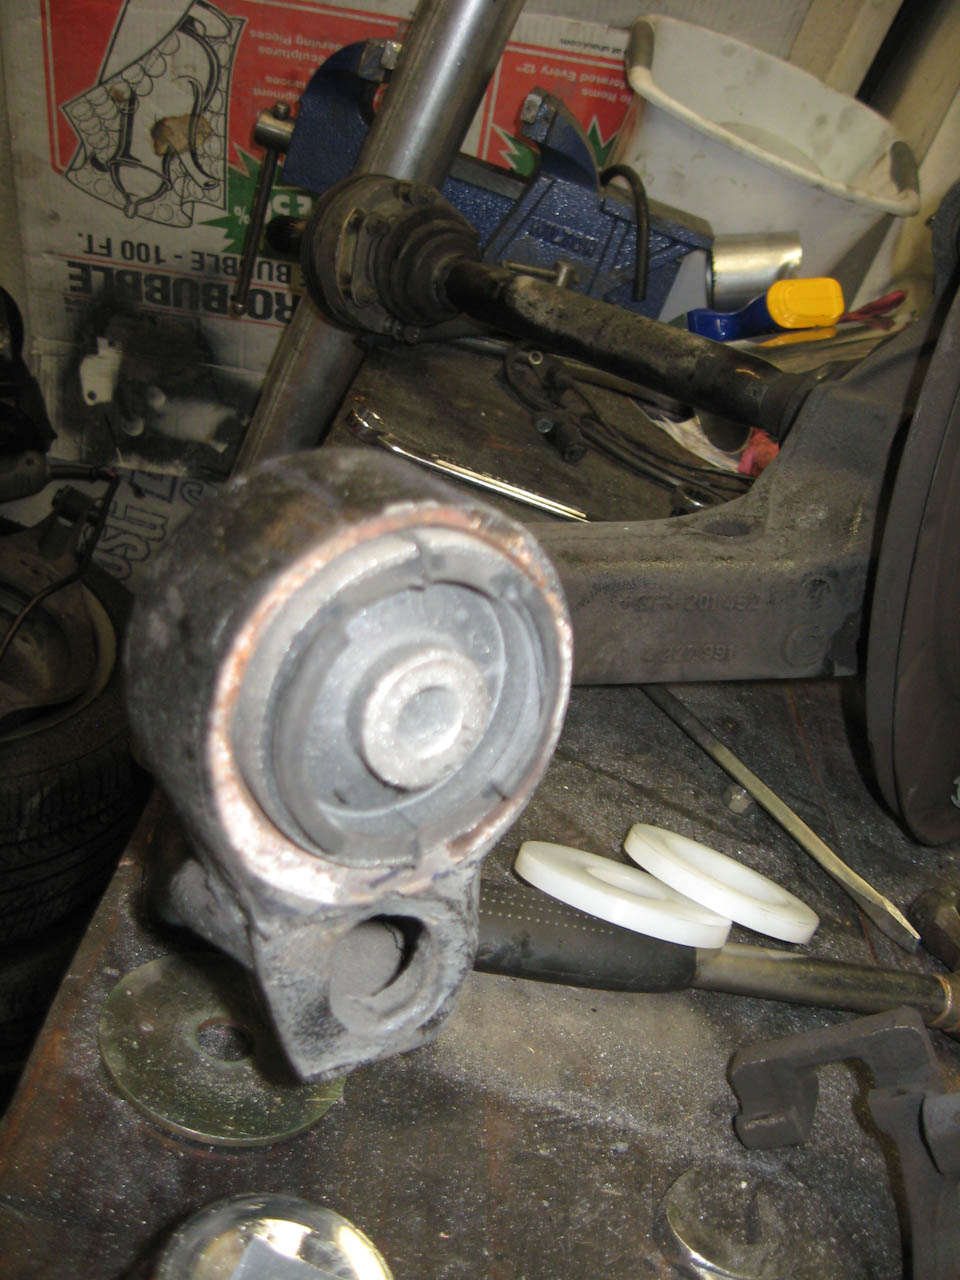
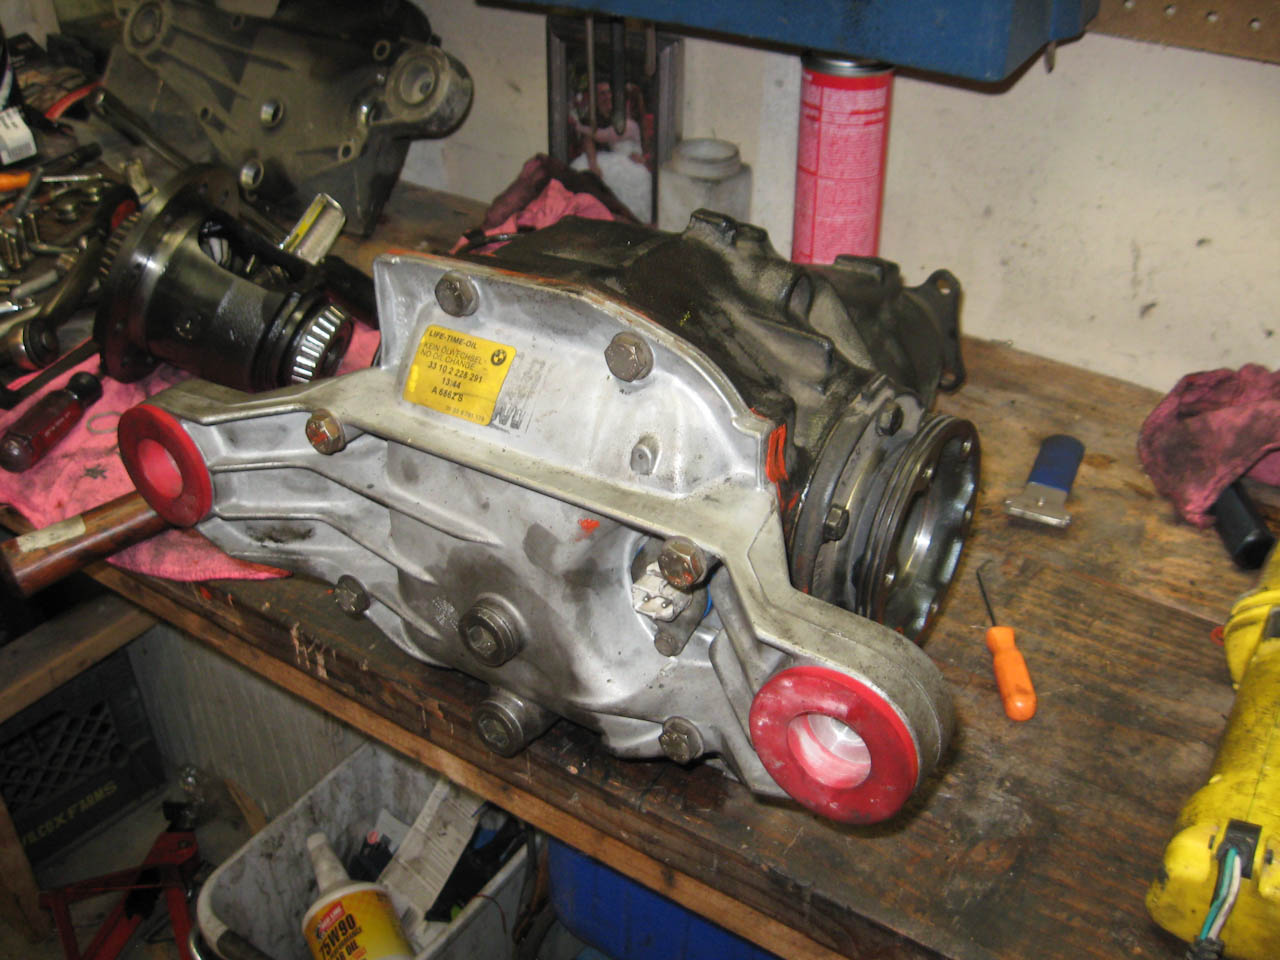
pulled the trailing arms and axles off and pulled the diff out and plopped the rest on the work bench.
there was a 10.9 bolt on the front mount of the diff so I suspect someone has given the rear end some love, it also looks like the rear bushings had been replaced at some point.
all the outboard spherical bushings/joints were tight except for one that had the slightest bit of play - as I can replace these on the car i'm going to not change them now, as the 4 of them are another 130 bucks in cost. the inboard bushings on the upper and lower arms cannot be removed with the diff in the subframe so I decided to replace those while everything is apart.
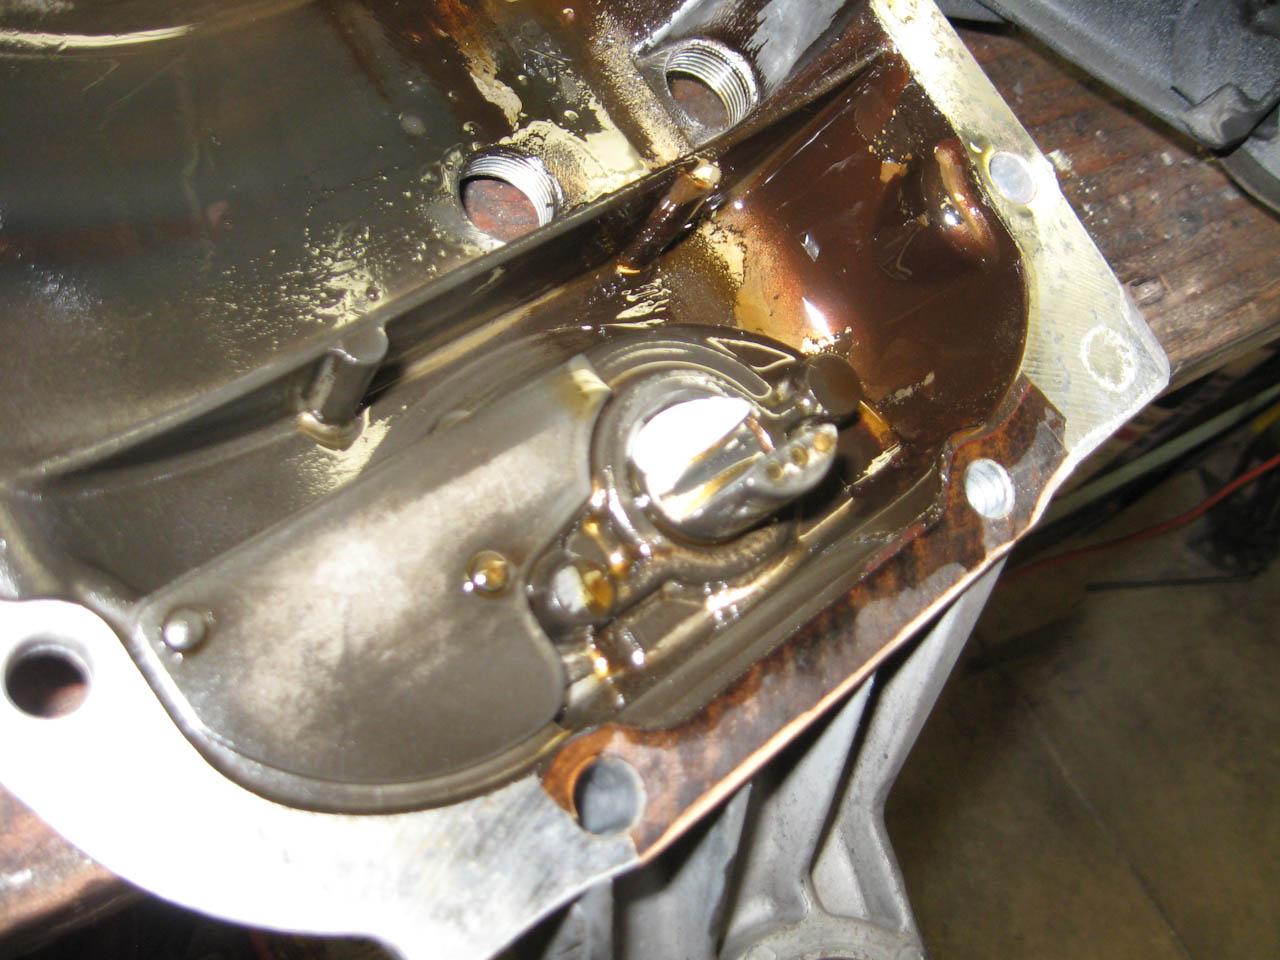
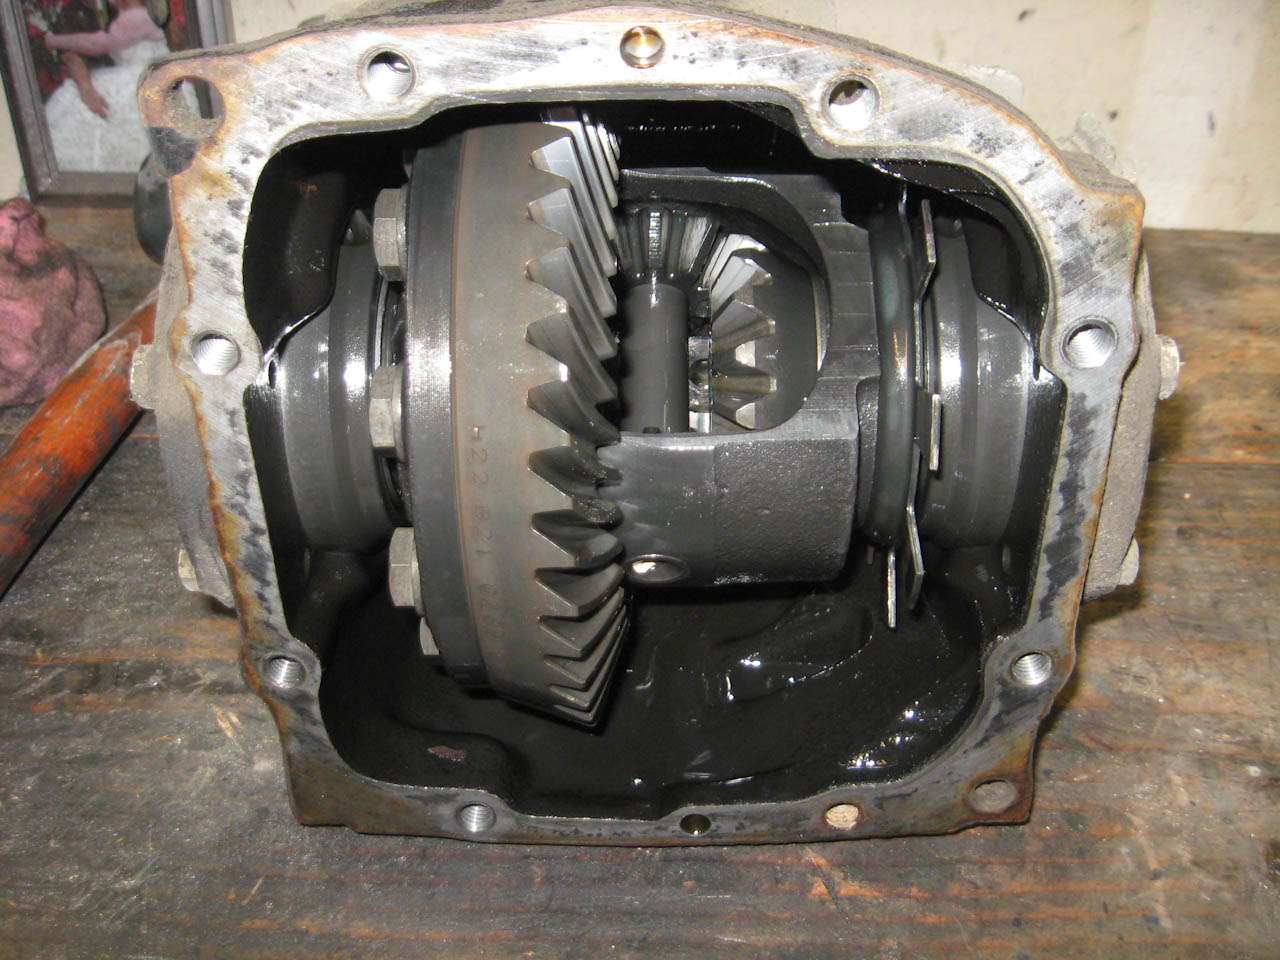
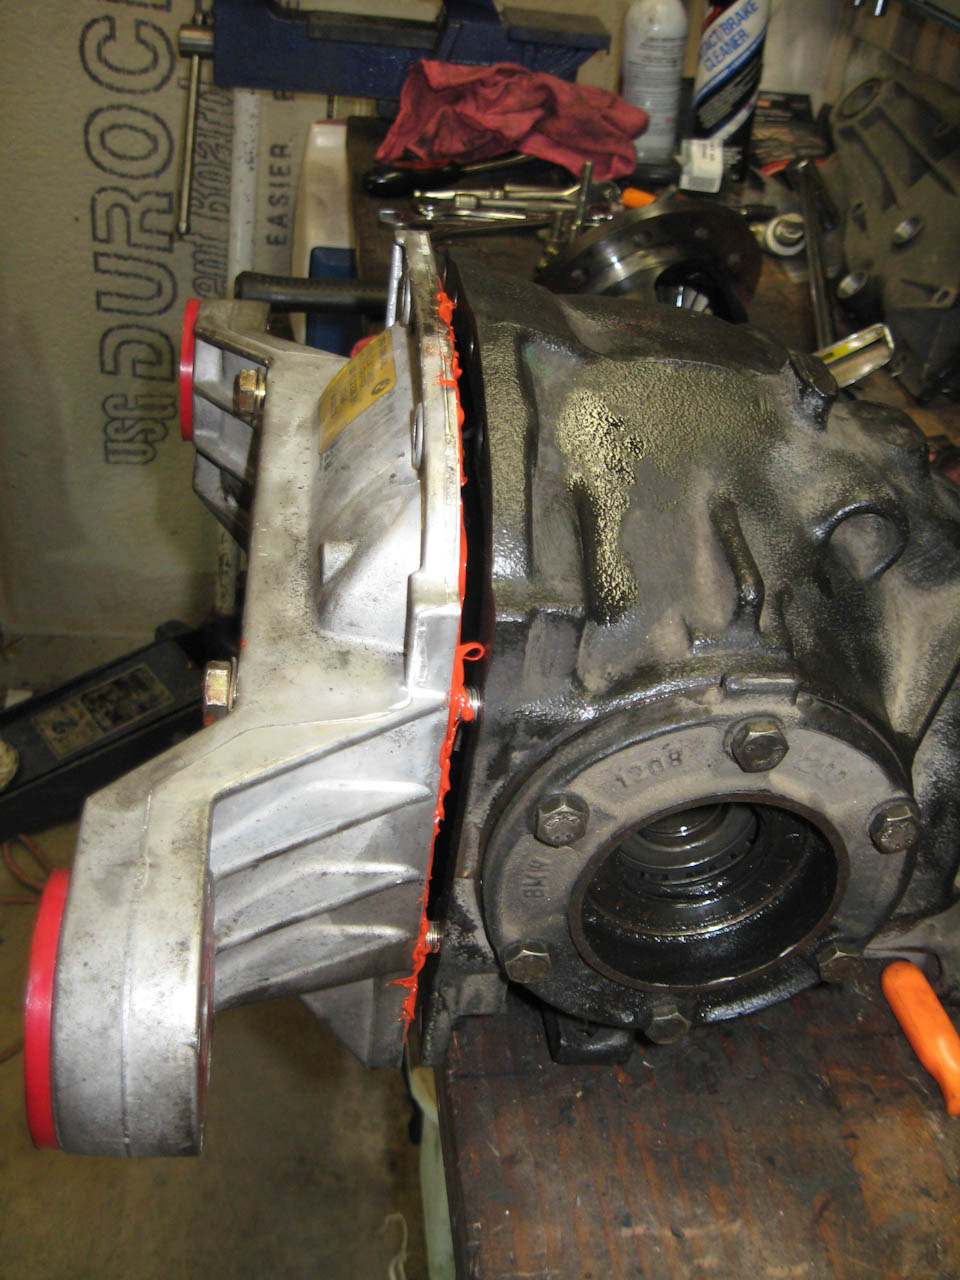
Pulled the diff cover to check all the bolts inside are tight as it's a known issue - everything looks nice inside and all the bolts are torqued tight.
accidentally broke the speed sensor cover off when I took the cover off, a little plastic weld and it was as good as new :o
I have ~13 bushings to press out tonight, gonna go pick up a press at harbor freight and add it to the garage tools so I don't pay a shop about the same and not be able to do work in the future (wheel bearings or front control arm bushings) and then i'll clean everything up and weld in the reinforcements. before pressing the new stuff back in.
Member
Rock on, been there, done that... It's fairly easy for sure!
I might have a speed sensor, let me go look tonight.
Member
I slowly put the car back together after taking the rear end completely apart.
some pics of the process.
learning how to use the press wasn't too bad and it definately made the whole process possible.
woo harbor freight
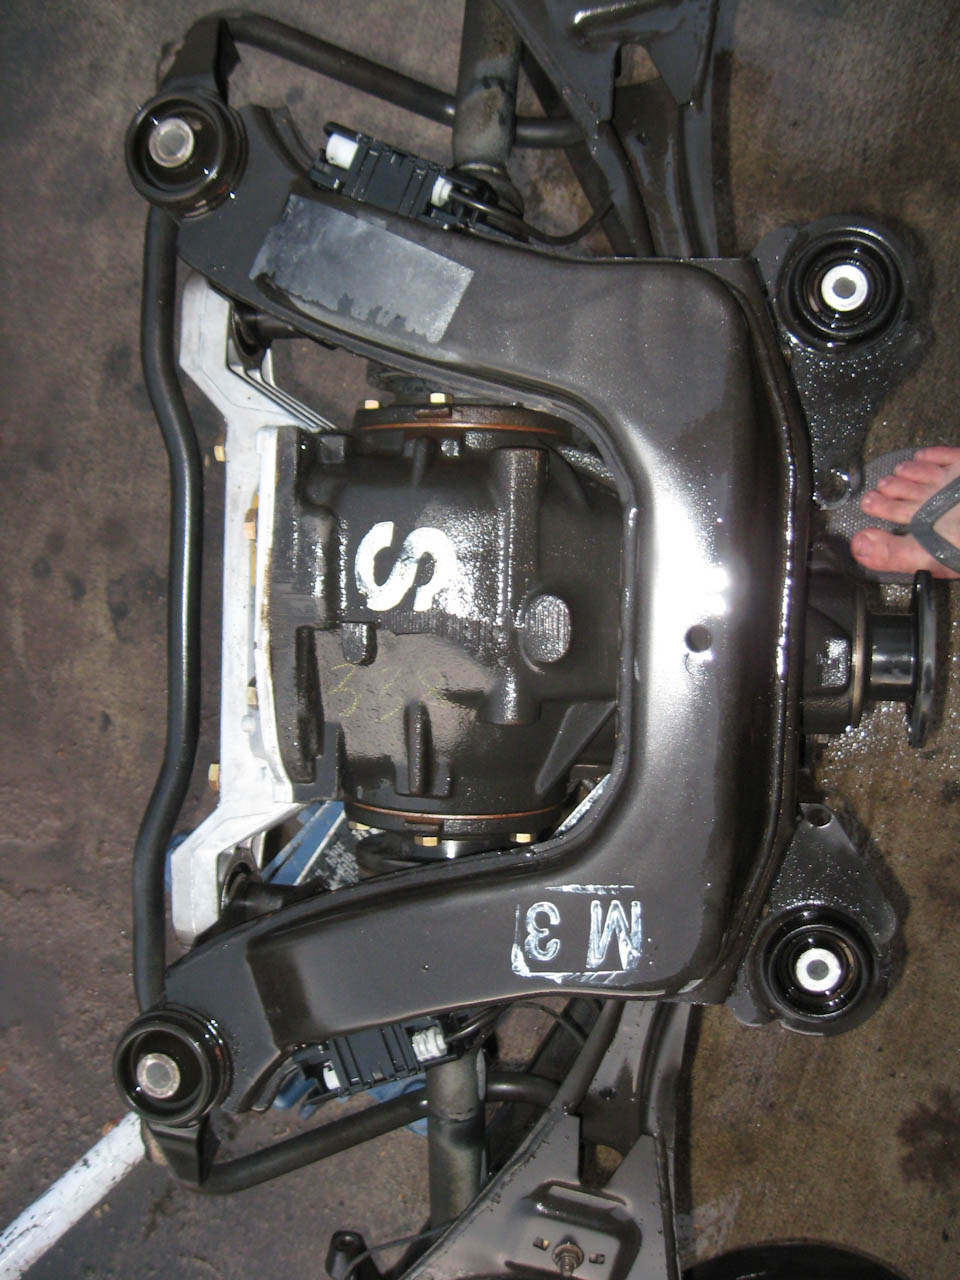
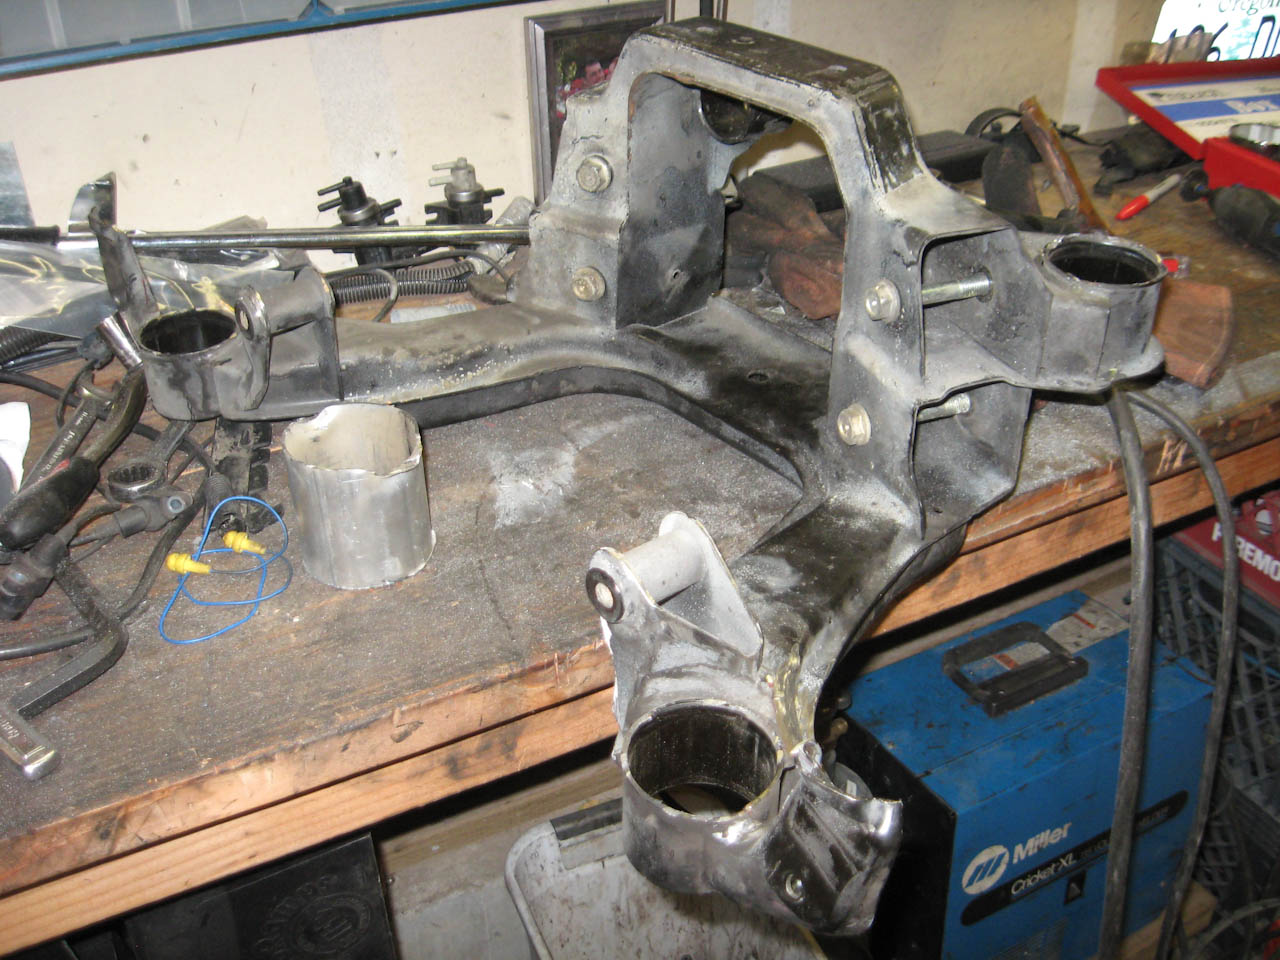
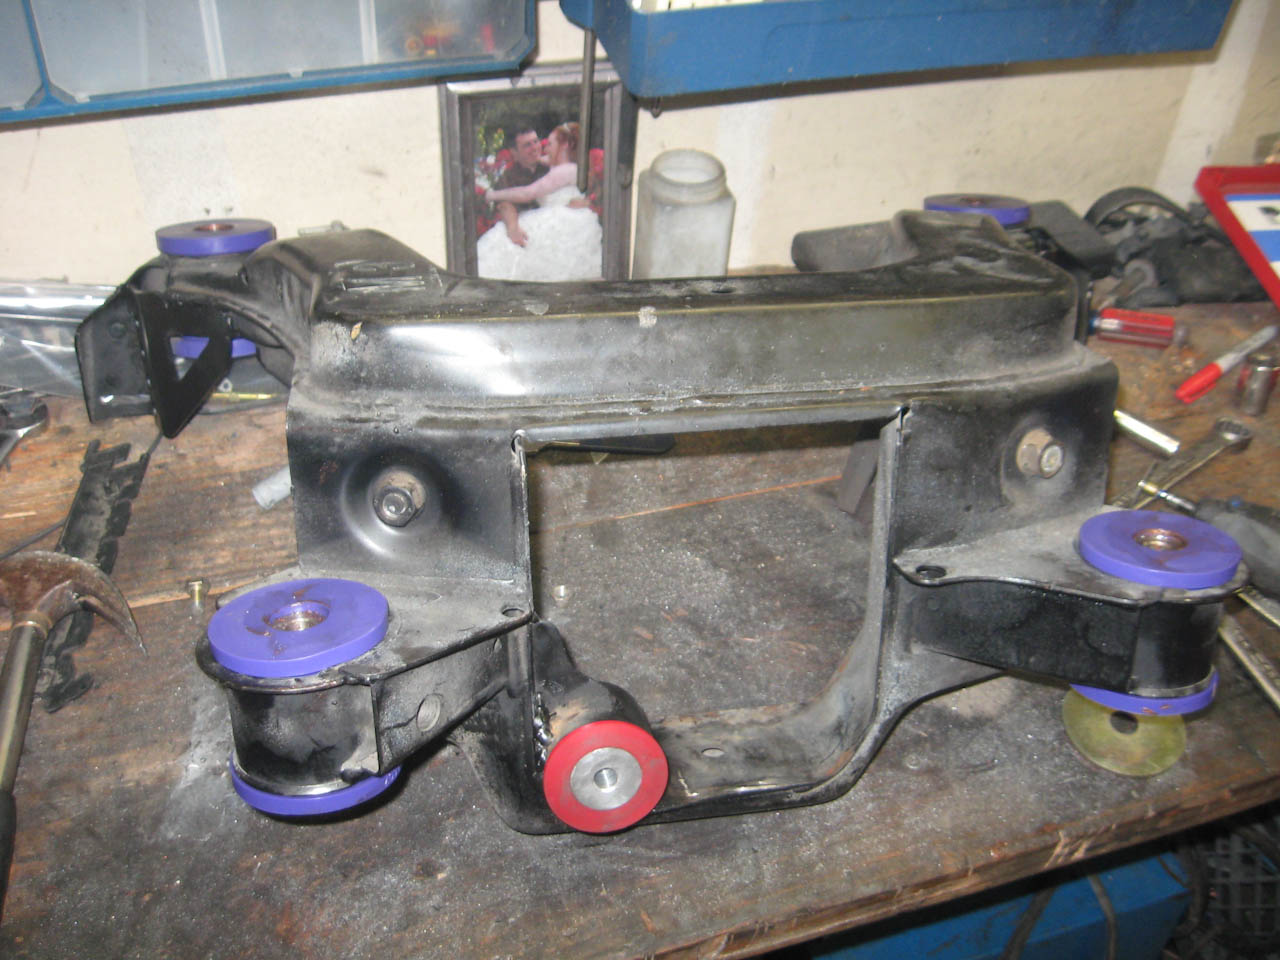
naked subframe
solid delrin diff mounts installed
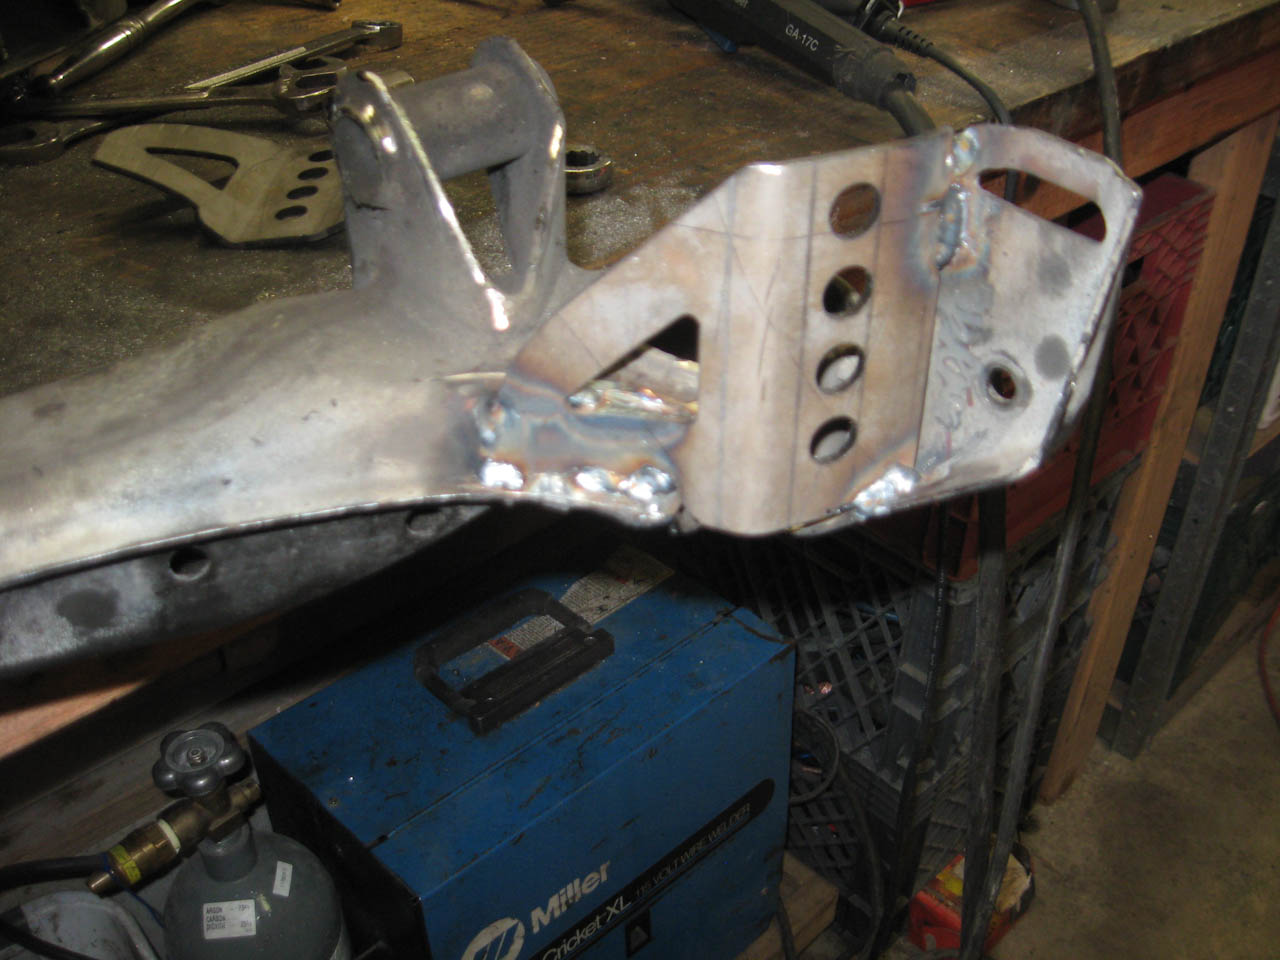
shaving the area down for reinforcement install
one side tacked in
new subframe stuff installed, welded up and good to go
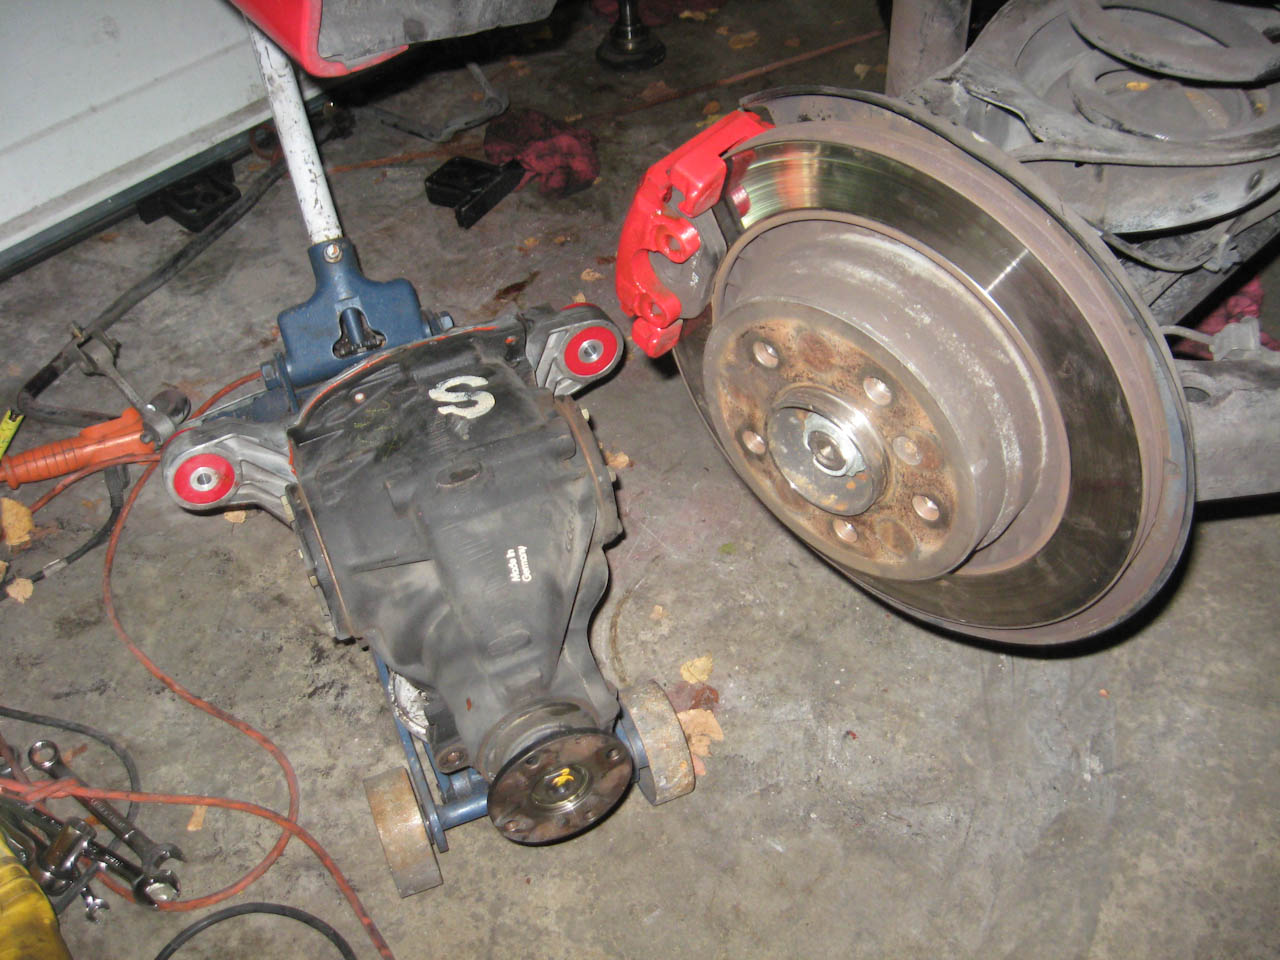
new RTAB installed
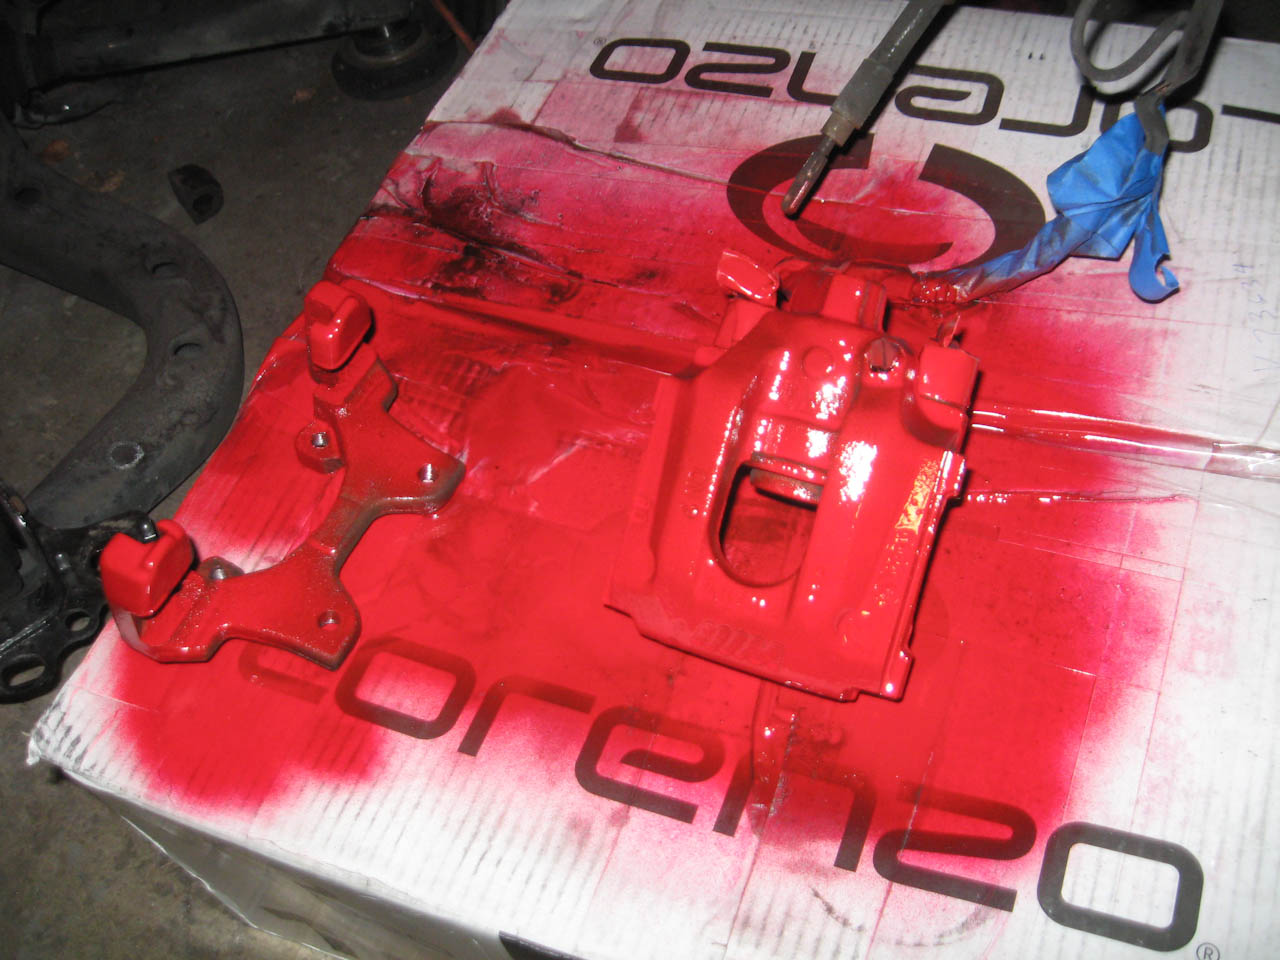
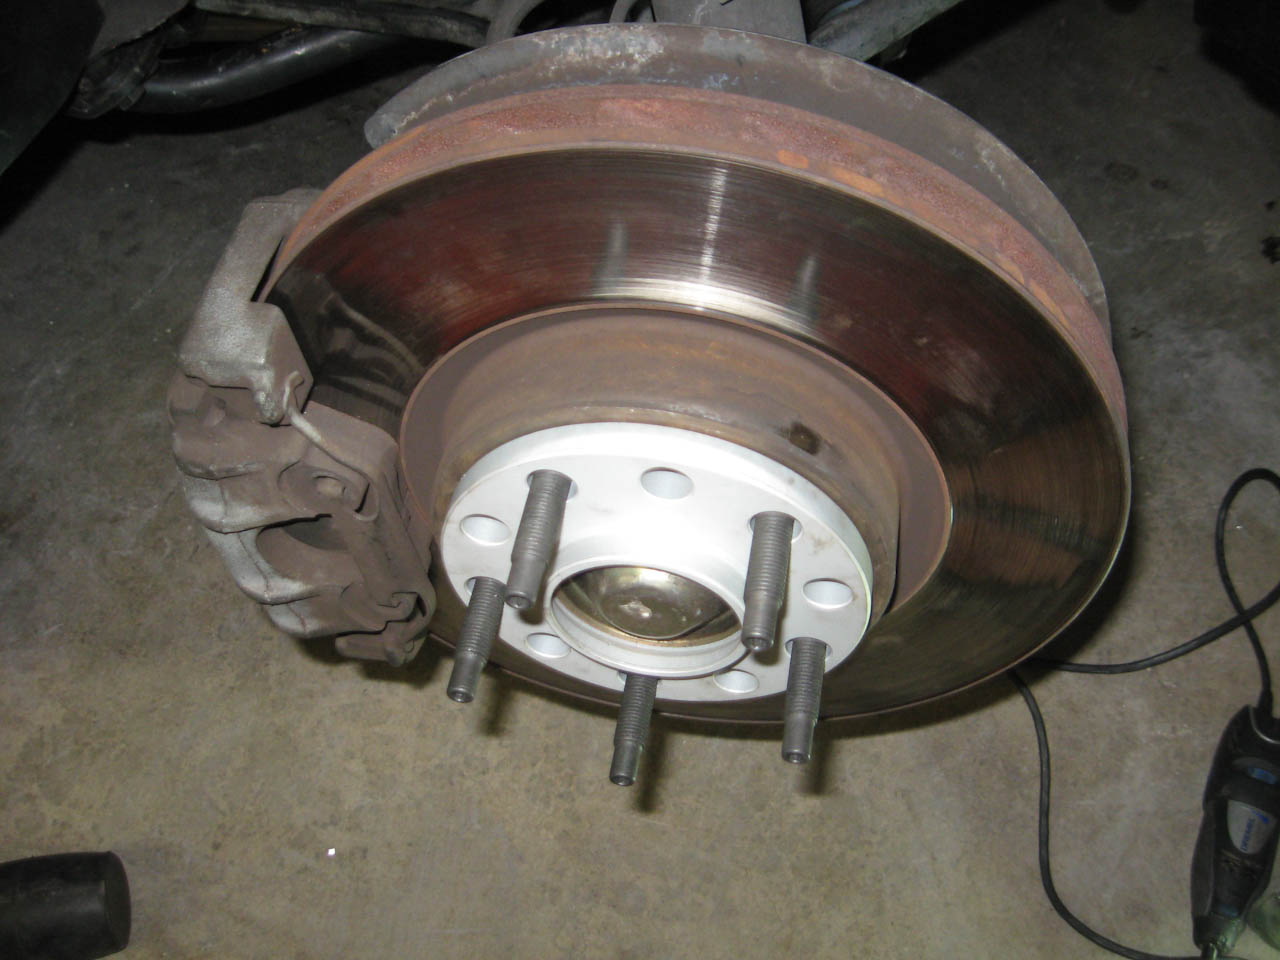
cleaned up the rear brakes and shot them to match the car
going back together
all in all it went back together pretty easily, I needed to pay attention to sides :o but all in all it was an easy job in a garage.
Back end feels SO much better. now the front end feels all sloppy loose because the back end is so tight.
going to go to the drags tomorrow night to see what I can run for a good shakedown
БМВ Фанат!
A lot of people say it is almost impossible to remove the original bushings. Did yours came out easily?
- 96 328is 6.0L. (LS1 to LS2 build thread: http://forums.bimmerforums.com/forum...ad.php?2098938)
- 96 328is 5.7L. (LS1 build thread: http://forums.bimmerforums.com/forum....php?t=1289987)
- 95 ///M3 6.0L. (LS2 build thread: http://forums.bimmerforums.com/forum....php?t=1619249)
- 97 ///M3. (e46 Fender Flares/track car build thread: http://forums.bimmerforums.com/forum....php?t=1727098)
- 96 328is (Dual Fuel Pump to Surge Tank thread: http://www.bimmerforums.com/forum/sh...ad.php?1964025)
16 valve E36 M3 :-0
Tong,
Looks good.
Couple questions.
Did you notice much if any added noise/harshness with the solid diff bushings?
Did you do anything to address the drive shaft rubbing in the tunnel such as lower the diff or the cradle?
Is the driveshaft still rubbing?
***edit***
One more question. The reinforcement you welded on the cradle/subframe, what is that reinforcing, (hard to tell from the pics)?
Last edited by BRAAP; 10-15-2010 at 11:29 PM.
Member
Sway bar reinforcements

Rob
Prior projects:
1998 540i with 6.6 LS2/T56 Chevy Power
- pictures and details
1992 325i with 6.6 LS2/T56 Chevy power - pictures and details
1995 M3 with 6.6 LS2/T56 Chevy power - pictures and details
Member
I haven't noticed any increased nvh, if anything it feels quieter in general back there because the old diff cradle bushings aren't allowing movement of stuff. if there is an increase I would say it is very minor.Originally Posted by BRAAP

I still have some small shims in the trans mount - i'm going to pull them out and see if I rub anymore but I suspect the solid mounts will keep the diff case from lifting the snout and prevent any rubbing.
I was thinking about the movement options while I was working on the min-project and I wouldn't THINK of lowering the subframe - all the rear suspension counts on that lining up with the stock suspension - moving that causes weird geometry on the trailing arms and the shock/spring ratios - too much stuff to move around.
lowering the diff would be a possibility in the cradle but would require hacking up the front part of the cradle to get the diff nose to go lower.
I'm going to see how much of an issue it is with the delrin bushings - I suspect it will be good though now.
I welded in as rao stated sway bar reinforcements - those are the AKG ones. I also welded around the front diff mount to tie it down better and around the the 4 subframe mounting points to make those all 360 circle welds.
Member
Awesome swap my friend
Member
So I don't have any pictures from my work today but I did a TON of little things.
replaced the tie rods and tried my hand at a home alignment, turned out really well and wasn't that complicated or time consuming.
put the fender liners for the front tires back in and buttoned up all the various little bolts in the front stack and aligned the bumper so it's perfect.
finally replaced my brake light switch because the OBC has been bitching about it. even with all 3 brake lights operational and the brakes working the damn switch STILL is reporting failure, wtf. I'm wondering if I have an extra wire for the auto tranny or something that needs to be grounded or something.
speaking of the auto tranny I pulled the auto tranny error light out of the cluster. now I only have the CEL and nothing else on :o except the damn check control when I have my parking lights on.
Was going to do drags tonight but they weren't doing it tonight
Next little project is the front ball joints and control arm bushing. I have all of them sitting on the workbench to tackle soon. I also found an early 325 in a wrecking yard. gonna go scope it tomorrow and see if it has the 3.91 LSD that I so want.
Member
How did you do this: "sensor needs the plugs moved to stick out of the side instead of the top of the plug"?
About to start my own swap and wanted to make sure I had all the bases covered.
Member
what did you finally do for the PS? didn't read the link, but read everyone else's posts. 944 swappers have the same issue, what they did was either go to a turn 1 pump (get it calibrated for the porsche rack required psi) or get fancy and mount the porsche pump back on. THe turn one is nice if you want to run a hydroboost, as you can use it as a vaccuum source.
super racy guys also look at new front kframe with a new FR rack with appropriate psi for that. I would say that if you were to do any spirited driving, you will find out that there are problems with mismatched psi's.
Other than that, fantastic work, esp on the rear end rebuild. First rate, even on a budget!
You fly when you work. Saw a pick with a girl in it. There is no way you have a job, a wife, and or any kids. Either that, or you spend a ton on red bull. You are my new internet hero.
Member
huh? which sensor?
I haven't done a final addressement of the power steering mismatch issue. It isn't a TERRIBLE issue when the car is driven but I do think it will be a problem later on after some serious track time and high temps. I haven't found a lot of info on adjusting the pressure up/down - lots of talk about doing it but no solid "do this to increase, do this to decrease" or I would take a swing at it.
thanks for the kind words! I really don't spend too much time working on the car and tend to slack on it for a few days at a time and then have successful productive days. The lady friend and the dog get plenty of attention. If I had kids I wouldn't have toys
My old age is starting to catch up to me. I started a journal on the car of all the maintenance I've done and any issues I note while working on different parts of the car. So much for being able to remember all this stuff off the top of my head. ugh.
325 at the wrecking yard was a non lsd unit
Member
Check your trunk wiring. The wire that runs from the inside to the trunk lid has been known to crack and rub the insulation off from all of the opening and shutting of the trunk. It causes all sorts of weird obc/ electrical issues. I had same problem with my brake switch and it was the trunk wiring.
Member
ooh, thank you for the tip, i'm going to check that because it does seem random and it's exceedingly annoying.
lololol auto merged
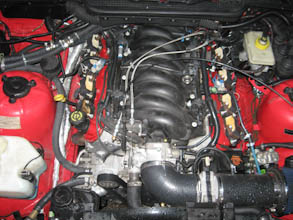
Decided to figure out what was with my knock sensor codes. started by testing continuity between wiring harness connector and ecu - at first I thought it was a loose wire but I tested better and confirmed it wasn't - alright off comes the intake manifold to look at those things.
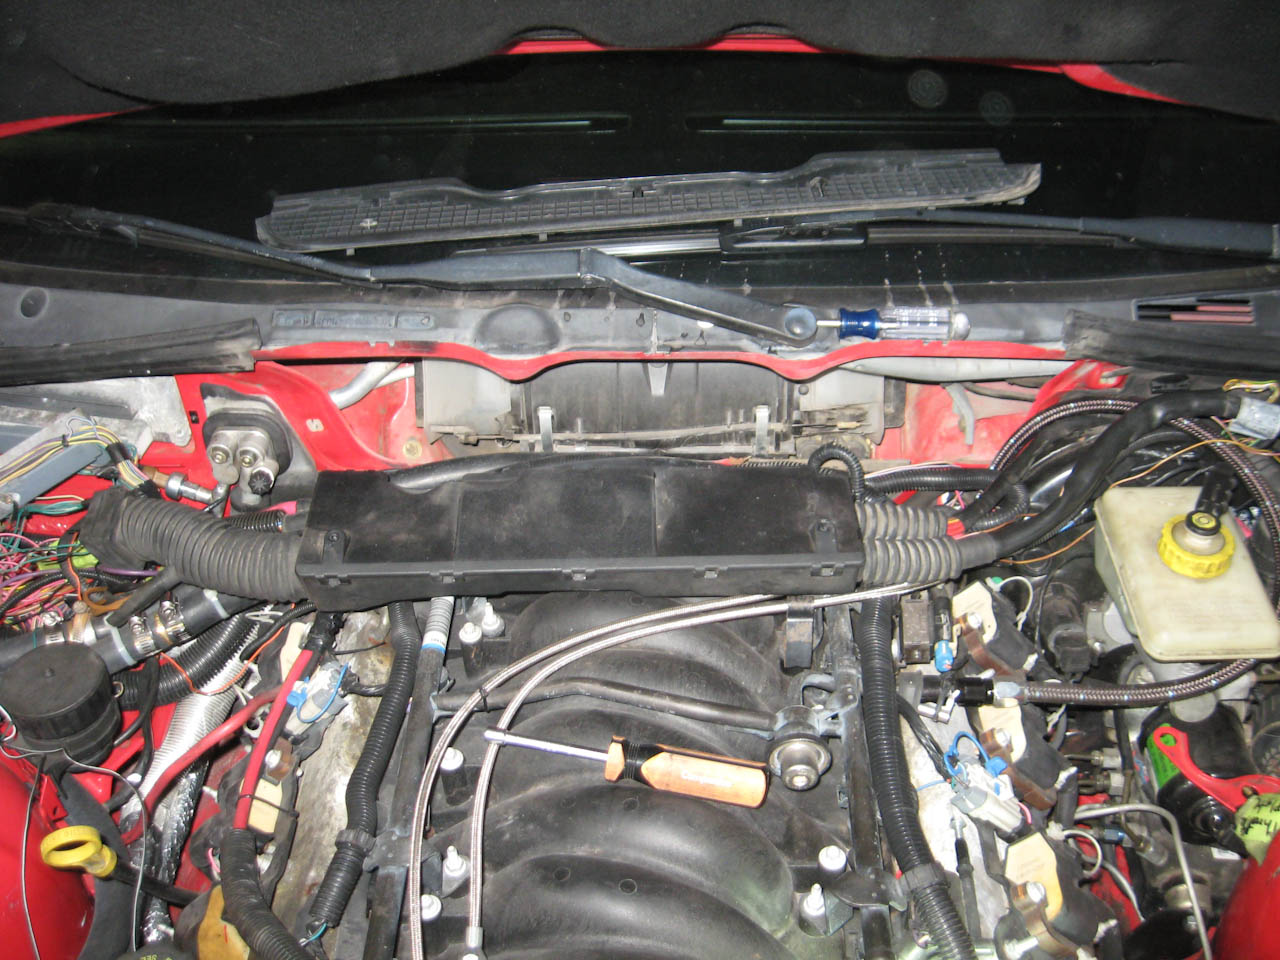
lot more room in the back part of the engine bay if I take the 3 little screws out and take that vent cover out - wow, can't believe I didn't do that before, idiot.
seriously though - look at all that room it creates on the back side of the motor
SURPRISINGLY easy process - pull the fuel injector plugs, few clips, like 10 really long bolts and no more than 20 minutes later and it's off - easiest intake removal evar.
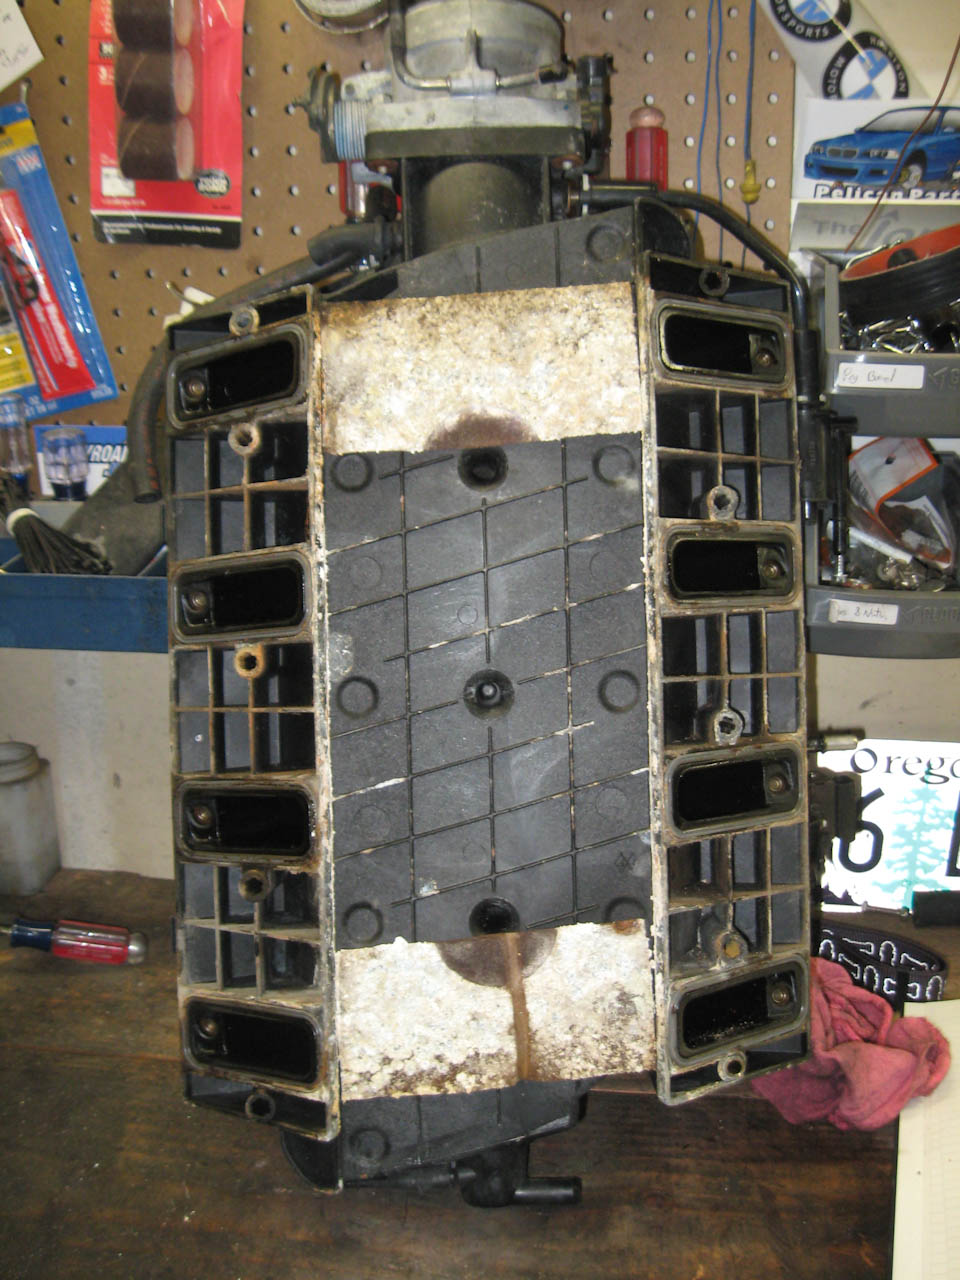
ready to come off
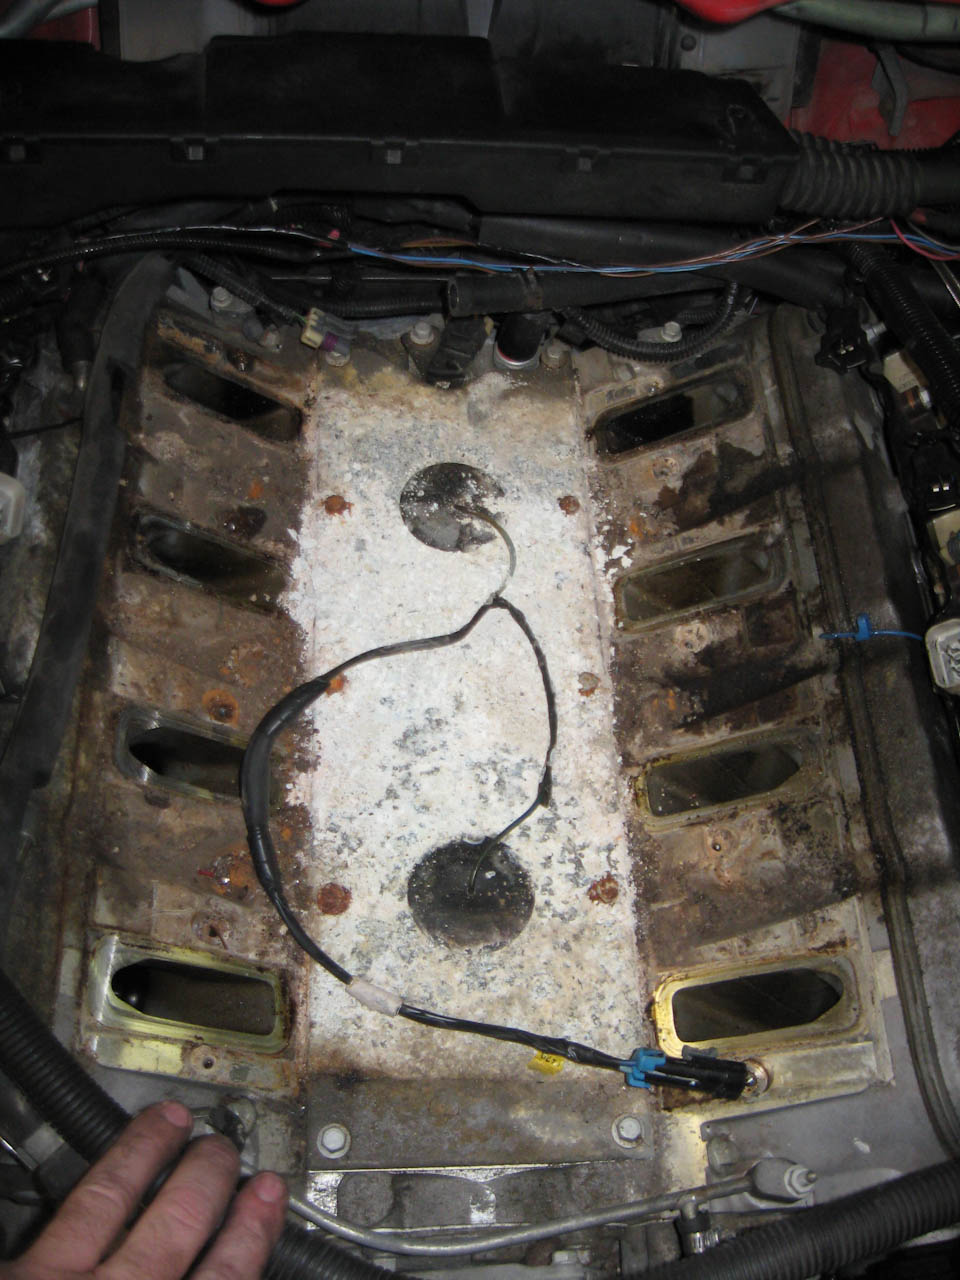
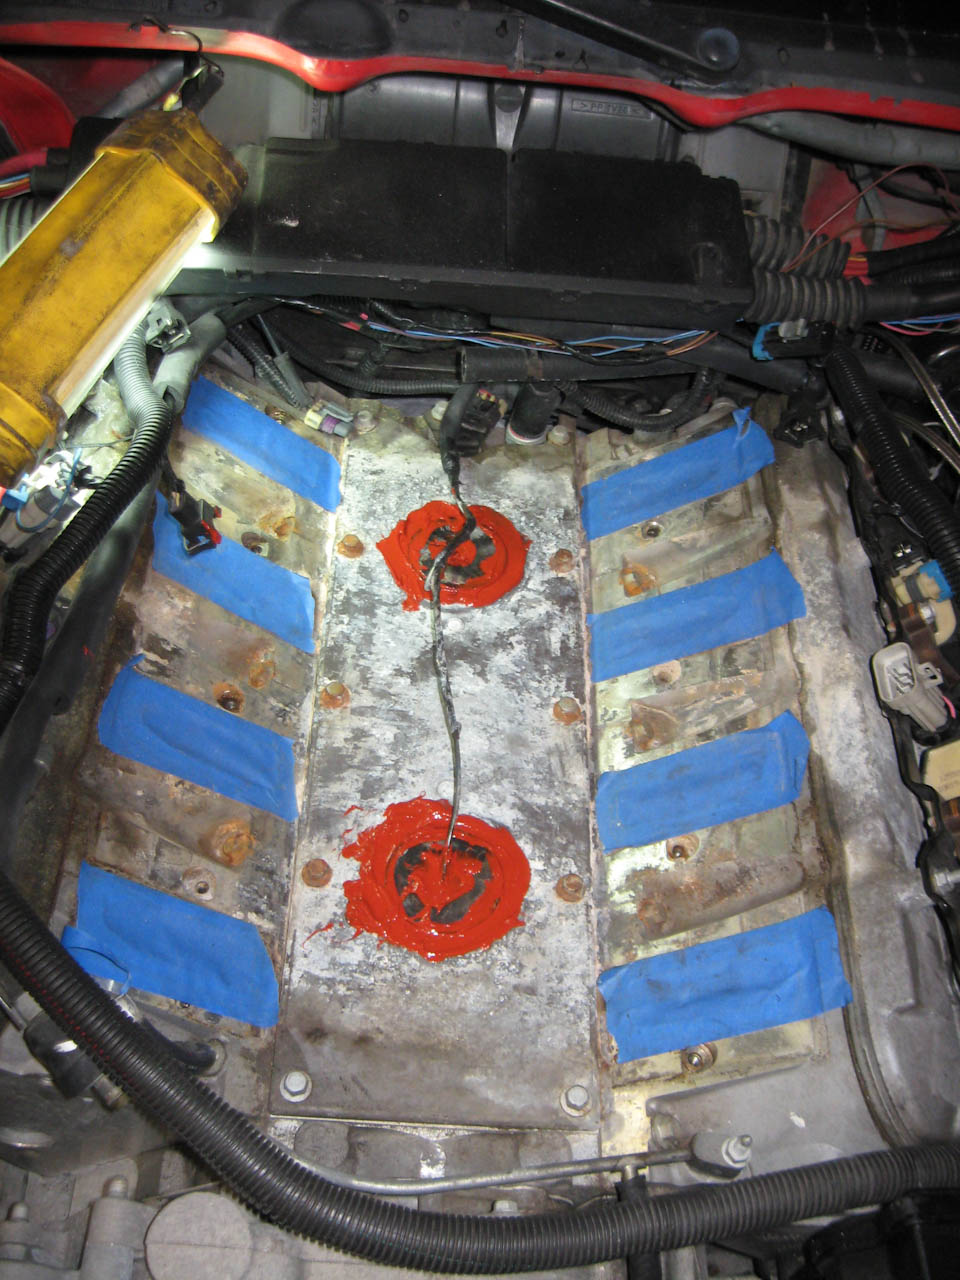
gee, I wonder if this is where my problem lies...
bottom side of hte intake manifold - not as corroded as the aluminum cover plate.
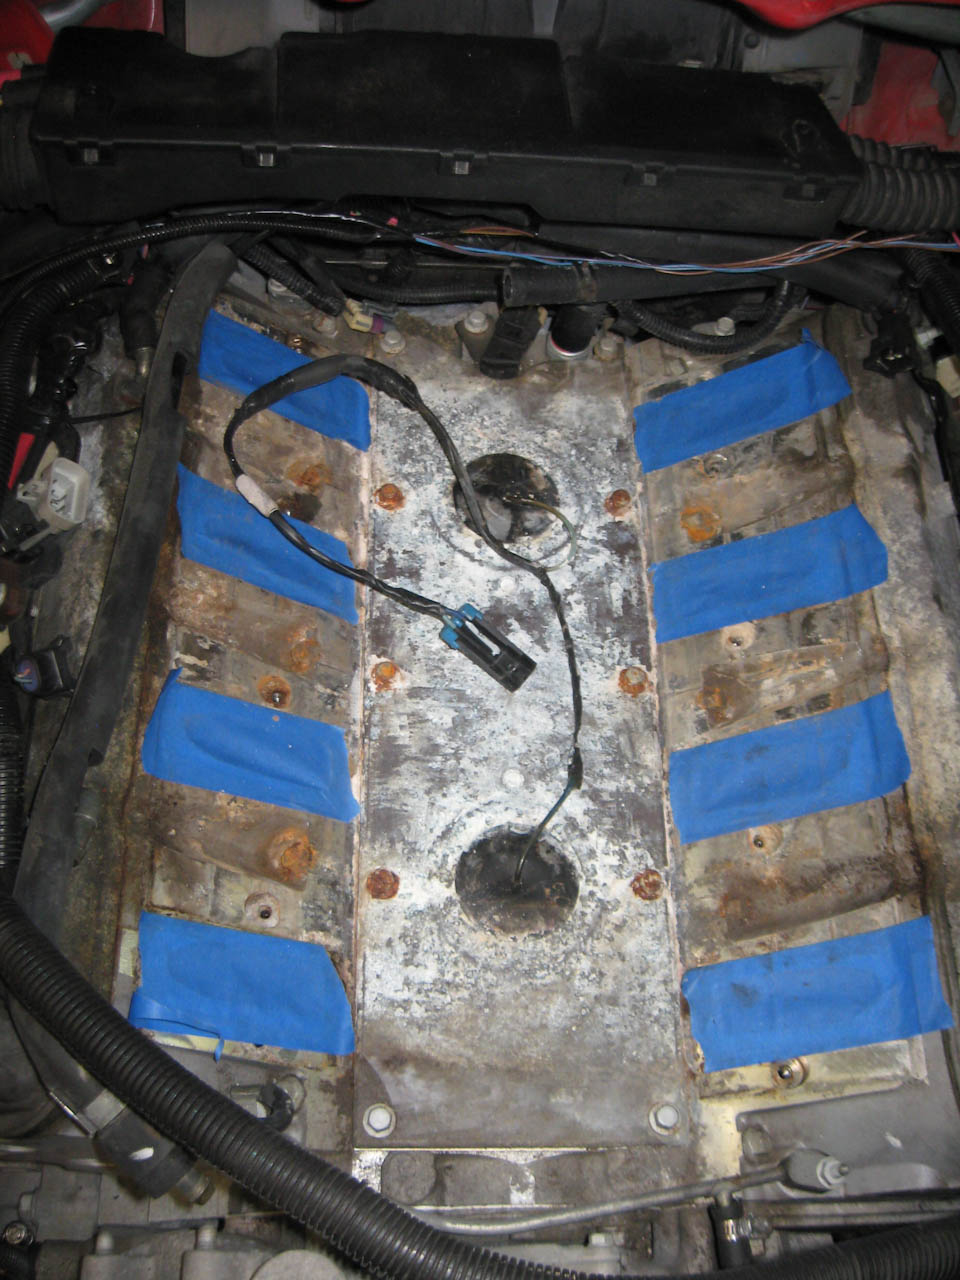
took a gasket scraper and a vacuum to it, taped up teh intake ports and started scraping and vacuuming to clean it up as much as I can
looks a lot better, the corrosion is pretty bad but as I don't believe thats structural I don't think there are any issues besides the knock sensors.
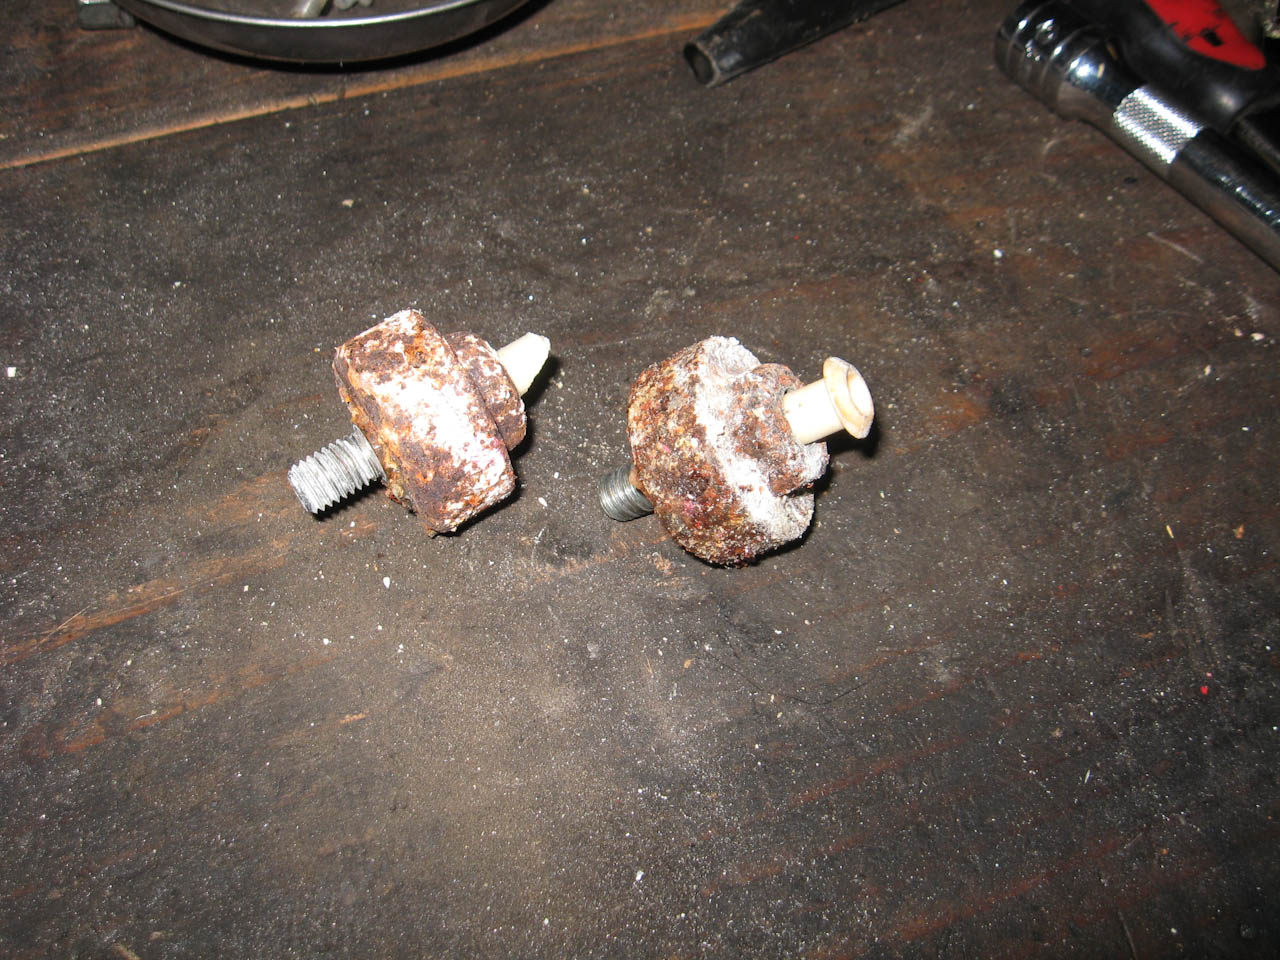
yep - they've seen better days.
I'll pick new ones up tomorrow and have it buttoned back up pretty quick. an extra 4 degrees over timing should make it even meaner
Last edited by Tongboy; 10-19-2010 at 03:16 AM. Reason: Automerged Doublepost
Member
I think this is going ot get auto merged again too... damn that feature...
anyways - 13.4 @ 107 tonight
also have pics of finishing up the knock sensor replacement and the front suspension. suffice it to say the subframe gets in the way...
Member
Very nice intricate write up, very impressed! Whats next performance wise for the engine?
Infiniti G35S Turbo BMW M3/4/5 Ninja ZX6R 636
Penn State University '08...better than your school since 1855
Sigma Lambda Beta International Fraternity Incorporated
UTI Class of '10, BMW "STEPchild"
Acurazine.com Mod Squad
Member
Thank you! I'm going to insure I have 100% no CEL's or other issues before I do any engine work - also going to get the 3.91 rear end in first because of how much of a difference it will make compared to more power. After that it'll probably be a set of 243 heads and a medium sized camshaft.
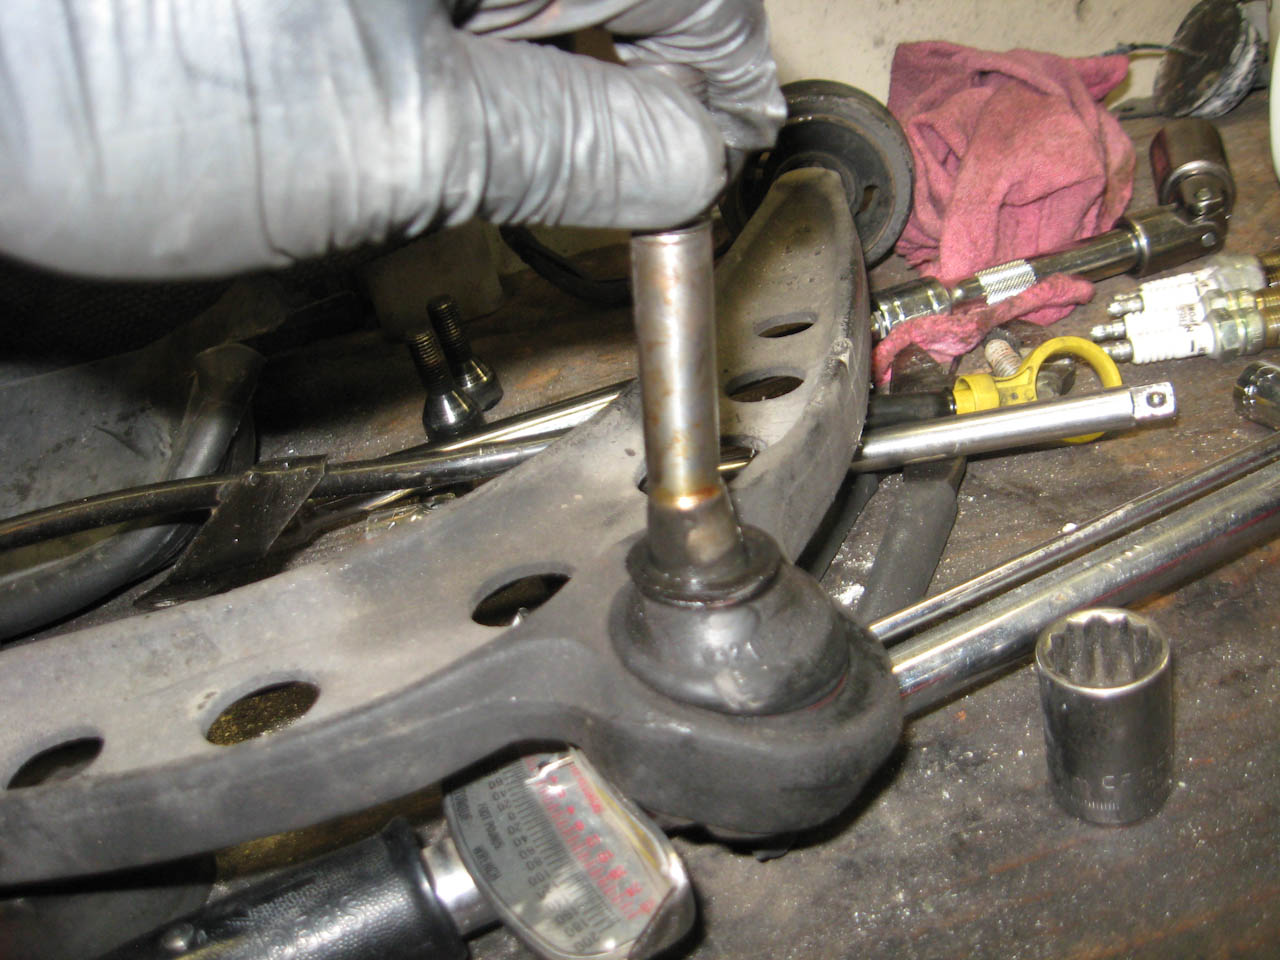
Pics of putting the suspension back together - found some bent up ball joints on the passenger side - first and second pick are the how bent hte ball joint was between being turned one way and the other way, pretty bad: - the smaller ball joint was not as bad but still slightly bent - to say the slightest the alignment was quiet a bit different afterwards
front wheels got 10mm spacers and studs for the spacers
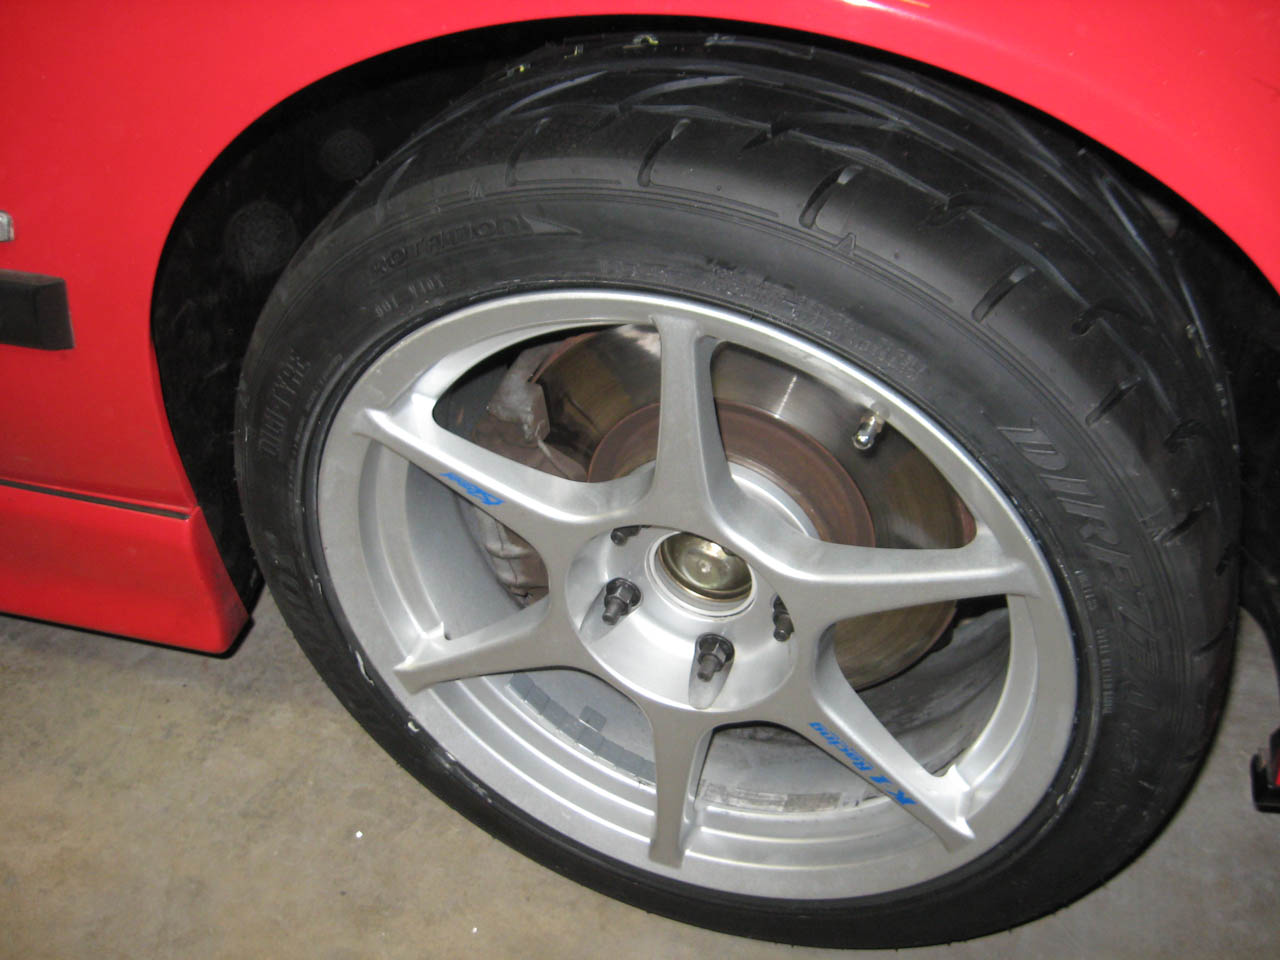
new k1's mounted with a square star spec setup
new knock sensors installed and sealed with way too much RTV
also installed new plugs, MSD plug wires and a heat shield for the back drivers side plug wire to stop the boot melting.
pulled the spacers from the trans mount and NO driveshaft rubbing - even at the drag strip.
Last edited by Tongboy; 10-23-2010 at 04:22 PM.
Still has a E39
Supporting Vendor
what happened at the dragstrip?
Member
two posts up 13.4 @ 107
Member
Nice!
Member
Very nice! Yes, the vent thingy takes up a LOT of room. I have run a few cars without them because of that... though mostly because I kept taking them off to get thigns done...
Nice choice with the K1s! I really like those wheels.
Member
Today's update is brought to you by better gearing.
After looking for far too long for a good trade for a 3.91 lsd I took 357i's advice and built my own. He gave me the i'm sane after making sure I was doing it right and as others have talked about (but i've never been able to find a good pictorial of) the process was pretty straight forward and easily accomplished in a garage with a vice and some basic hand tools.
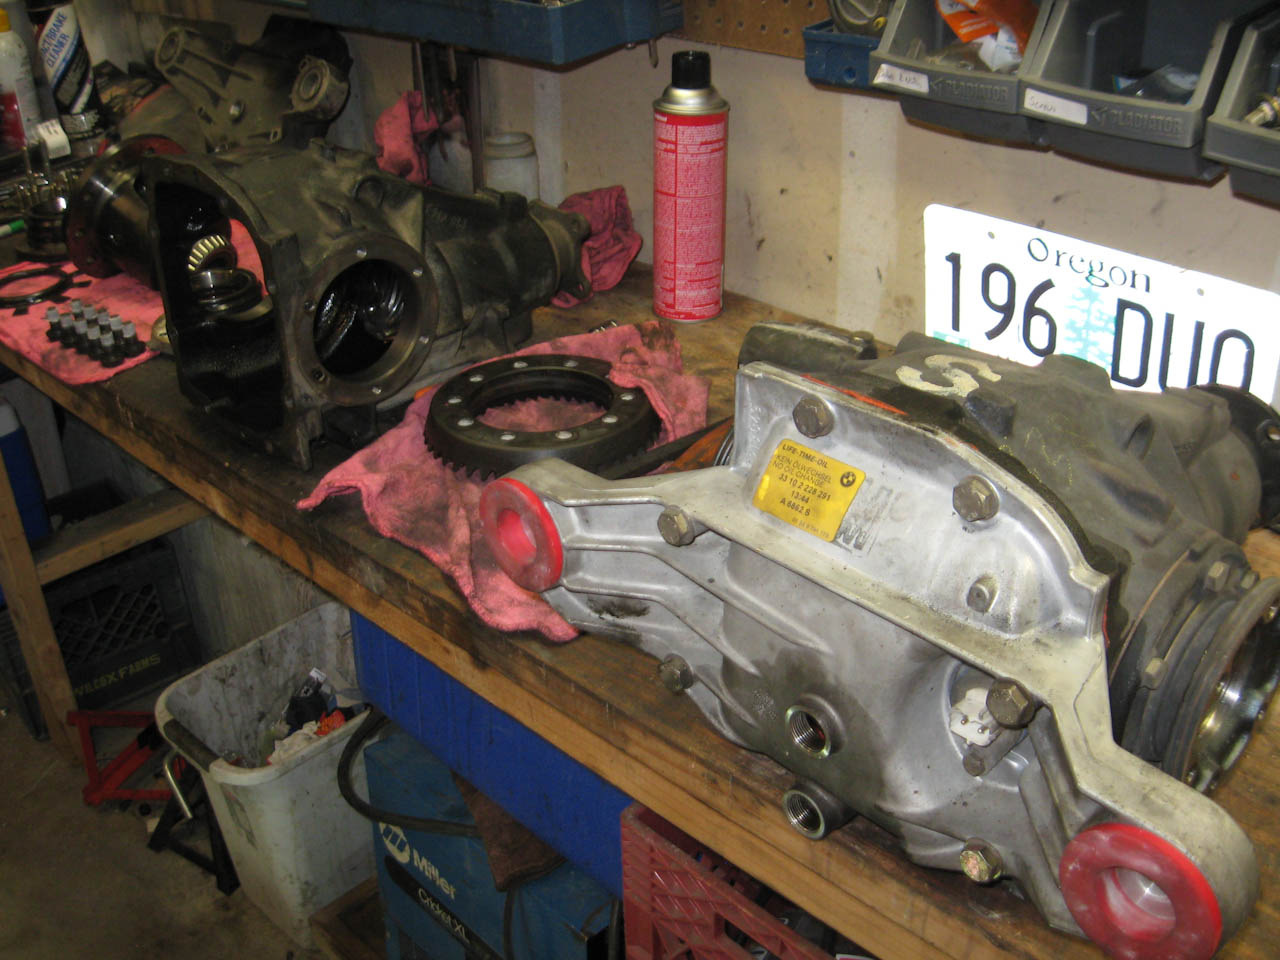
I basically took my 3.38 - pulled the lsd and put it into a 3.91 that I picked up from a local junkyard for ~85 bucks.
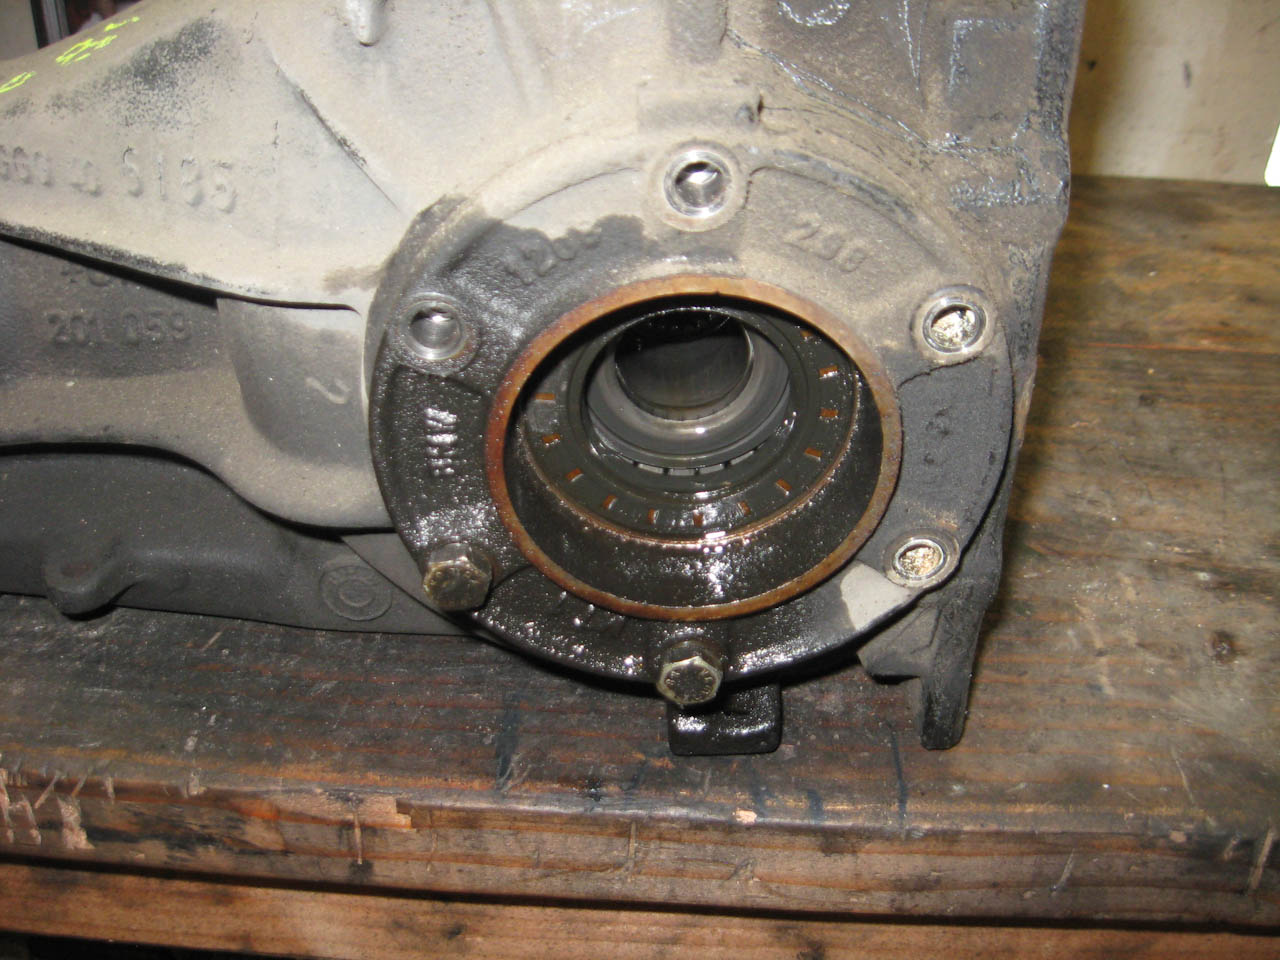
junkyard diff drained, pulled the speedo sensor first this time - look, i'm learning...
the ugly though good condition guts, yuck, open diff, rear case comes off with 8 16mm bolts
pop the side seals off both side of the diff with a 13mm
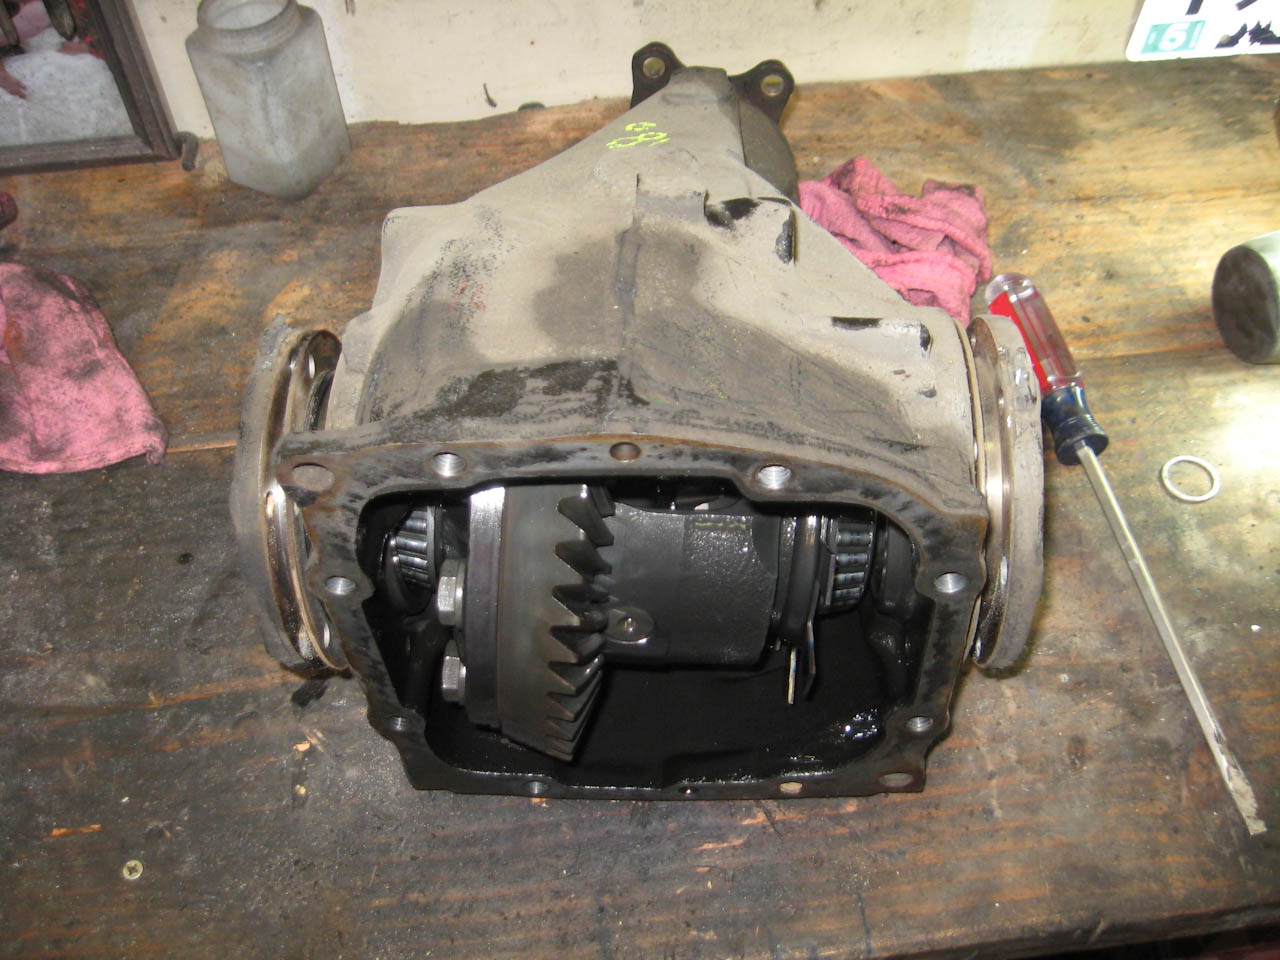
hammer time on both side seals pops them loose from the top tab - slowly move them out and the diff will set down in the case
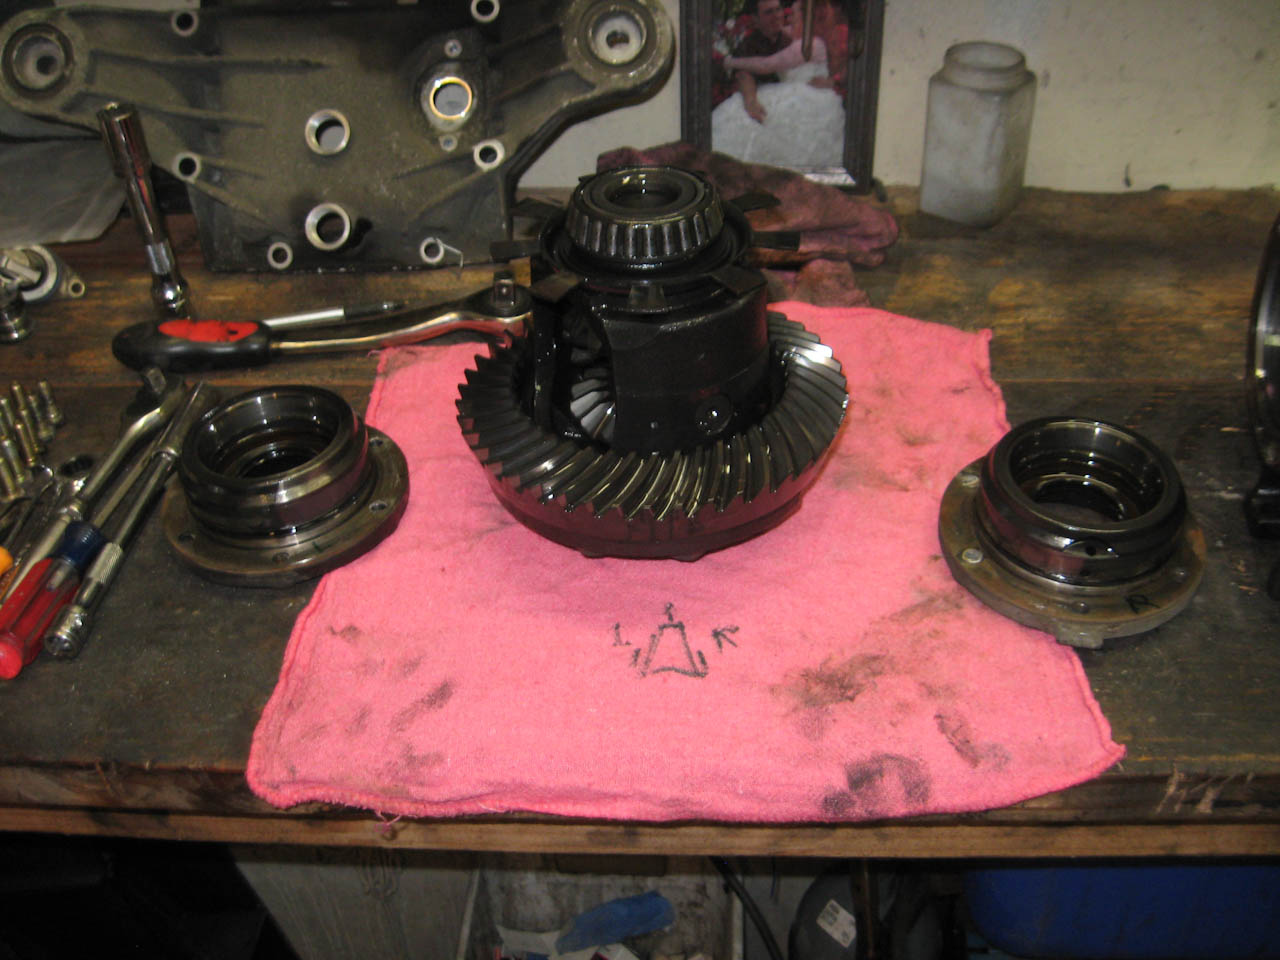
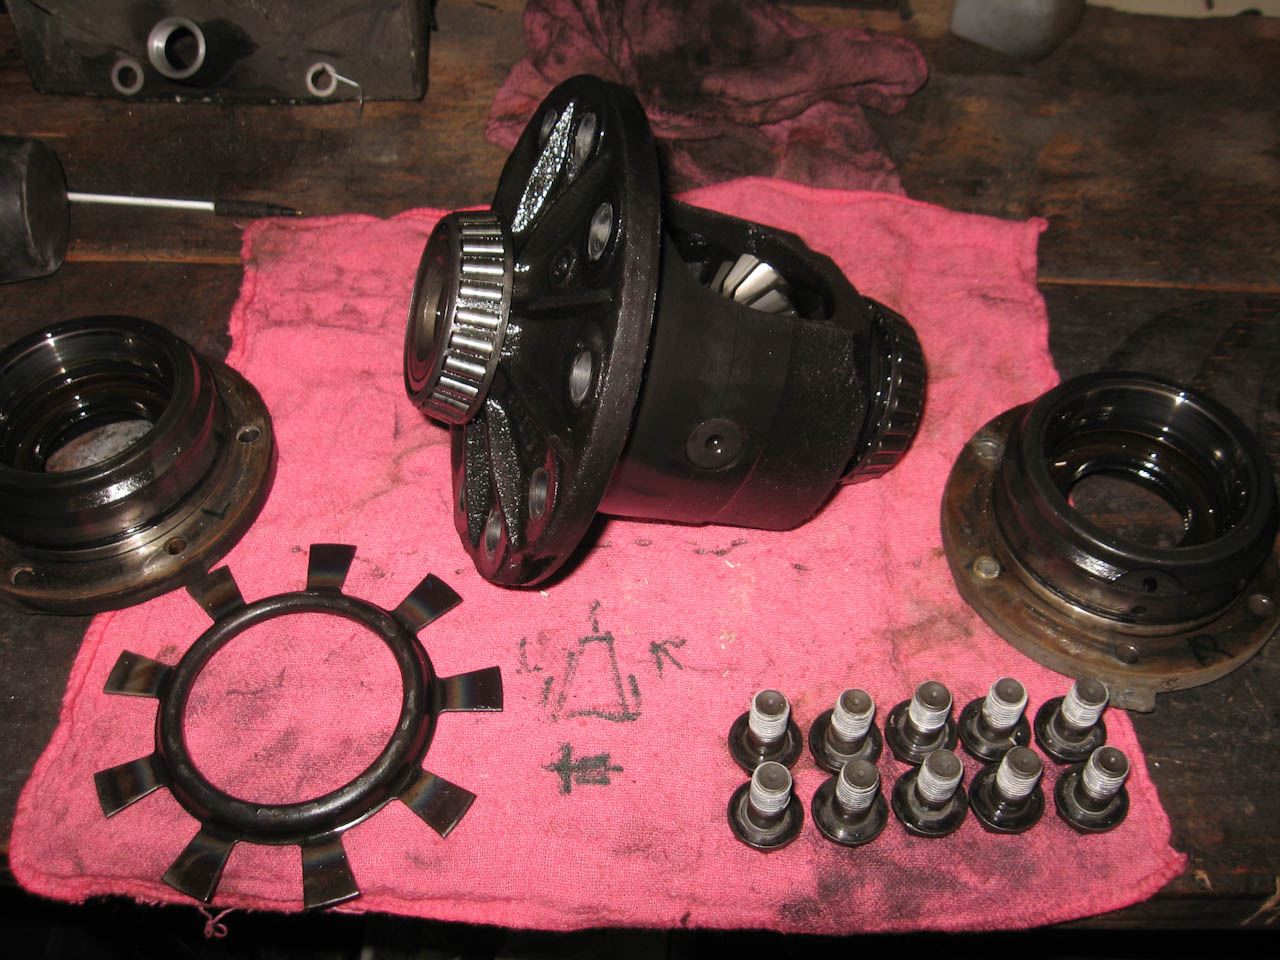
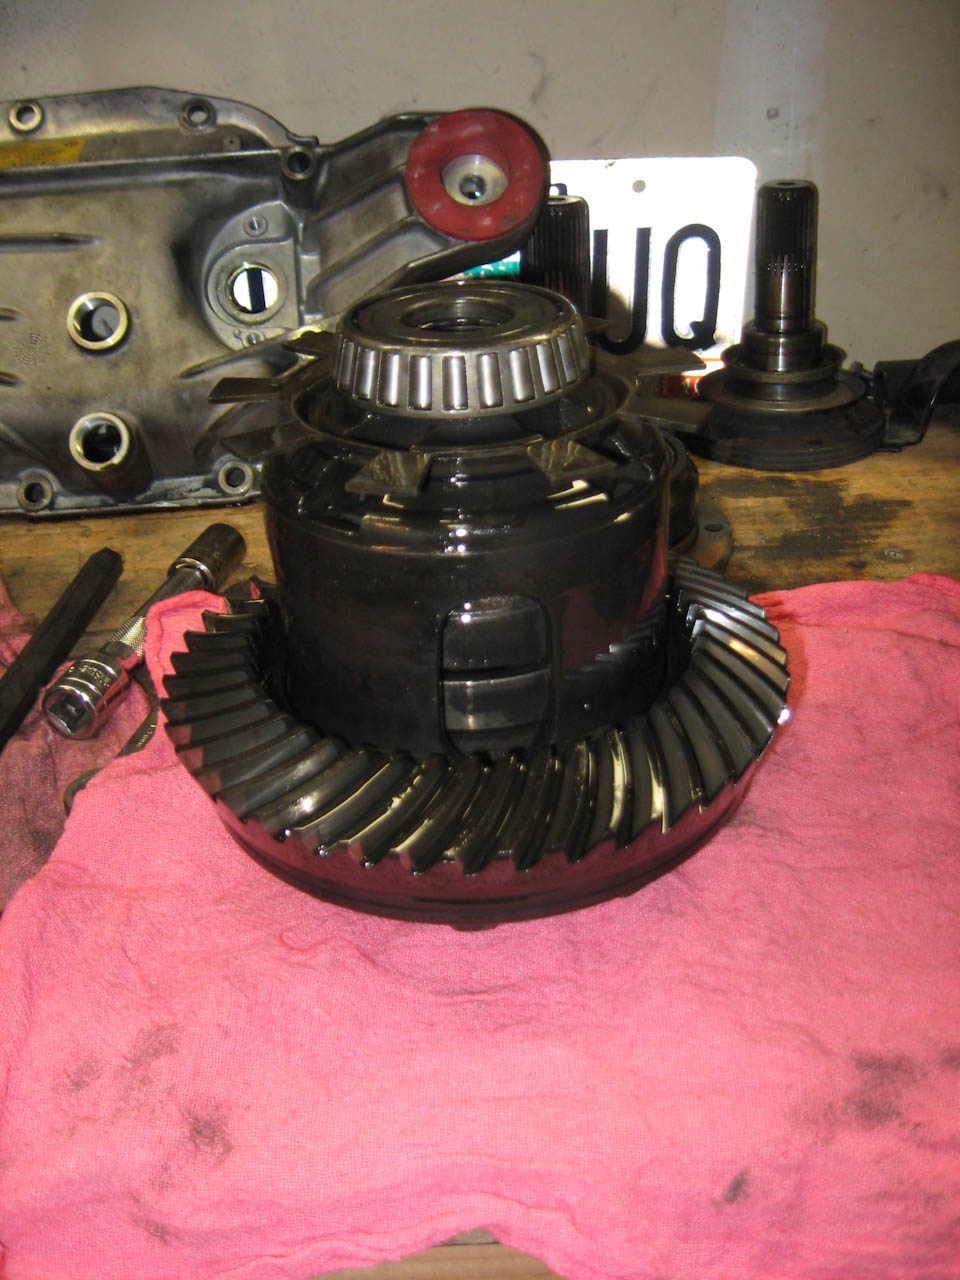
the guts on the table, I labeled everything just so I didn't put anything in backwards.
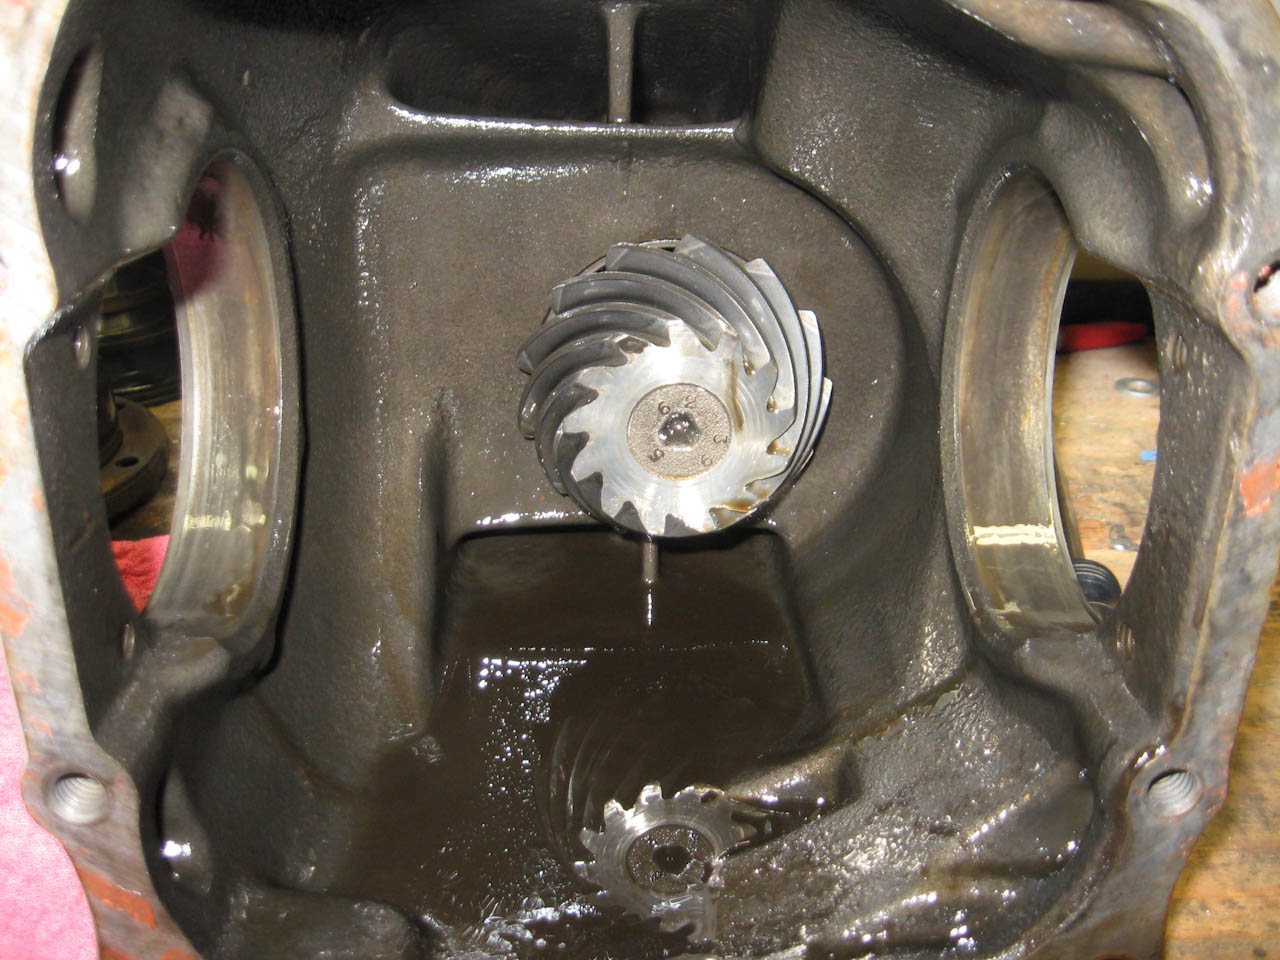
checking the pinion gear and the internals
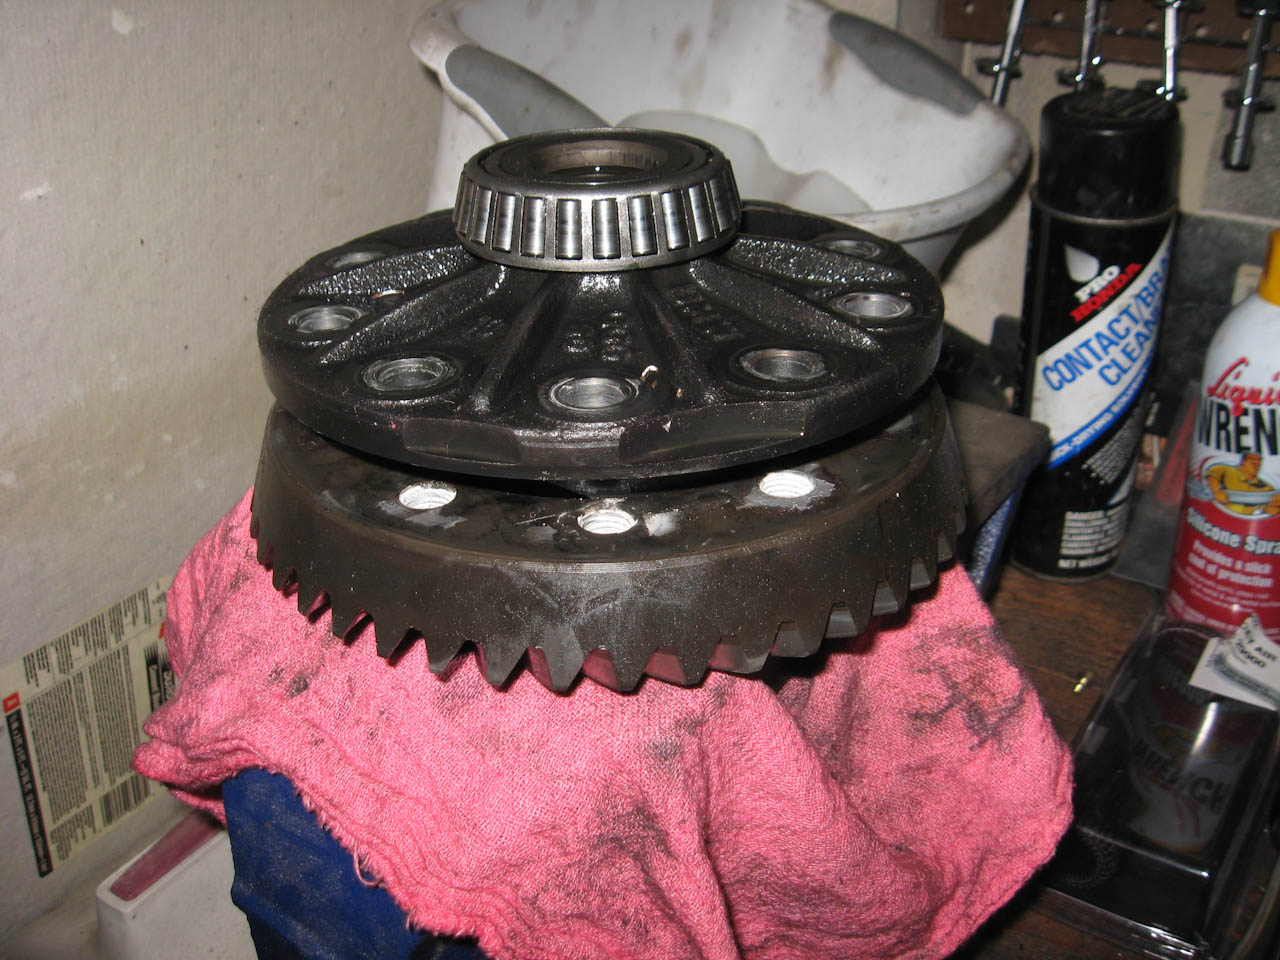
popped it into the vice to remove the ring gear - those 10 19mm bolts were TIGHT - 120+ lb/ft
pulled the speedo ring off - couple of hits with a screwdriver around the edge pops it off
used a screwdriver/hammer pry and removed the gear that is quasi pressed on to the diff
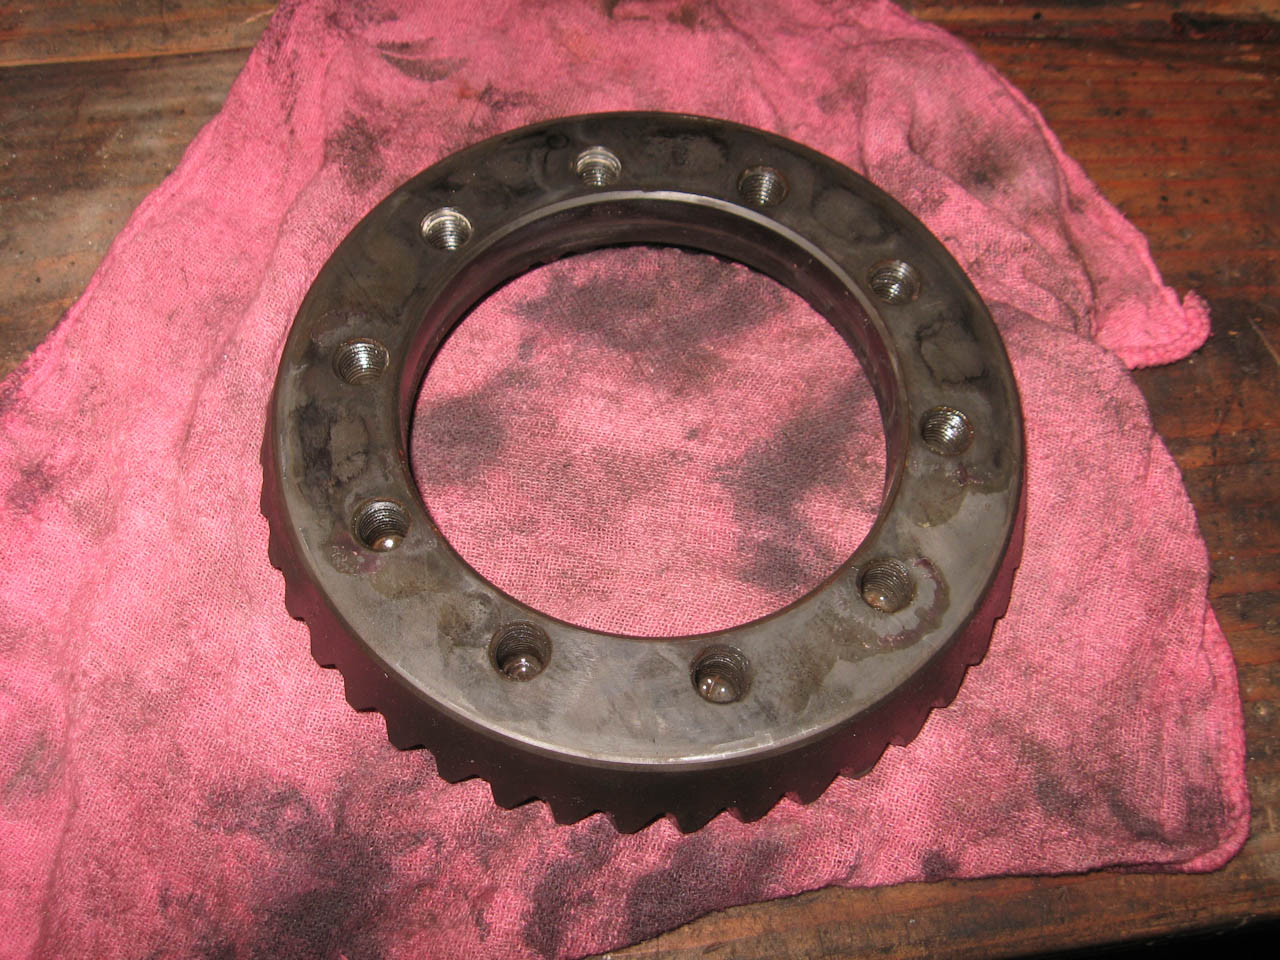
ring gear off and free - sprayed some parts cleaner in all the screw holes and wiped them down to get them clean.
everything apart and ready for the next diff
from here on out I did all of this over a lazy evening last night (to give concept of time scale)
put the car up on drive up ramps on the rear.
dropped the diff - didn't remove the exhaust, only the mid-point sway bar links were removed - the exhaust made the axle on the drivers side difficult but not painful enough to drop the exhaust.
diff out and ready for swappin'
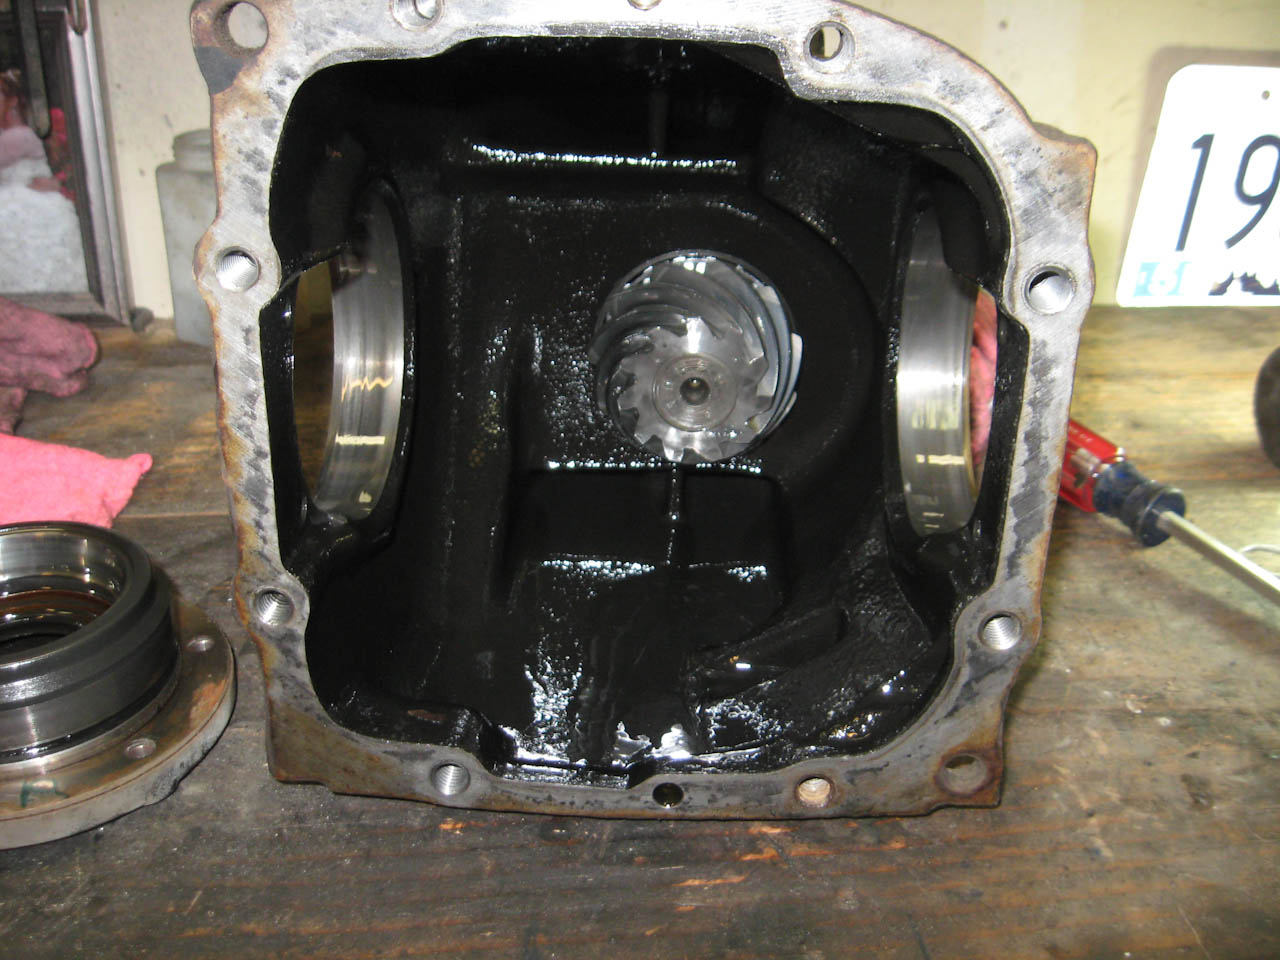
torn down to the lsd pretty quickly, no seeing through this diff.
internals look good (anyone want a 3.38 ring/pinion case with an open diff?)
worth mentioning about fluids - having both of these sitting next to each other - the redline 75/90w that I replaced not 500 miles ago in the 3.38lsd diff - the fluid sort of sticks to the metal on the gears, in the case, etc, it's pretty interesting to see compared to the stock fluid in the 3.91 non-lsd - which feels more like just general motor oil that doesn't "stick" to the metals in the case - it's obvious the newer fluid is MUCH better at protecting everything.
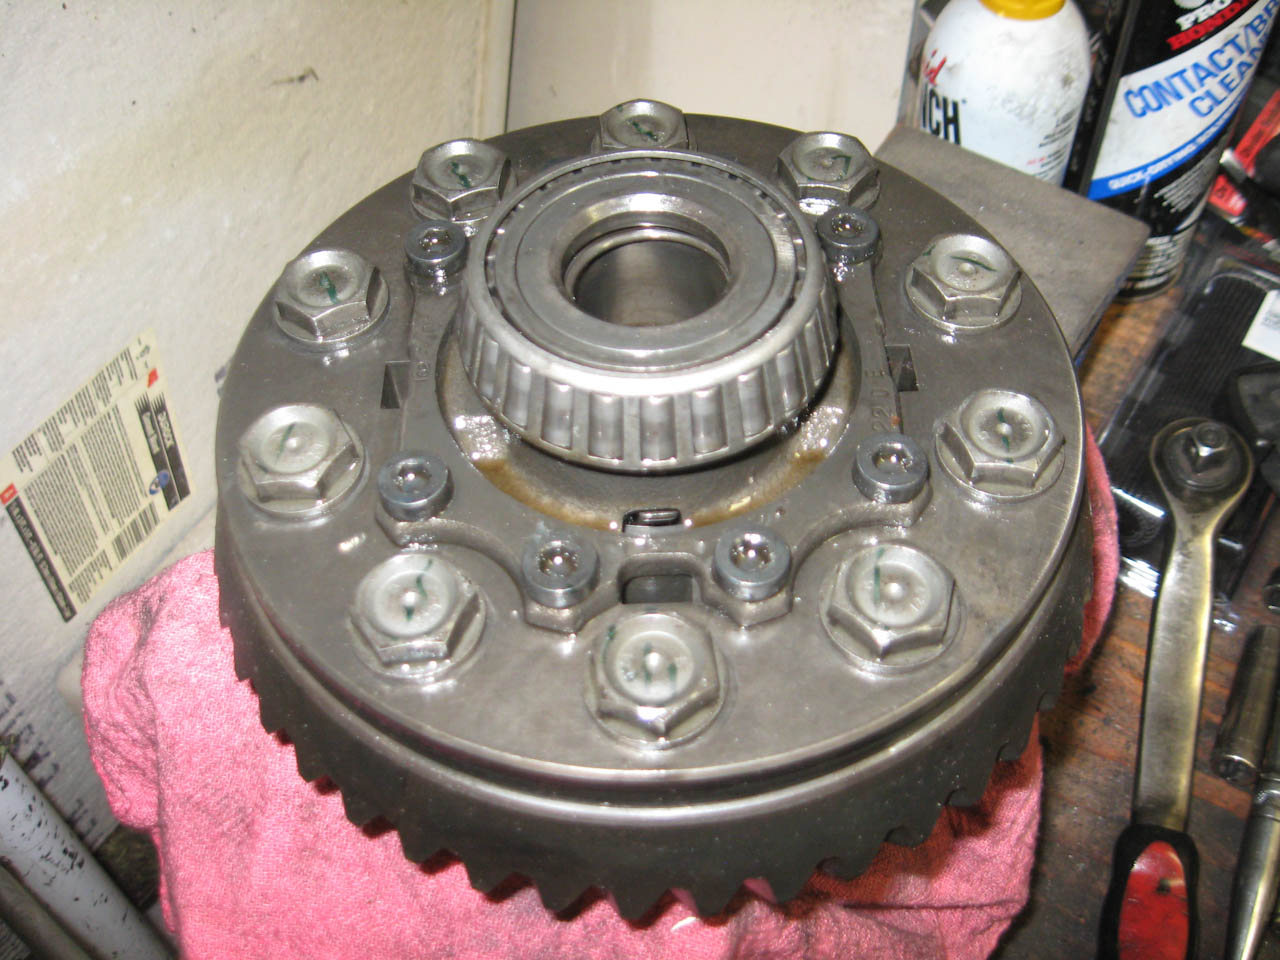
pulling the 3.38 ring gear - perfect time to check the torque on those allens (I had already done it previously but I did it again, it's too easy not to)
popped the gear and used the screws to pull the new gear on and a little press in the vice to even it out marked all the screws as torqued and it's ready, little bit of blue locktite and it should stay put.
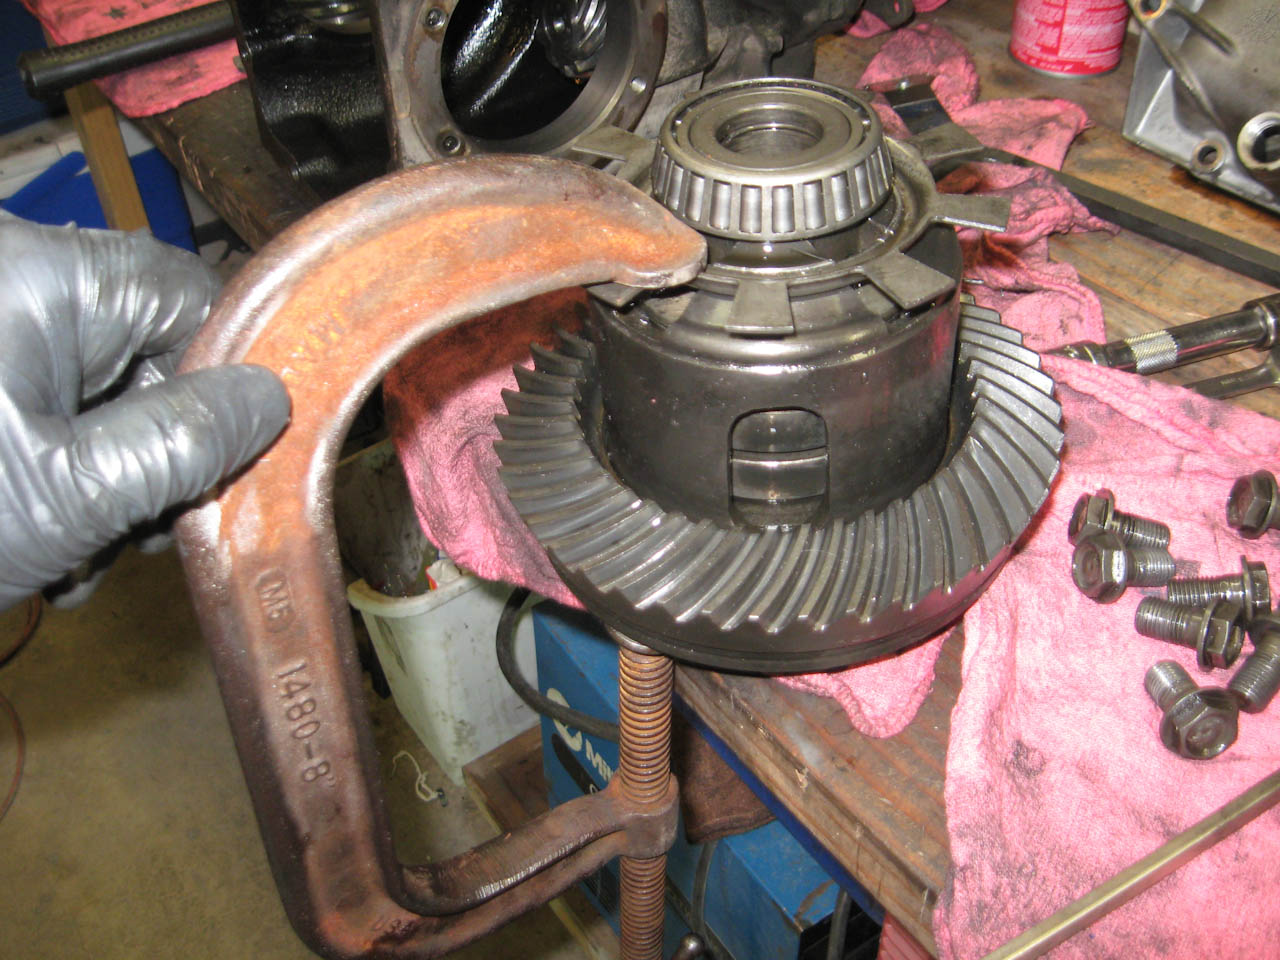
357i mentioned that putting the speedo gear back on was a pain - I completely agree, it was frustrating, it keeps wanting to shuffle around on the end. I ended up using a c-clamp with just a little bit of pressure to hold one side down and a hammer and a big screwdriver to set the other side on and then work around the ring to get it fully seated.
pop the newly assembled diff back into the case and relube and install the sides - this take a bit of shuffling to get everything lined up but it isn't too bad. once everything is back in and assembled spin everything and make sure it feels good and tight (without being too tight, gotta love differentials...)
I then popped my rear case with the solid bushings on the new diff (that I had cleaned up the exterior of) and sealed it up
topped up with fluid and tossed it back in the case
put it back in the car and took it for a spin - the gearing is SO MUCH more correct for the engine/tranny - 2nd gear @ 6k is 63mph instead of some oddly spaced ~75
no noise, gear whine or any odd behavior out of the rear end. Worth noting - the 3.91 front nose was slightly longer than the 3.38 diff - it protruded farther forward once installed - as such this made my driveshaft as tight as it can possibly be - seriously - to remove my driveshaft I now need to loosen my diff bolts to slide the diff back a bit. This has gotta create an interesting situation for people making "pre-made" e36 driveshafts - an ideal length would be somewhere in the middle of the shorter & longer diff nose...
Member
Looks good.
Questions -
1. Did you verify tooth contact pattern?
2. How do you know the preload will be identical to the original open diff when you installed the guts of yours in the other? I think it would vary, no?
Doug
'97 M3/4
Still has a E39
Supporting Vendor
Glad to see everything turned out well!! I'm over 300 miles with no problems(so far haha) Its pretty simple once its all layed out in front of you. There is no doubt that a 3.91 is a great gear option for the t56, I am very happy with it... gotta love punching the throttle at 60+ mph and breaking the tires loose =)
Member
Great write up, I too was wondering about the above questions.
 Posting Permissions


 Reply With Quote
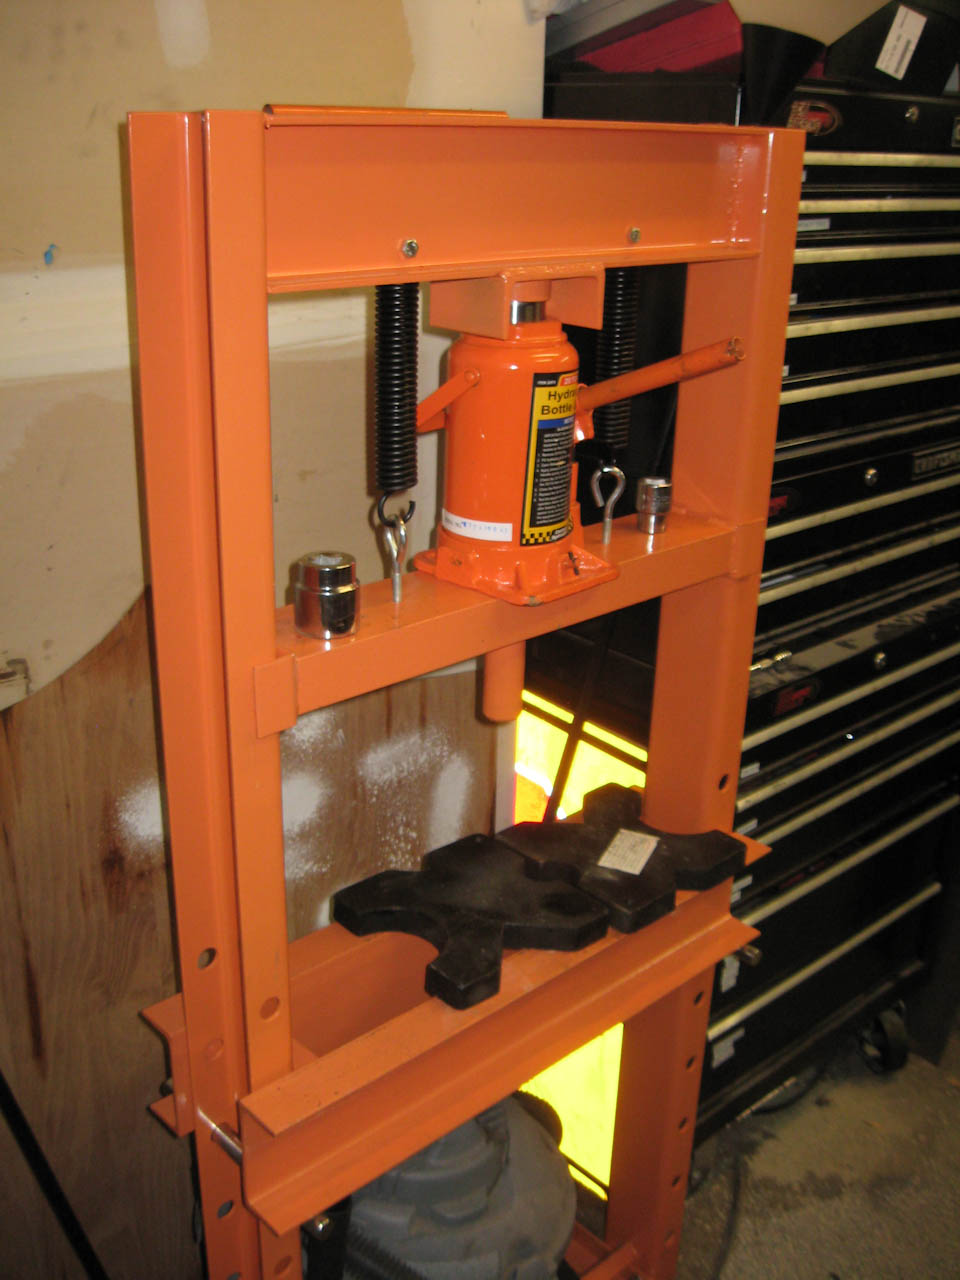


Bookmarks