
 Still has a E39
Supporting Vendor
Member
Still has a E39
Supporting Vendor
Member
I'm waiting on header fabrication but I hope that I too can easily fit the ABS up and over.
X3 on the PCM fitting easily in the hole. once you have the BMW DME brackets out of the way it slides right in. Thinking about some foam to hold it in place.
Member
foam is a good idea, my plan was to use some non-static computer foam (not that I think it's necessary but I have a bunch of it laying around and just cut a few sheets to fit around it and keep the ecu stable.Originally Posted by Pzary3233

Member
non-static computer foam would be better... where do I get that?
Senior Member
I used extra rubber hoses :P
Member
computer components tend to come wrapped in it, don't know where you would actually go about buying a small amount of it by itself though... the pcm is static sealed and grounded, I wouldn't worry about non-static safe foam around it.
Last night I didn't get too much done, got the engine fitted and bolted down and confirmed the headers don't hit the brake lines (which I was very excited about)
the big ticket item was that I had my s52 picked up and sold so i'm very happy about that.
in a sadder note I also broke one my my man sandles
driveshaft is supposed to be here tomorrow, fuel and power steering hoses will be test fit & installed tonight, potentially some cooling hose work as well but mostly I want to get into the wiring because I know thats going to be my time sink.
I've documented most of the wiring I need and the BMW side is looking very good with the bentley diagrams that i'm familiar with from my VW days but the LS1 stuff the info i've been able to find has left me a little wanting, particularly in the solidification of a few PCM power wires and the starting system. I'm sure i'll figure them out and plow on.
Senior Member
If you're looking for LS1 wiring clarification, both Pzary and I have posted our wiring setups. His is in the "E36 LS1 Wiring" thread, and mine is in my build thread.
Mine works 100% (the issues I've had have been with loose connections). It's with an 01 Camaro engine/t56/PCM. As far as I know most 99-02 F-Body harnesses are the same. I know the trucks are different, and I don't know about the Vettes.
Member
Thanks Raghbag, I've looked at both of yours and they are indeed very helpful, unfortunately both of you are working with the obd1 stuff and i've got to contend with the obd2 stuff.
my intentions are to start with basic operations and gauges and then work into the emissions based stuff once the car is running.
Senior Member
Eww, OBD-II! Sorry I can't help you much there. I don't know what else is involved other than the rear O2 sensors, EGR, and AIR systems. For those, the PCM controls them, so if they're connected you should be good to go. There is also some kind of fuel vapor-catcher thingy attached to the driver's side of the throttle body. It is supposed to go to the charcoal canister I know. I removed it for my swap so if you need one let me know and I'll ship it out to you.
Those are the only OBD-II systems that I know of, but as you know I kept it simple since it will be registered in FL where there is no inspection at all
Member
lol yes my reply is the same... EEEEEEEEEWWWWWWW lol, the OBDII system on the LS1 side of things is very self contained... So not really a problem on the BMW side of things from my "De Smogging" efforts.
Member
haha, obd2 isn't THAT scary, it's just more sensor and motor inputs to feed the PCM. I haven't dealt with it before but it isn't some super daunting scary task. Most of the emissions stuff is encapsulated in the engine harness - as ragh mentioned the only external connectors are the evap canister in the trunk (I think?) and the fuel tank pressure thing
anyways - pictures from the last two days:
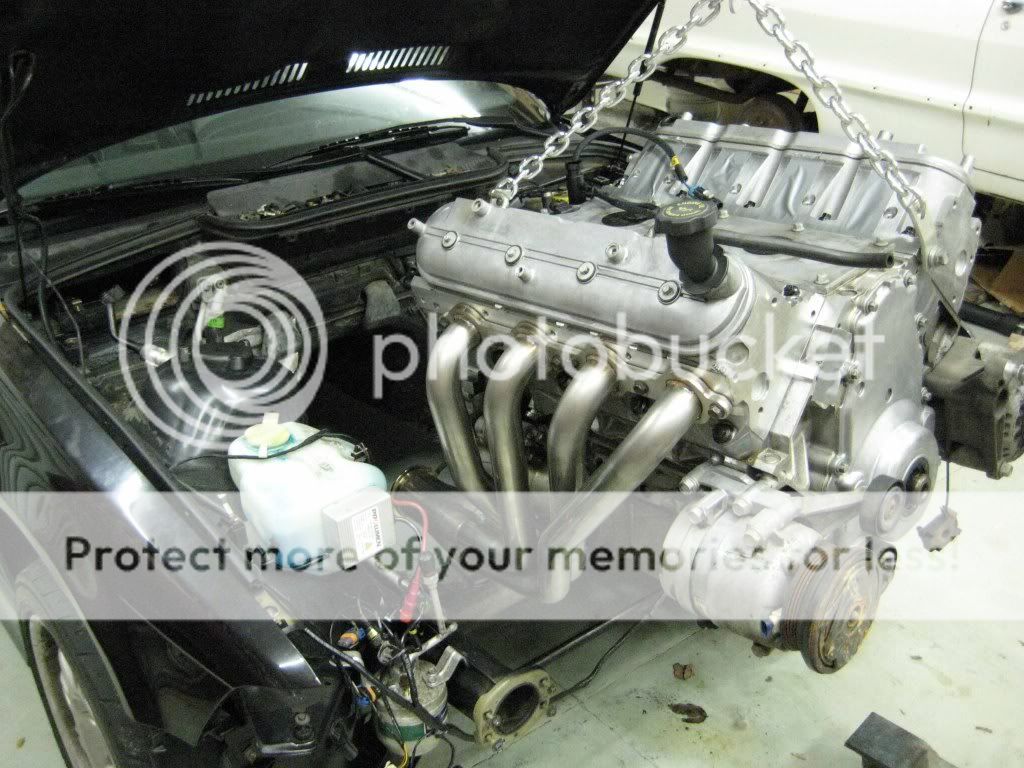
Wed night I bolted in the motor for what I believe to be the last time.
after seeing the room in the trans tunnel in relation to the t56 clutch line I hit it with a hammer, just a bit, i'd rather have more room around the clutch line and it's bend out of the trans than not enough...
I was most excited that the headers fit and cleared the brake lines and module move without any issues
my trusty sandal brokeso of course I had to go get a new pair Thursday (I always work on cars in sandals for some weird reason)
Last night I tackled the wiring harness - pulling apart the e36 harness and removing what I didn't need. thankfully the harness is self contained and the bentley matched most of the wire colors and locations.
This is the outcome - it's still messy but about half the harness wires have been removed, probably more and are now sitting in the box beneath the harness
This is what I have to go to the PCM area, I left the various emissions related stuff in there as well so I don't have to find the wires later - not many wires there, the ~3-5 emissions wires, 12v batt, ignition, two ac wires, tach, fuel pump relay, a pcm relay actuator (I don't think I need that?) CEL and maybe a few more, pretty straightforward.
I bundled up the removed wires that go into the car body harness over by the three plugs - I still have a few connectors to remove over there and probably 4-5 wires left on the engine harness just because I wanted to make sure I’m not using them before removing them.
Since I’m using the majority of the emissions things down the road on the ls1 harness I don't have a ton of wiring to remove from it but there is surely more than enough. I'm going to leave it bundled to the engine until I get it running and then I’ll move the two back engine harness wire blocks into the bmw top cover to clean up the engine bay.
tonight's going to be all about getting all of the ancillary systems buttoned up around the engine and starting in on the wiring integration to get the motor to hopefully run tomorrow
Last edited by Tongboy; 08-20-2010 at 12:32 PM.
Member
I wonder if a shop that reprograms LSx PCM's would be able to eliminate those OBD2 functions so they don't throw a code? I know this is doable with Hondata's K-Pro system.
Member
efi live and hptuners can do that without any issue. I don't know about their ability to then set the readiness for testing but getting rid of the codes is easy.
I'd like to actually have everything working correctly, not right away, but within two years :o
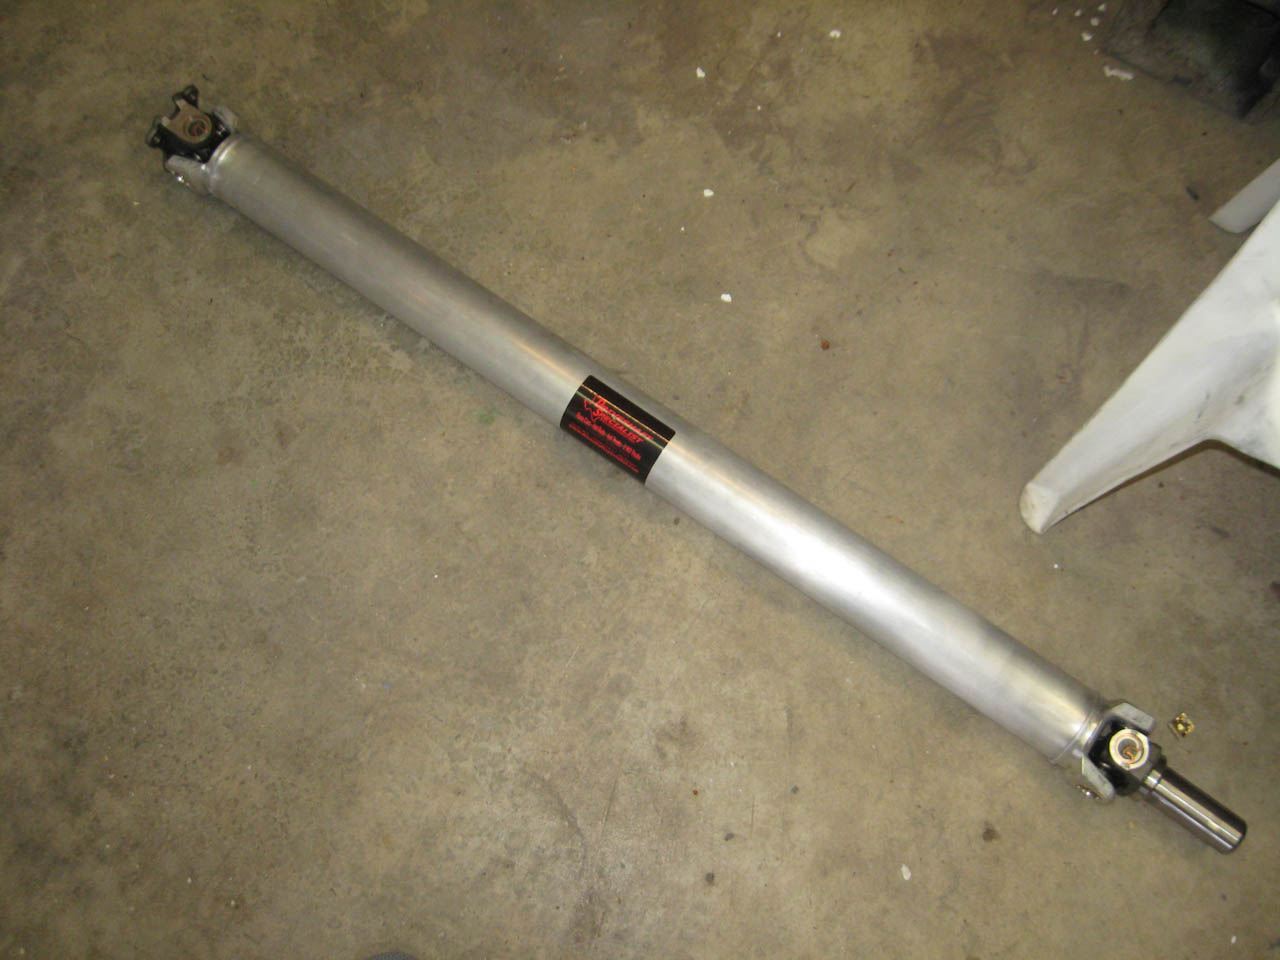
Got the driveshaft today - 3" aluminum unit - turn time of sub 1 week from texas driveshaft specialists - very nice looking unit, looking forward to spinning it.
the 3" just BARELY clears the rear of the tunnel where it gets tight right by the brake cable exits.
anyone doing the swap - save yourself the money of the vorschlag and get a 3" aluminum unit for ~350 from various places + the jagsthatrun rear piece - everything bolted in perfectly and I reused the stock studs from the original driveshaft with no issues. smack dab on 4' end to end on the driveshaft dimensions.
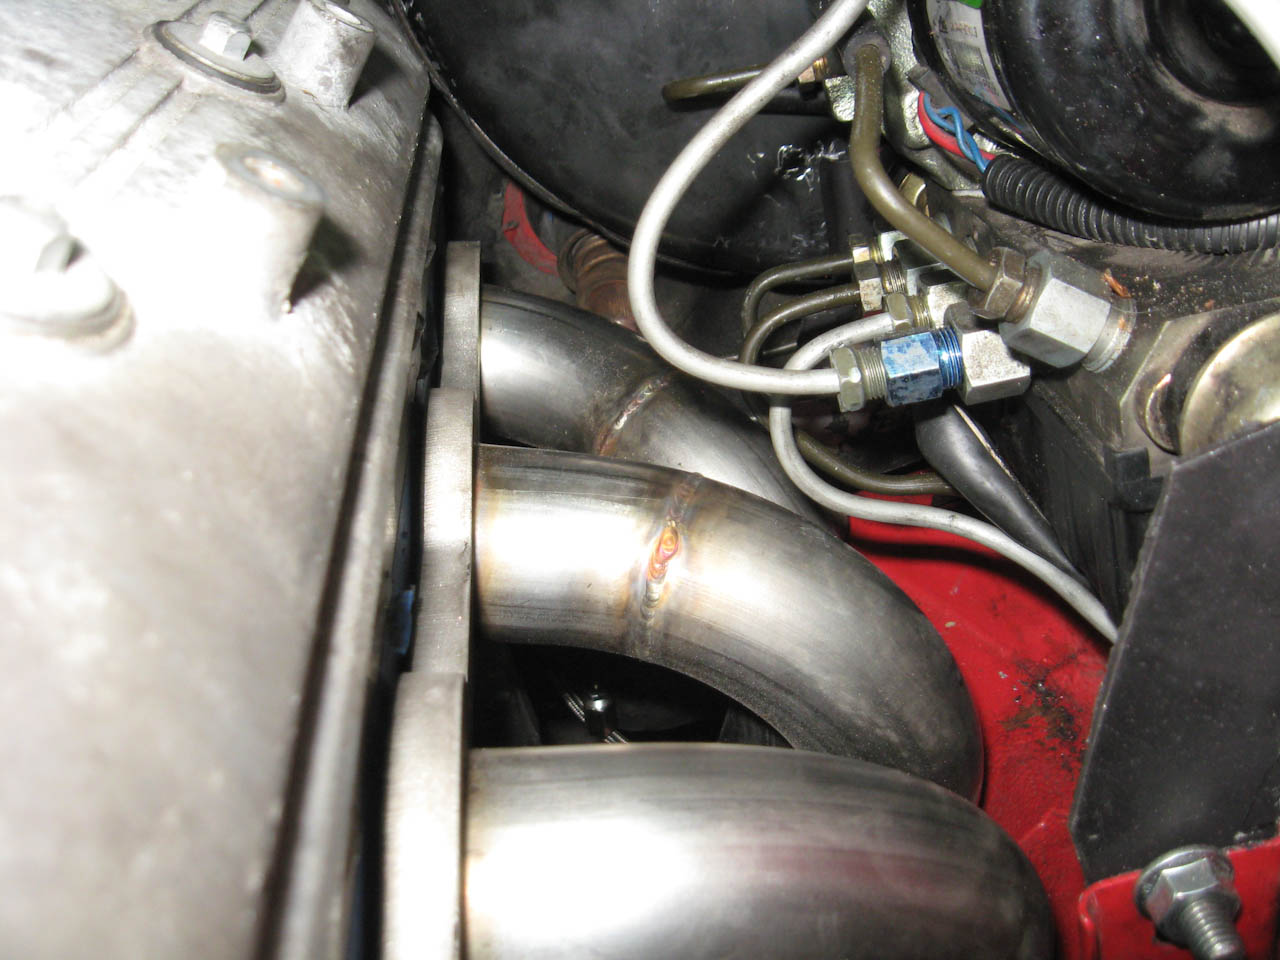
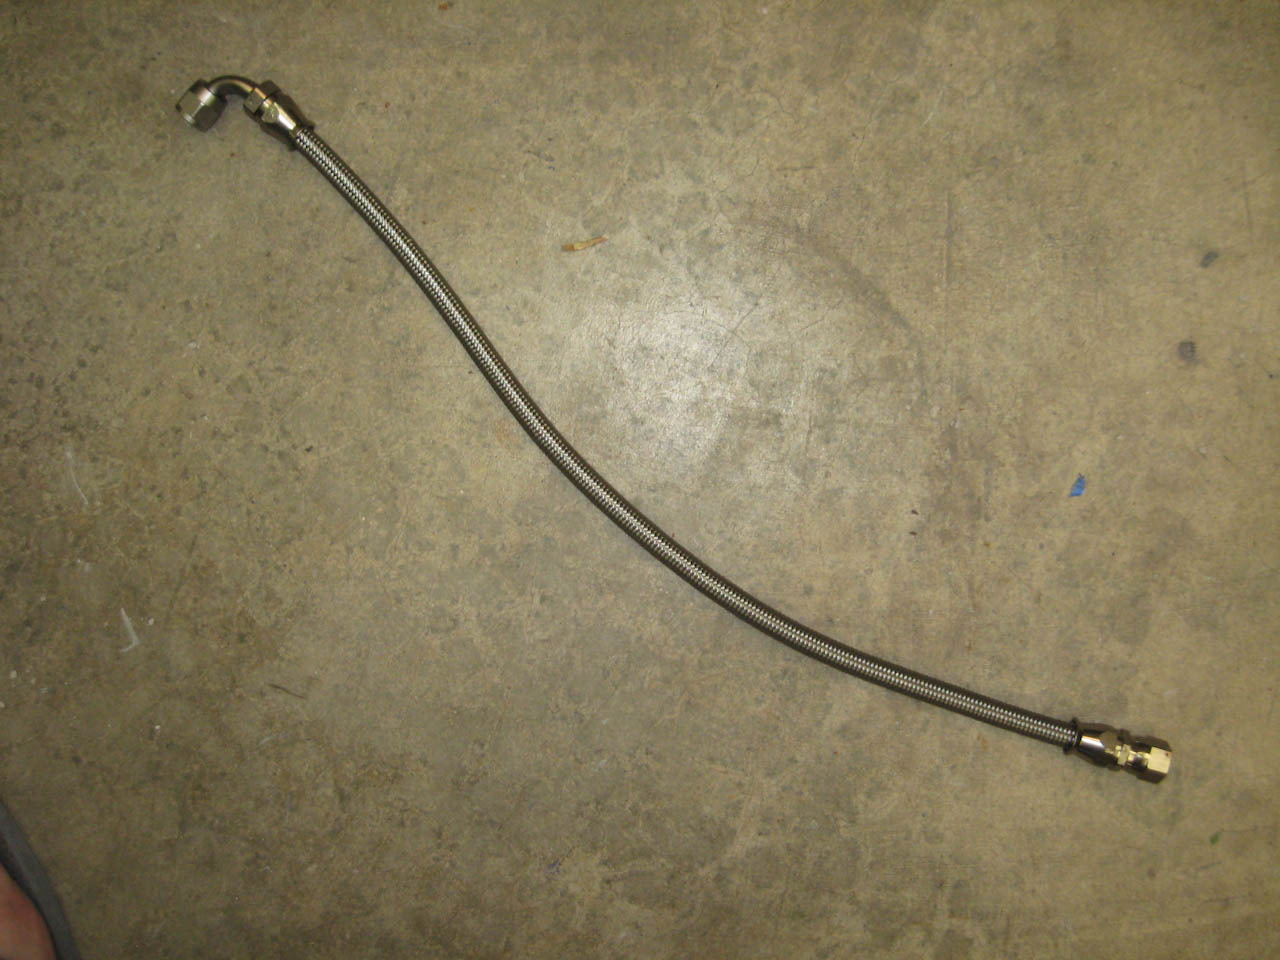
finished my power steering line as well - the AN lines from the conversion off of the pump down to the conversion fitting on the rack - the 3' hose I ordered is EXACTLY perfect to do two hoses, so now I have spare hose to make a second if I need it
not pictured I also finished my AN hose for my fuel filter to fuel rail length - it was about ~4.5 feet from up in the engine bay off the rail - bit of a rap around the master cylinder and back down the firewall to where the stock filter is.
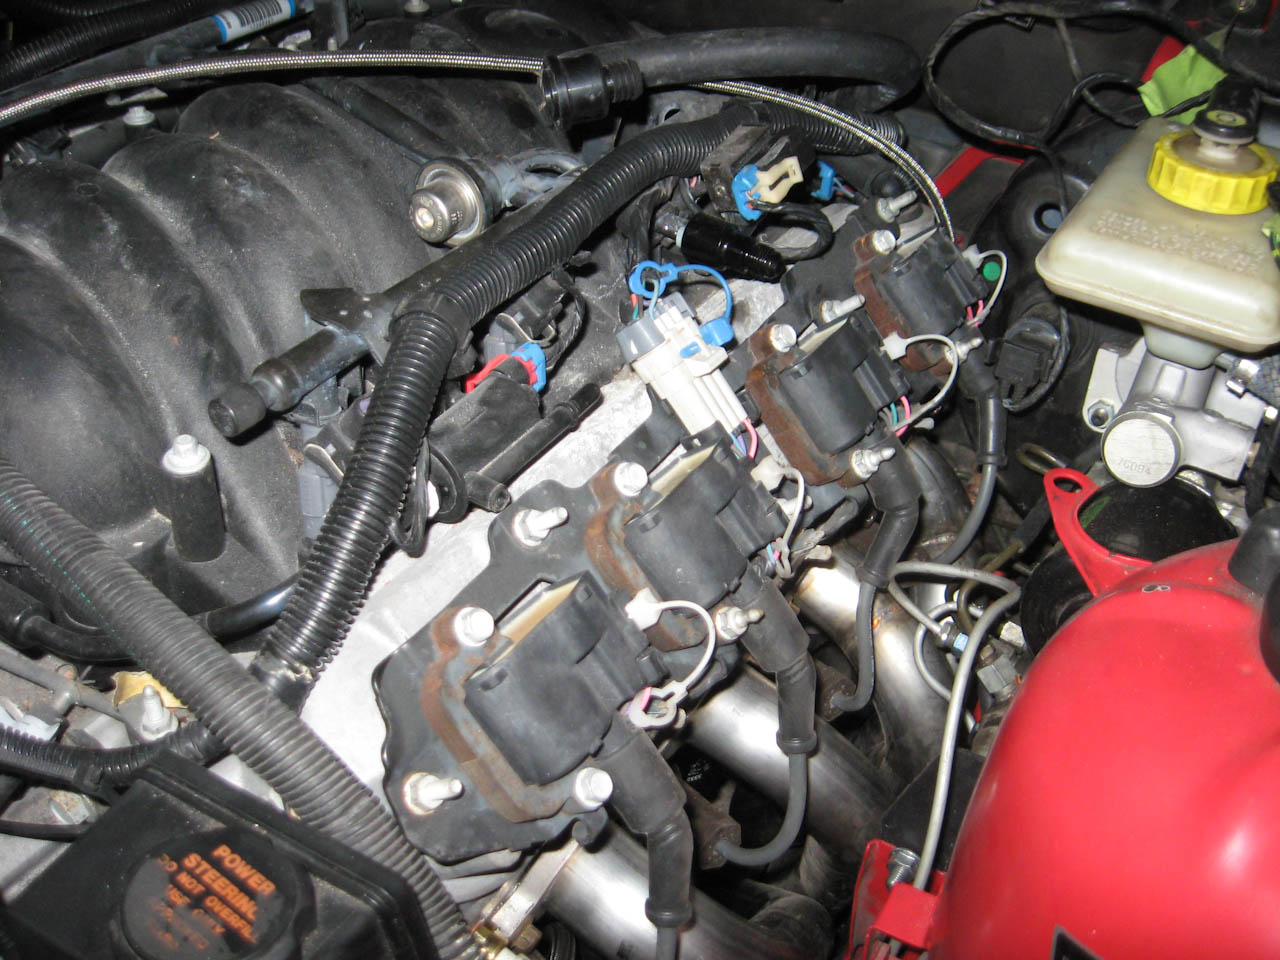
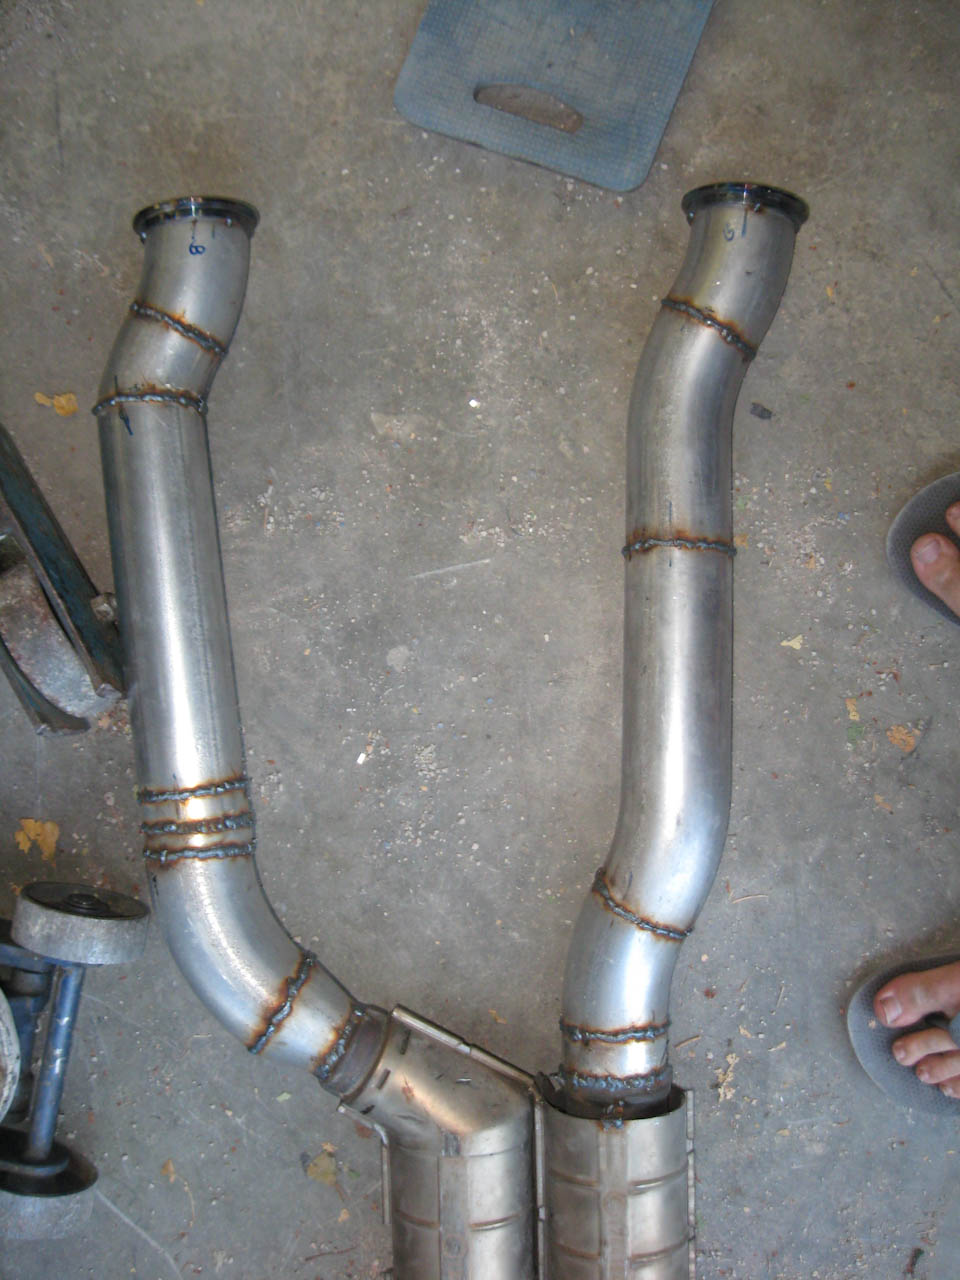
I bolted the headers down on both sides and installed the coil packs and spark plugs as well
the highest interference point i've found on the top side of the motor is actually the dipstick - it pokes into the hood liner decently - not enough to actually cause any problems but enough to notice.
also drained the old oil out of the motor and refilled with new filter and fresh oil.
tightened all of the clutch lines down
tomorrow will start with filling the tranny fluid back up and getting the fuel hooked up and then to the wiring to see if I can fire the motor and then from there sort out the cooling around the motor (the front side looks straight forward - I need to spend more time hooking up the three lines on the firewall to make sure those are tight.
i'm expecting wiring to hold me up tomorrow so i'll dedicate the majority of the day to it and hopefully not get too buried in it.
Last edited by Tongboy; 08-21-2010 at 02:29 AM. Reason: Automerged Doublepost
Member
wiring fun
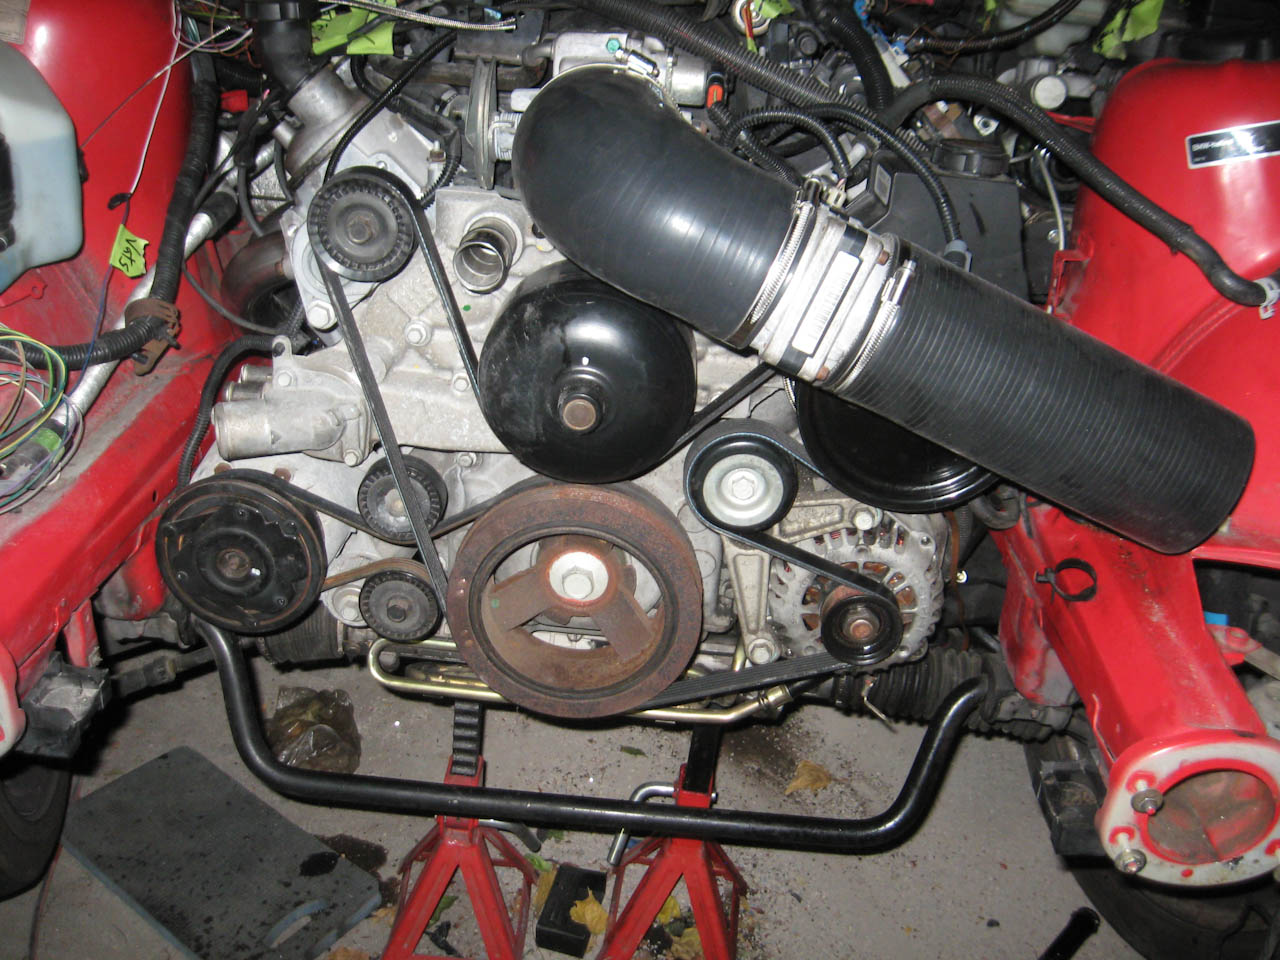
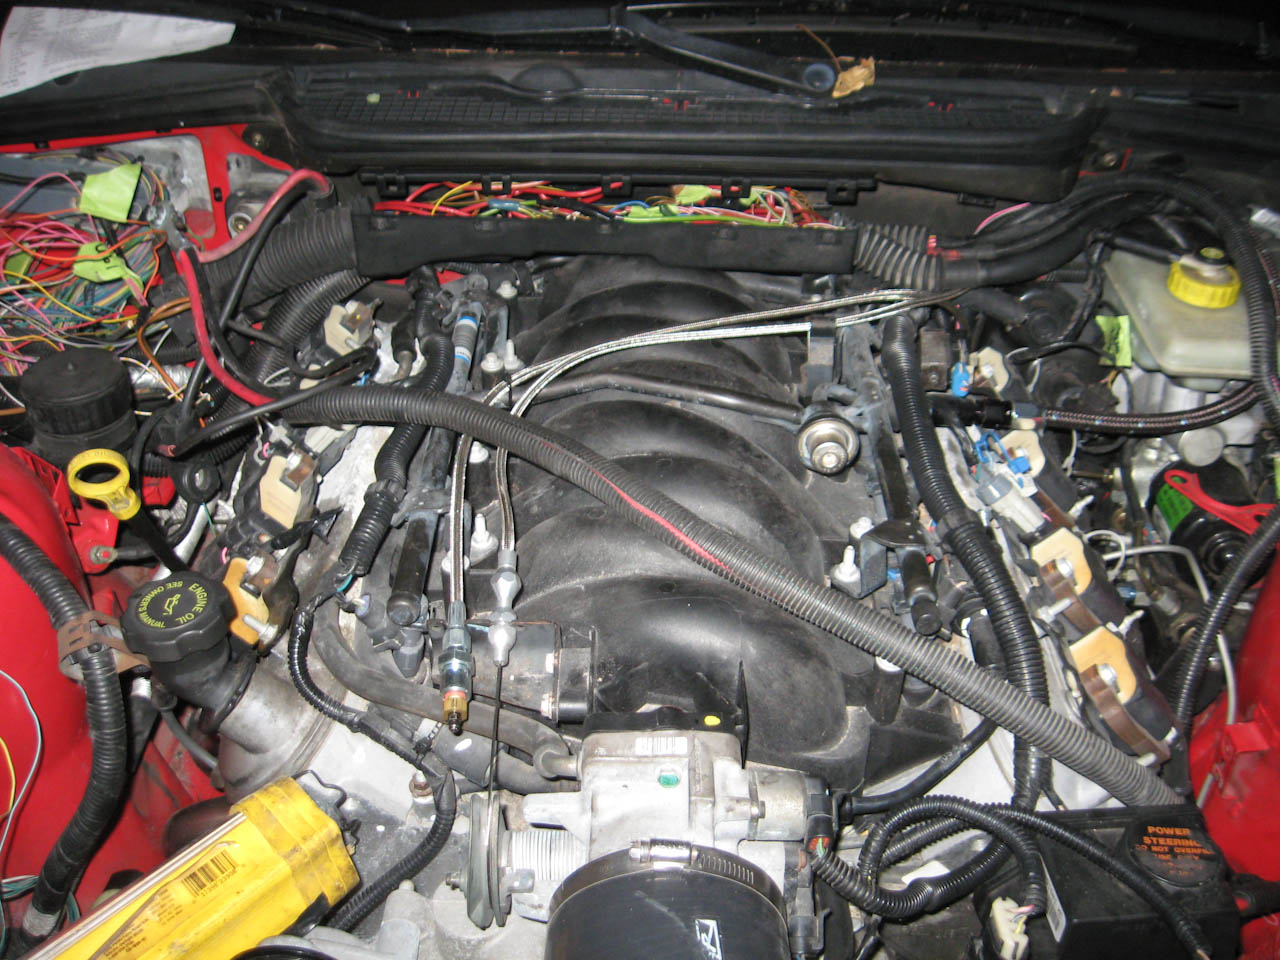
serp belts on, finished installing the power steering pulley and test fitting the intake
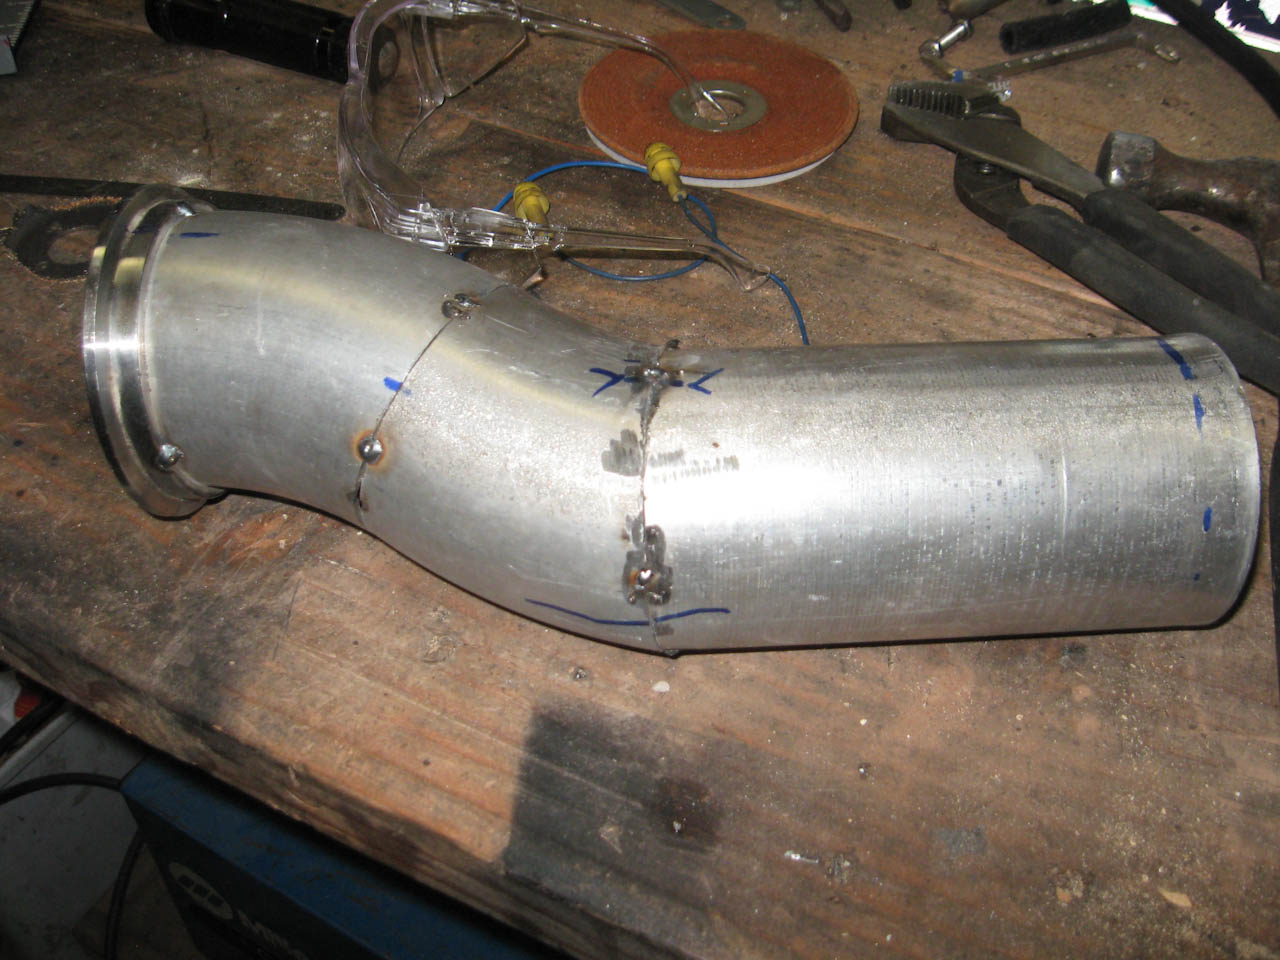
fabbing exhaust up
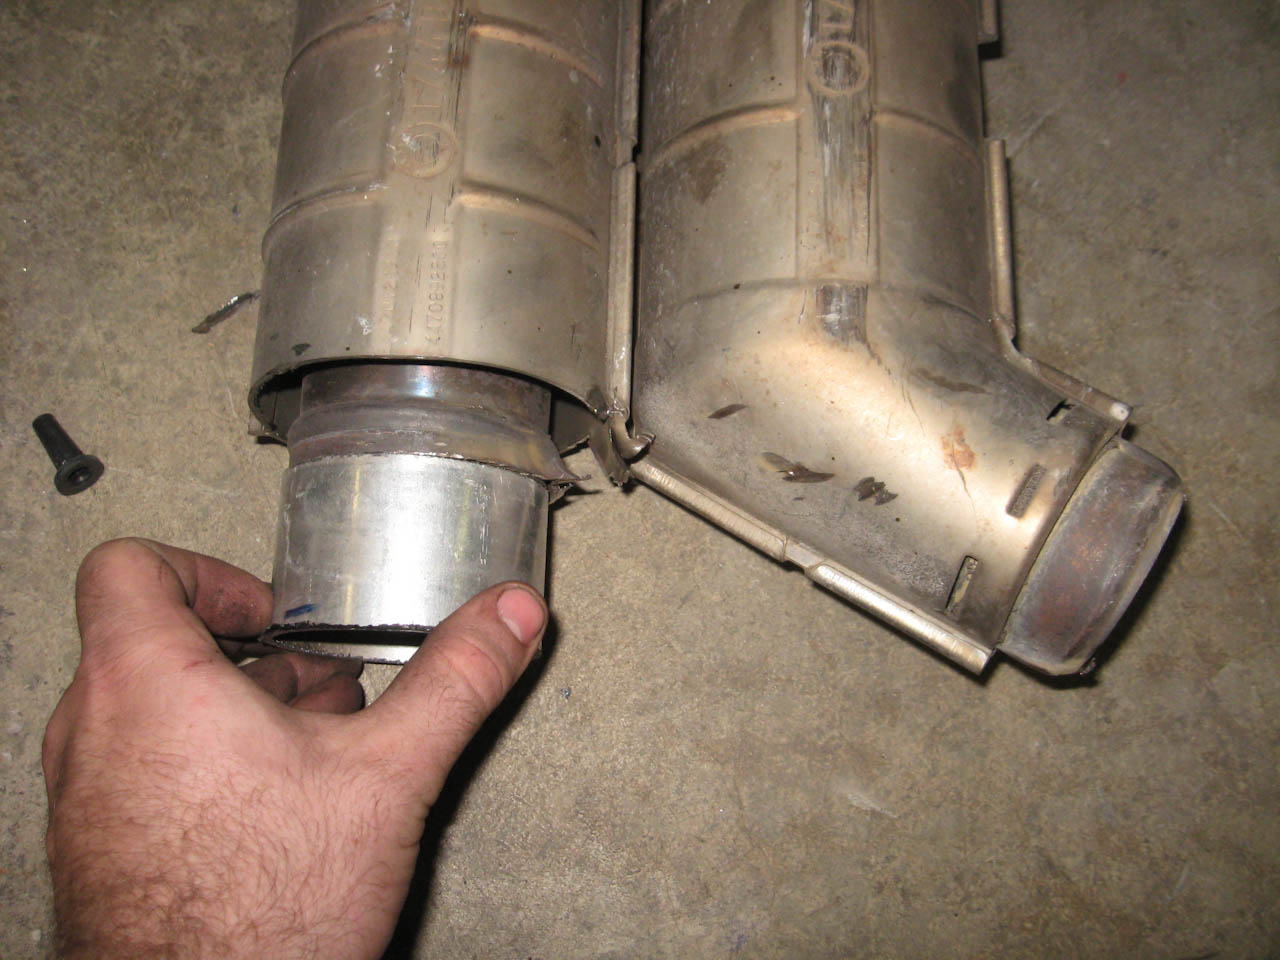
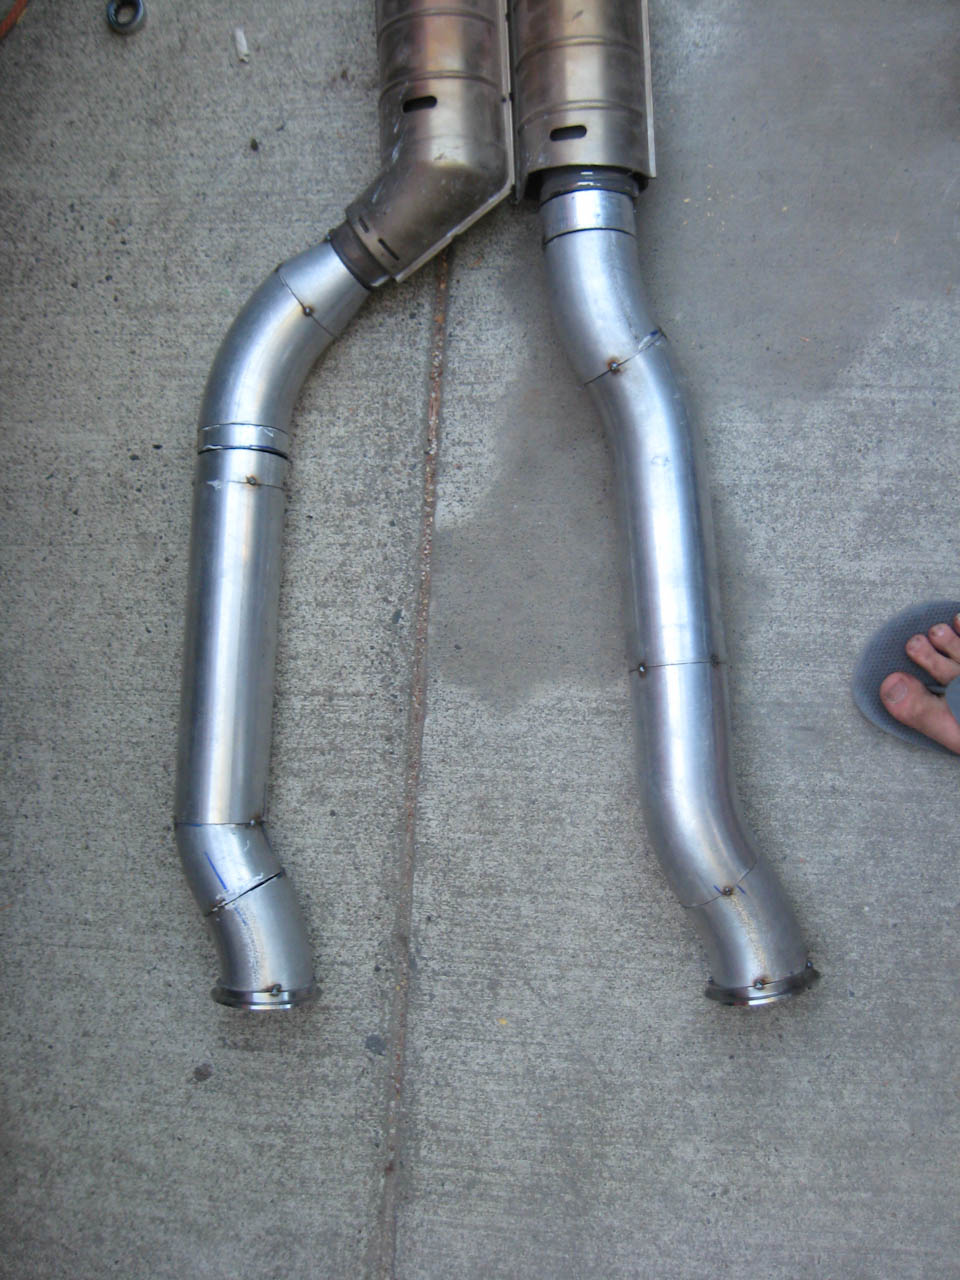
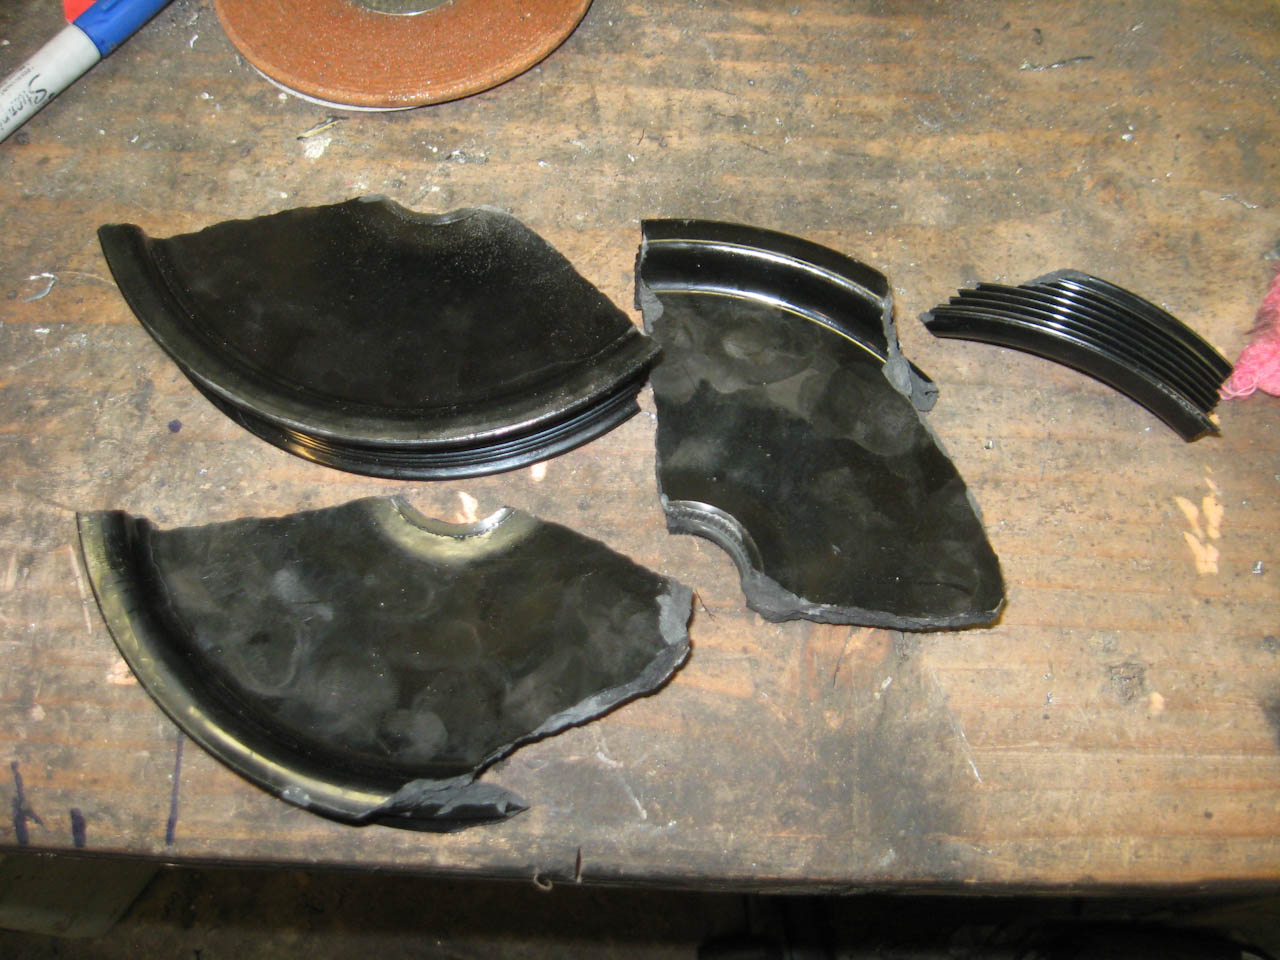
hmm, the stock cats are exactly 3", that's awfully handy
way too many hours of me hacking exhaust pipe leads me to a decent re-use of the stock cat backs to get the car happy for now
still to weld it all the way up and weld in o2 bungs.
finish sorting the cooling system and the car should be driveable at that point and then to clean up/finish the wires, ugh
16 valve E36 M3 :-0
Nice work. Good to see another one almost ready to drive. Been enjoying reading the others that have recently fired up.
Is that the F-body A/C compressor? Looks like it fits well. How much clearance do you have between it and the passenger frame rail? Have you found a source for connecting the GM A/C compressor to the BMW lines? If not not, Oil Filter Service at 615 SE Market St in Portland should be able to set you up. When I had them build up my P/S steering pressure hose they sent me home with an A/C hose/fitting catalog and mentioned they are more than capable of adapting/joining mismatched lines.
Now if I could just find that catalog.
Member
glad to see someone adapting the OEM center section.. I will probably need to do something like this to pass visual inspections
nice work
- Peter Shen -
Member
got the exhaust all welded up and fitted in with the front o2 sensors hooked up.
wiring is still a mess but I want it to run first...
I get it to crank, catch and run for 3-5 seconds and then it dies... my vats bypass module stays green as in it's operating the whole time... trying to diagnose what the issue is...
meanwhile my replacement power steering pump pulley exploded when I revved the motor just a bit off idle while trying to figure out my problem... so that's fun - I'll ask the ebay company for a refund and probably just replace the whole pump rather then waiting for another pulley.
car is a LOT quieter with an exhaust than open headers
Member
laugh at my ugly welds but i'm pretty proud of this from a fabrication stand point.
I tried using a 10" chop saw instead of my angle grinder with a cutting wheel - results were SUBSTANTIALLY better - it's the ticket to decent exhaust fab IMO. angles and u-bends on a 3d plane are a PITA to get right and require a lot of - oops, almost, add a bit more angle there - cut, refit, cut, refit but the results were good, it bolted in and fit pretty well and doesn't impede ground clearance much.
my exploded pulley - new one will be here Thursday
spent some time cleaning up the wiring. it's not done but it's better by quite a bit. the overtray really helps keep the mess contained.
completely removed one wiring plug harness by the fuse box and pulled a lot of wires all the way back to the other two - left them wrapped up in case I end up needing a wire or two in there. the unplugged harness was the auto trans plug.
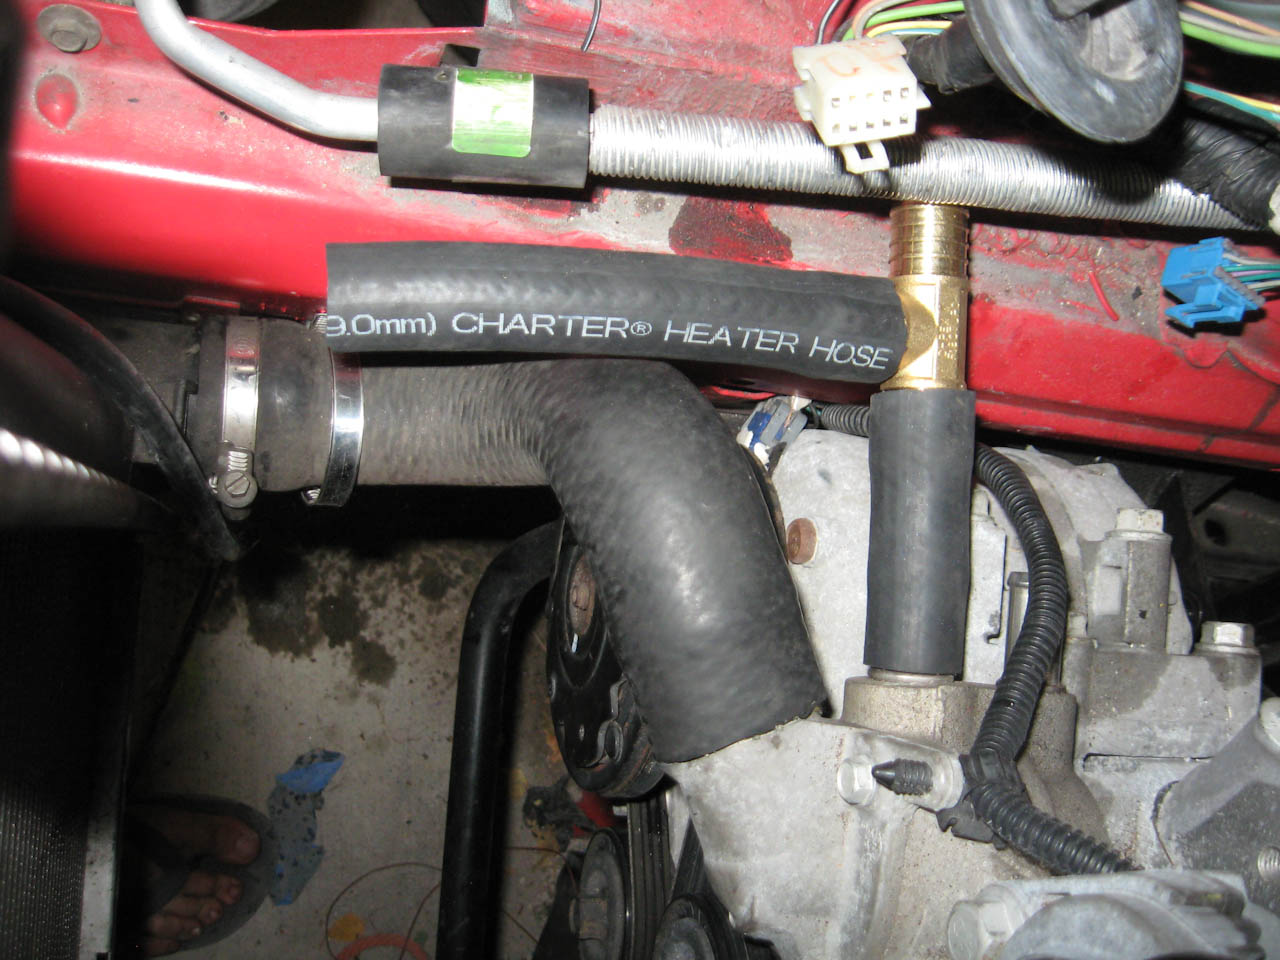
working on the heater hose routing - this is the t-off the heater hoses over to the overflow bottle. using pex fittings from home depot, a pinch more expensive than the heater hose stuff from the auto parts store but i'm a lot happier with metal fittings instead of plastic.
Member
Nicely done!
Don't worry about the welds, we all have some boogers.... but those don't look anywhere near as bad as what an Exhaust shop did on my car!
Member
BRAAP to the rescue! he was able to delete vats from my car and now it runs!
pulley comes in today and I should be able to putter around the block with no front end on the car just to see whats up and to mark it as a milestone. also to find out if my clutch is actually hydraulically actuating because it's so light to the foot.
it was scary at first - when the headers warmed up a pinch while the car was idling for 30 seconds or so they started smoking and I thought wires were sitting on them or something and it was just the oil from the pipe manufacturing/bending smoking off.
Senior Member
Good choice with the metal T-fitting. I used the exact same fittings. Much more peace of mind.
Member
I have a useful little anecdote that might save some time/frustration for the other obd2 swappers.
the 95+ cars have the obd2 port in the footwell by the drivers foot - they have 4 pins in them - the whole port is basically an extension of the data link connector in the engine bay. the only wiring difference from the bmw to the lsx (and subsequently any programming or OBD compliance down the road) is to move the serial data pin from the BMW location of pin 7 to the GM location of pin2.
if you're careful with a dremel with a cutting wheel or a razor if you really like spending time you can unbolt the obd2 port and cut the plastic above the #7 pin where the wire and connector are installed until you can pull the wire and pin/plug out without damaging the plug (it's a one way installation with the little pins you can kind of see that prevents you from pulling it out without an expensive electrical pin removal tool)
take that pin and then push it into the #2 slot and push it down with your fingers until it bites and doesn't pull back out and you're all set.
to hook up your GM PCM just find one of the white/purpl/yellow wires that are numerous between the data link connector and the across the wiring harness and splice your obd2 port connector off of the Gm body harness connector into it.
now you can use a BMW tool to read any of the non-engine related systems at the data link connector in the engine bay and any OBD2 emissions testers can plug into the port in the footwell or an hptuners or similar will work there as well.
this has been confirmed working with an hp tuners.
can't beat a one wire obd2 port hookup.
Member
Nice tip...and I have that pin removal tool at home so it should be even easier for me.
And damn, you work fast...I should just bring my car to you, it'll be done a lot sooner
Member
Humm... Anyone have a black 96+ coupe kick panel???
btw, the 96+ cars were OBD IIThose of us with '95s got OBD I. :-p
Member
Great looking kit/project!
I don't understand why everyone is running an aftermarket steering shaft. I'm running my stock steering shaft with the Vorshlag kit. They included one from Flaming River but after having problems with it I tried the stocker and it works/fits perfectly.
 Posting Permissions


 Reply With Quote


Bookmarks