
 Priapism Sufferer
Well, if I ever did miss a step, it's because I had to pause to listen to one of my sons play his drums.Originally Posted by Z3Couper

Last edited by rocknroad; 08-23-2010 at 05:38 PM.
.
Member
I might have to try this some day, I have access to a laser cutter to make that part easy.
Wouldn't it be easier to glue the neoprene onto the wheel first? I guess you would still only get one shot gluing the leather onto the neoprene anyways.
Member
BMW CCA Member
Noticed the attempted ninja edit. Sneaky sneaky. BTW, "Priapism Survivor",
DO IT YOURSELF.
I brought this up earlier in the thread. Look back a page.
Member
BMW CCA Member
Member
Any chance of uploading the factory fitment PDF?
Priapism Sufferer
I don't know how to post a pdf to this forum but if you email me at bryantja@yahoo.com I'll send you an oem template.
I have templates for oem 3 and 4 spoke wheels as well as templates for overwraps.
Send me an email but put "steering wheel wrap" in the subject line as I get 700 or so emails per day.
81BBFE1B-5E12-7877-B3B1-CB584577F9DC
1.03.01
ughh, I really want to know what this damn code is following me around.
Last edited by rocknroad; 09-12-2010 at 04:53 PM.
.
Member
Thank you for your great write up! I've started working on a early 4 spoke alpina wheel, and I hope it will look something like this when I'm finished:
I've removed the old leather, but unfortunately it took some of the hard, dried up foam that is supposed to stay on the frame with it. But I'll probably be able to correct that. The main problem is that I cant get a good measurement from the old leather because it won't go flat. I've soaked it for a couple hours, but the glue/foam that still sticks to it prevents it from taking it's original shape.
So I'll have to resort to taking measurements from the wheel itself as I can't find a template anywhere. My question is, have you done this before, and could you give me some insight?
The leather will obviously need to be cut a little smaller than the actual sizes to pull it tight. But by how much? If the circumference of he wheel is 44.5", how long would you cut the leather?
And the same question for the circumference of the grip: 3.66"?
Any help appreciated!
Last edited by Bentsdl; 03-29-2011 at 05:55 PM.
Priapism Sufferer
What I would do if this were my wheel is sand everything off the back of the leather - yes, leather can be sanded especially on the suede side. When most of the old glue and foam is gone, resoak the leather and get your template sorted out. If you're handy with a computer you can just take measurements of the original wrap and transfer those measurements to a cad.
The thing about measuring the wheel is that the leather wrap will end up being too loose when you go to stitch it leaving lots of puckers - and not the good kind.
Also you will want to take the exact measurements of the original wrap and cut to those same specs. Leather stretches but I never cut shy of the original wrap.
But if you cant get any of the above done, you can measure the wheel and go from there. If your circumference is 44.5 you'll want to cut the length 3" shorter than that and if your grip is 3.66", you'll want to cut your width that same amount. But then you have to get the spoke placement right. As you stitch up the wheel, the leather will get tighter with every stitch of you pull just right.
Here are some pics of a 3 spoke wheel from a 2002 that I had to do a lot of the above.
.
/roadster happiness/
rocknroad!most excellent!
I have a spare wheel and was planning on doing this very thing. This will be a whole lot eaiser with your write up. Truly excellent!
fj..
photo by Gary Glades
/roadster happiness/
Ok Jeff, after re-reading this several times I have a question on thread. You mentioned using Yale Blue and Scarlet as the edge thread stitching colors, but I see no mention of the color used for the binding stitching. I also don't see a color that is close to what looks like the 'dark blue' color you used on thethreadexchange site for it (though their color sample pics aren't very good). Between your pictures and theirs, the Yale Blue looks more like the binding thread but the light blue edge stitching color doesn't look like any color they have on their site.any help here?
thanks again,
fj..
photo by Gary Glades
Member
Thank you for that extensive reply. I've measure the original wrap, and it's exactly 3" shorter than the actual circumference of the wheel. The with is the same size as the actual grip circumference. So the soaking/drying might have turned out good after all, I've added a picture of how it looks now. Does that look good enough to take measurements from in you opinion?
About the foam padding, it's in a little bit worse state than I feared. The top is hollowed out and loose around the core metal. there are also some tears. I'm afraid the wheel won't have a consistent feel when I try to fix it.
I've looked at the wheel in in your link, that appears to have no foam/rubber core in the first place. Did you wrap the leather around the bare metal? If not, how did you make the semi soft core?
ps. I got enough leather to do it 3 times over, so it's not a problem if if f*ck it up the first time.
Last edited by Bentsdl; 03-30-2011 at 06:25 PM.
Member
Where's a good place to get leather from that isn't a full or half hide?
Member
You should beable to locate a Tandy Leather store near you, they sell scraps
Priapism Sufferer
Check out the polyester thread section and you will find all the threads I mentioned - however I have to apologize for not mentioning the very important securing thread - and that thread is NAVY. Polyester thread is better than nylon simply because of it's UV protectiveness. But you will find yale, scarlet and navy here. Dont rely on the website pics, just trust that I have already done the trial and error for you and you can trust me. No, really you can.
okay, first, there are ways to fill the missing foam. I think the foam used on those wheels was a very soft open cell foam which can be filled using a product called Great Stuff here or, you could even go to your local fabric store, grab some cushion foam, cut fill pieces, glue in place and sand clean. That's right, open cell foam as well as closed cell foam is sandable.
Now, that wheel i referenced came with a solid rubber form that I sliced off and replaced with a silicone rubber hose plus some other things I would rather forget to get that right. That wheel was pure evil. But it turned out and that's all that I care to remember.But it looks like you can get a good template from that leather in your pic. That looks a lot like what I started with. (hint: I used a steam iron and a wet towel to steam the leather a little flatter) We'll talk about your shoes in an off-topic forum.
Tandy sells some great items and I rely on them for most of my tool purchases but for automotive leathers they aren't the best place - however I have to say Tandy is where I started when I wanted to learn leather, with their scraps. I (used to) purchase leathers from GAHH, Spinneybeck, Townsend, Garret and even ebay - you'd be surprised at what pops up when you ebay "automotive leather" but of course if you're wanting oem, BMW leather matches, it's a hit-and-miss on ebay.
.
Member
Okay, thanks for the tips. I'll let you know how things proceed. Just received the leather too, should be more than enough::P
I will first make some test pieces to figure out the perfect grip size, and how to cut around the spokes.
Last edited by Bentsdl; 03-31-2011 at 07:59 AM.
Member
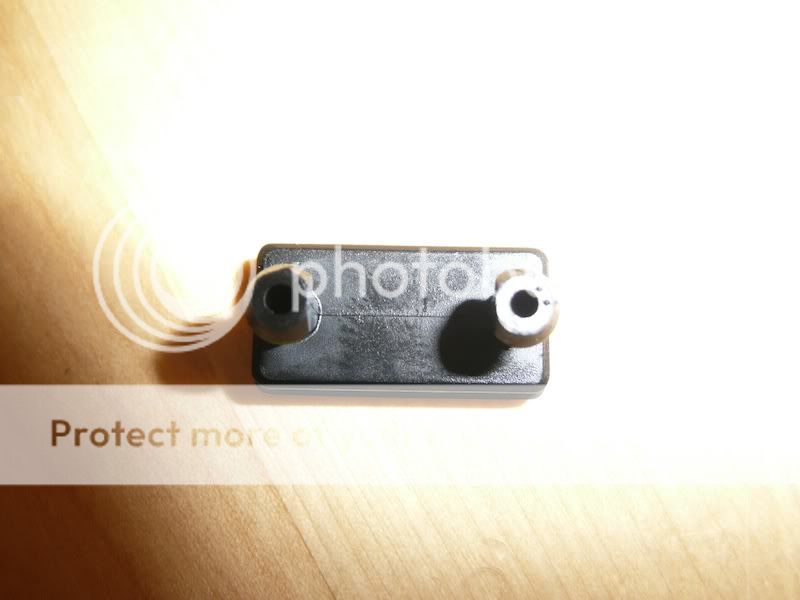
I got my ///M badge through today:
Are you able to offer any advice or pointers for installing this?..
2016 BMW M135i LCI (F20) = Current
2016 Mercedes Benz GLA 200 AMG Line = Current
/roadster happiness/
Perfect. I had sort of figured out that either the web pictures were way off, or they had changed their stocked colors. Glad to know it was the former.
With the quality and care of your work, I think I can go out on a limb on a huge $6 on a thread purchase.We'll see where you ultimately lead me ....
Thanks Jeff,
fj..
photo by Gary Glades
Member
At first glance I thought that was a piece of leather cut to the shape of the
United States.
Member
LOL you are right!I already cut Florida off for some testing.
Member
Managed to fit this myself after some careful thought - so thought I'd share the approach I used in case it helps anyone in future:
Fitting was interesting to say the least - as you can see the badge has 2 thick plastic prongs which lock it into place:
Fitting the badge is quite fiddly - you need to feel through the leather for the indentation of where the badge sits and then I took a thick sewing needle and gently pressed through to get the location of the holes. Once the location of the holes was established - I then rotated the needle in a circular fashion to enlarge the holes slightly. I then offered up the badge and pressed it firmly down into place (making sure it locked). Job done!

2016 BMW M135i LCI (F20) = Current
2016 Mercedes Benz GLA 200 AMG Line = Current
Member
What colour dial faces are they?, were they easy to fit?.
1999 Topaz Individual, Euro 2L M52TU, manual, M54 2.5 inlet manifold conversion, Eibach lowered springs, E-tec strut brace, 8/8x18" BBS LM, footwell lights, glovebox light, starter button.
Member
they're Lockwood dials (cream/beige colour to match the interior
http://forums.bimmerforums.com/forum....php?t=1276904
http://forums.bimmerforums.com/forum...&postcount=192
2016 BMW M135i LCI (F20) = Current
2016 Mercedes Benz GLA 200 AMG Line = Current
/roadster happiness/
pangsterZ3: Wheel looks great! As does the general look of your interior/gauges. Nice clean look.
photo by Gary Glades
Oh Dear.
BMW E36 M3 Expert
Any way to get photos on page two up? Damn I was so looking forward to the final part then the tv cuts out.
 Posting Permissions


 Reply With Quote


Bookmarks