
 Member
I think some time ago I saw a DIY but not here. I decided since I had to remove my panels to replace broken belt covers:
http://www.realoem.com/bmw/showparts...96&hg=51&fg=50
item 3
I decided to take a few pictures once done and explain how to do this. Also now is the time to lube those areas that are never lubed because this side panel covers them.
First of all I lowered the top so that the window is 1/2 folded in the boot. You need to do this because the side panel has a cover plate which has a spring which is attached to the top assembly
http://www.realoem.com/bmw/showparts...96&hg=51&fg=50
item 8
You will need to remove the back seat to get this done. First remove the seat pan. To do this just pull up on the seat in the front part of it. It just clips into the inner body. Once you pull up and unclip the lower seat pan on both sides, one clip per side, just pull forward some as the back part of the seat is tucked under the back seat back.
To remove the back part of the back seat you pull forward and lift up. Note that the rear seat belt and fan housing require you to pull forward some before lifting the seat back up and out.
I removed one of the seat belt latches but you don't need to do that. You will have to move them around the seat belts in the middle however.
OK now you can attack the side panel. The front of the seat panel where the back part of the front door at the top meets the front part of the side panel you will notice a rubber cover cap attached to heavy welting on the side panel. There is a black plastic button there which you need to remove.
Once done you can move some of the heavy welting out of the way. The only mechanical fastener you need to remove is a torx fastener which is pretty obvious in location.
The panel is held in place by the black plastic button, the torx screw and the clips that hold the panel firmly to the side. These are the same type of clips which hold the door panel to the door. to separate the side door panel from the side of the car you should pry on the inside of the rubber, nothing should be between your tool (I used a plastic panel removing tool) and the inner most rubber which you pry against it. The rear of the panel has a different kind of clip which you remove vertically. You can see by looking at the pictures of what the clips look like and what the panel looks like and how they would fit together.
You also need to remove that spring I mentioned and referenced above from the convertible top. I also removed the side seat belt on one side because one panel was very tight and I needed to move the panel toward the center of the car at the bottom to assist in getting the panel loose.
You will also need to remove the seat belt to get a new panel out or repair yours. To do so remove the torx bolt 50 at the bottom of the seat belt track and just slip it out.
Installation is of course the reverse of this and this might be one of the cases when reinstalling something will only be as hard as it was to remove it maybe even easier.
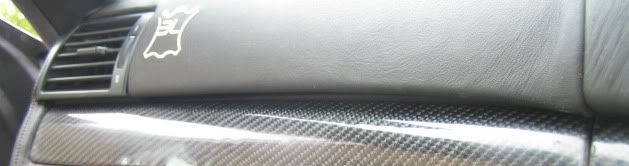
I will be posting pictures below and in the next few posts to aid in what I was trying to say in this DIY.
Member
More pictures supporting the write up.
Member
More pictures of the side panel and convertible top linkage
Member
I have learned that the black plastic bolt with spring can be a real pain to reinstall. The panel has four clips that just snap in horizontally but the last clip is a vertical install and has to be attached first by lowering the back side of the panel. You have two tapered ends of the panel, one down by the lower front door and one by the upper rear panel area that need to be inserted too so some messing around is required.
You will never get a better time to lube those linkages with something better than WD-40 so it lasts. I took that opportunity to do that knowing that this car had never been done before.
One panel is in and the other will be installed once my epoxy hardens tomorrow so I can reinstall the seat belt holder which also is the holder for the wind blocker.
Last edited by fun2drive; 10-31-2009 at 08:23 PM.
BMW E36 Expert
Nice writeup.
What are these plastic yellow tools? They seem ideal for lifting out plastic pins/rivets and doorpanels and such without damaging everything else.
PS: mine are broken too, but all you see is a hairline crack. It will only be a matter of time before they go again. I can't be bothered.
I also just check on the price of those rear panels. Big $$$!
I still don't understand how the seatbelt piece is fastened to the panel. I see those 2 metal clips, but in that pic with the hole shown (backsite) and can't see any mounting points.
Could you do me a favor, since everything is out and I see you have the H/K sub. I'm dying to see how the loom is routed from the amp to the sub and to the other side. I tried a couple routes when I retrofitted the H/K system, but hell, to be able to mount that sub cover, the loom had to go through the sub housing on either side.
If you could take of that cover and make some pics. That's be awesome.
Last edited by MParallel; 10-31-2009 at 09:14 PM. Reason: PS...
1998 BMW M3 3.2 Cabrio Alpinweiß III on Schwarz German spec 1 of 12
SMG SRA PDC AUC OBC GSM HK UURS IHKA FGR MFL
IG: https://www.instagram.com/iflok/
Member
http://www.harborfreight.com/cpi/cta...emnumber=95214Originally Posted by MParallel

Member
Yes those are some 5 buch Harbor Freight tools which work very well and are ideal for our panels.
I am sorry I put the seats back in again before I saw your post so I can't help there.
I will shoot some more pictures showing the tabs for the rear side inner panel so no one breaks theirs taking it out.
I plan to add a few more pictures to this DIY.
My assessment was except for the spring and plastic pin that is attached to the convertible top linkage itself and functions to move one of the rectangular covers the rest was not that hard. Those plastic tools made the job more manageable and nothing was bent or broken...
Member
The loom goes on the bottom and it is attached by one plastic clip (U form). Then when placing over the SUB is not a problem (I don't understand how can you have problems as there is much space left). From that location where the clip holds all the wiring (of the audio and previous car wiring) the SUB conector goes front and up to the sub. It wired perfectly without extra wire hanging or to much tensioned.
I have the phone + changer wiring extra there so I can't see how in yours is mixing room to place the wires
About the attaching the belt plastic: the panel has the holes so that the 2 plastic screw mounts go throw and on the inside you screw them up with the metal clip betwen the screw and holes. On the front it only hooks up (look on the picture 4 second post) as it has an extension on the place where the sun blind plug goes in the plastic.
I have mine new prepared and going to change them once this weekend. For breaking in the future I still have 2years of warranty
About removing all the other stuff is not so necesary as it can be done only with removing the panel trim, removing the torx and then tilting the panels out for 3-5inches (enought to have place for the screw driver to undo the screw).
Last edited by vlakci; 11-03-2009 at 04:20 AM. Reason: Automerged Doublepost
E36 320i conv 1/97':
fog lights; power steering; M body; M steering wheel with MFL; M3 vader light gray leather seats w/heating; phone; cruise control; harmankardon; PDC; CD43 business radio+dension adapter USB+Ipod with ID3tags; hardtop+lift+stand; wind deflector; 17" stly22 Motorsport wheels; EWS; DWA alarm; remote central locking; 4x el.windows; CD changer; cup holder+CD box in glovebox; coin box in door; roll-bar; full auto.el.softtop; luggage straps; ASC; ABS; engine compartment light; glovebox light; automatic A/C with AUC; OBC; light cleaning; intensive wash; heated wash nozzles; fire extinguisher; westfalia towing hitch
--------------------
E30 318i sedan 9/87': everything expcept Mbody and sunroof
Member
you can those plastic tool kits from ebay for about £5, i have a 10 piece set, great for prying into dash's and removing trim panels etc without causing damage.
http://cgi.ebay.co.uk/CAR-INTERIOR-D...item518d96f5df
Last edited by bbroony; 11-03-2009 at 11:27 AM.
Member
Wow I ended up doing this today without even knowing about this DIY . I had to remove the same parts and more to get to my broken rear passangers window . Lucky I had the seat belt cover pieces already . Thanks for taking so many pics , it will help in my reassembly .
BMW E36 Expert
I have looked into different routes when I did it. I can't remember exactly what the problem was, but there simply was no way I could route it otherwise. The wiring would need to be folded into tight corners, with chances of breaking them. Maybe if I did it again now, I would see how it should do.
Maybe I places my amp in an incorrect orientation. but from what I remember, you can only fit it in a single position.
1998 BMW M3 3.2 Cabrio Alpinweiß III on Schwarz German spec 1 of 12
SMG SRA PDC AUC OBC GSM HK UURS IHKA FGR MFL
IG: https://www.instagram.com/iflok/
Member
OK guys here are some poor pictures of the rear side panel and how to do it. Really all you do is push the side panel forward maybe 3/8" and carefully remove. Nothing is attached. See the pictures and you will get an idea of what I mean. The rear inner side panels I am replacing have a couple clips missing and broken from those that are not careful or a shop that didn't care I guess....
Installation is simply place the panel as far forward as you can and slowly while applying slight side pressure to help the clips find their home move them to the rear of the car. Done.
Member
See how you can snap that plastic clip? Just be careful and you should have no issues at all.
Last of my pictures.
I hope what is posted makes sense. I know it is out of sequence but at least you can see what the panel looks like, how to take the inner panel off, how to take the outer panel off hopefully with no damage.
Last edited by fun2drive; 11-05-2009 at 07:23 PM.
Member
I just did this job, and noticed some additional things. Of course, you have to remove the headrests to get the back seat out. if you haven't done this before, it works for me to push down on the headrests, and then immediately lift them up and they should come right out.
I just replaced all the black pins/screws that hold the welting, as without a tool, they'll probably break or bend beyond repair.
Be very careful removing the inner panels that contain the speaker covers. The panels go forward to remove, back to install. If you move them toward the center of the car, you are guaranteed to break the black clips that hold them in place.
For the spring that attaches to the linkage, I suggest unhooking the spring at the vert top end, not the panel end, as it can be really hard to hook it back in place with the panel on the car. Remove the black plastic pin first (about 2" long, that threads the inside of the spring), and then unhook the spring. Later, when you replace the black pin, look for the groove in the head of the pin that 'hugs' the end of the spring, and slip it in.
To get the panel off, I pulled up on the panel until it came out. Probably a great way to break it, but I got lucky. The 4 clips lock into the rail.
It was tricky to get the panel back on with the clips. I had to put the rear clips on the panel and the front ones on the rail to get the panel on without the thick metal bracket pushing the new seatbelt cover out and almost pulling the little screws loose. When you put the panel back in place, make sure that the new seatbelt cover isn't pushed out by that metal bracket that channels the seatbelt, otherwise, you might have to pull the panel off and start over.
If you move the covering (#5 in the realoem diagram), there should be a little rubber wedge that keeps the seal tight (right after it bends toward the center of the car). This is easy to lose in the process. Also, if you are careful, you don't need to remove #23 in the diagram. In fact, I recommend you leave it in place, as you will bend it if you remove it. It will go back in if you do, but will have some subtle bends.
Underneath the 3" squarish piece that attaches to the spring and slides in the track, there is a little metal bracket about 3" long. Not sure what it does, but it can come off.
If you have the hardtop hardware installed, you might cover the contact points with tape or something to protect them so you don't waste a fuse if you make a contact with a clip or something.
Member
Sorry for summoning this thread back from the dead... But is there a way of retrieving the pictures posted?
Thanks for the effort anyway!
Verts rule! Coupes drool!
I still see the pictures...
- Ken -
 Posting Permissions


 Reply With Quote

Bookmarks