
 Member
I did this for one of my forum brothers and decided to just make a thread of it.
This is for replacing the cable on the handle side. This is the one that seems to go out most of the time.
Alright here we go, set aside at least an hour so you can take your time. I think this should take you about 30mins to open Hood and about 20mins to replace Cable. There are three cables, get the one that is on the handle side. Part # 51238176595. I paid $35 from the Steeler.
I also took extra pics today to help explain better.
Alright Here we go.
**Might be different for the I6's****
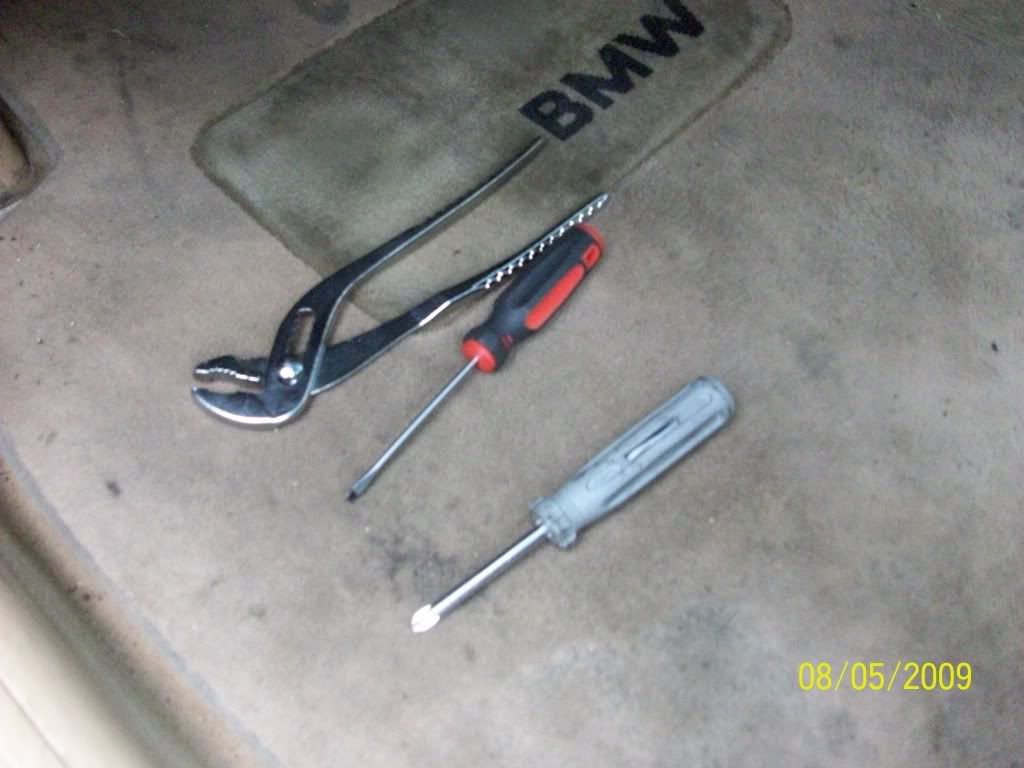
1. Tools you will need. Phillips from tool box, smallest flat head screwdriver
you can find and the gripping pliers majiggy from the tool box. You also need a torx bit set (not in pic) Get the smallest bit set. upwards, I dont remember the size
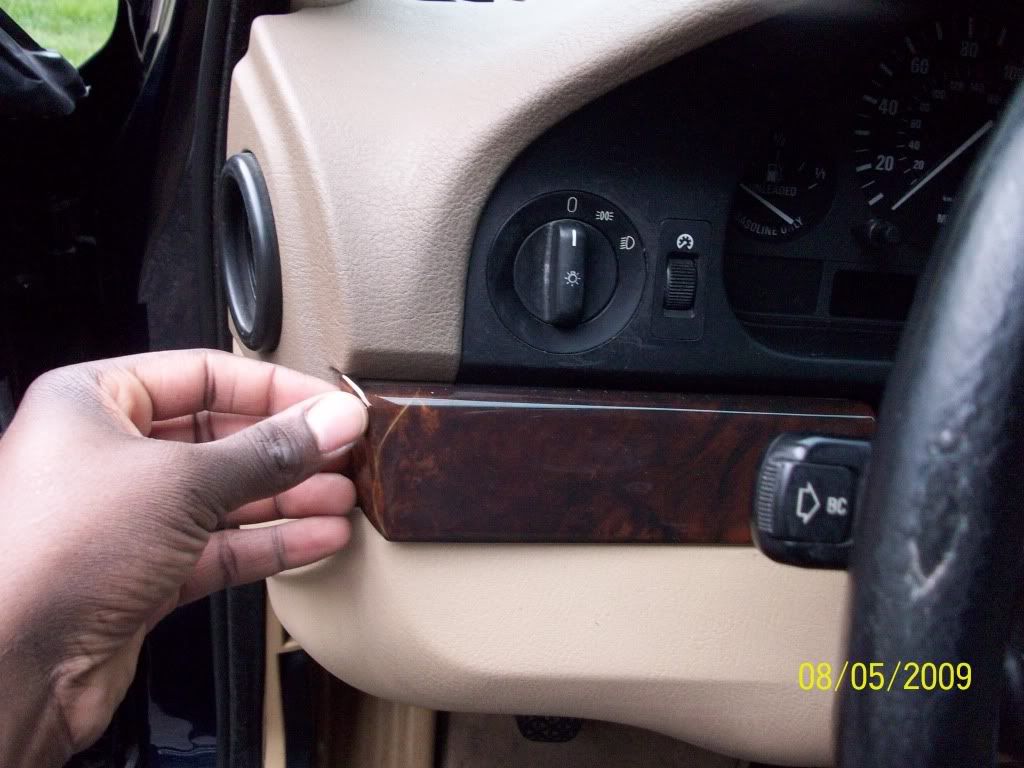
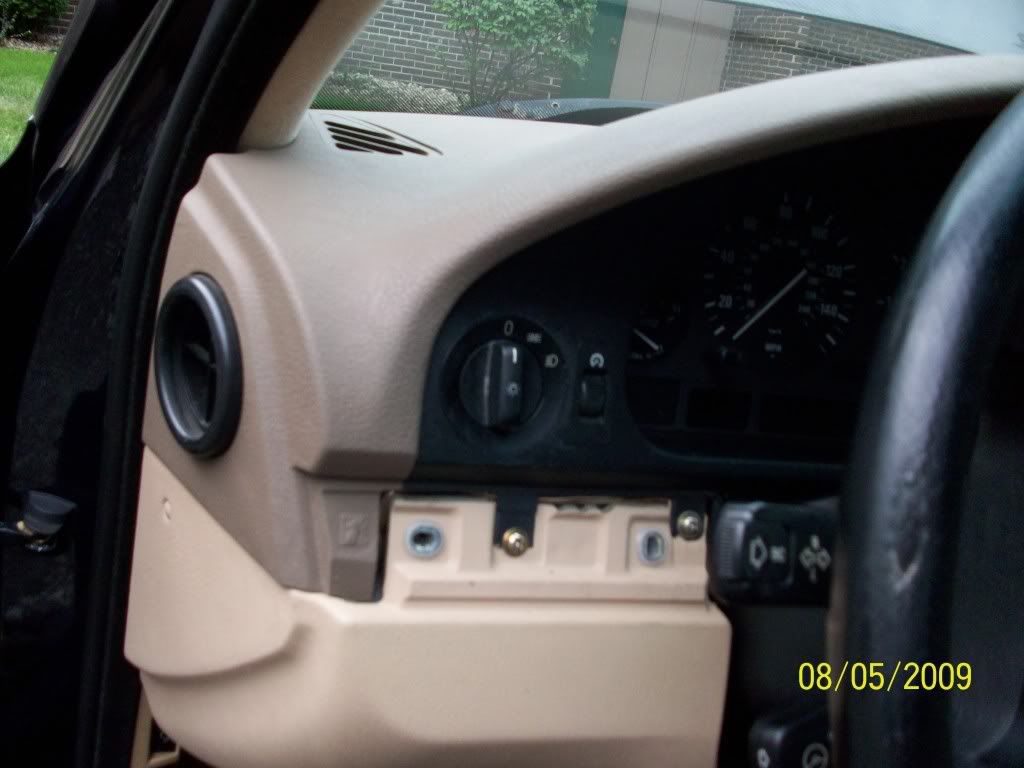
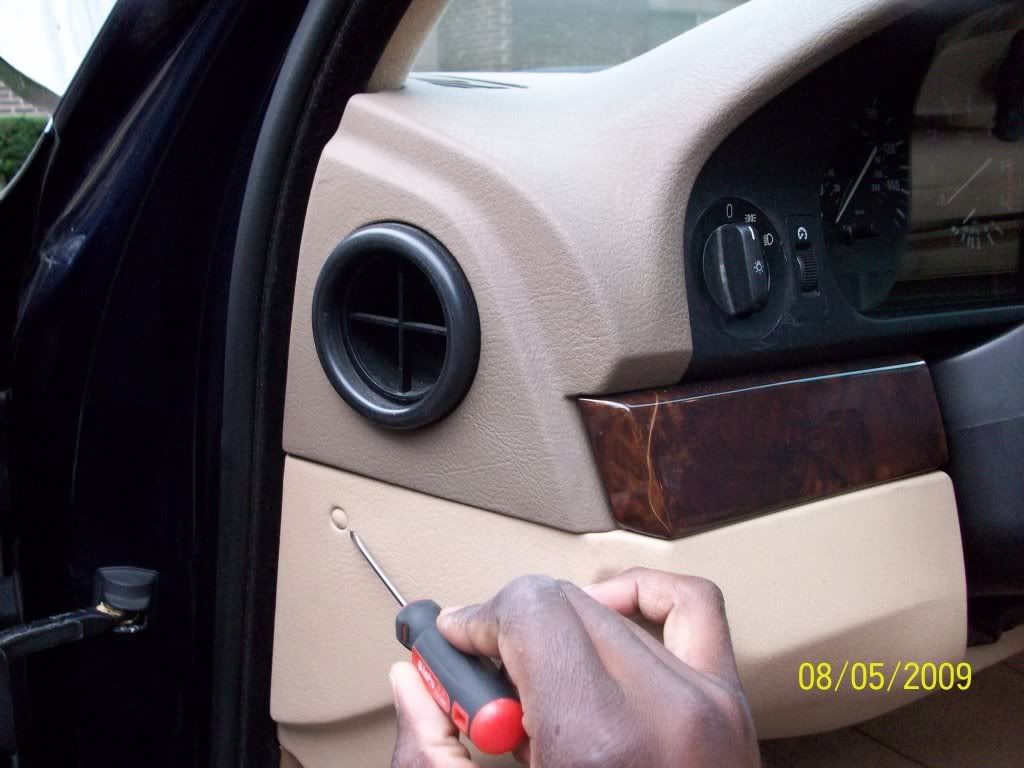
2. Remove Trim. Each piece has 2 plugs. The left trim is easy just grab it on the left and dently pull toward you. then wiggle it to pop out the other side.
The trim on right you will need to use the flat head screwdriver.
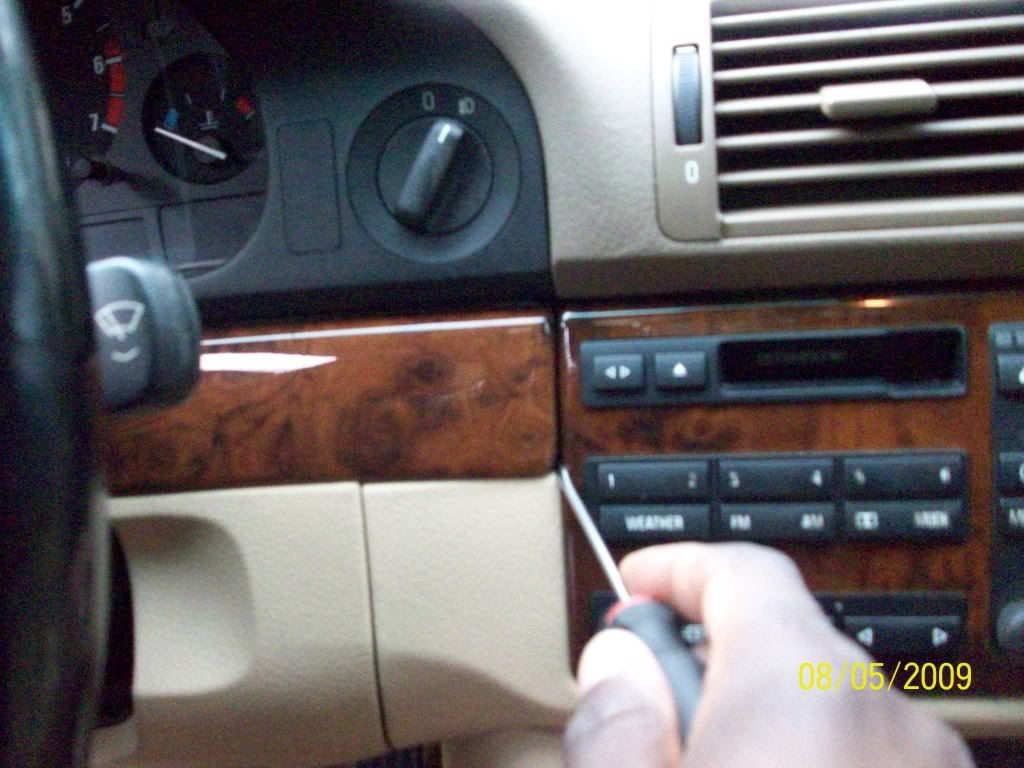
There are two screws under each trim. Left side.
Right Side
If you look to the far left under the Ac door vent there is another screw there. Pop the little rubber cover off withe the small Flathead.
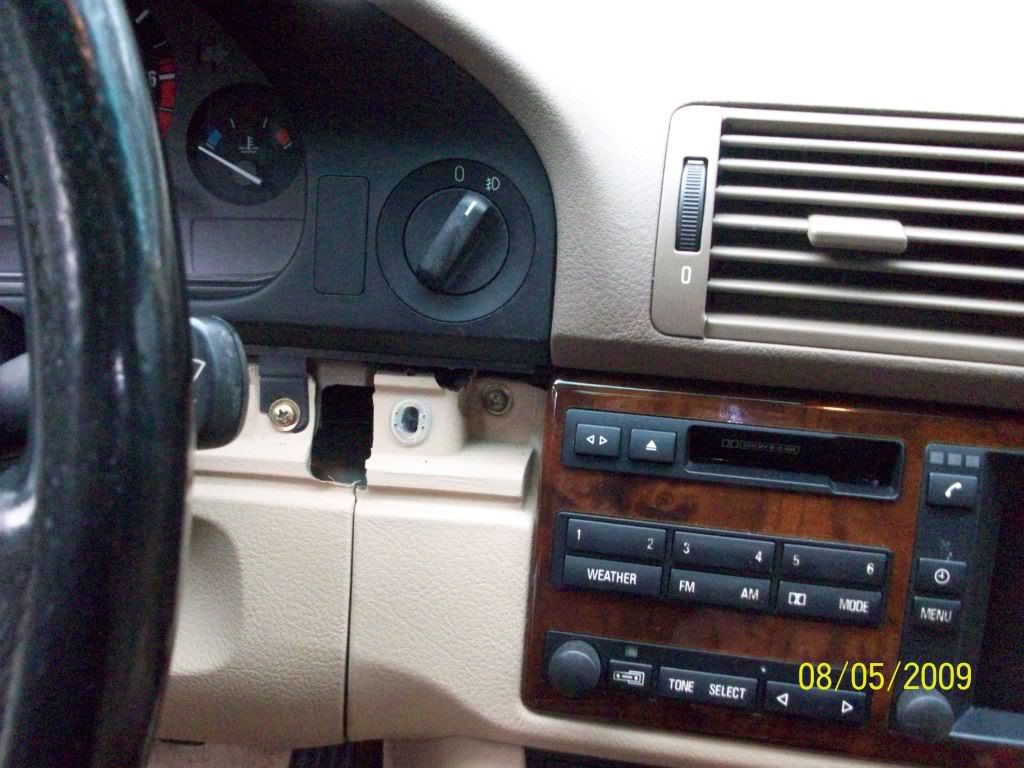
I wont post pics of the screws under the dash, you will see them when you look under there....however...
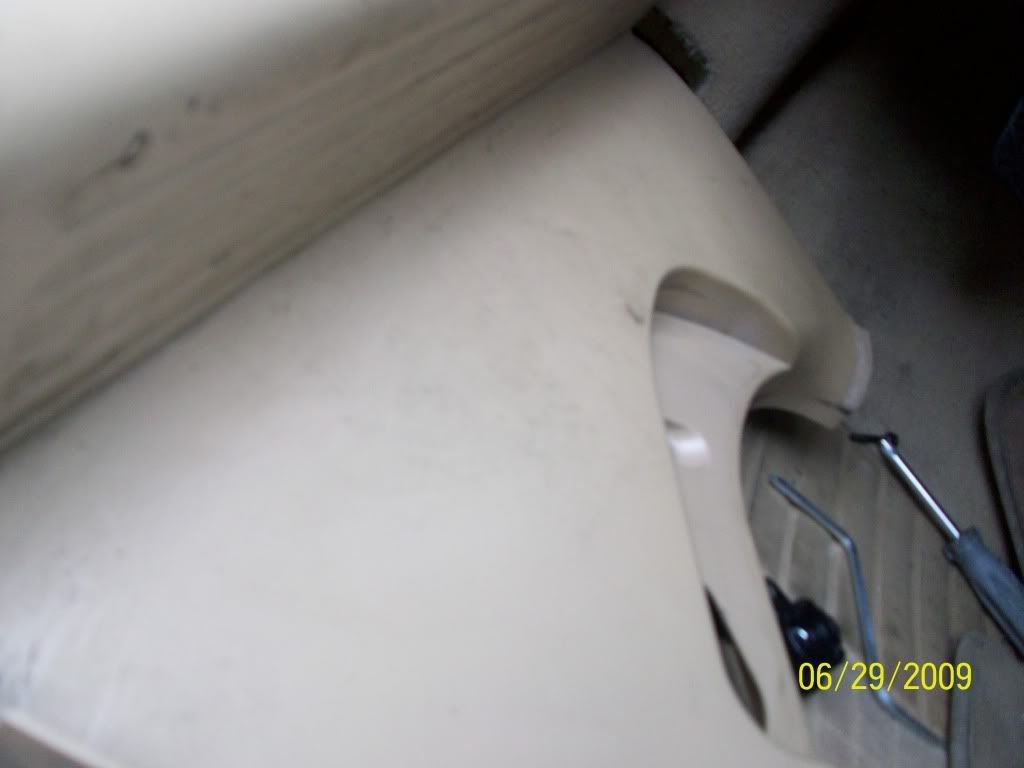
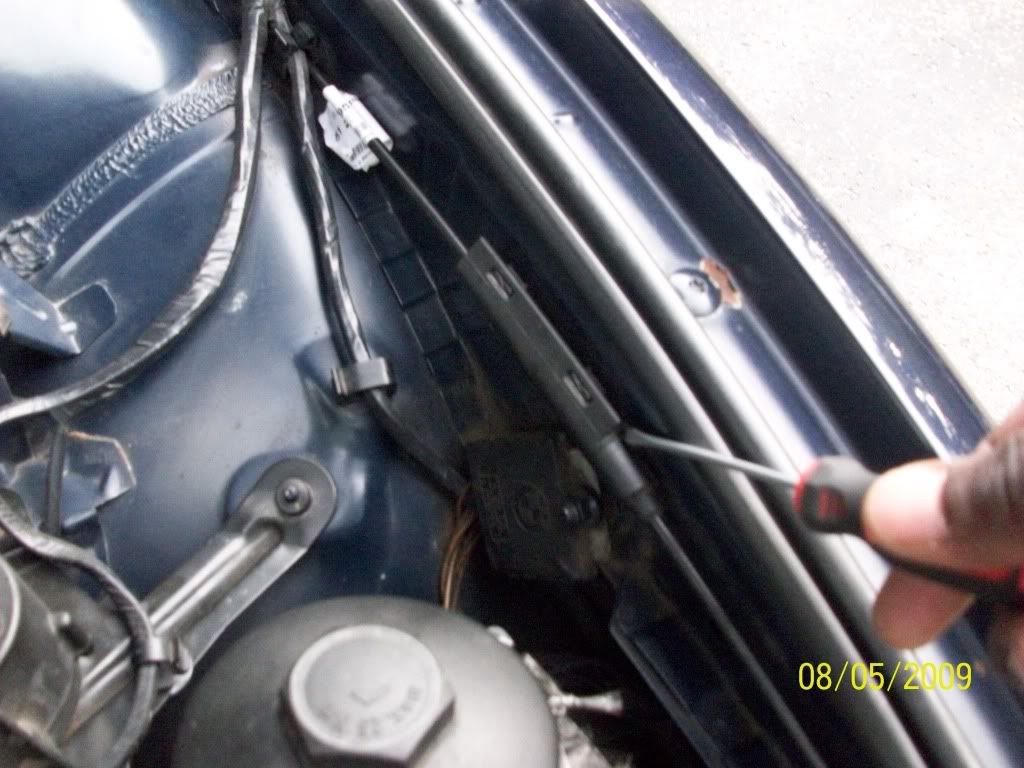
3. Unscrew the Hood Release Handle.
4. Undo the plastic screw plug under the Handle. Mine is missing I broke it when I did my project.
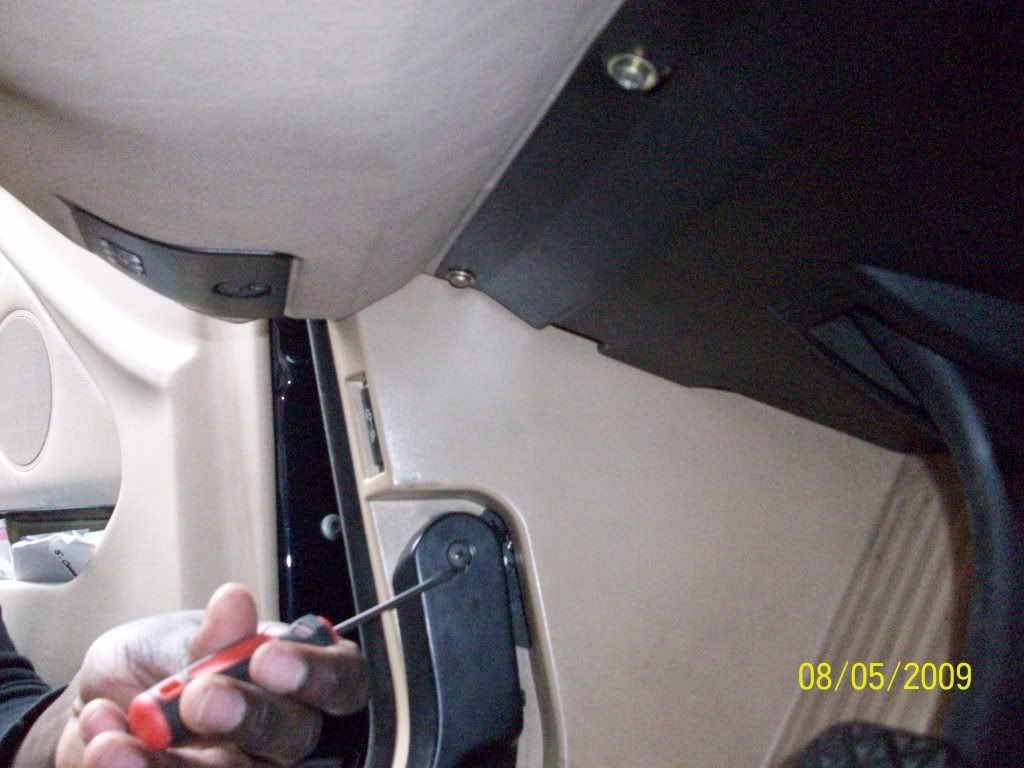
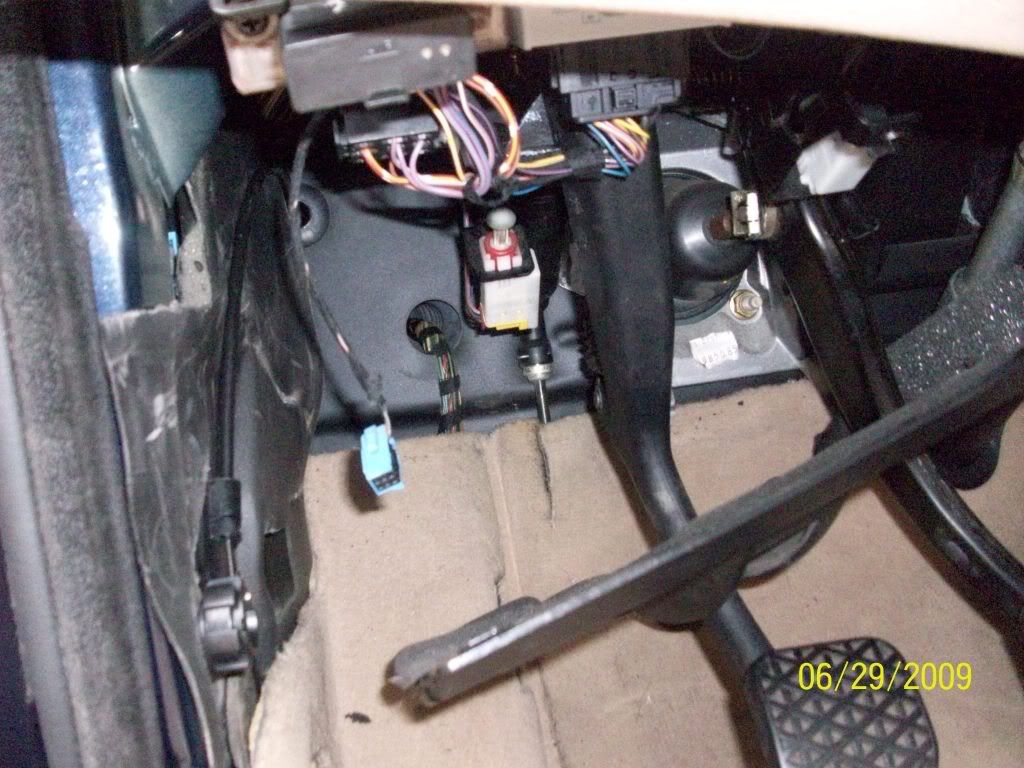
After all screws under dash are removed this is what your car looks like under all that pretty trim and covers. I didnt need to remove the whole of the lower dash because Im lazy, I just moved it to the side. lol
5. Now the fun part. Be firm but gentle. There is a notch at the smallest part of the dead pedal, closest to seat that goes into the trim by the door, pull it forward and to the right (toward the Passenger side blah blah. You will swear you are about to break something but it will eventually come out.)
This Part is right next to the Phillips. Sorry this is after I took the pedal out but you get the idea.
Now Pull the Dead pedal away from you while lifting the bottom toward the pedals and the top part towards you in one motion. I hope thats explained well. Careful not to completely yank the pedal out because you'll yank out the wires to the trunk release with it and you do not want to do that. Ask me how I know?
When you have a gap big enough to put your hand behind the pedal disconnect the Trunk release switch.
6. Now unscrew the torx screw the holds the hood release lever to the frame then grab the piece and tilt counter-clockwise to remove. This is what you will end up with.
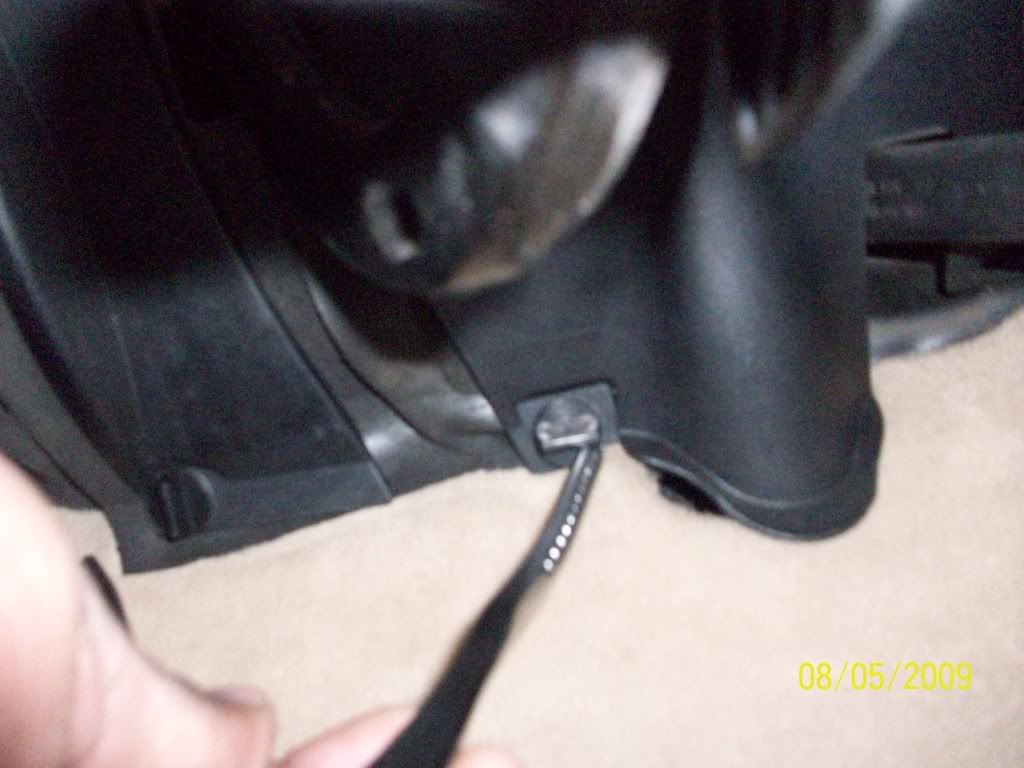
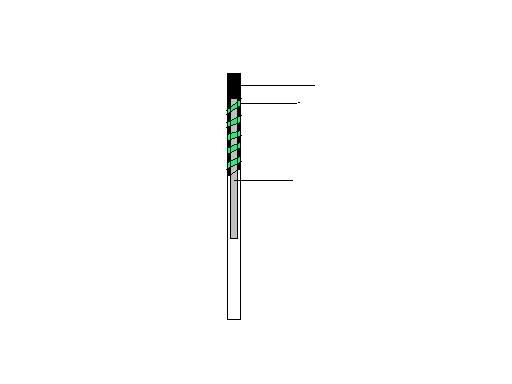
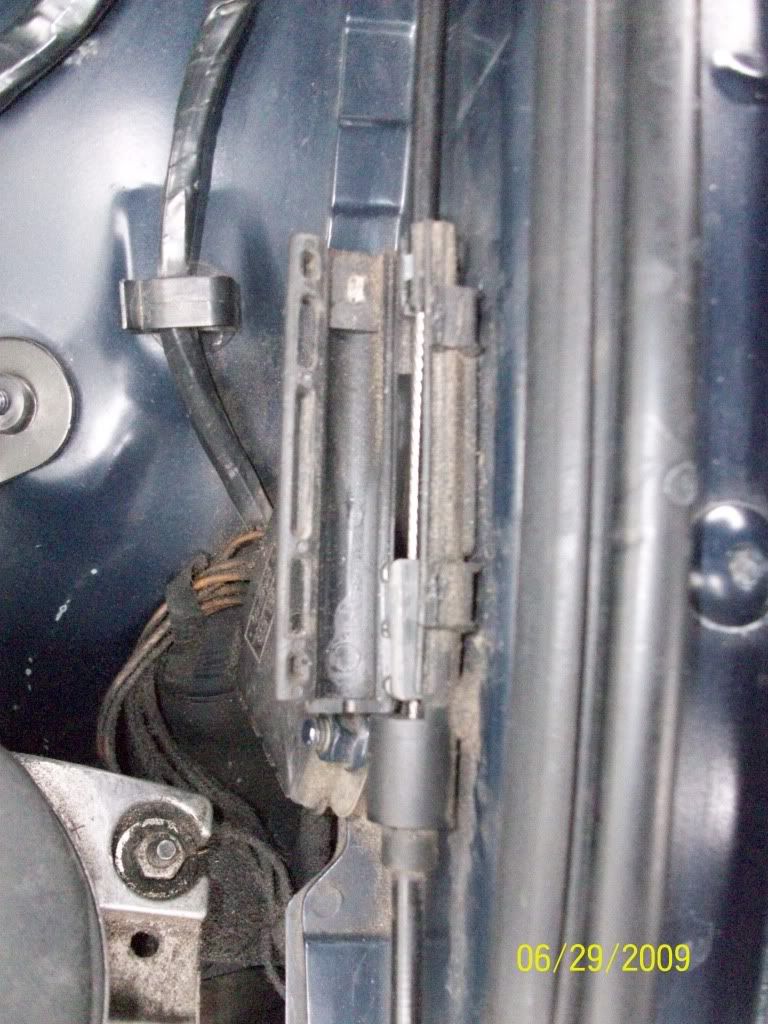
7. Now find the cable.
Pull on the sheath (white in diagram)till it comes off exposing a plastic tube (Black in diagram) with a metal strip (green in diagram)twirling around it.
Now use a knife or other cutting tool to cut the plastic all the way around at the highest point, then grab the pliers gripper majjigy and pinch the plastic/metal strip right under the cut and pull. This will expose the actual cable (grey in diagram). Pinch the cable and pull hard then pop goes the hood.
Alright, almost done.
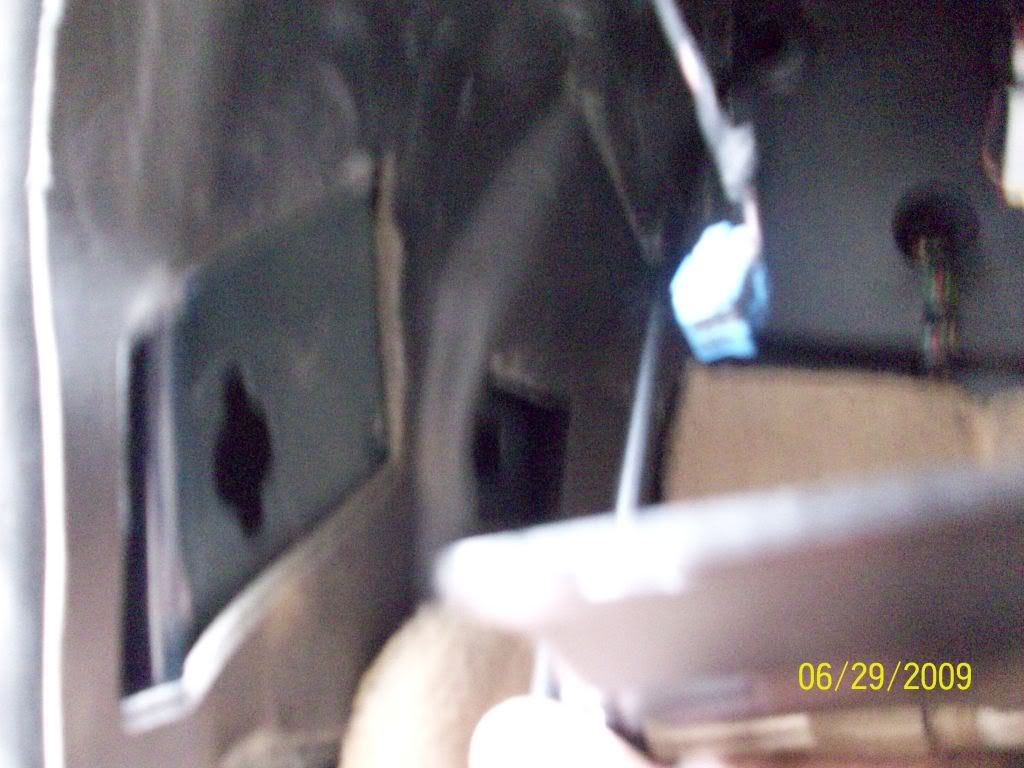
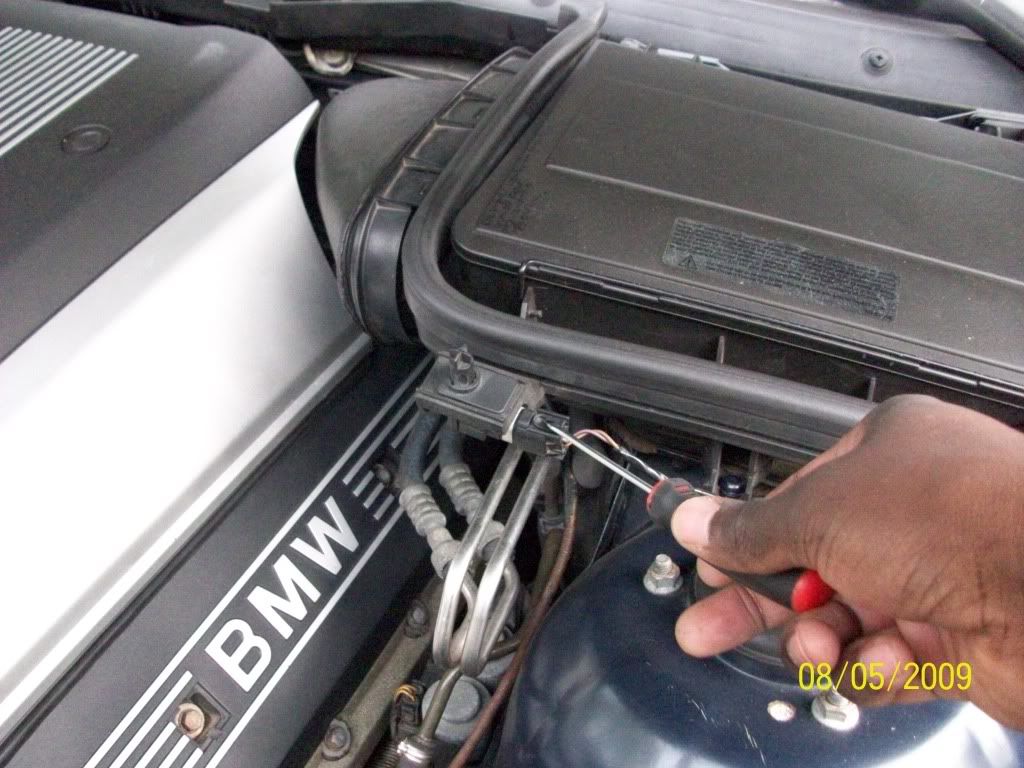
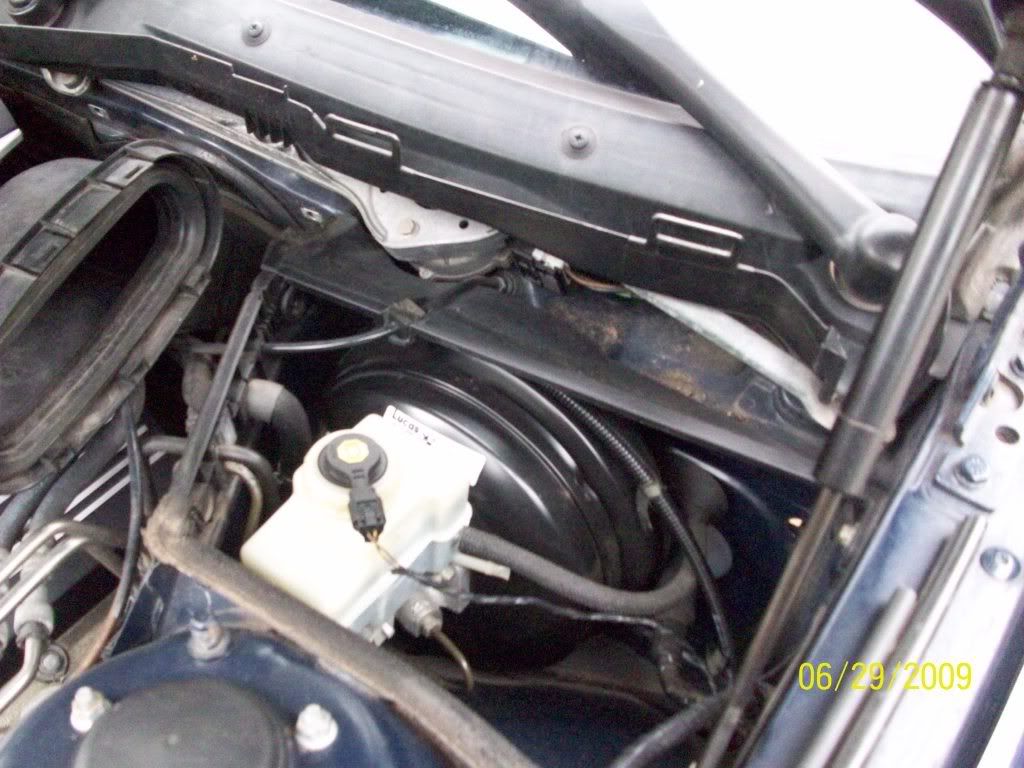
8. Open the hood and remove the Driver side airbox.
Unplug Sensor.
Pull towards you and remove the cover.
Pop tabs and pull to the left. To remove pull out clip on front side, pull airbox towards passenger side and up.
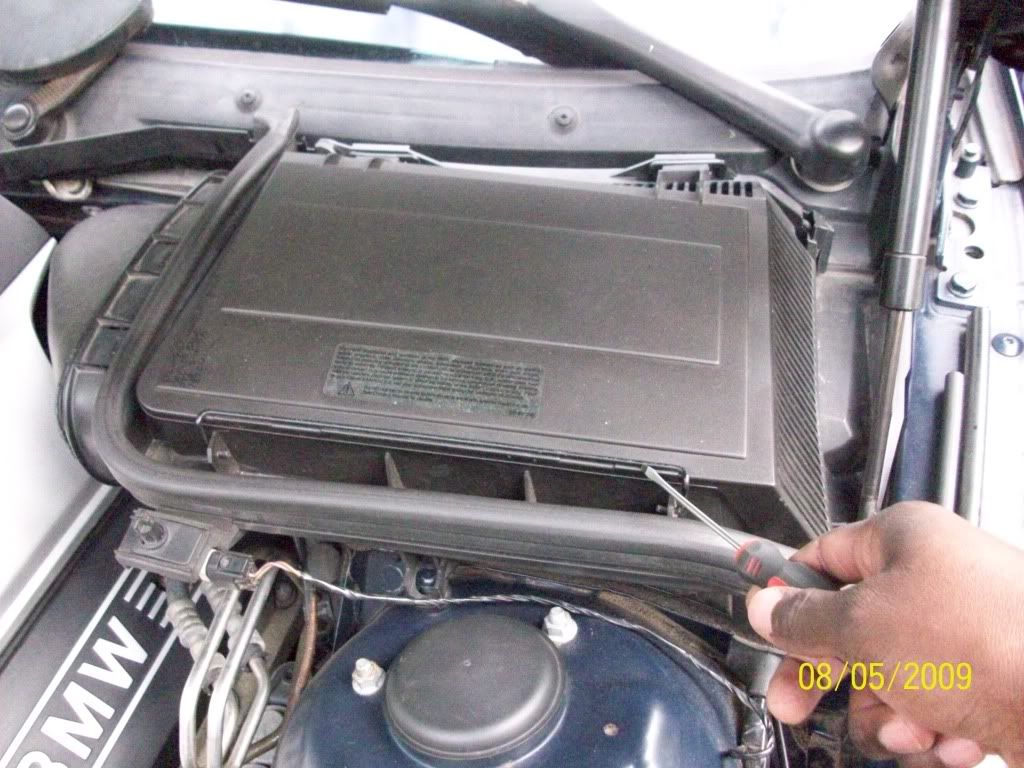
This is what you will have.
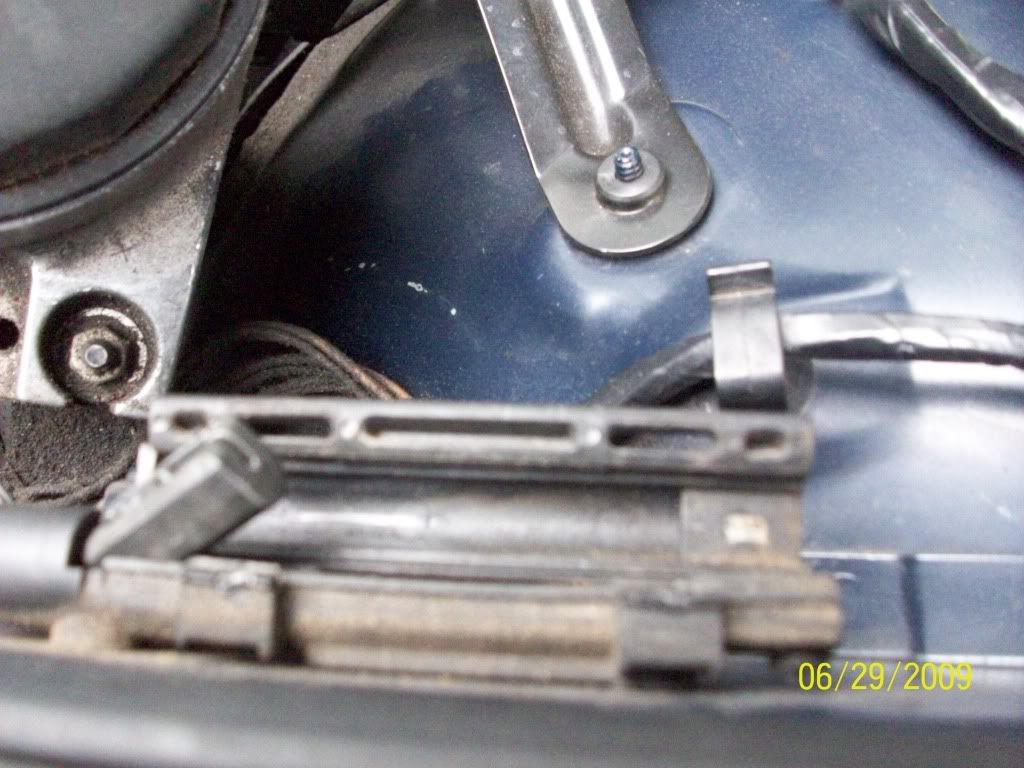
9. Pop open cable connector that runs next the firewall.
10. Pop Open
11. Use small flat head screwdriver to pull out the part of the cable you are removing.
Now just pull the cable out from the engine bay not the inside of car.
12. Now install the new cable. From interior, put it through the hole to the engine bay.
13. Install the metal side of cable into the connector on the firewall.
14. Go back into car. Put cable lever into frame hole and twist clockwise and screw torx screw back in.
15. Put dead pedal back in. Dont forget to plug Truck release switch back in.
16. Put handle back and screw back in.
17. Now test the hood release before you close the hood. Use screw driver to close hood locks.(the holes the hood plugs into), then pull the lever. If the locks open which they should, you are good to go.
**Thanks to homerraas from the E38 forum for this part.**
(I used his DIY which is similar to the E39s when I changed mine)
Now put everything back together and go show more people your engine.
Have fun. Let me know if you run into any problems.
Last edited by larinah; 08-07-2009 at 08:57 PM.
Member
thanks, i just gotta wait for my cable to get to my house now, i was looking at my car yesterday, i didnt have to remove the trim to get everything apart, all i had to do was unscrew the plastic cover that the pedals go into and then i was able to pull my dead pedal out
Member
Perfect. Nice work. Your thread and photos remind me to lubricate the cable on mine tomorrow so I never have to do THAT.
Member
Thanks! this will come in handy my snapped last week.
4Doors
V8
6spd
Member
The cable has end piece (reminiscent of a fishing line weight) - will that fit through the black sheath when threading the line back in (from inside the car?
Great thread and thanks for the info!
John
pompous a*s
I don't have to do this, yet. however, a sincere thanks because I feel that I may be soon.
I know I have to replace the passenger-side hood latch and associated cable
Member
Mine is getting more & more difficult to open. I have a feeling the same thing will be happening to me soon... !Originally Posted by 540VIspd


Senior Member
Supporting Vendor
In case anyone is still in need of the components we have created a Hood Release Cable Kit with Only Genuine BMW parts.
Click HERE to order or for more information.
Feel free to shoot us a PM if you have any questions!
Best,
ECS
Last edited by ECSTuning; 02-20-2012 at 11:35 AM.
Check twice, fix once...
Larinah,
Nice job! Anyone know if there is there any peridoc maintenance like lubing the cable that would prevent this failure? Any tricks to pop the hood open from the outside like one the E28 or E30s?
Thanks for taking the time to put this together!
1999 540it - Schwartz II/Sand Beige, style 5 rims, Conti DWS 235/45 tires, Billy HD/Sports, Stoptech S/S BL, F1 Pinacle 35% tint, Zionsville Cooling kit
1998 318ti Cali Sport - Schwartz II/Schwartz Anthratz, staggered style 23
1997 318ti Sport - Schwartz II/Schwartz Anthratz, staggered style 68 ,
1995 318ti Active - Alpineweib III/Schwartz, squared style 32
1994 325i - Bostongrau/Tan, Billy Sports, H&R springs
1991 318ic - Schwarz/Anthratz Stoff, Bilstien HD, Z4 3.0 SS, Magnaflow, S/S Stress bar, x-brace, M20 FW, Elipsoid/HID, K&N
BMWCCA# 160411
1995 318ti Sport Schwartz II/Schwartz Anthratz - Sold
1985 635CSI - Schwartz\Sand - Sold
1984 533i "Max" - Schwarz/Schwarz, - Sold
1984 318i - Champagne/Tan, Stock - Sold
Member
BlackBMWs,
You are correct, remember the British used to say: "an ounce of prevention is worth one pound of cure"?
I wrote a periodic maintenance DIY here. As long as you lube those points once a year (especially after winter for those who live in snow belt areas), you will never have problem with this hood cable:
http://www.bimmerboard.com/forums/posts/366665
Last edited by cnn; 06-11-2010 at 03:18 PM.
BMWCCA 484984
Hood Release Cable Maintenance DIY
Check twice, fix once...
Ah, Thanks! Now know how to replace it if needed and how to prevent it.
Thanks much!
1999 540it - Schwartz II/Sand Beige, style 5 rims, Conti DWS 235/45 tires, Billy HD/Sports, Stoptech S/S BL, F1 Pinacle 35% tint, Zionsville Cooling kit
1998 318ti Cali Sport - Schwartz II/Schwartz Anthratz, staggered style 23
1997 318ti Sport - Schwartz II/Schwartz Anthratz, staggered style 68 ,
1995 318ti Active - Alpineweib III/Schwartz, squared style 32
1994 325i - Bostongrau/Tan, Billy Sports, H&R springs
1991 318ic - Schwarz/Anthratz Stoff, Bilstien HD, Z4 3.0 SS, Magnaflow, S/S Stress bar, x-brace, M20 FW, Elipsoid/HID, K&N
BMWCCA# 160411
1995 318ti Sport Schwartz II/Schwartz Anthratz - Sold
1985 635CSI - Schwartz\Sand - Sold
1984 533i "Max" - Schwarz/Schwarz, - Sold
1984 318i - Champagne/Tan, Stock - Sold
Member
Sorry to post in this thread. I've searched around on the forum looking for information regarding the hood release cable and ran into this thread. I need to replace my cables and this thread is very informative! However, I cannot currently release the passenger side latch; only the driver's side is releasing. Can anyone offer any advice/guidance on how to release the passenger side so that I may open my hood?
Thank you in advance for any assistance!
- Chris
Call me Eric :)
Darn it! Mine just snapped. This looks like a PITA to replace.
Resident Third World Country Advisor
Call me Eric :)
Some observations now that I replaced mine:
1. By far the hardest part is removing and replacing the side panel + dead pedal (one single piece). It is not actually a back-side movement, since there are 4 "legs/clips" and they all point to different directions. You will have to pull, wiggle, yell, pull a little more. It helps a lot to get the lower dash section out of the way (the one that wraps around the pedals). Be careful not to break the clips, I managed to tear one of them. As the DIY says, be firm, but very gentle. The best way IMHO is pulling it towards you first. It will move about an inch or so and then stop. At that point start wiggling it towards the passenger side and slightly upwards.
When you are putting it in again, it's even worse since you have to match it against the lower dash section (there are tabs that must be aligned), and it will not want to reattach to the carpet.
Also, the door sills will interfere, I found best to bend the plastic and pull out the side panel from below, but it was very close to breaking.
2. The little head at the hood side of the old cable didn't want to come out. I had to cut the remaining cable and use a clip to "fish" the head out of the housing. It was not easy, and that alone took me like 20 minutes.
3. I don't understand why the original DIY says that you need to remove the trim to the right of the steering wheel and remove the two screws behind it. That's completely unnecessary. Save yourself from the hassle.
Last edited by crdiscoverer; 08-03-2011 at 01:41 PM.
Resident Third World Country Advisor
Member
This is great here, but my problem is actually cable between left and right locks. I am trying to find any information how to replace it, without success so far. Can anybody point to it if it exists or any other kind of help?
Thanks
Last edited by cvrle59; 08-04-2011 at 12:05 PM.
Member
Mine just snapped. How common are central and one going out to the latch cables breakage? Trying to figure out whether it makes more sense to get a set of all 3 from ECS tuning or just get the piece that broke. Car is 2002 530i.
Member
Thanks for the DYI. This took me about 2 hours to replace.
Crdiscoverer is right about the dead petal. Boy was that a PITA to remove and reinstall. I did crack the side molding a bit but it's very hard to notice it.
BMWCCA 484984
I know you posted this in August, but I want to address the question.
I've had the same issue for a month or so now. I was scheduled to get this done by my Indy because I don't want to mess DIYing right now, but he was sick and cancelled on me.
I'll try to document as much as I can when I finally tackle it.
Here's my thread on the topic.
***Hood Release (Bowden) Cable Replacement parts***UPDATED (1 2)
jamesdc4
Last edited by jamesdc4; 02-18-2012 at 07:40 PM.
Member
[QUOTE=540VIspd;17081181]Thanks! this will come in handy my snapped last week. Did not have to remove anything at dashboard level, Just the front door threshold and the panel where the cable and handle sit.
Jimmies: Not Rustled
I just did this, thanks for the write-up. Not gonna lie, getting the dead pedal on and off is a royal PITA. Luckily, mine did not break.
'14 Evora S - Chrome Orange/Ebony
'02 M5 - Carbon Black/Silverstone
'15 M235i xDrive - Mineral Grey/Black
Member
Thanks you rock
Member
Thanks a million. You saved me a lot of "discovery." The toughest part was putting the %#$@^!! black panel on the bottom of the dash back in. I made the mistake of removing it completely.
Cheers!
Member
OP was absolutely correct about loosening the lower part of the dash.
After attempting to fight the dead pedal back in place, I gave up and took out 4 screws to be able to move the dash out of the way. The pedal wants to go in from above and at a downward and leftward direction. Spend the 5 extra minutes and don't waste 45 fighting the pedal out and back in. You'll save yourself a lot of cussing and a you won't break it.
Addition #1: I popped off the door sill with three clips and it made the process a lot easier as well. One on each end and one in the middle.
Addition #2: Don't put the cable in place under the hood until the end. You need slack when putting the cable in place inside the car.
Member
Question for the gurus re Plastic hood release lever (the lever you pull in the cabin to release the hood); PN 51238226621 ($4 at dealer).
With this kind of age and mileage (150K) on the car, I think I should replace this cheap part since it is plastic, yes or no?
 Posting Permissions


 Reply With Quote


Bookmarks