
 Quality
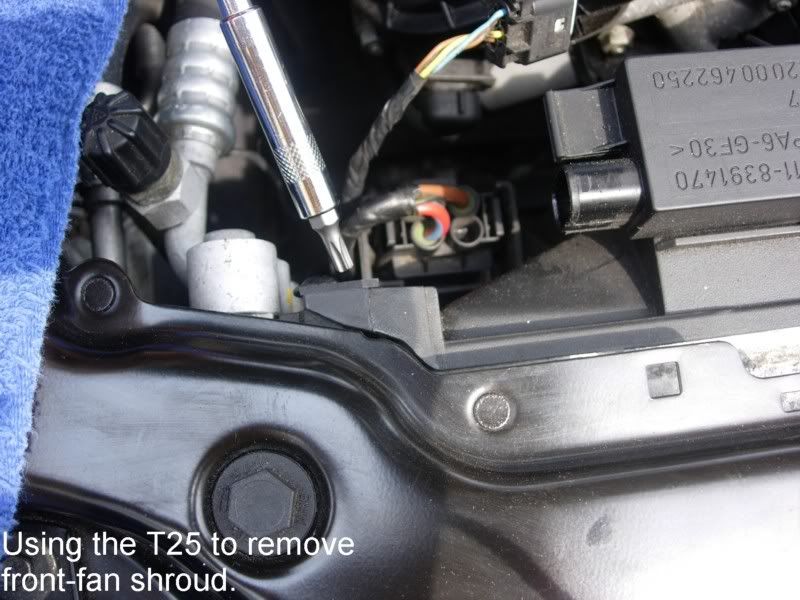
Because every DIY I've seen are for manual cars without the stupid fan in the way. This DIY is for the rest of us who own automatic cars. Also for everyone that is in need of possible pulling out their water pump since removing the fan clutch nut is the exactly what you will have to do on all cars (whether manual or automatic) to get the water pump out.
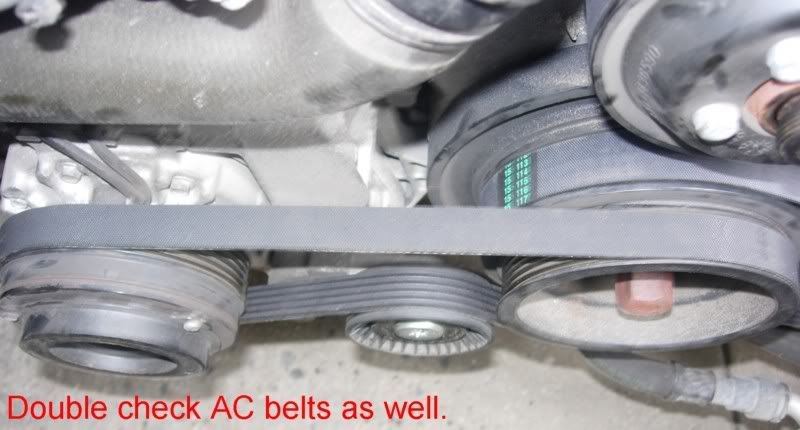
The belts DIY is easy in itself. The large pictures and crayola text within each picture below should give anyone with a brain the basic idea of what to do. I've changed belts on older BMW cars before without having to bother with the fan (like on the M44 engine) so the fan removal part of the M54 DIY was always a mystery to me and many with automatic E46 cars. Many of us followed all those website and forum DIYs, that was using manual cars for their DIY projects, up until we realized there was a big a$$ fan in there for our cars and couldn't go any further.
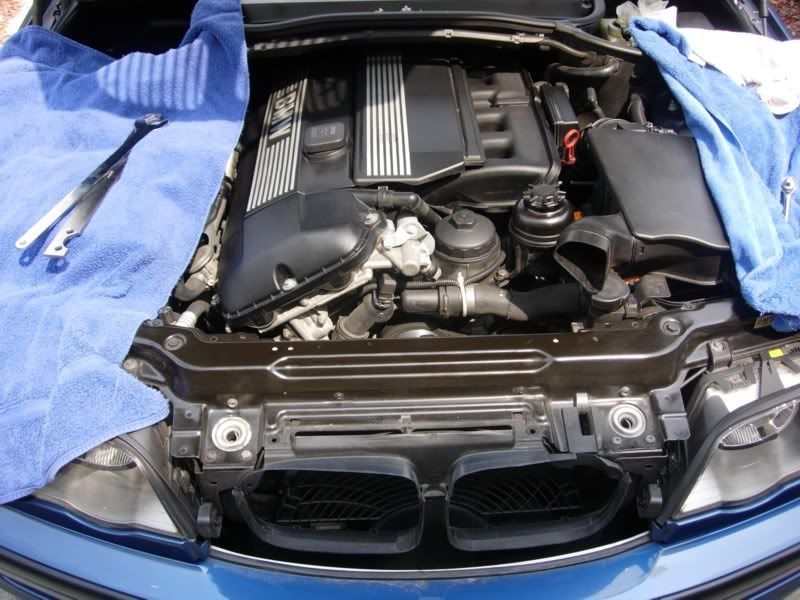
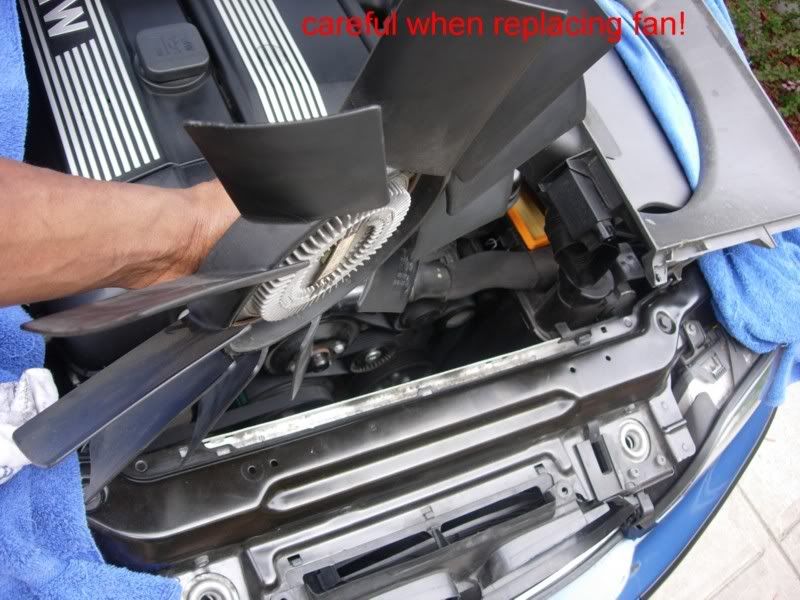
This DIY shows you how to safely remove the fan, belts, look at the inevitable water pump/thermostat failure regions and put everything back in.
My DIYs do not end in the middle, like most DIYs, and leave you stranded. I show you how to double check what you did and safely put everything back in there.
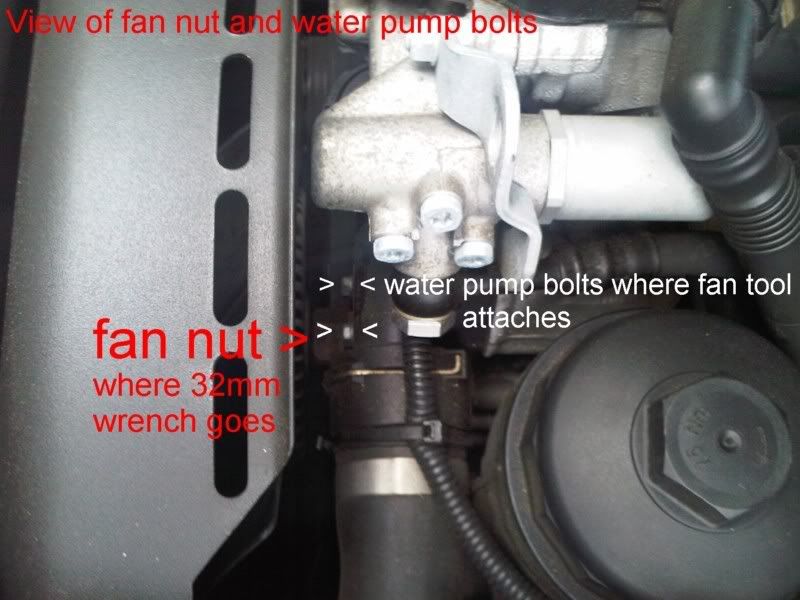
WATER PUMP and THERMOSTAT DIY QUICK INFO:
Only read this bit if you are interested in these tasks.
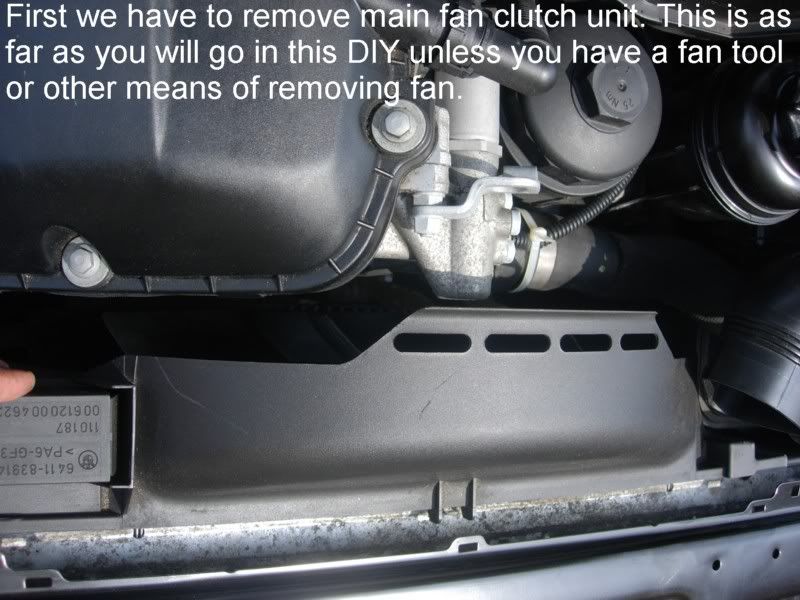
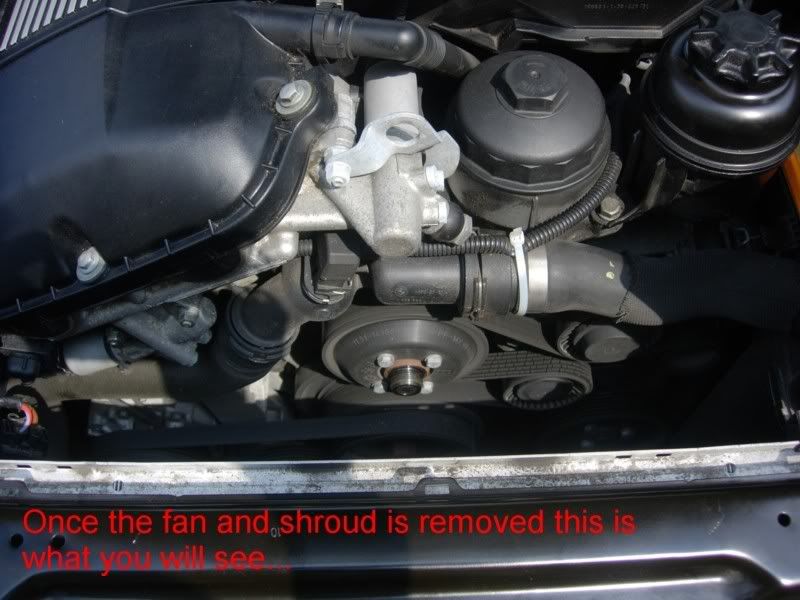
Said and done, if you can do this DIY then the water pump/thermostat DIYs will be not much more difficult, if not as easy. With the fan clutch out and shroud out and coolant drained, all that is left is removal of the bolts and bits that hold the water pump and thermostat in place. These are right there in front of you.
My car only has 49k on the clock, as of this writing, but it is still a 7-8 year old car so I plan of changing my plastic OEM pump and thermostat housing for the metal high performance water pump and an aluminum body thermostat housing over the next couple of months just to be safe.
HERE IS THE BMW M54 E46 Automatic Fan Clutch & Engine Belts DIY:
PART 3

Last edited by delmarco; 08-06-2009 at 12:40 AM. Reason: Automerged Doublepost
Quality
PART 4
PART 5
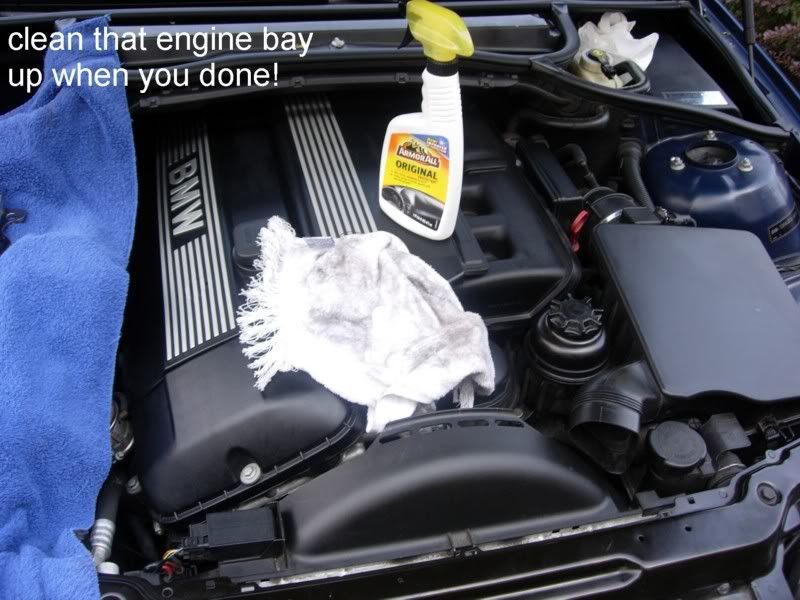
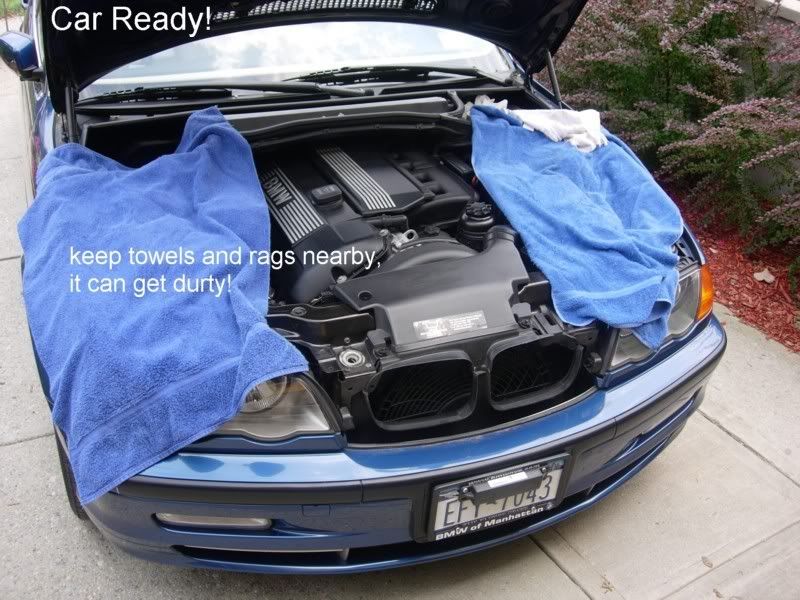
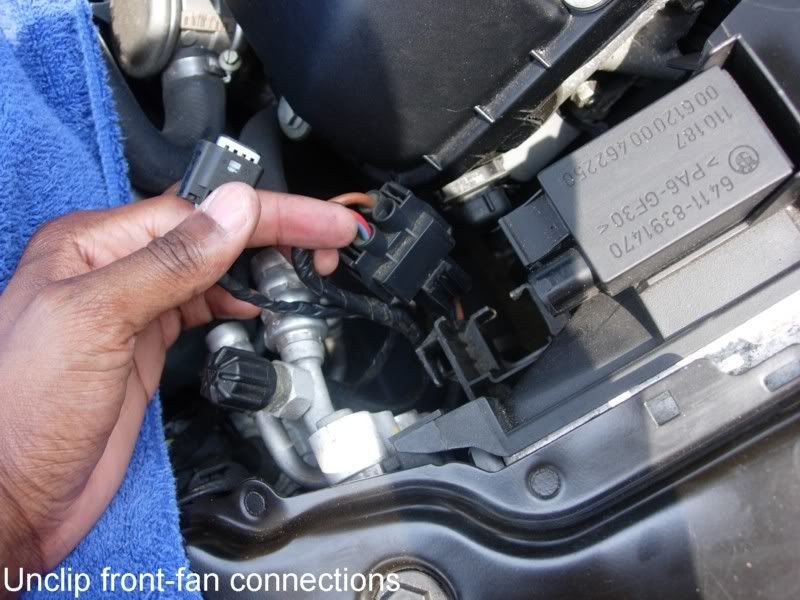
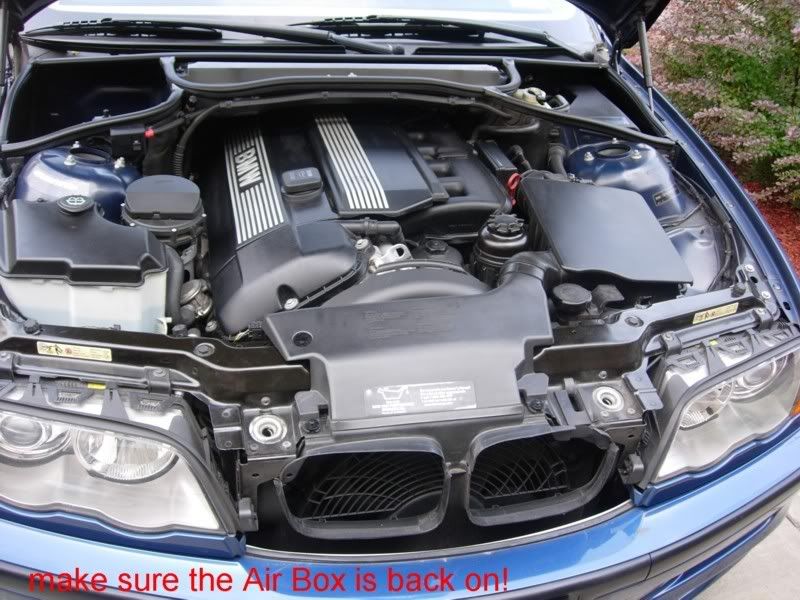
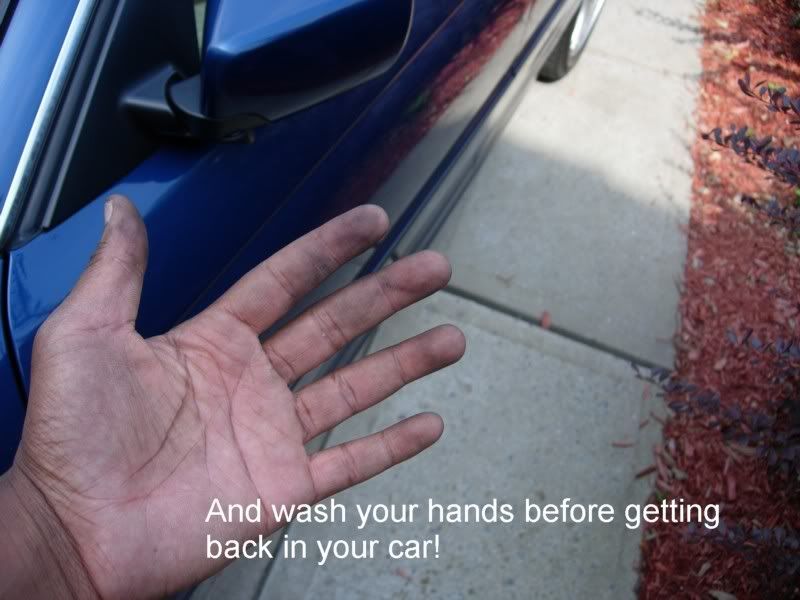
After you are done and double checked everything (including those front-fan shroud/radiator connector plugs) get yourself cleaned up and go start your car leaving the hood up and the windows down. Keep your hand on the key in case you have to shut off the engine immediately.
If the engine starts up okay and everything sounds and feel normal (no squealing or fierce vibrations) after a minute or two go look under the hood. The fan and belts should be moving okay. My fan seemed wobbly for the first couple of minutes but after it was okay-leaving me thinking it was just my imagination.
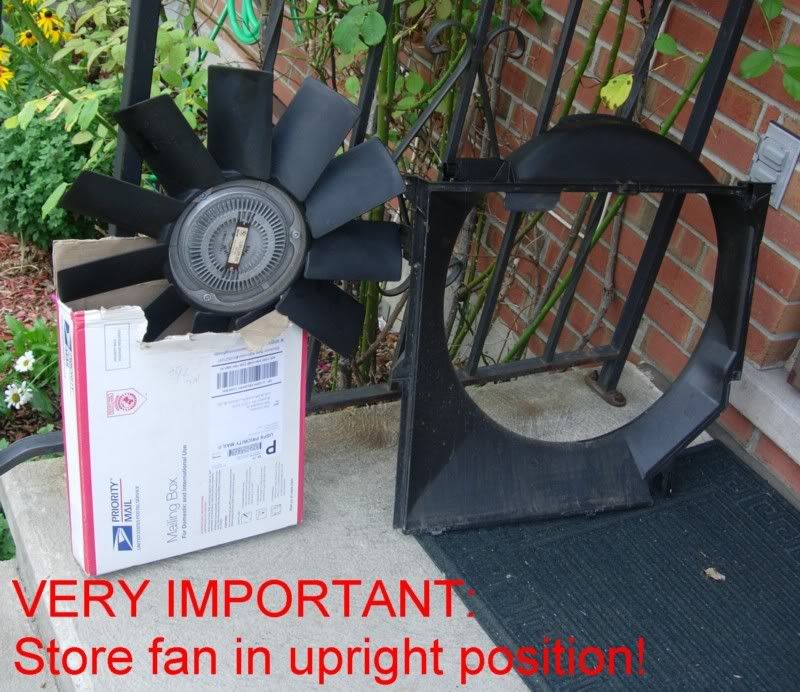
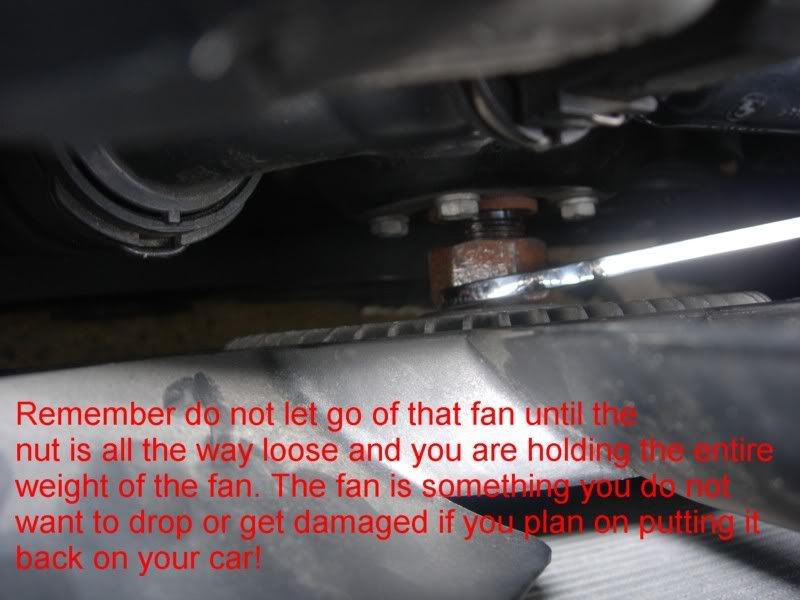
The worse that can happen is usually the fan blades either break off spontaneously and/or the fan comes off, thus exploding sending pieces of hard plastic everywhere. This is why you NEVER drop the fan, lay it flat or damage it if during the DIY you plan on using it again. Even if one blade gets chipped or scuffed then the fan can quickly lose equilibrium and wobble itself to bits destroying your engine block and hood.
This is also why it is best to first start the engine with the hood up and everyone clear of the engine bay, and your hand on the key in case you have to cut the engine off pronto. I think the rule of thumb is if your fan doesnt explode right away you should be good.
That is it! DIY completed! Now its time to think about that inevitable WATER PUMP failure prevention upgrade and Thermostat Housing upgrade DIY.
Enjoy,
Delmarco.
Last edited by delmarco; 08-05-2009 at 11:53 PM. Reason: Automerged Doublepost
Member
Your DIYs are the best. Detailed and plenty of pictures. Thanks for your tireless efforts to help us out.
BTW, how do you keep that engine compartment so damn clean? I mean it is like brand new! Only the rusty nuts gave it away.
WiL d[-_-]b
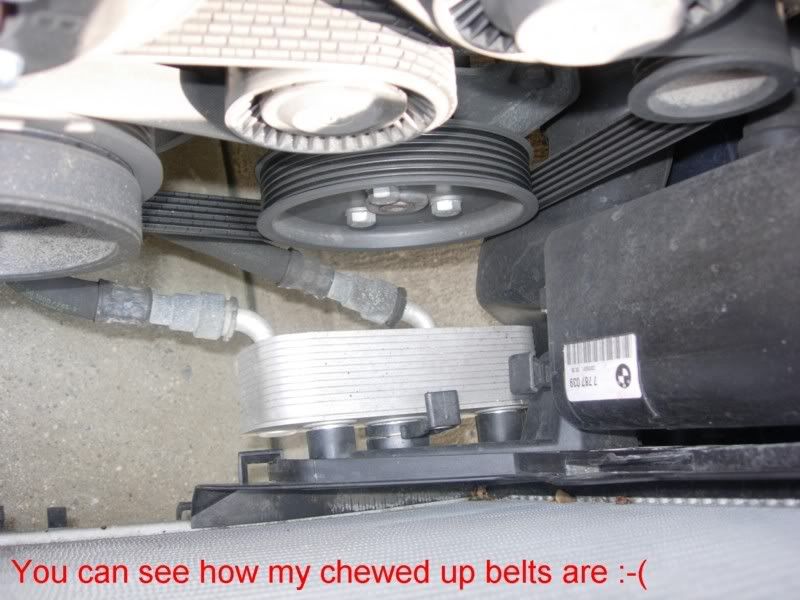
this is a lot of help for me! my main belt fell off and tangled itself with the ac belt... thanks..
Last edited by wilman; 12-11-2009 at 08:32 AM. Reason: Automerged Doublepost
Member
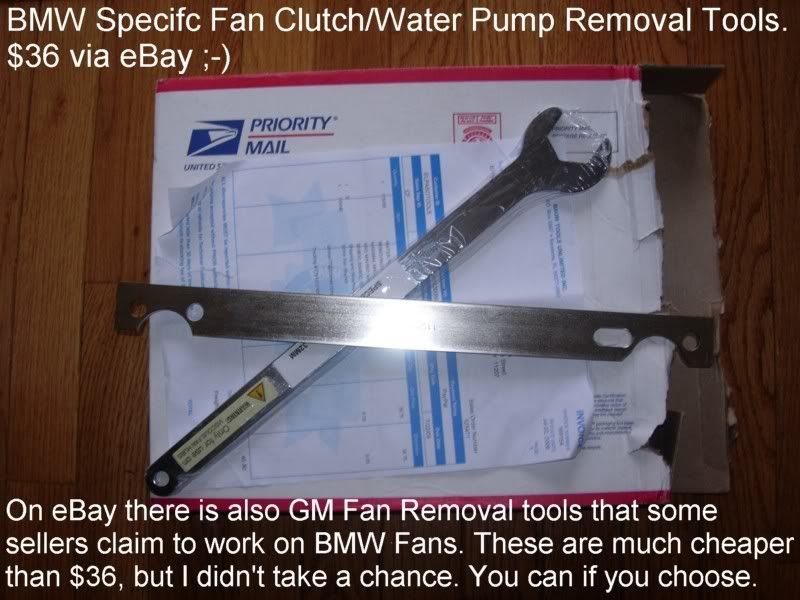
beautiful DIY post! I actually did this 4 months ago. I have a friend who's a "master tech" at BMW in fairfax, va. He said he rarely uses that special tool to loosen the fat nut. He just puts a wrench on it and gives it a "wack" to break the static friction.
Dr.Q 007
ty!
The most fun you can have with your clothes on.
Member
Awesome Post, I wish I would have seen it yesterday. I just spent a good deal of time on my newly acquired '02 330i removing the alternator. One comment on the fan removal, I was able to take it out with a "plumbing" crescent wrench which has a narrower face and by using a long screw driver to hold back the housing by the water pump bolts.
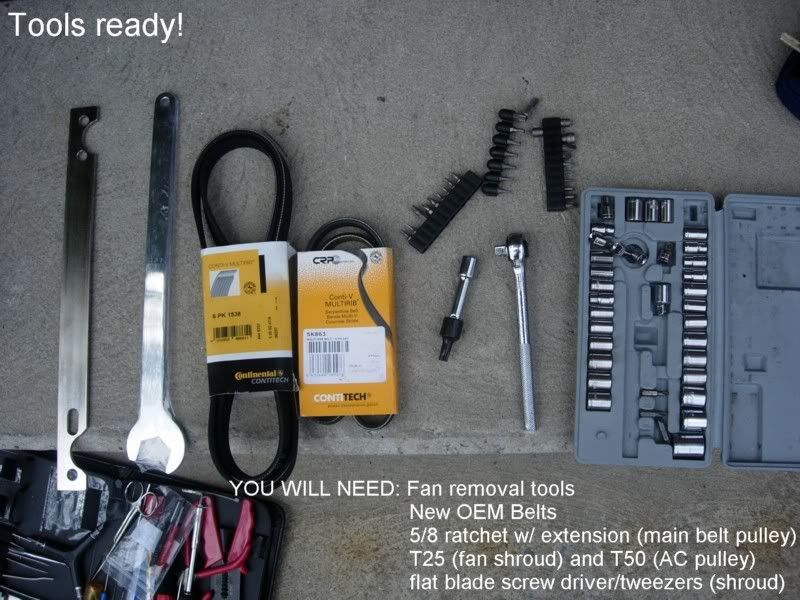
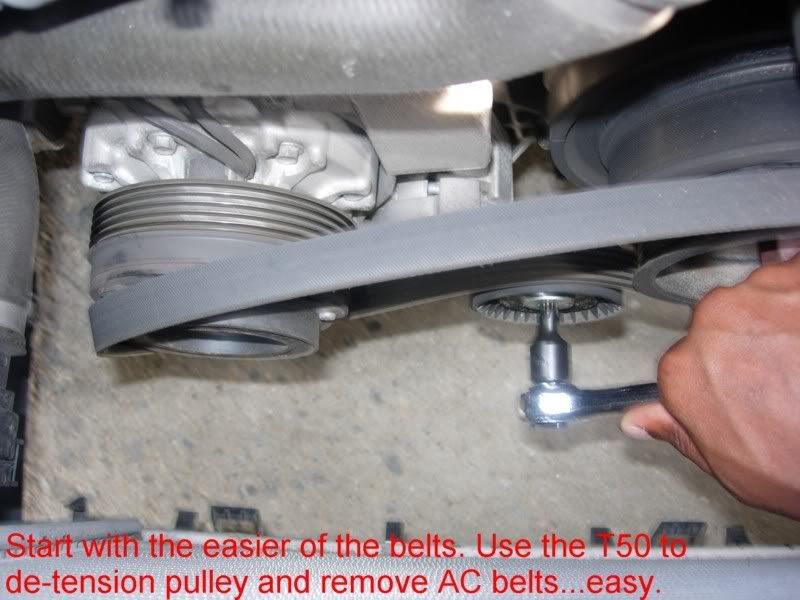
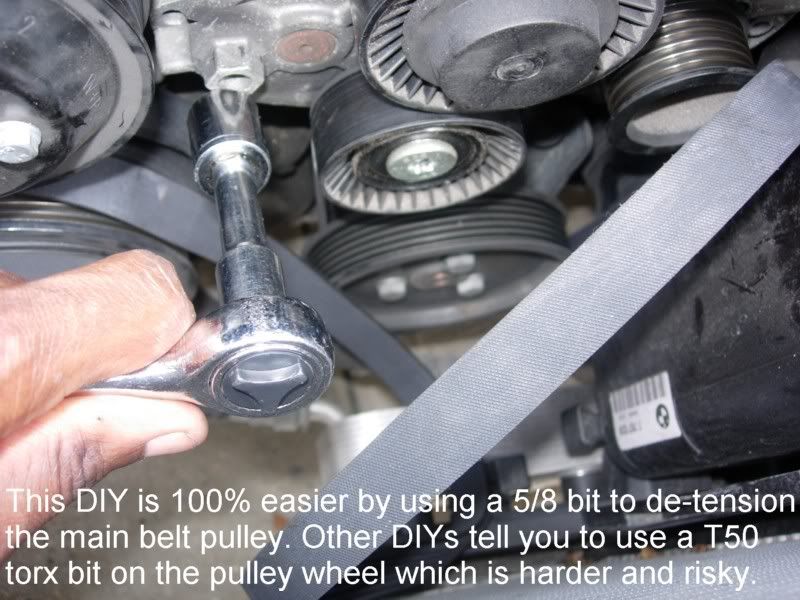
Also I do recomend the using the 5/8 (16mm) tensioner bolt face to release the tension on the alternator belt as that route worked great for me and the belt came off very easily.
Well Tomorrow I am off to the parts store to have the alternator checked out to be sure, and to pick up a replacement.
Again, great job with all the photos!
This is my first post here, I love this site!
Dr.Q 007
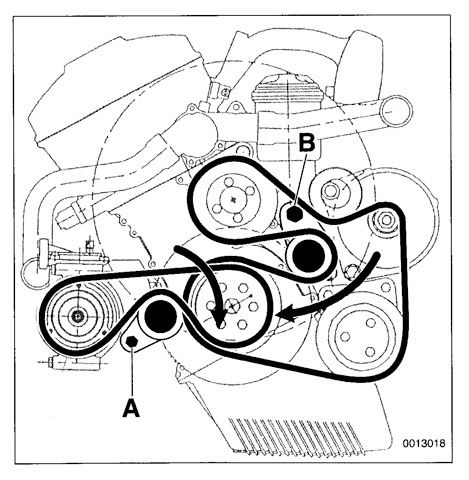
This might sound stupid but...i cant for the life of me find that bolt.. Where exactly is it located? I know the pictures point it out, but this confuses me.Originally Posted by RNeumann

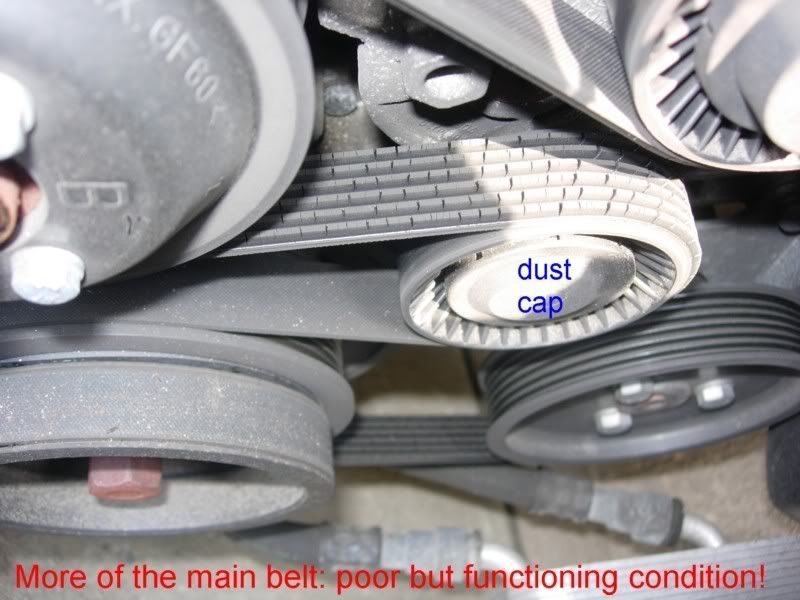
This is what im looking at. In this picture, notice the cylinder looking part right over the top left of the tensioner.
And in this picture, the bolt looks like its right in the open. And the cylinder part is not there. Maybe its cause i was working in the dark, but i cant see at any angle my setup looking like the picture below. But more like the picture above.
This is the area i was looking at, B on the diagram, for the bolt. I cant find a thing, i was looking for a mirror to get a better view but didnt have anything small around me. Im gonna give it a better look in the day, plus i have a idler pulley to replace....
The most fun you can have with your clothes on.
Member
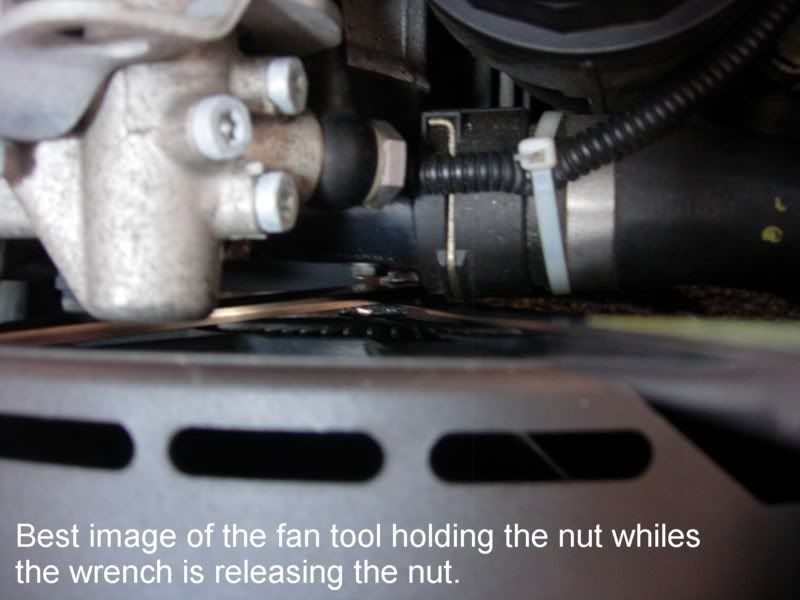
I replaced my thermostat last night in about 20 minutes using this method. I had to go to ace hardware and buy a 1 1/4" wrench for the nut but I didnt need the flat one from ebay. Used a screwdriver hold the 4 bolts near the big nut so i could break the torque which was very very easy to break. After that I just held the fan and took my time spinning the nut with my big ole wrench until it came off. Replacement of thermostat was straightforward after that. I also didnt drain my coolant I just let it spill out a little bit and was ready with a pan underneath. Very easy to do.
Quality
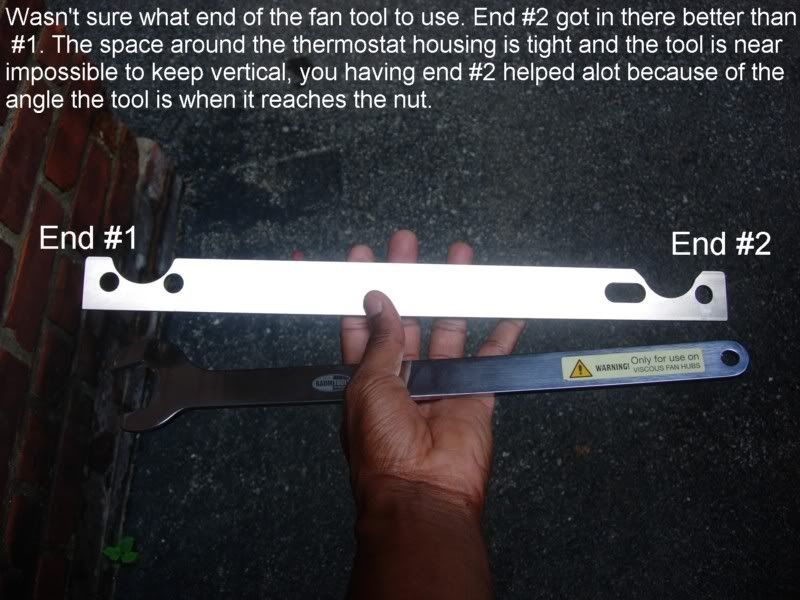
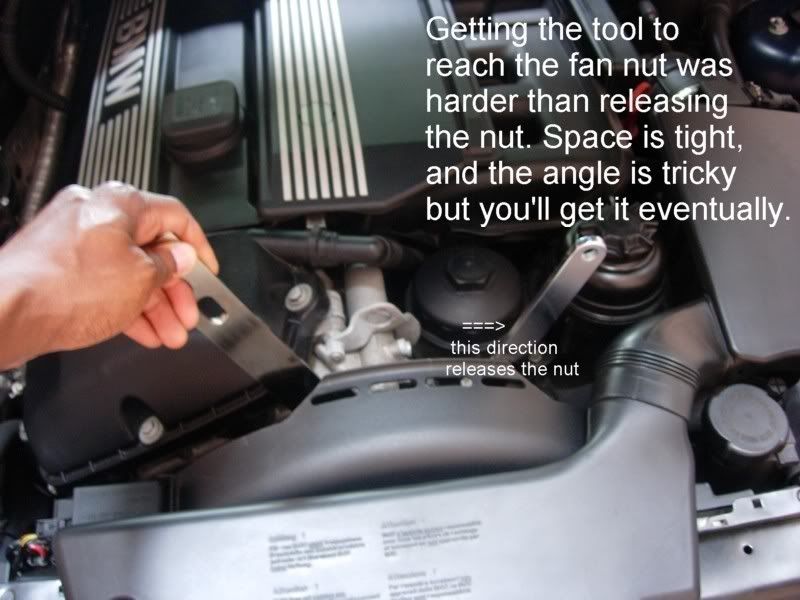
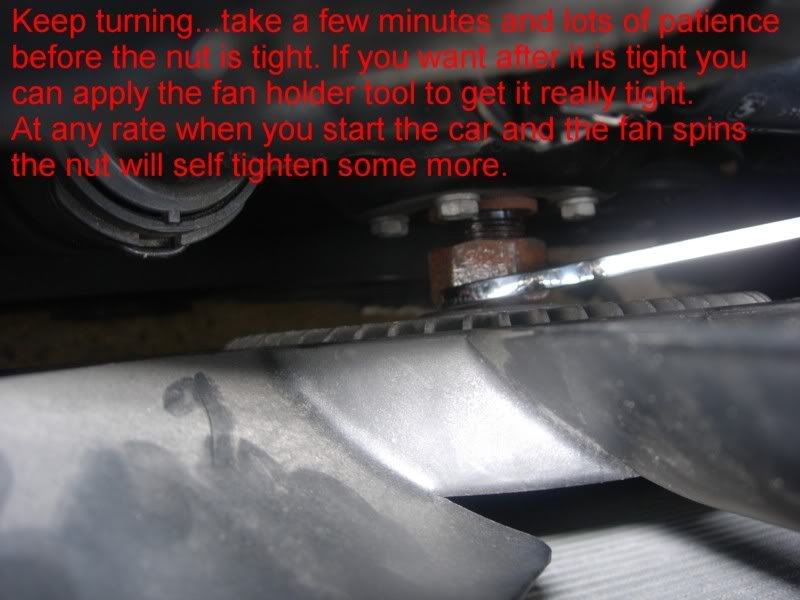
FAcing the front of the car turn the wrench to your right (or towards the driver's side in the USA on US spec cars) to loosen the fan nut.
Replacement is the opposite.
Also when do you know you need to change your thermostat?
Drive with Power!
Here's a video DIY on how to Remove the BMW Radiator Fan / Clutch :
[ame]http://www.youtube.com/watch?v=GuKguZBW_MA[/ame]
Hope this helps someone.
Dr.Q 007
Forgot to update. I finished after finding out the idler pulley needed to be replaced. So i replaced that. Did end up stripping the torx bolt that holds the tensioner pulley, used one of these to get a grip to remove it.
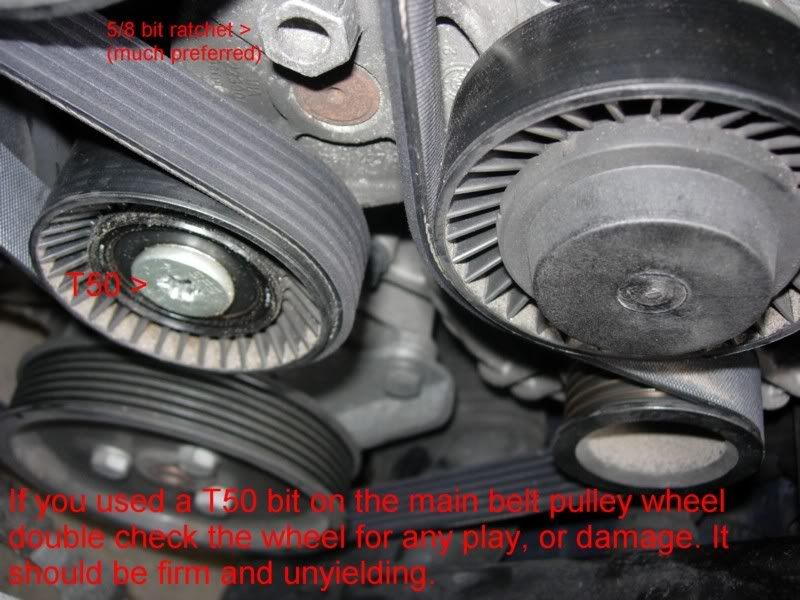
One thing that should be noted is, these cars come with TWO different tensioners pulleys. Newer ones used a hydraulic tensioner, and another different design on older models. So im guessing only the older one, non hydraulic, can be used with a 5/8 bit ratchet to de-tension. No wonder why i was getting confused trying to look for the nut..
And its pretty easy to do it WITHOUT the special tool, just a tight fit.
Last edited by XCELMotorsports; 02-11-2010 at 05:50 PM.
The most fun you can have with your clothes on.
Member
First of all this looks like an awesome DIY... so thanks in advance.
I have (what I think to be) a tensioner bearing screaming.
My dad and I are planning to tackle the project in about a week. How do I know whether my car is a mechanical tensioner or a hydraulic one? any suggestions on where to order parts? any suggestions on what all to replace while everything is apart? (obviously the belts) any suggestions, comments, helpful tips would be great!
thanks!
Alex
Drive with Power!
You will gain much information here. Read through and watch the Videos for more insight.
Helpful tip:
If like you said your dad is a GM man... (from http://forums.bimmerforums.com/forum....php?t=1417899)
Give him a heads up -
BMW 3-Series will Not have the same amount of "working room" that domestic GM vehicles have. So, be patient when working in the engine bay. It's going to be a very tight fit.
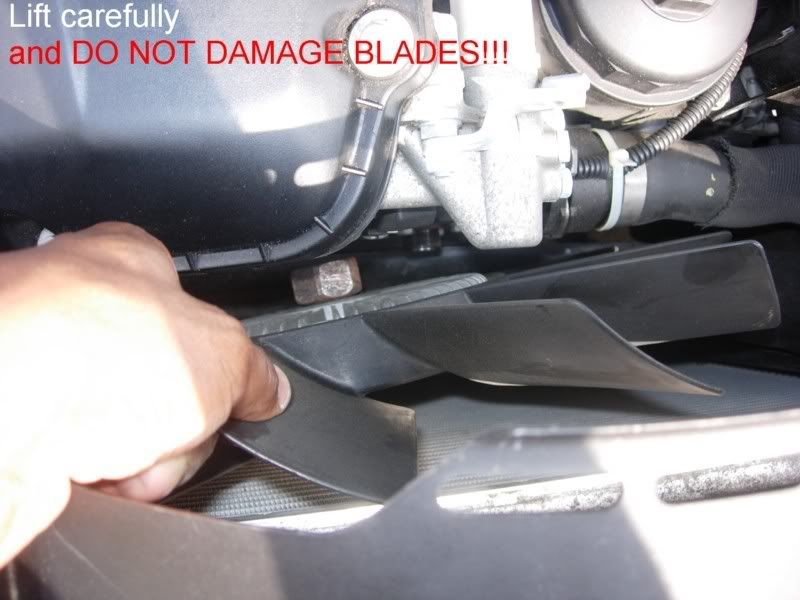
And, don't force your way around parts (ie: radiator fan blades) You might chip or break off a blade.
Last edited by BimmersGarage; 03-14-2010 at 02:14 PM.
Member
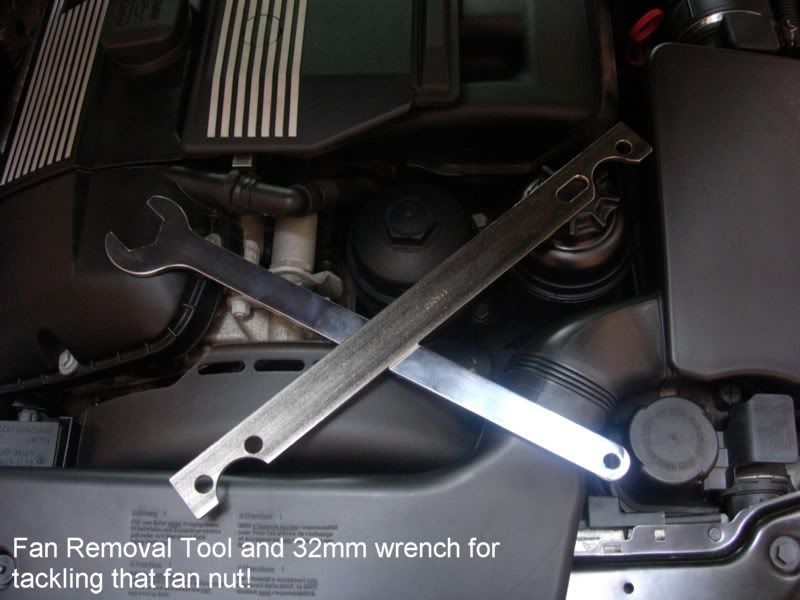
Though I know some folks, myself included, have removed the fan clutch without having the normal tools before, I finally decided to purchase them since I seem to be taking stuff apart often... Just wanted to let my fellow enthusiasts know I found a great quality clutch fan kit (both 32mm wrench and holder) for $34.99 on Koch Tools website. I looked on ebay and amazon, and just ran into these pups which I feel better about to purchase.
http://www.kochtools.com/index.php?p=product&id=115
2nd Day Fedex: $17.40 to my zipcode, which is pretty dang good imo.
Total: $52.39 (tons cheaper then what I have seen online, and this set looks like it's much better quality
Last edited by mugsy77; 09-17-2010 at 05:50 PM.
Member
Great DIY, no doubt, but if anyone can point me toward instructions for E46 manual transmission version, please do. I have searched but all I'm getting is delmarco's version posted on lots of different sites (as it should be) but nothing in the realm of man trans.
Altho man trans cars don't have the mechanical fan on the water pump, there is an (electric?) fan assembly of some sort that has to come out in order to have enough room to work on this part of the car. Its housing is plastic and I'm aiming to avoid breaking anything while attempting removal.
TIA...
Member
Never mind...found a couple good DIY's for the manual trans E46. I'll post them here for those who may have the same question:
Belt Replacement:
http://forum.e46fanatics.com/showthread.php?t=522832
Belt Tensioner Replacement:
http://forum.e46fanatics.com/showthread.php?t=439006
Member
Thanks for taking the time to so clearly photograph and document your work. I did a cooling system overhaul today and found this post invaluable.
Member
My car is 4 years old - with only 26k miles - but at the last oil change, the dealer (stealer?) recommended changing the belts (car came from Texas - extra hot - and is now in Colorado - extra dry).
With this DIY, I feel pretty confident in tackling the job myself.
Thanks again.
- Bill in Denver
"Speed limits are for those lacking the common sense to drive within the prevailing weather, traffic, and/or road conditions." - Me.
Member
So, do I really need this special tool to remove the fan? Anyone else improvise?
Member
BMW CCA Member
Great DIY
Does anyone know if the fan-clutch tool for the E46 M3 is the same?
Quality
Yeah it should be. Terra you can borrow my tools if you need. Send me a text.
Member
Quick question,
Is there a reason why the fan has to be stored in an upright position?
Can't you just lay it down on it's back or front?
Even during shipment the thing doesn't stay upright; or were you just afraid of putting any weight on the fins?
Member
BMW CCA Member
Heh, now that the weather is decent, I may actually tackle this soon. I'll let you know if I need to take you up on that offer, thanks!
Member
I need to replace belts on mines too
2015 M235i 6MT
 Posting Permissions


 Reply With Quote
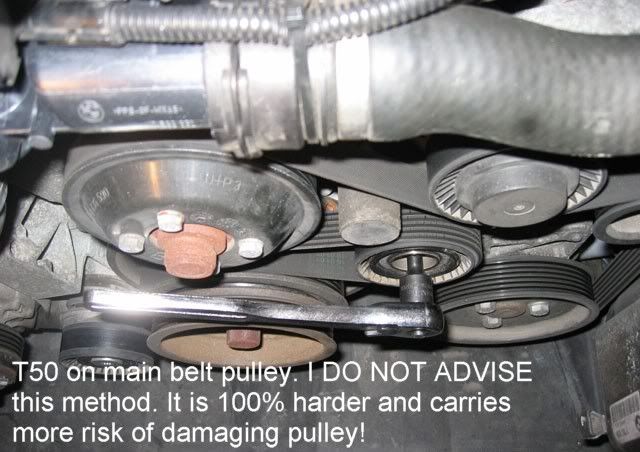


Bookmarks