
 Member
I saw a thread on here, a while back about an Alternator cable upgrade, to prevent a potential FIRE !!!
I thought they were on Wuffer's sight but I have not been able to locate one...
Any help would be appreciated, I want one of these to prevent what appears to be a HUGE potential problem...
Thank-you in advance
DMP
Sick Puppy Motorwerks
Item is on Ebay from time to time
'93 850Ci - Mineralweiß Metallic
2001 740iL - Titansilber
ALPINA B7 -Alpinweiß III
...the price of cool ain't cheap!
 Member
And available directly from Wuffer. 8-)
91 850 (Panzer), 2012 Mini Cooper Countryman (WifeMobile) www.wuffer.ca
Only pre-bungle bimmers
It's on RF site. There was some noise about it here, too but mostly a repeat of RF stuff.
Btw, if you check on wuffer.ca for products for sale, there is a cable kit. And then there is the BF bloke with the funny painted mostly green car who sells them on EB.
CB42613, CB42577, DH29770 and counting...
Member
before you go out and buy the cables, check yours, checked mine at wuffers, it was brand new, so just wrapped up my oem in some hight temp tape....
Mike's kit on ebay isn't bad, just make sure you get it without the ends attached (easier to push the wire through the metal tube) or you can go with the Tom's kit which is real good, looks great mounted in his engine bay, either kit is better than oem if your cable is done.
Last edited by tread72; 07-31-2009 at 01:03 AM.
Folie a Deux
Mostly green? It's getting more red as time goes on........Originally Posted by cantbl8

[ame]http://www.youtube.com/watch?v=smQmnSuVP1g[/ame]
Member
I am interested in changing out my alternator cable but the service manual doesn't have a clear explanation or pictorial on how to do it. Does anyone know of a DIY pictoral guide to do it? Any help and especially pictures would be enormously helpful.
Thanks in advance
Last edited by mjrgroup; 07-25-2010 at 12:46 PM.
Member
Cable always on ebay here:
http://cgi.ebay.co.uk/ws/eBayISAPI.dll?ViewItem&rd=1&item=390081069995&ssPa geName=STRK:MESE:IT
and available in the US from
maxlumens@finemotoring.com
It comes with full installation instructions and does not use welding cable!
8Tech.
Last edited by 8Tech; 03-14-2010 at 08:35 PM.
Member
Just changed my cable yesterday. Took my about 4 hours to do. Getting the alternator-side nut that holds the cable off is a PITA, but doable with a 13mm deep socket and small ratchet and break bar.
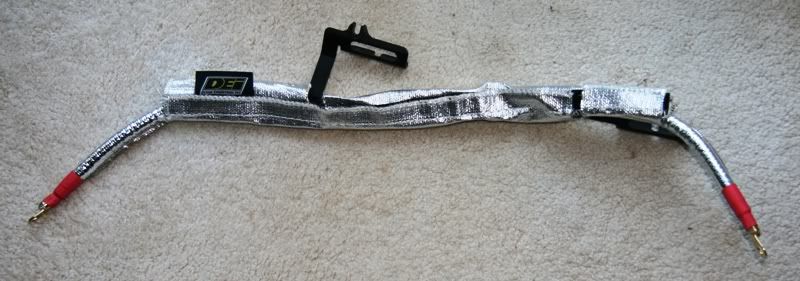
I bought a new "upgraded" cable from the BMW Rocket Science guy off ebay, it looks like an exceptionally good cable, I'm going to put heat shielding over the exposed cable parts (the parts of the cable that are outside the metal tube).
Pics:
With the alternator cable and metal tube removed. There is a black rubber boot that covers the rear electrical connections on the alternator. Also the B+ cable runs through a small hole in that boot along with a small blue wire, which has very little slack.
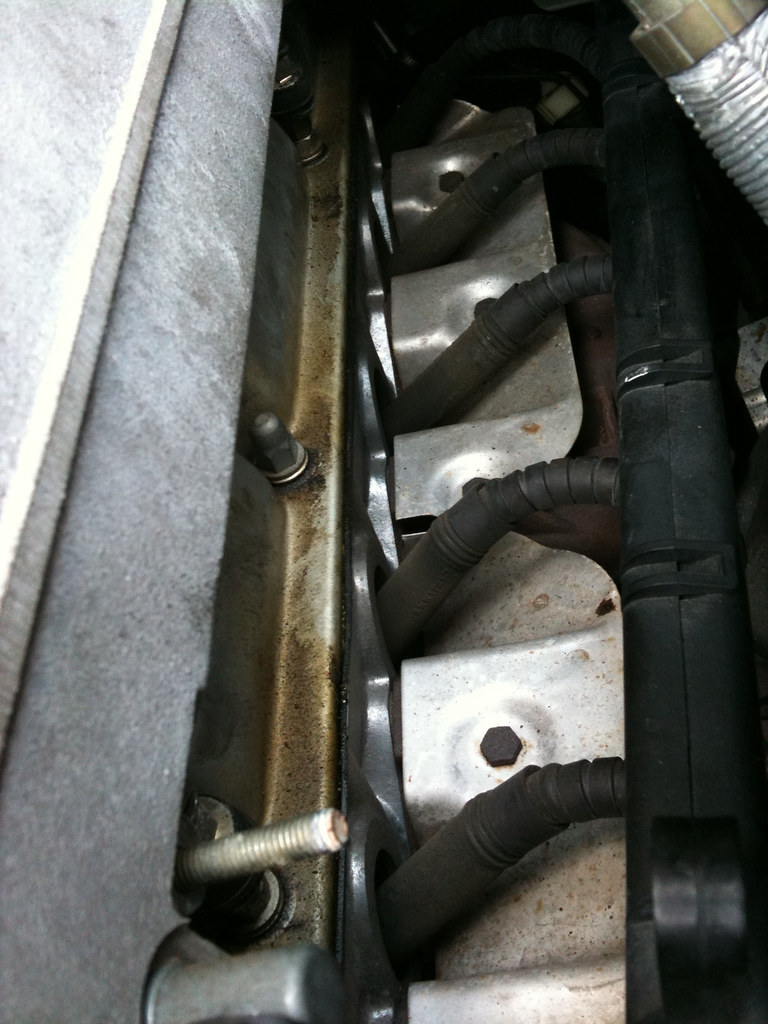
Driver's side intake manifold and ignition cables (with B+ alternator cable removed). The metal tube attaches to elevators attached to the valve cover nuts. You don't need to remove the nuts on the elevators to remove the tube, just loosen and the tube slides out.
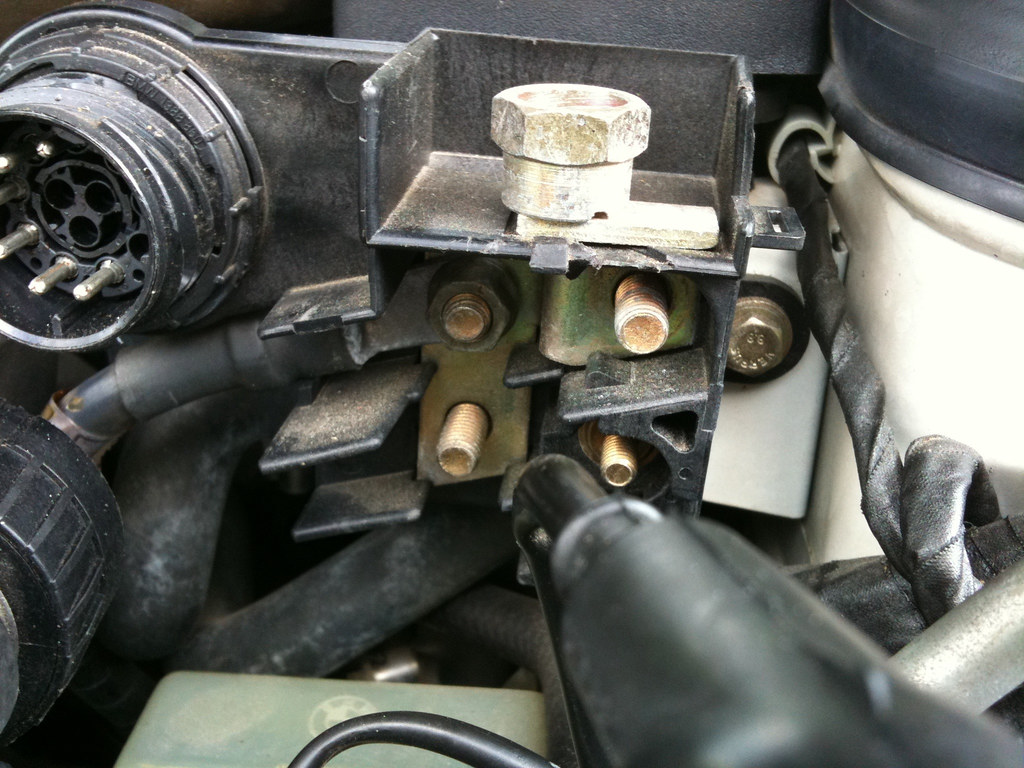
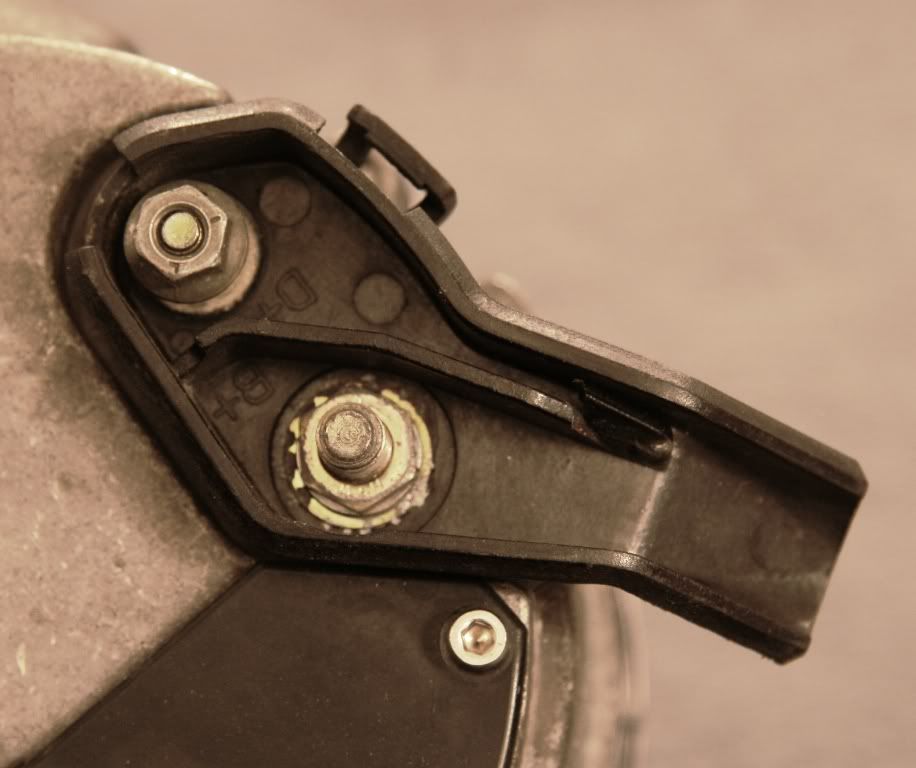
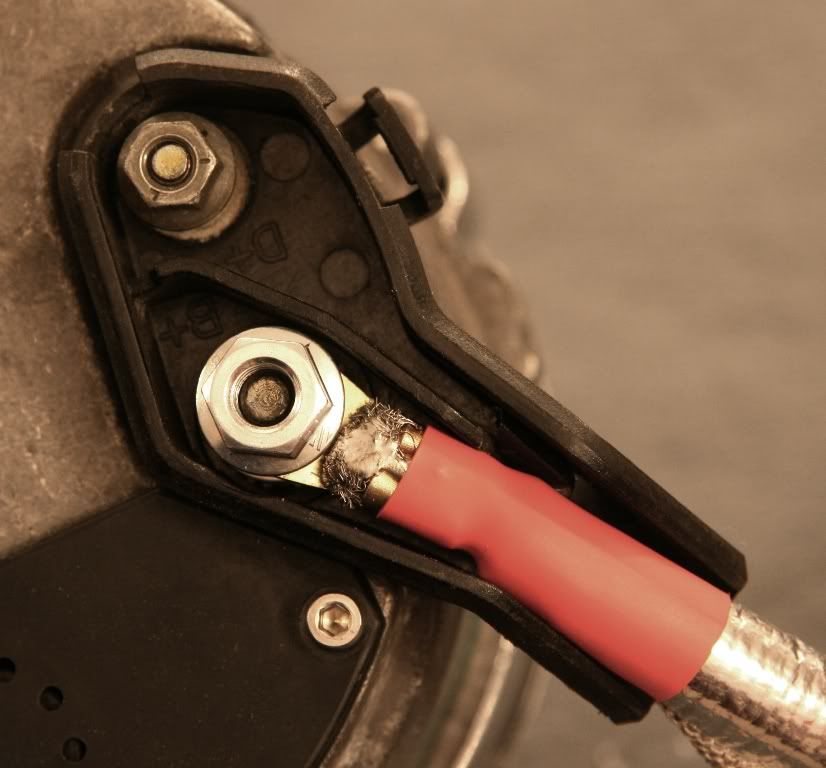
B+ distribution box, getting the plastic cover off is a little tricky, without bending/breaking it. Take your time. This shows the old cable.
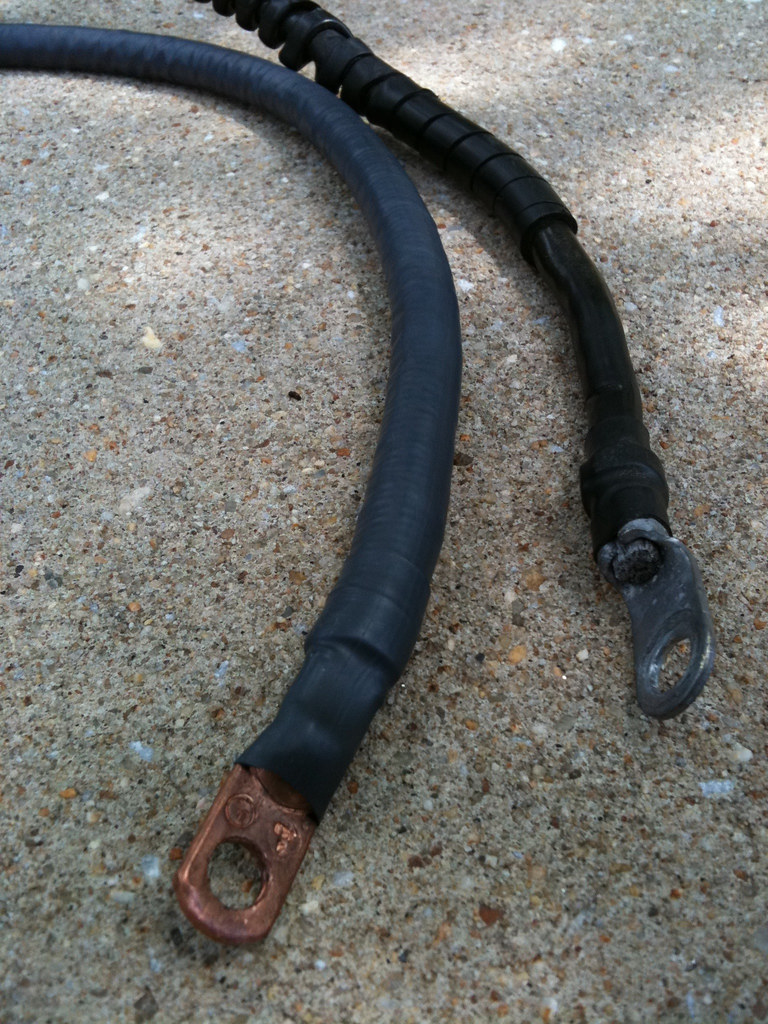
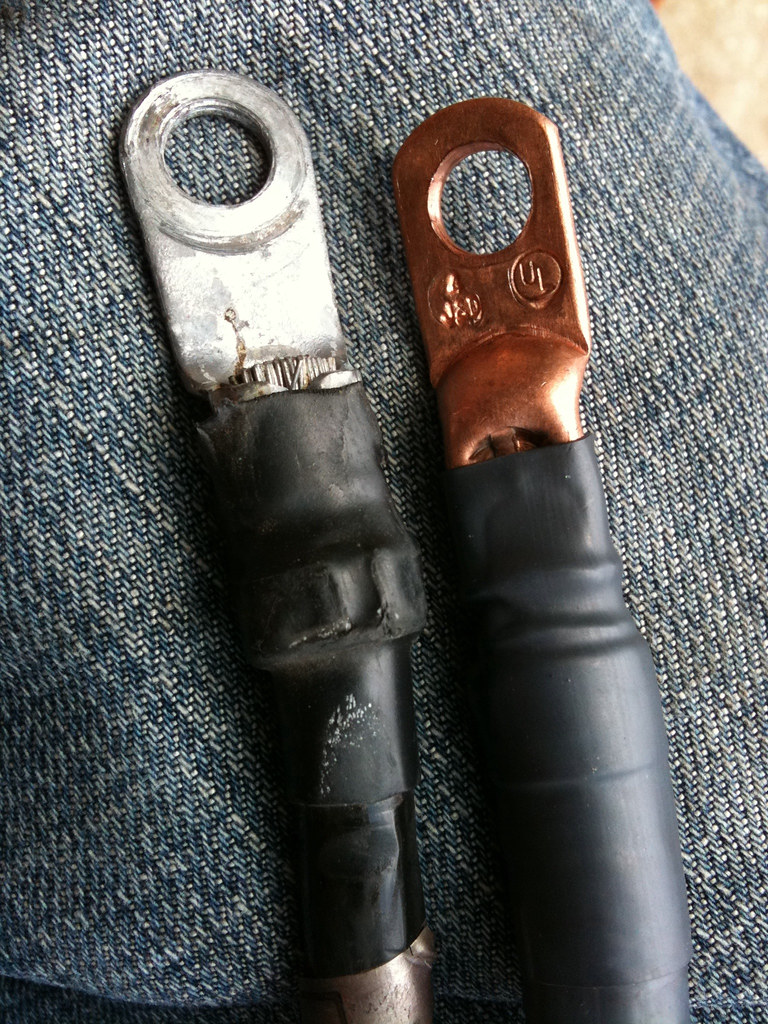
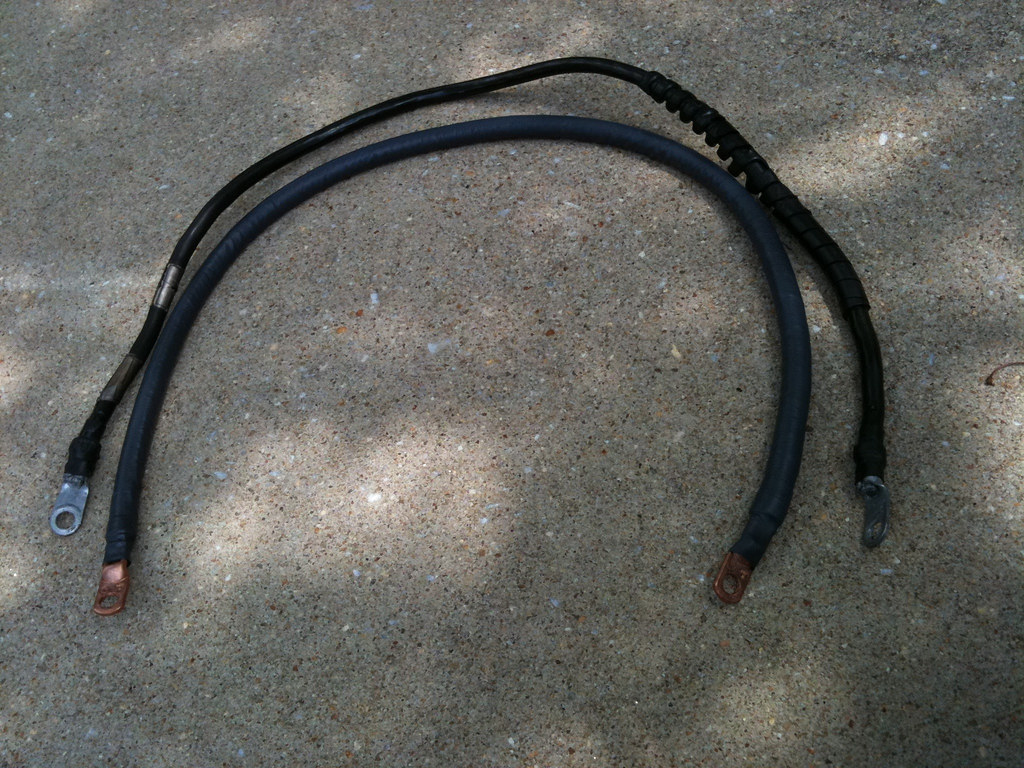
Old and New cables
More old and new pics
More old and new:
1991 BMW 850i / V12 5.0L [M70] / ZF4HP24 E/H
Folie a Deux
Congrats Michael for digging through the archives and researching old posts for good information. If only more people did that......
achthundertfünfzig
This is something mine desperately needs, I noticed the insulation was starting to go when I was in there last.
Watch out for the little blue warning lamp wire, when I went to disconnect it on mine the whole wire just came apart and tore off! They don't do well down there because they're so close to the exhaust manifolds!
Member
Just a quick question regarding the alternator wiring....
I can see the big thick cable that goes to the battery "+" terminal, but where does the thinner smaller (brown?) wire travel to? This is the one that is pretty frayed and corroded on my car. What is it's function? Is it replaceable? What is the blue wire for?
Is the thick wire the only one in max's kit or does it come with both? The thicker wire looks really thick...can it still fit inside the metal support bar?
Member
BMW V12 ALTERNATOR CABLE FITTING INSTRUCTIONS
These instruction show you how to replace the alternator cable running from the back of the alternator to the jump post box at the rear of the engine bay bulkhead with the new upgraded and insulated cable.
We very strongly recommend disconnecting both batteries before commencing work. Disconnect the lead from the jump start post by undoing the 13mm nut. Now disconnect the lead from the rear of the alternator, it is the larger of the two cables retained by a 13mm nut. Now disconnect the cable tube from the engine by removing the bolts retaining the metal tube the cable runs through to the engine.
You can now cut off the connector from one end and pull out the old cable from within the tube.
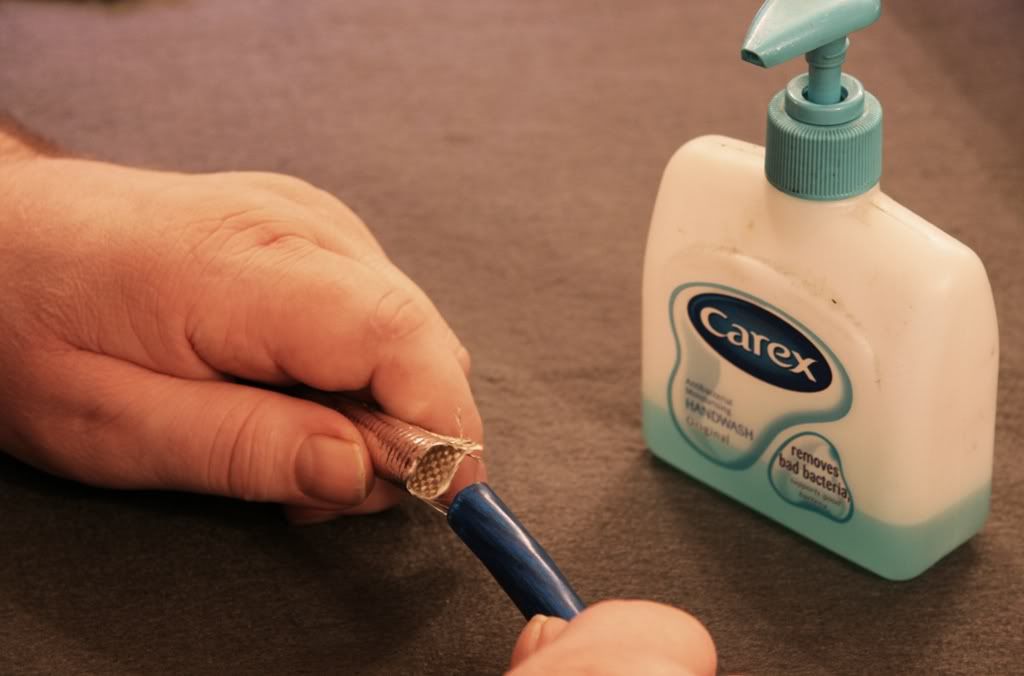
Taking the new cable, thread it through the length of heat insulating sleeve supplied.
The easiest way I have found to do this is open up the sleeve with a stick or similar and then use a liquid soap within the sleeve whilst inserting the cable and feeding it along its length. Various lubricants would be suitable as long as they are not flammable or dry quickly. Once through, you will have a length of cable protruding from each end.
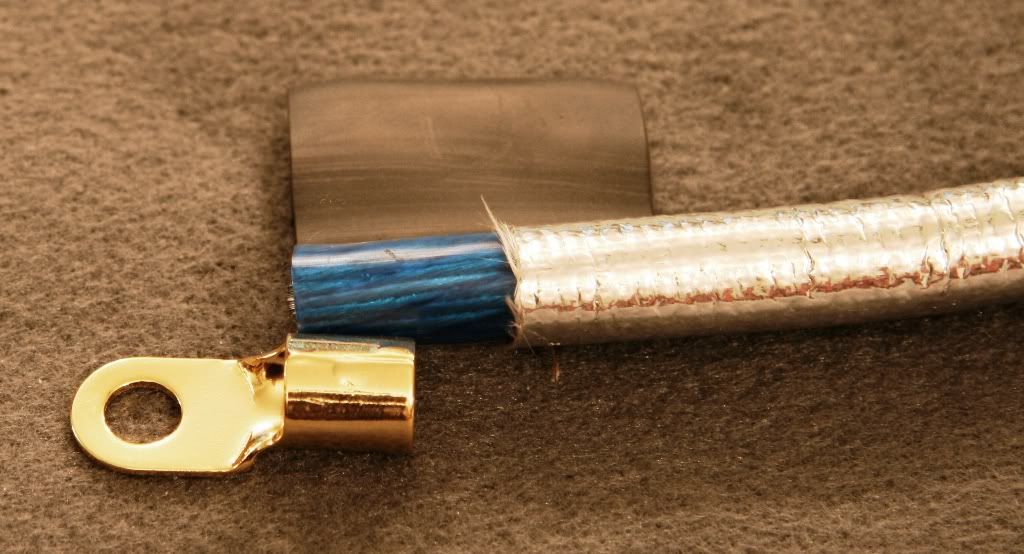
Now thread this cable with its insulation, through the metal tube. A similar technique can be used here as was used inserting the cable through the sleeve. Once through, bare 15mm of wire from each end of the cable. Insert this into the gold terminals supplied and crimp. Ideally, this connection can also be soldered.
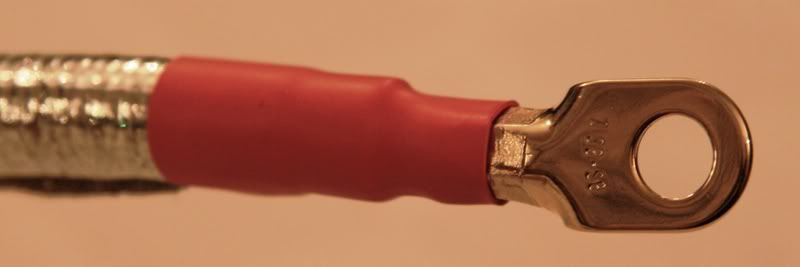
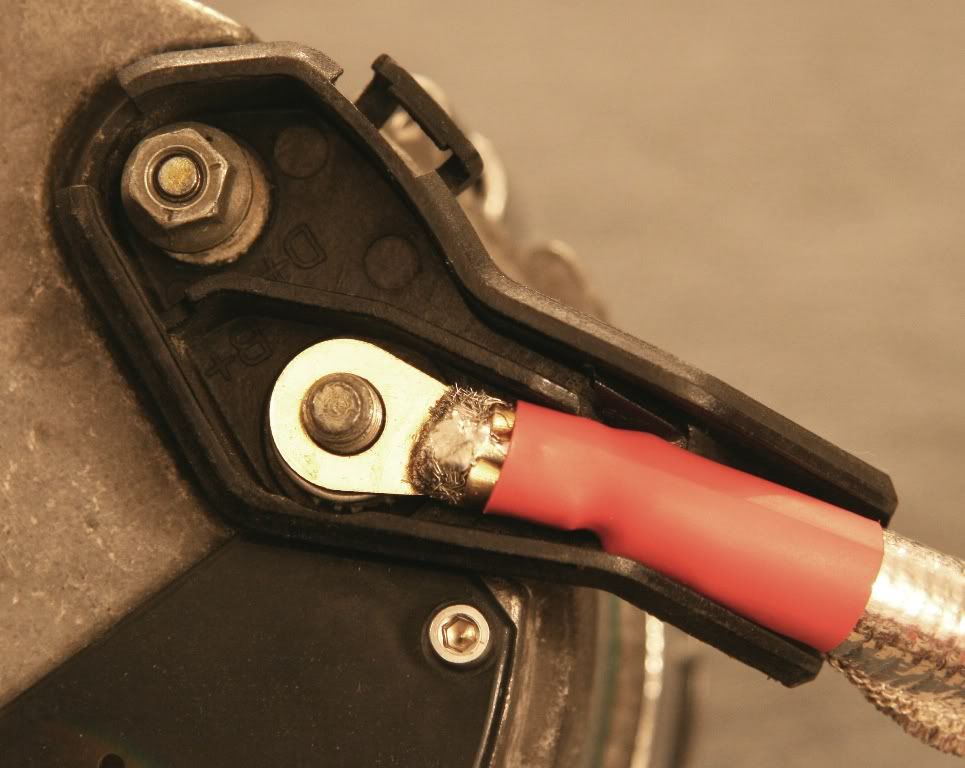
Now retract the heat protective sleeve a minimum of 15mm along the cable so that there is a clear gap between the end terminal and the protective sleeve of at least 15mm. Secure the sleeve end with a short length of electrical tape. Slide on the heat shrink provided and slide it over the sleeve also. Heat to shrink until tight. This will securely hold the sleeve in position as well as insulate the new ring terminal. Repeat for both ends.
If you are not fitting the 6.0l or turbo kit then the assembly is now ready to refit. If you do have the 6.0 or turbo kit, now wrap the metal tube in the insulating jacket and secure with the velcro fastening. (Note, you will need to cut the jacket to wrap around where the tube mountings meet the tube. This is designed to be a loose fit. It may be secured at each end with a stainless steel cable tie if required to neaten the install.)
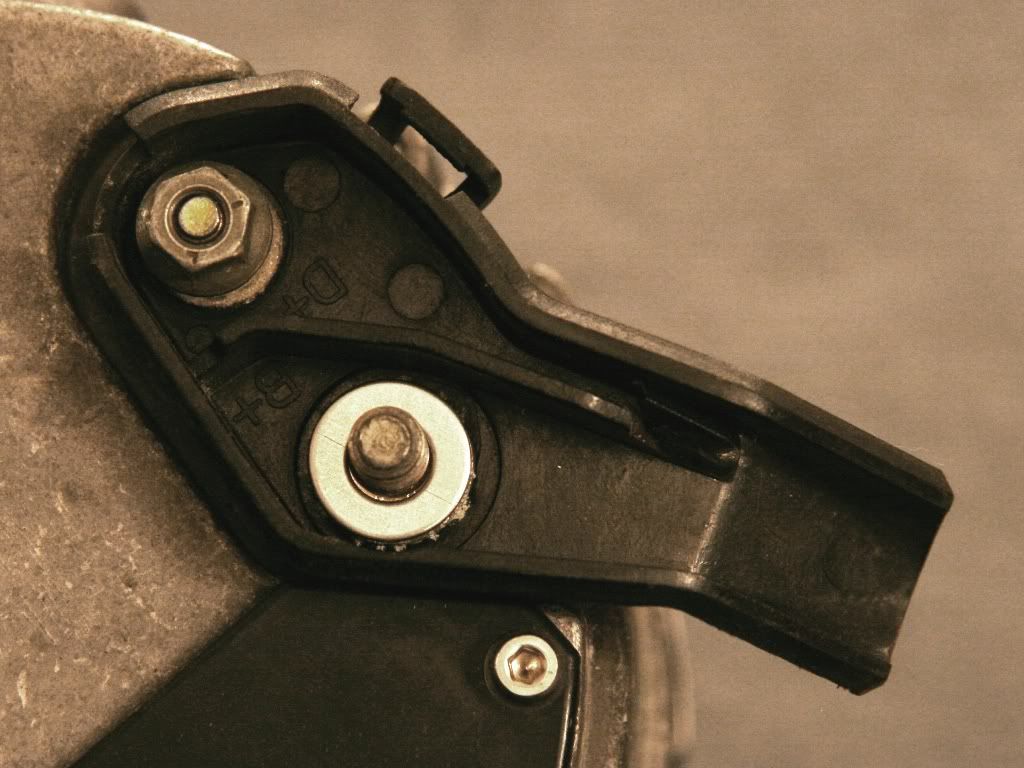
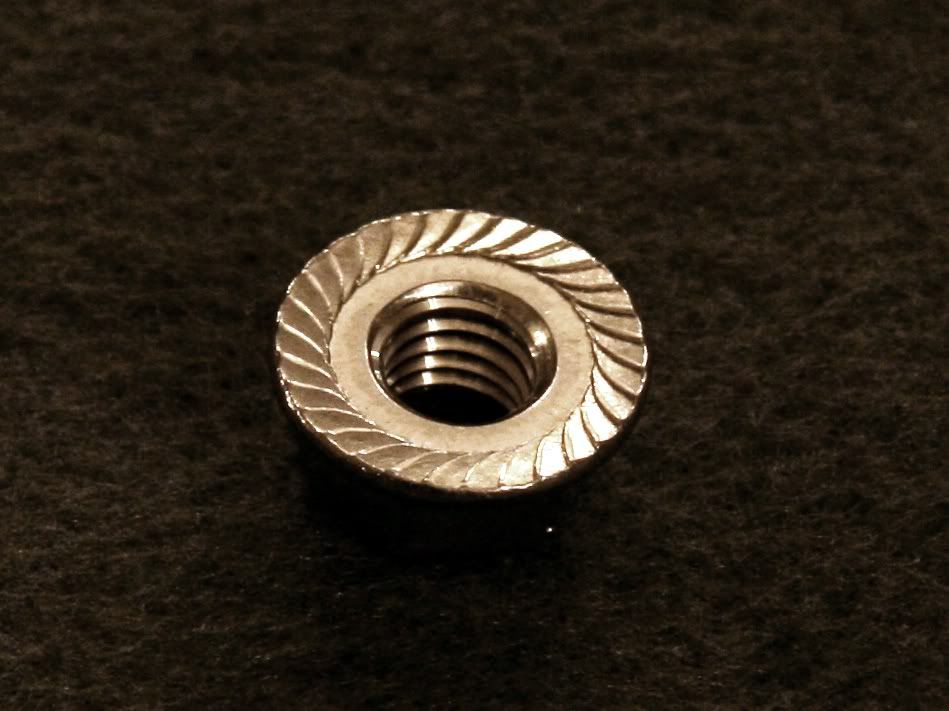
Refit the new assembly and using the new stainless steel fasteners supplied, firstly fit the new washer to the alternator post, then the lead, then the serrated flange nut. Refit the jump post end in reverse order of removal. (Alternator removed for pics)
We now recommend checking the cable insulation and installation before reconnection of the batteries by ensuring an open circuit between any part of the visibly exposed insulation material and the positive jump post. Any circuit here will indicate a short circuit between the thermal jacket and the core of the wire or end connector and MUST be rectified before progressing further.
With an open circuit proven, the batteries can be reconnected and the voltage checked with the engine running to confirm correct operation of the alternator.
Member
Anybody know of any alternator cable / wire kit available to purchase?
Member
Think I have a couple of kits left - contact me at: wuffer at shaw dot ca if interested.
91 850 (Panzer), 2012 Mini Cooper Countryman (WifeMobile) www.wuffer.ca
Member
A local 8er was over toady and his cable was fried. I got to look into mine.
Member
Just make your own, make it longer, and run it across and along the engine bay back to the power junction. This keeps it away from the hot engine. I used marine cable, though I forget the gauge off the top of my head.
Very simple mod to do, and it eliminates the fear of engine fire caused by the stock cable in the tube.
Live, Love, Life, Amazing...
Member
Have one 850 kit left if anyone is in need/interested.
wuffer at shaw dot ca
91 850 (Panzer), 2012 Mini Cooper Countryman (WifeMobile) www.wuffer.ca
Member
Thanks again Tom for your shipment! Perfect time to change my fried cable.
 Posting Permissions


 Reply With Quote


Bookmarks