
 Crazy Cracker
BMW CCA Member
Crazy Cracker
BMW CCA Member
Thanks man.Originally Posted by dcskate102

Cam removal
Well took off from work today to remove the cams, studs, cam carries, lifters, and go to the machine shop. This was a blast!!
intake & exhaust stud removal. (note: taking off the intake and exhaust studs is not necessary for standard head work. They can be left on as I later found out.)
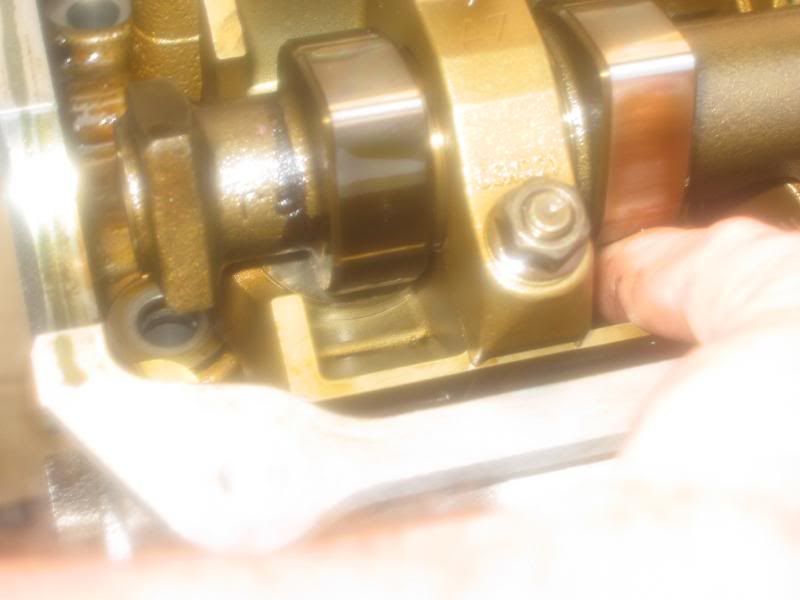
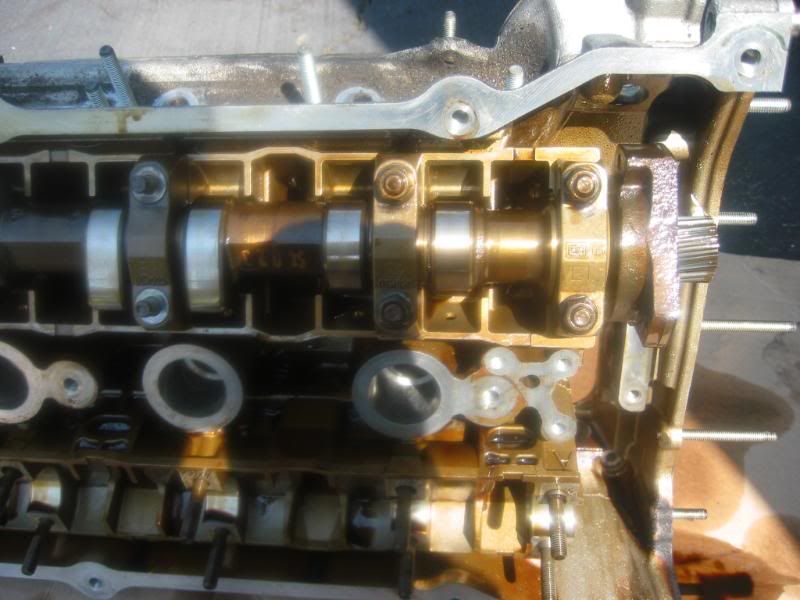
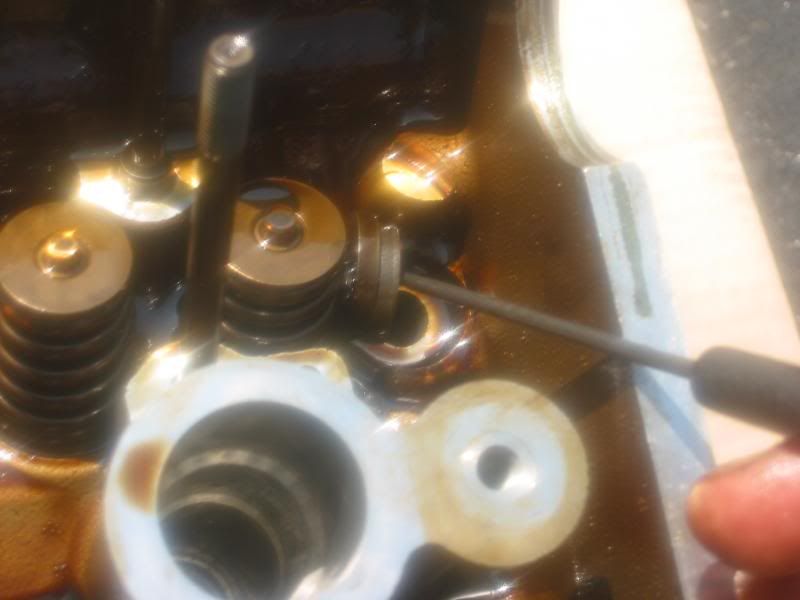
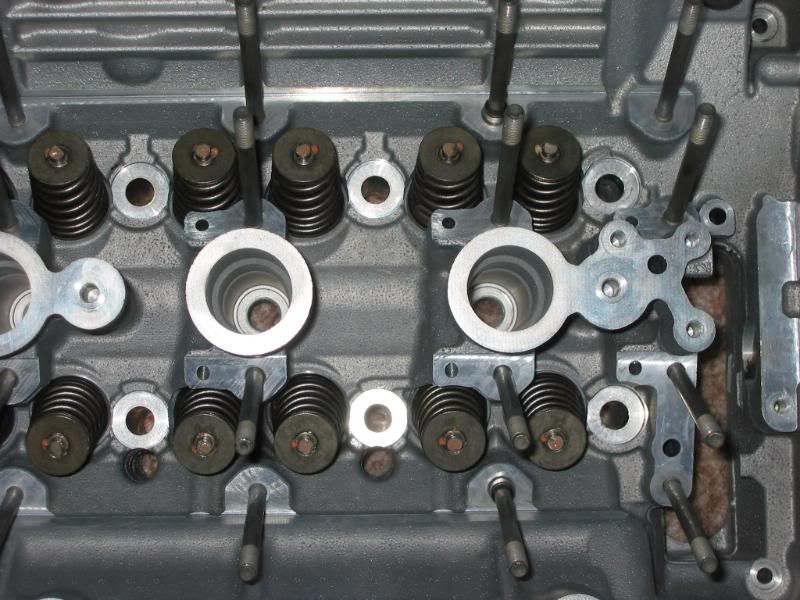
Used Pelican's tech article on cam removal from post #1. Rotate the cam until cylinder #1 is the only one that has tension on the lifters.
Lifters should spin freely on 2-6 lifters. Make notes where the cam is rotated. The lifter is the little round thing under the cam.
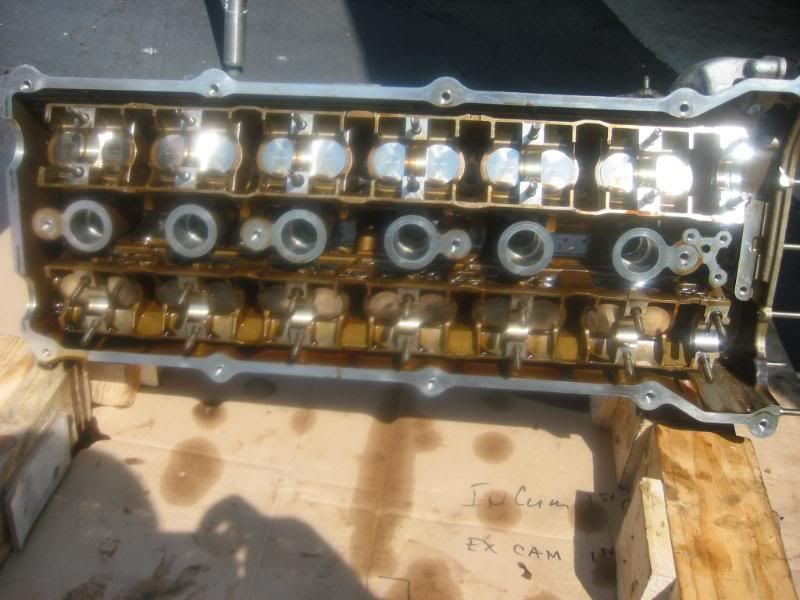
Remove cam carrier caps 2-6, and document how / where they go. I found this easiest to do with the head on it's side.
Have a SECOND person hold the cam in place while you loosen the last 2 caps by the 1/8-1/4 turn. There are just enough threads on the bolts to do this. Repeat for the other cam.
Put the head on it's side. Wiggle out the lower carriers with lifters. These puppies were really in there. They will not fall out the top of the carrier, BUT WILL fall out the bottom.
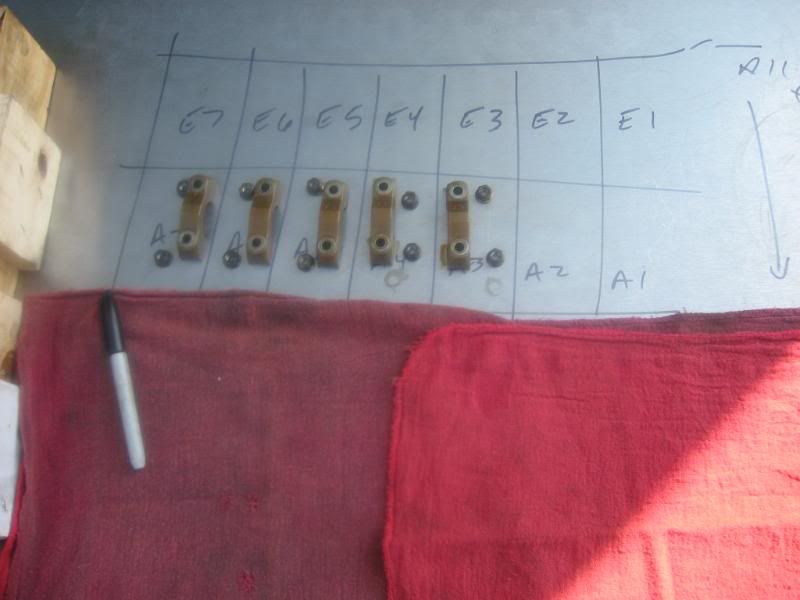
All parts documented in placement. Lifters should be stored in their upright position.
Remove the washers that were below the head bolts. Note where they go for good measure.
Off to the machinist.
Well it was a long driving trip the machinist. Baltimore to Sterling, Virginia is not easy on a Friday around the DC beltway.
It's a small shop and the guy immediately knew it was from an M54. Makes you warm & comfy when they guy working on a random part can identify what it's off of from 20 paces.
He said porting and polishing was done at another site to the tune of $1200-1600 on top of the normal service he does. That wad of cash is not in the budget, Mega Millions is not working out in my favor.
He'll call next week with an estimate.
Last edited by Jackcat559; 05-30-2010 at 09:39 AM. Reason: Automerged Doublepost
Member
Oh my!
Looking for an E39 belly pan , passenger front inner fender liner
Member
Hey, how much time do you think you've spent on this so far? I'm about to tackle this and am borrowing a car. The wife is killing me and I haven't even started yet. Just looking for a time frame. I don't care how long it takes me, but man...it'd be nice to get done to get her off my back. Hehe.
1997 528i: My intro to Bimmers
'99 ///M3: I.LOVE.THIS.CAR. - SOLD... why did I do that?
2002 325xi Wagon - SOLD
2004 325xi Wagon - New Wagon, Same Old Issues
Crazy Cracker
BMW CCA Member
I've been taking my time, so about 2 1/2 days so far. The machine shop will be about a week.
Here are some high end numbers. If you find cheaper, get a 40oz, and pour one for the homies.
ball park averages:
head gasket $85
gasket kit $225
exhaust manifold gasket $45
vanos seal $60
machine shop (varies) $500 +/-
fluids (mandatory) $100
small stuff $30
special tools $450
Last edited by Jackcat559; 05-10-2009 at 08:32 AM.
Member
Jackcat--since seeing this post I'm contemplating a change out of my intake gaskets
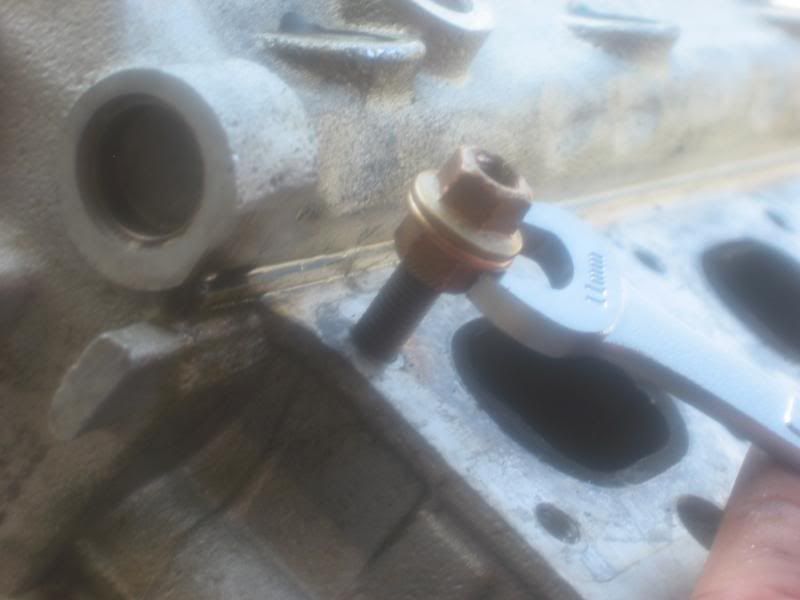
and cleaning my intake--you mentioned a 16mm bolt or nut that you had trouble with--would like to know more about that and how to remove the positive power post on the top of the intake---I'm sure that before starting this that the battery is of course disconnected--car now has about 150k miles --and just thinking that at that mileage would be a good time to freshen up those intake gaskets---any coments
Thanks
Crazy Cracker
BMW CCA Member
Since this wasn't intended to be a though DIY I didn't get into basics of draining fluids, disconnecting the negative first on the battery....
The 16mm bolt is where the Bentley manual states where it is. By the drivers engine mount, and very hard to find. Used a flexible wrench with a ratcheting feature to reach ithttp://www.sears.com/shc/s/p_10153_1...sName=Wrenches One way to get to it is on your back from under the car. Another is to remove the trottle body for better access.
The positive power post and all that is in the manual. Unscrew the bolt and thread the cable through the intake.
My feeling on gaskets if it's leaking, or the seal is broken by removing parts, replace it. They are cheaper compared to time and labor
Last edited by Jackcat559; 07-24-2010 at 10:27 AM.
Miami Performance Inc.
After the head gets re done, ship it here. We'll do porting/polishing on that head for under 400 bucks just cuz you rock!
'02 E39 530i/5sp Topaz Blue/Black Interior - MegaSquirt3x - Garrett GTX3582R turbo - E85 fuel - Apex FL-5 - 265/295 tires - Custom Porsche Brembo BBK - 600whp @ 22 PSI
'15 E84 X1 35i M Sport Alpine White/Coral Red Interior - H&R Sports & Bilstein B6 - Velgen VMB5 - 265/305 tires - ETS FMIC - MPI Charge pipe & DME Flash - 3.5" down pipe
Crazy Cracker
BMW CCA Member
WOW, that would be a great deal, but I've had extremly bad luck shipping car parts & having them damaged.
Did some digging on the arragate oil filter housing leakage. Found these:
http://www.bmwtips.com/tipsntricks/oil/housing.htm
And from BF:
slycapt02-18-2008, 08:44 PM
Just wrapped up some work to resolve a pesky oil leak. Unfortunately it still leaks, yet there is more to this story. This car is a '00 528i with about 80k mileage.
It appears the gasket behind the oil filter housing, which BMW calls the Aggregate Support w/ Oil Filter, is prone to leakage. This looks a lot like a pan gasket leak.
I first cleaned everything up, and replaced the Oil Filter cover O-ring just to be sure it wasn't something this easy. It wasn't.
Replacing the agg support gasket isn't too bad of a job, and also provides an opportunity to replace a hose or two, and get one of those deep inside the engine looks that you can't see very well from above.
Also once you get everything apart (remove air box, unbolt fan leave in shroud, remove water pump drive belt, remove alternator, set aside power steering oil carrier (reservoir), unbolt and set aside power steering pump) you can see why this gasket is prone to leakage. Aside from being a cheap gasket, it gets hot and the support carries a lot of load from the accessories and drive belt load.
While I had this all apart, I replaced the vent pipe hose that runs off the VANOS and into the pressure regulating valve. This is a tough hose to get to, and was very brittle. Also replaced the suction line to the power steering pump. It was rock hard, and seeping.
While I had the alternator out, I gave it the once over. Seemed to spin ok, and had no previous known issues. I pulled the plastic cooling housing and was surprised to find it full of small leaves and various debris. This could have been a latent short circuit waiting to occur.
Gave the engine a good cleaning while the access was good. This certainly helps to observe the results of your work, and to keep an eye on leaks in general. Unfortunately this area still leaks, and I am bummed.
When I compared the old gasket with the new one, the new one was almost twice as thick. The old one barely protruded from the support housing, as it was compressed and set. It was quite hard as well. I thought this was a no-brainer of fix. New gasket installed, snug it up properly, no more leak. Not the case.
Is there anyone out there with some helpful experience with this gasket/repair? I do not believe the gasket has a pinch or crip as is seats very securely in groove. This is one of those nuisance leaks, which drives us bimmer fantantics crazy
Last edited by Jackcat559; 05-13-2009 at 05:22 PM. Reason: Automerged Doublepost
Crazy Cracker
BMW CCA Member
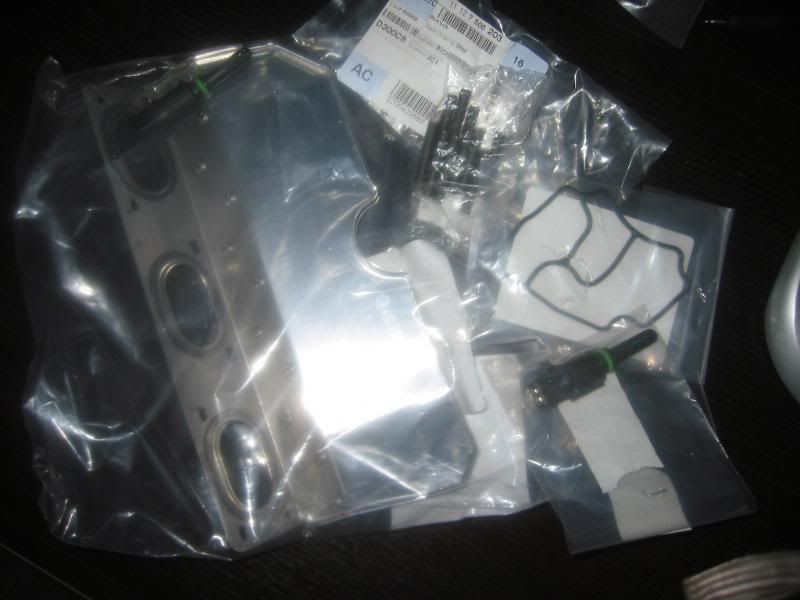
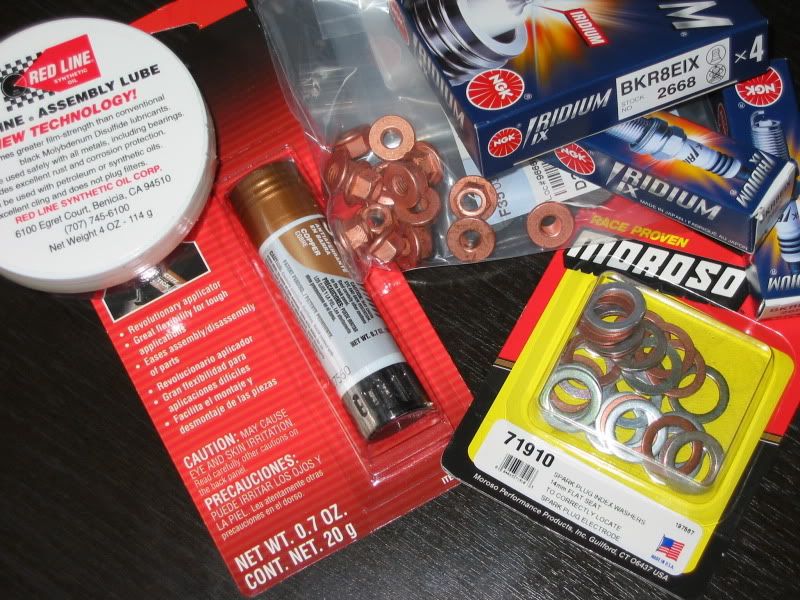
More parts this week. Decided to index the plugs. New exhaust bolts ( was missing 1/2 ), copper anti seize, assy lube, index washers, oil filter housing gaskets, and a few othe small bits
Last edited by Jackcat559; 05-13-2009 at 05:28 PM.
Boosted Member
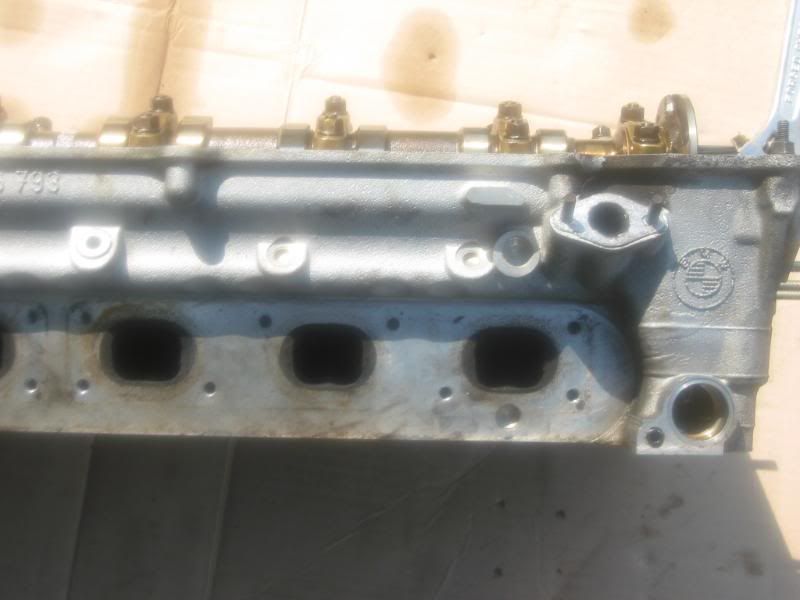
Hey, are some of the exhaust stud bores missing from the head, or is it supposed to be like that?
Garrett
Crazy Cracker
BMW CCA Member
All I6's are there. Does seem like the bolt pattern is a bit odd. Hey, Garret did you have to tension your timing chaing via the primary tensioner to 6in-lbs?
Last edited by Jackcat559; 07-19-2009 at 05:18 PM.
Boosted Member
Interesting, there are 24 exhaust studs on the S52.
Yep, same deal re the dummy tensioner.
Garrett
Crazy Cracker
BMW CCA Member
Did you actually tension it with an in-lb wrench, or is there a way around it?
Boosted Member
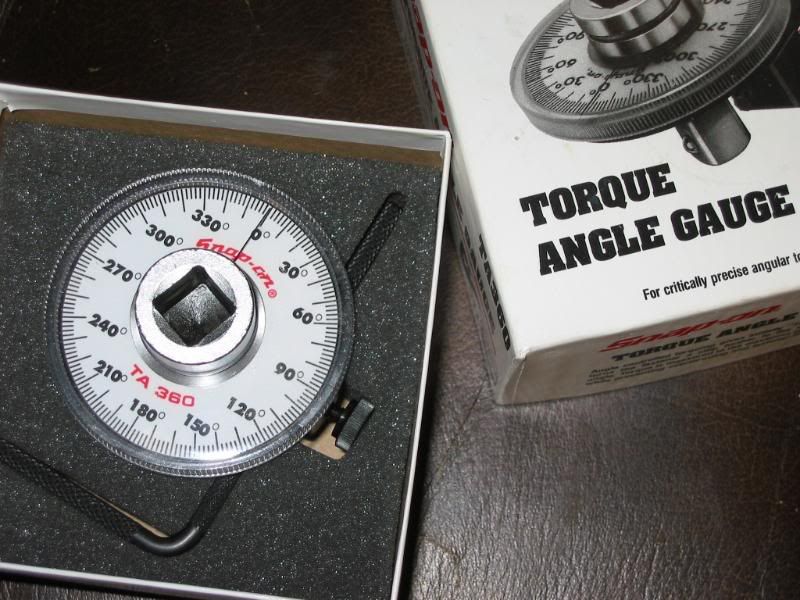
The same buddy who sent me that awesome TechAngle wrench, sent me his in-lb wrench (says its critical for proper vanos set-up). So I will be using it, hopefully, this weekend. Been out of town the last 2 weekends and so I'm still at it. Only thing left is vanos . . .
Pelican says you can just tension the dummy tensioner "finger tight" and be close enough, and I suspect that's correct.
Garrett
Crazy Cracker
BMW CCA Member
Called the machinist yesterday. The head should be back late next week. Nothing too crazy was found.
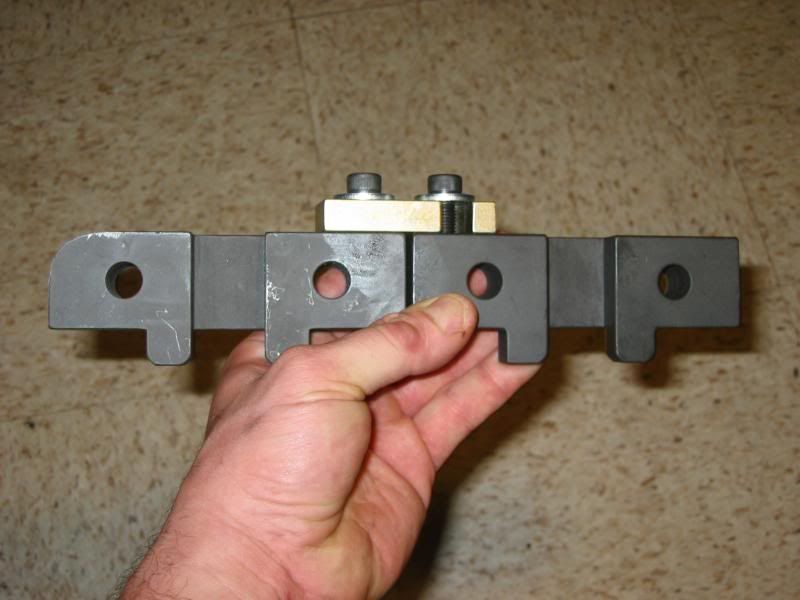
Ground down the exhaust side of the cam shaft tool to clear the ABS heat shield. This was the main reason it wasn't used during disassembly.
Ebay has provided a new tool for the head bolts. They must be cranked an extra 90 degrees twice.
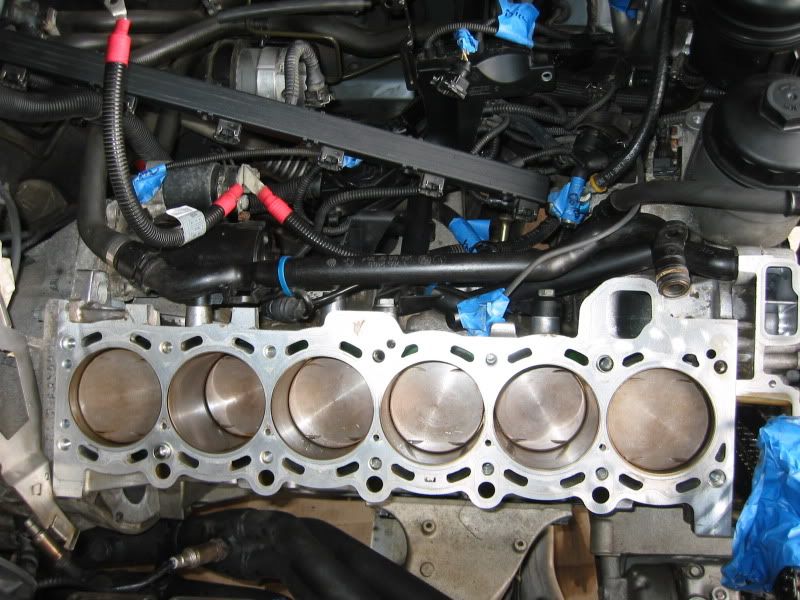
Cleaned the engine bay, pistons, bores, and block today. Most references said to use acetone ( nail polish remover ) to remove the gasket material.
Last edited by Jackcat559; 05-20-2009 at 05:05 PM. Reason: Automerged Doublepost
Crazy Cracker
BMW CCA Member
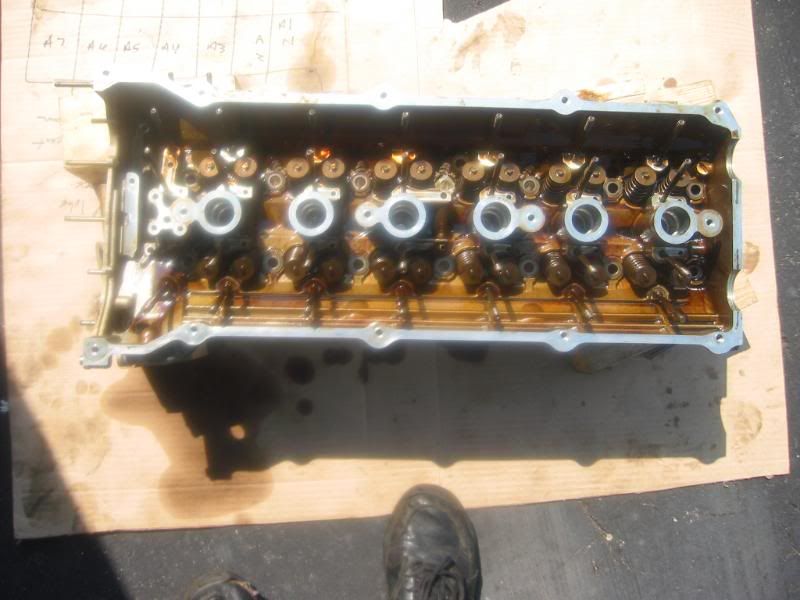
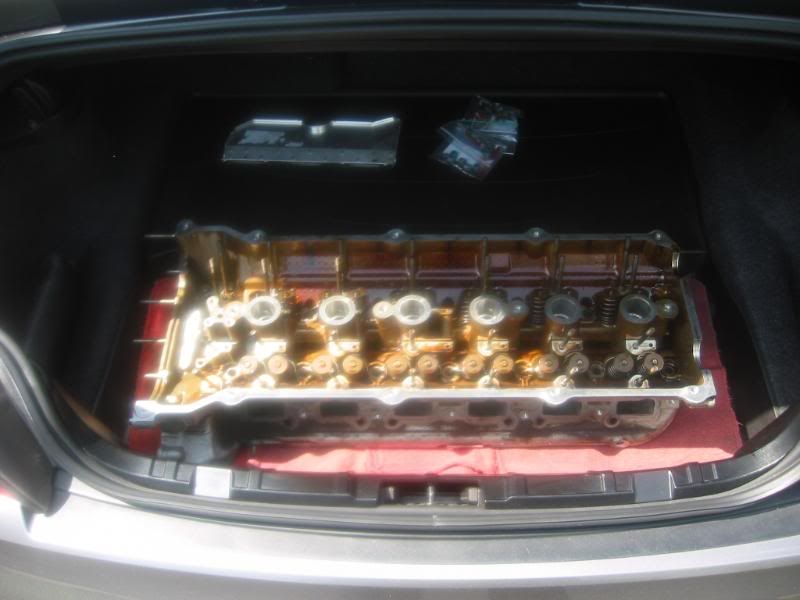
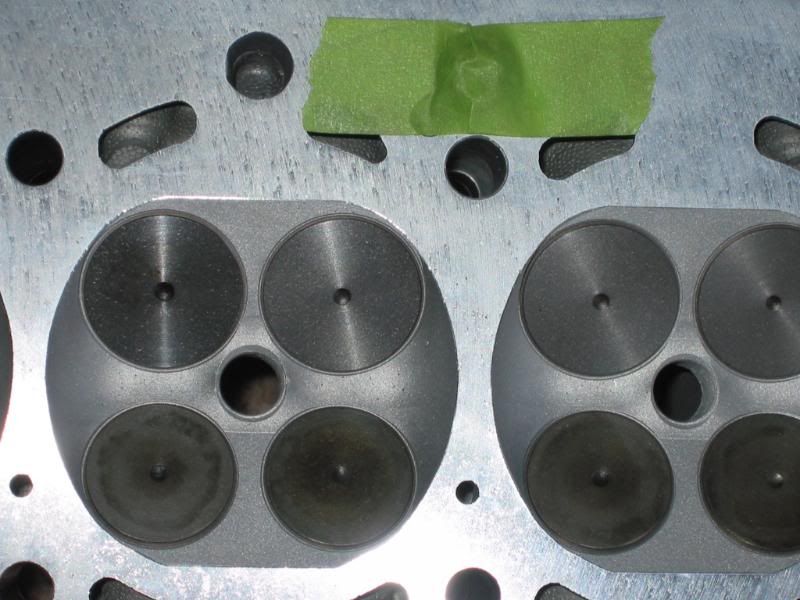
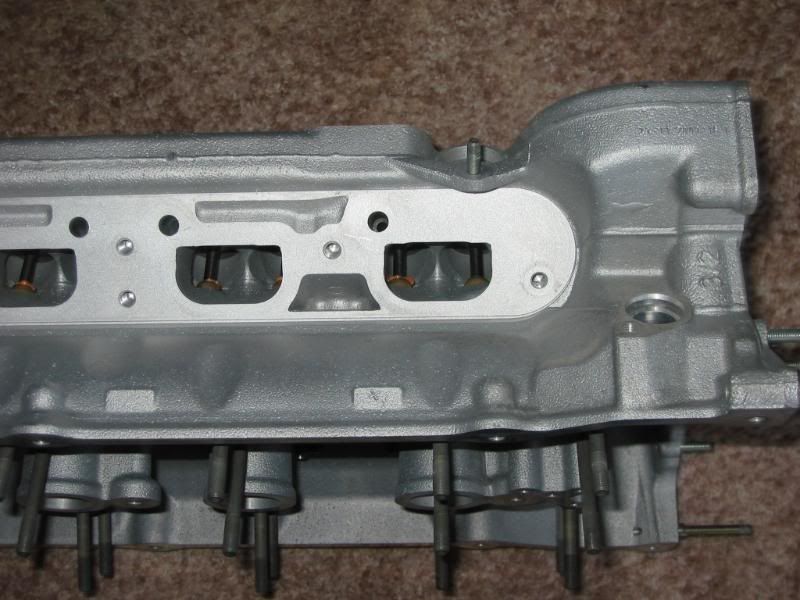
Picked up the head from the shop, and left a few hundred behind. Nothing unusual to report back. Just very dirty. Shaved the deck a bit. Valves show normal wear. Didn't need to remove the intake & exhaust studs.
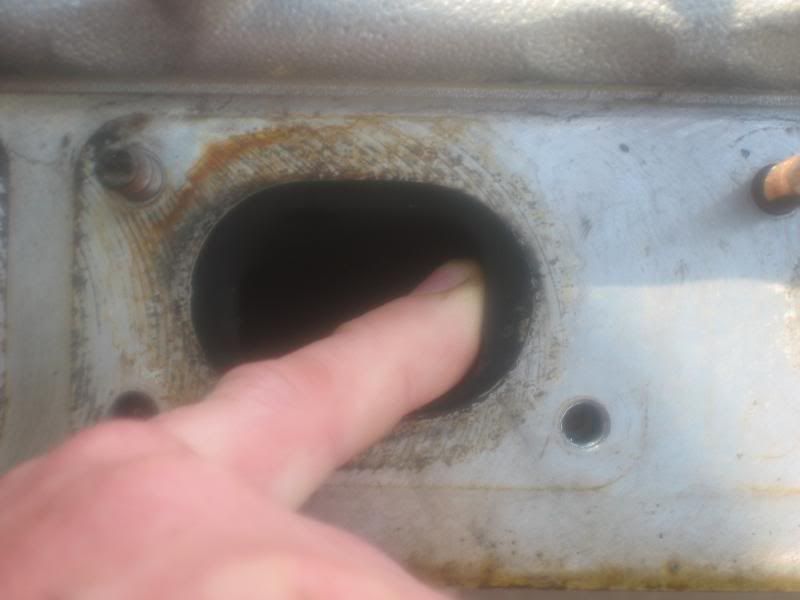
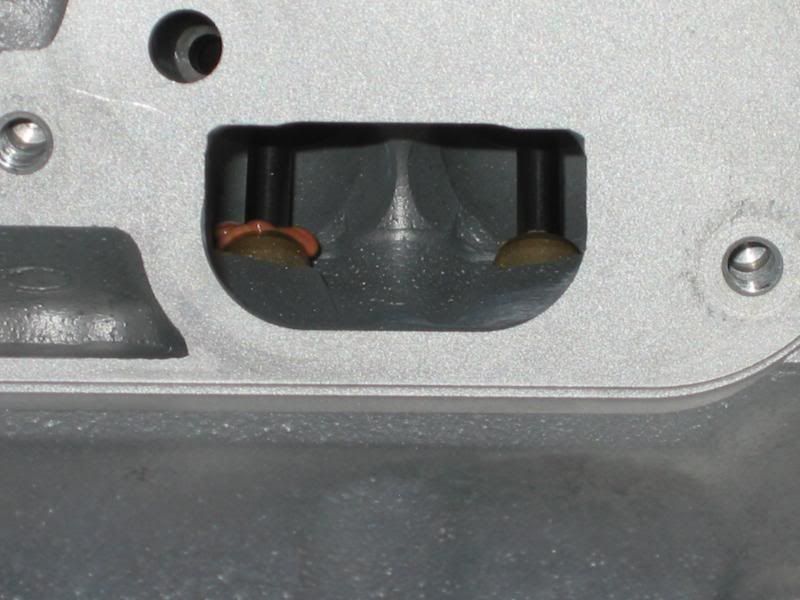
Under the tape is a check valve. The machinist recommended replacing the o-ring. The whole valve, with o-ring is $12
Drop me a PM if you're in need of a good machinist in the Baltimore / DC area.
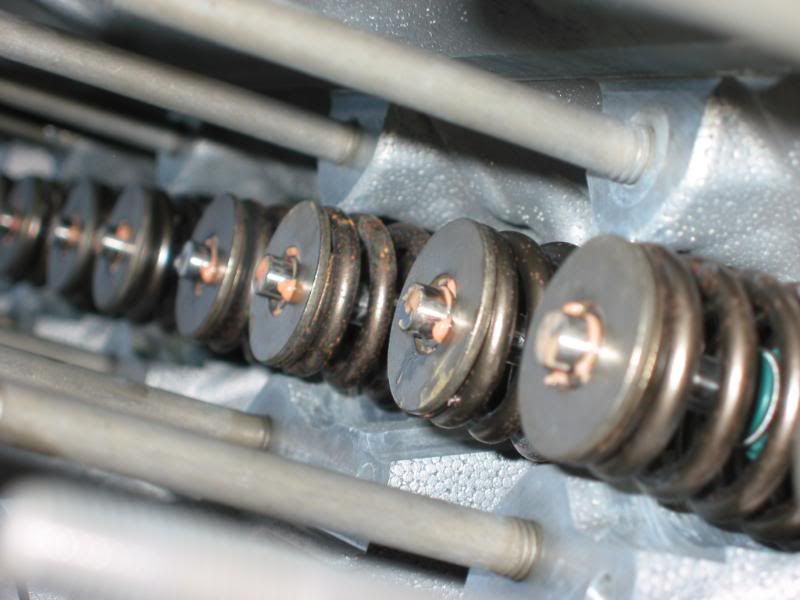
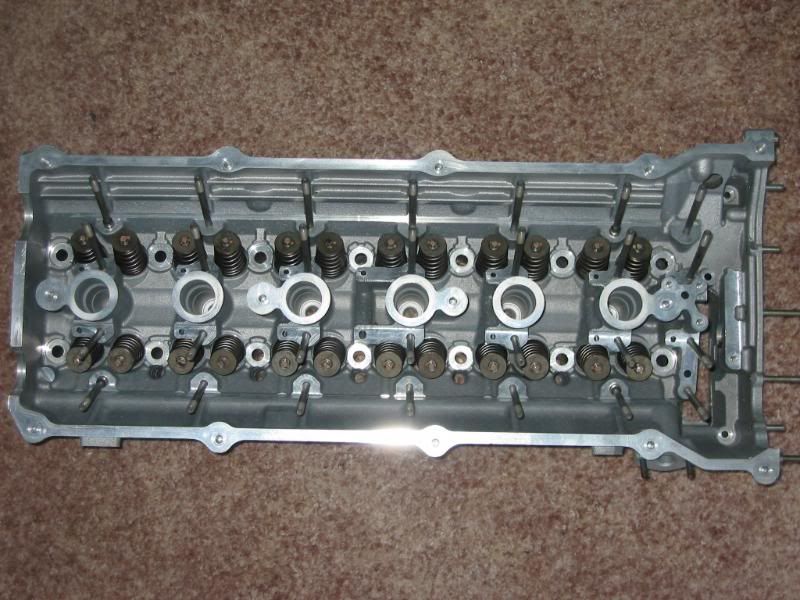
Also there is an option to run SuperTech valve springs for an additional $500. These are primarily used in high reeving race engines, and forced induction where boost psi is over 15. The idea is, the valve will return to a closed position faster under load. This is when the spring would have enough momentum not to follow the cam during high rev's (floating).
Last edited by Jackcat559; 07-24-2010 at 10:30 AM.
Boosted Member
Whoa that's purty!
Didn't need any new valves, huh? I had to replace like all of my exhaust valves and 2 intakes. EDIT: I see it looks like he replaced half your valves, too.
Regarding that dummy tensioner tool: I think my tech/buddy is right. Getting the in/lb trq. correct does seem pretty critical. The torque spec is a lot tighter than "finger tight", and I could see the chain move, albeit a tiny amount, as I continued to trq. the dummy tensior past "finger tight" and all the way to spec.
Last edited by Mad Dog 20/20; 05-20-2009 at 04:36 PM.
Garrett
Member
Awesome! I will tell you that the feeling of DIY and accomplishing what you set forth is priceless! I'm the type that won't allow anyone including trained BMW Technicians to even lay a finger on my car unless it's FREE. Bought the 540i as a project car!
Crazy Cracker
BMW CCA Member
He wasn't to chatty today. Just said nothing major, and normal high mileage wear. Some of the valves do look new though.
Ok now which one of us is going to have their car running first, since we are almost at the same point in reassembly?
Re-read the Pelican article about the tensioner. I've been eyeballing an inexpensive 0-15 in-lb toque wrench on Amazon for $137. Money I wish I didn't have to put out. Oh well.
You are soooo correct. Looking back at the indy's and dealers 20/20. Now I can see the things they should have done. It would be easy to be angry about it all, but I'm not. It all forced me to grow, learn and push myself. All that hippy stuffAlmost thankful.
Now let's see if I can get it to run
Last edited by Jackcat559; 05-20-2009 at 05:02 PM.
Member
Yep --thats nice and clean work---good job dude--wish I could hear her crank after all this---That check valve thats under the tape--what does that do--is the tape removed when placing the head onto the gasket?
Crazy Cracker
BMW CCA Member
Thanks.
Not sure what it does yet. I've ordered a new one w/ o-ring already. The tape is there just to hold the un-screwed part in place. This let th o-ring, in question, to be shown easier to the goof ball owner.
Last edited by Jackcat559; 05-20-2009 at 06:08 PM.
Boosted Member
I am all but done . . . just waiting on a few little parts and fluids, which should be here this week. Everything is back together, except the intake manifold/intake. I'm putting an aftermarket water temp sensor in the head and am waiting on the sender and adapter bushing. Then add fluids and crank (and cross fingers, toes and anything else I can think of)!
But I am also thinking about doing the oil pump, rod bearings and installing baffles in the pan. So you'll prolly beat me to the finish. The car has been down for so long and the weather is so nice, though, I may have to defer the bottom end for a few weeks and test out the head work.
Wow, I had no idea those little inch/lb trq wrenches were so pricey. I would definitely try to source one though if I were you.
Garrett
Crazy Cracker
BMW CCA Member
Sounds almost like a totally rebuilt engine by the time your done.
Did you consider attaching the exhaust to the head, then installing on the block?
Tried a few friends for the wrench with no luck. Believe it or not, that's the cheapest. Snap-on can go above the $300 mark to start.
Member
Jackcat - Nice work man! You deserve a mental timeout, a trip to the local cineplex for Star Trek. Maybe even the IMAX version! Some Pepsi, Butterfingers, SnoCaps, Juniormints FTW!
Poolman - have you replaced these vacuum hoses:
http://www.realoem.com/bmw/showparts...03&hg=11&fg=45
They are next for me.
"I'd smash that (Jennifer Connelly) like a failed coup in sub-Saharan Africa."
~Macktheknife in my epic Jennifer Connelly OT Thread
Boosted Member
Its a "poor man's rebuild".
The oil pump/nut on the e36 motors is known to fail and cause catastophic damage. VAC sells an upgraded unit. The motor is also know to suffer with g-induced oil starvation in certain situations on the track. VAC sells baffles to eliminate that. Once the pan is dropped, the rod bearings will be staring me in the face, and they are actually an easy/cheap repair compared to the head work we are doing/did: 12 bolts and 65 bucks later and new bearings are in.
Once its all sorted and running well - I'm going to strap an AA C38 SC kit (425 hp), hopefully this poor man's rebuild will give the motor a fighting chance of surviving boost at the track . . .
I did not try installing the head w/ exhaust moounted. My headers are kinda crazy-shaped and I don't think it all would have fit. But with OE or a more "tidy" set of headers like your SS, that is the way to go.
I put the bare naked head on, THEN installed the trays, cams, etc. I know that's not CW, but it just seemed more logical and easier to me. I had my buddy hold/direct the chain, while I placed the (relatively) light naked head on the block. I coated the lifters with assembly lube, and the viscosity was such that they stayed in the trays long enough to get them in the head.
Last edited by Mad Dog 20/20; 05-20-2009 at 10:19 PM.
Garrett
 Posting Permissions


 Reply With Quote


Bookmarks