
 Crazy Cracker
BMW CCA Member
Crazy Cracker
BMW CCA Member
Pro log
Well doing a head gasket DIY would be nuts. Plus I'm doing a few other things along the way, so here's a little journal of the events as they happen over the next few weeks.
Back story
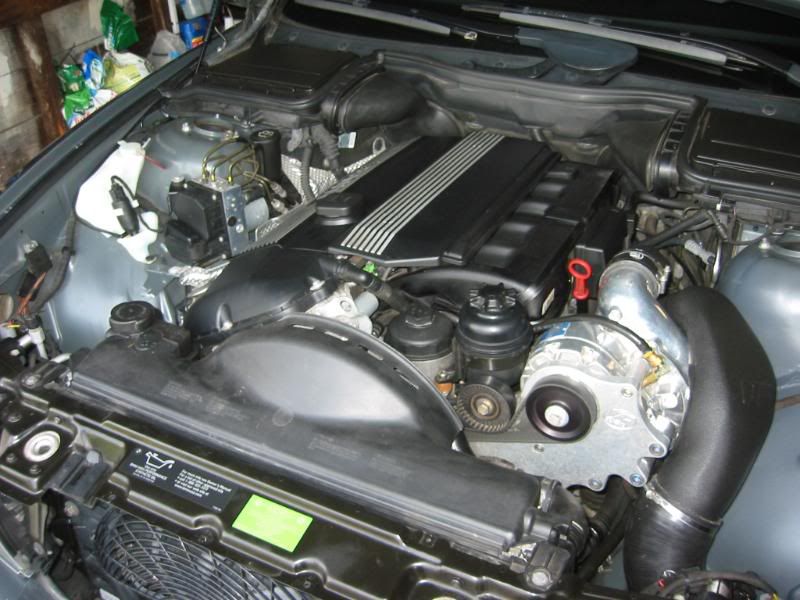
I have owned this car since new. Have done all the maintenance as scheduled / needed. The car has never overheated. That big shiny thing on the front of the motor has been on for 20,000ish miles. A leak down test 3 years ago, when the blower was put on, showed slightly better numbers, but did indicate the head gasket would need to be addressed blower, or no blower. So, the supercharger did NOT cause this condition.
Present Day
About a 1/2 dozen months ago a leak down test came back within barely out of tolerances. So I decided after some bad luck with local shops I would DIY the head gasket. Replace / upgrade parts along the way. Knocking out a few projects at once. All the proper tools and Bentley manuals will be used. If a better part is made it will be used. Otherwise it's OEM. Believe me I looked & contacted companies directly for parts. If it's out there (and not a gazillion dollars) it's in the mix. Expecting some surprises along the way. Not too confident on the last shop that touched the car.
Here's what we're looking at so far:
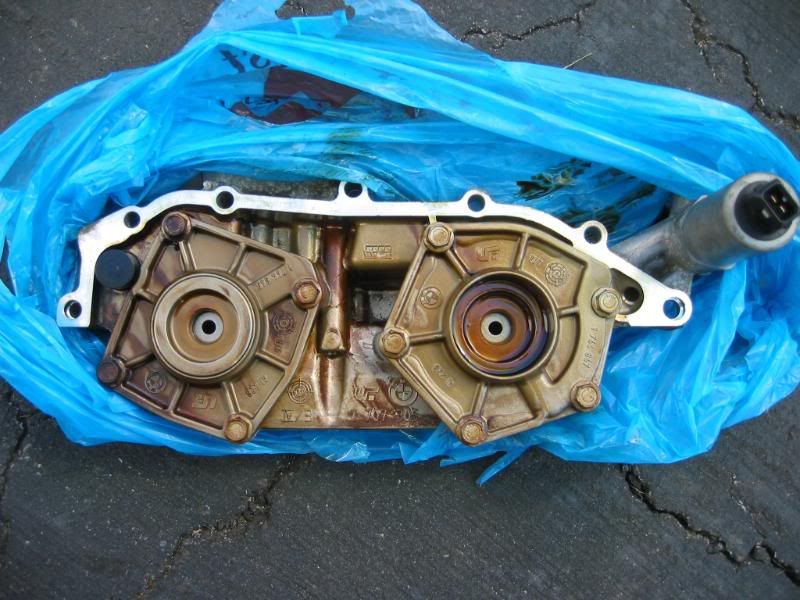
1- replacement of cooling t-stat, Stewart water pump
2- update oil separator
3- remove head and send to machine shop
4- replace all affected gaskets
5- clean everything
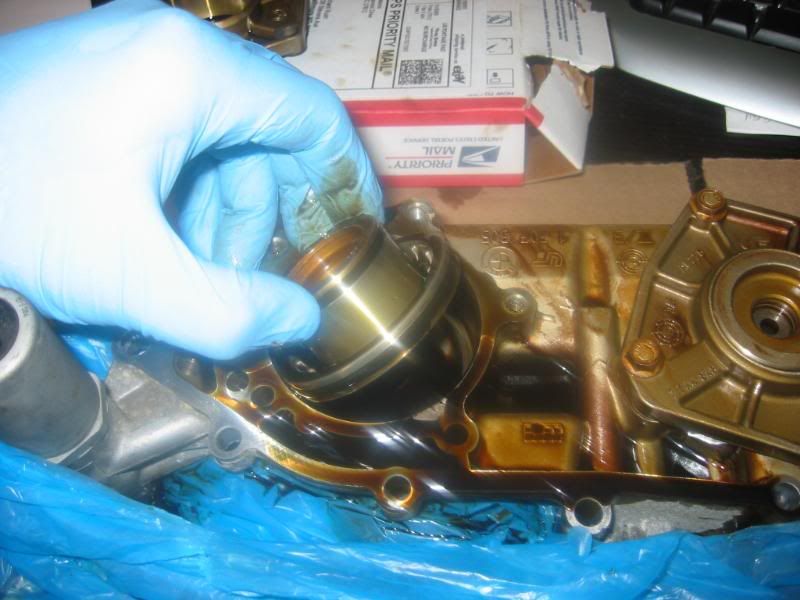
6- replace vanos seals
7- not blow up car, very important
Tools & stuffs used so far:
1- metric wrenches to 16mm & sockets to 22mm w/ breaker bar
2- gasket kit. head gasket comes separately in 2 thicknesses
3- e12 socket for removing head bolts
4- spark plug socket
5- new fluids & filters
6- trusted machine shop
7- new head bolts
8- new vanos seals & exhaust manifold gaskets
9- new spark plugs
10- double vanos timing tools (set)
11- 5-80 ft-lb torque wrench (with newton meter scale is preferred. This way the inch-lb values can be used on the same wrench)
12- tape, plastic bags & makers to label things
13- penetrating oil
14- Patience
15- various other non-related parts that are wise to install ( oil separator, t-stat, sensors, water pump... )
16- vacuum tubes
17- Patience
18- Bentley manual
19- some useful links http://www.pelicanparts.com/bmw/tech...ead-Gasket.htm , http://picasaweb.google.com/cowenj1/BMWFixing#
Cheapest on-line parts found to date http://www.getbmwparts.com/
High Mileage Cars go ahead and have the machine shop install new valve springs. I experienced leaning of the air fuel ratios when on the dyno. It was originally thought to be a failing fuel pump. Come to find out later, at high rev's the old valve springs weren't closing as fast as new springs, and "floating" around the cam. OEM springs aren't tooo expensive. Some of the ol' sckool hot rod guys in the neighborhood confirmed seeing this in there own cars.
Also good sites for parts and such http://www.pelicanparts.com/bmw/index.htm http://www.eactuning.com/?bannerID=181 http://bmwfans.info/parts/catalog/ http://www.autohausaz.com/ http://www.getbmwparts.com/ other sites listed on following pages.
Take pictures for referance, bag and tag parts (because you will forget where they go), and label EVERYTHING !!!!!!
before
Attempting the headers. This is easier if the front is done first, and they are disconnected from the rest of the system. Or even better leave them on, disconnected from the rear system, and remove them with the head.
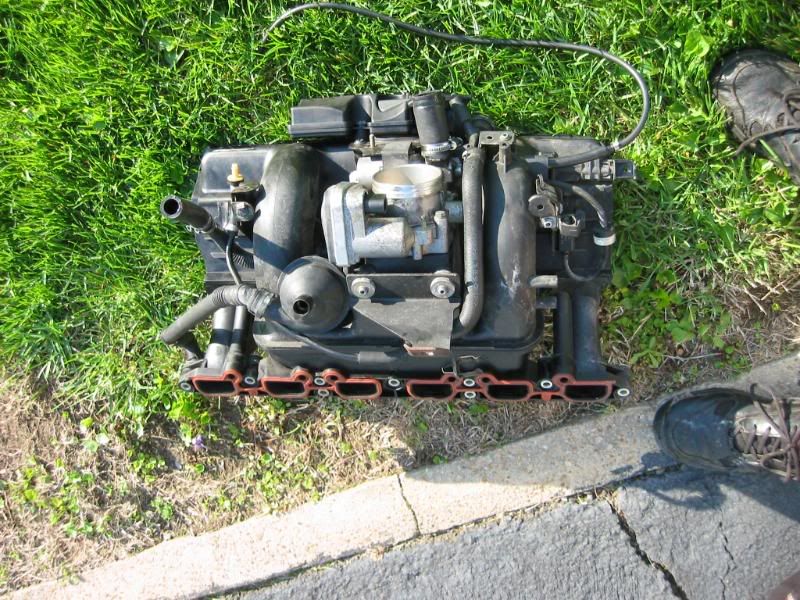
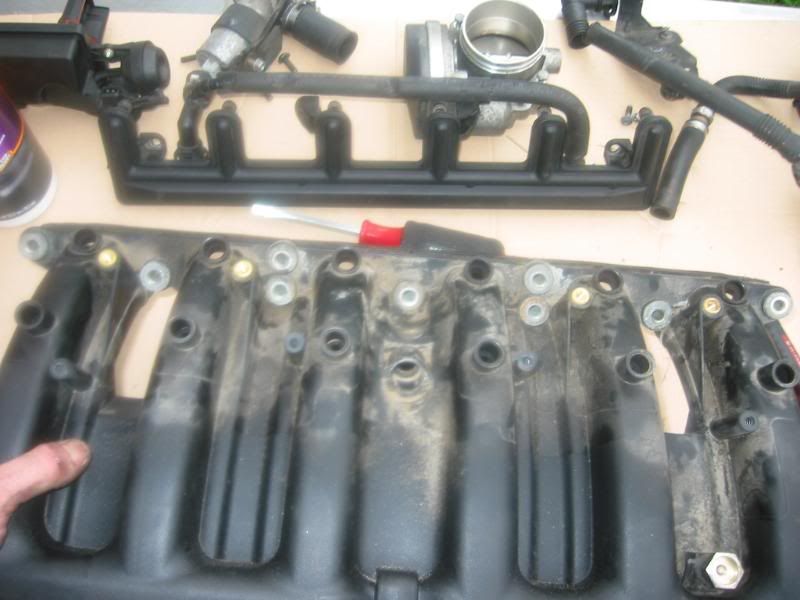
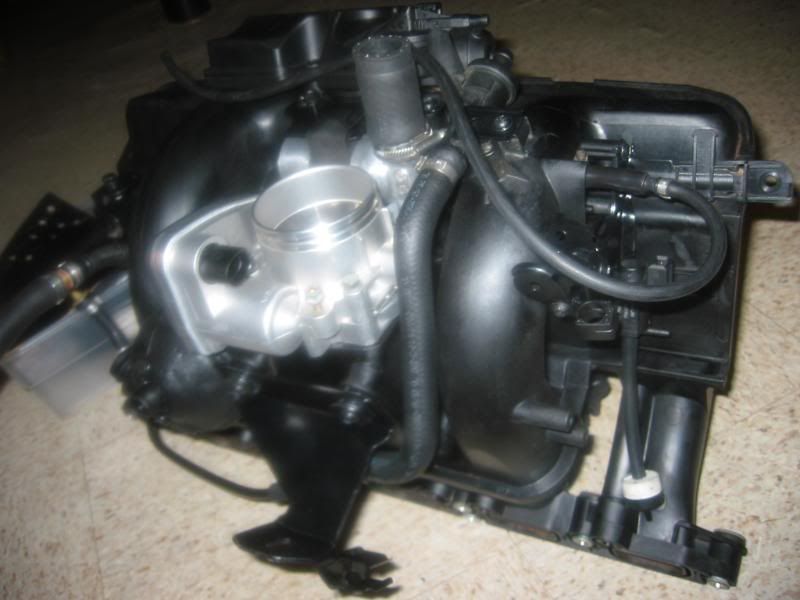
Intake out, and everything labeled. Also all nuts, bolts... have been bagged and tagged. Labeling is hugely important!!!!!
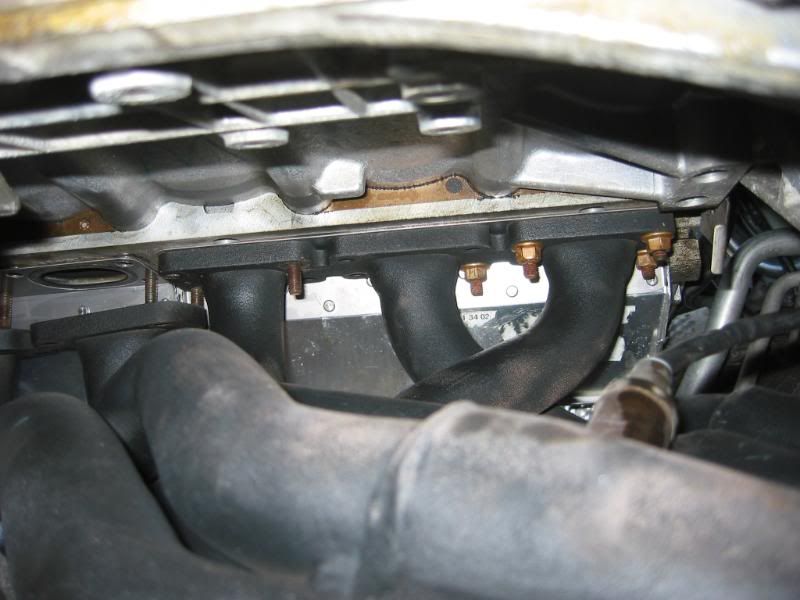
Going to re-build sometime this week. Here's a bottom shot of the intake manifold.
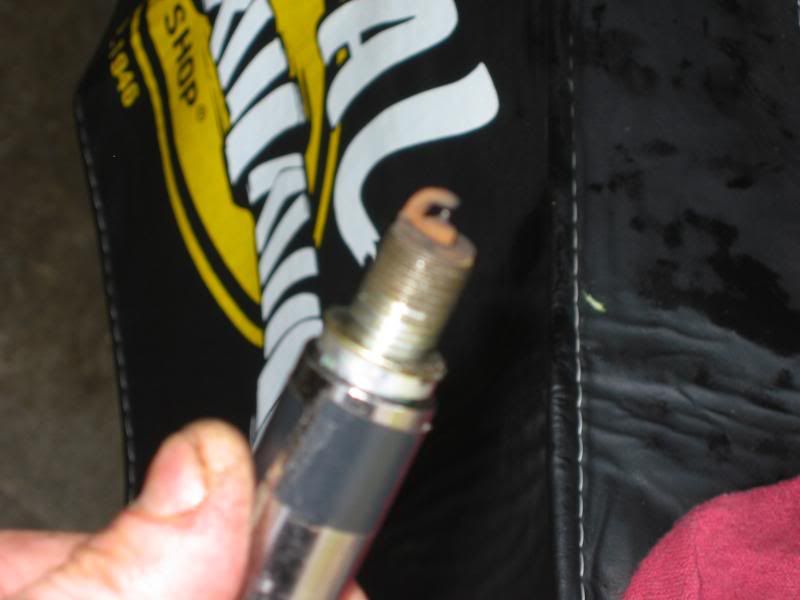
Damn, fouled plugs after 20,000 miles. Going back to the 4 prong OEM style.
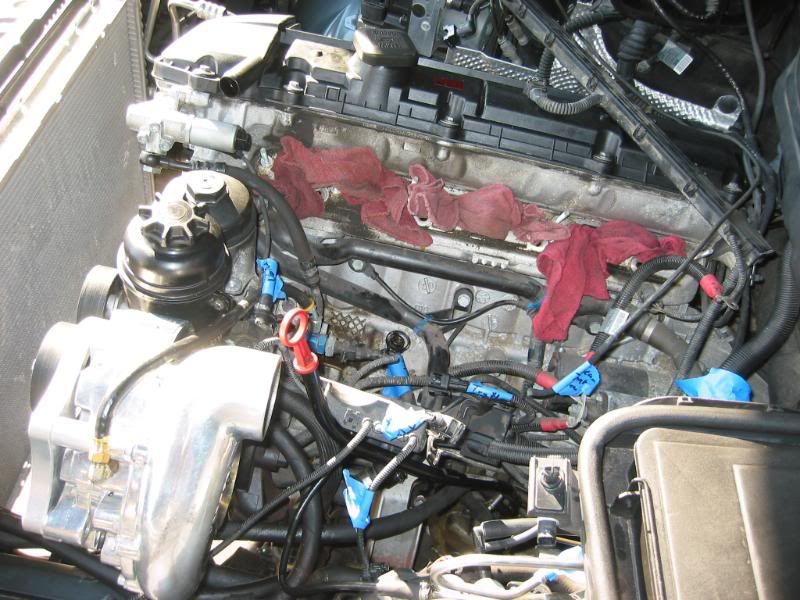
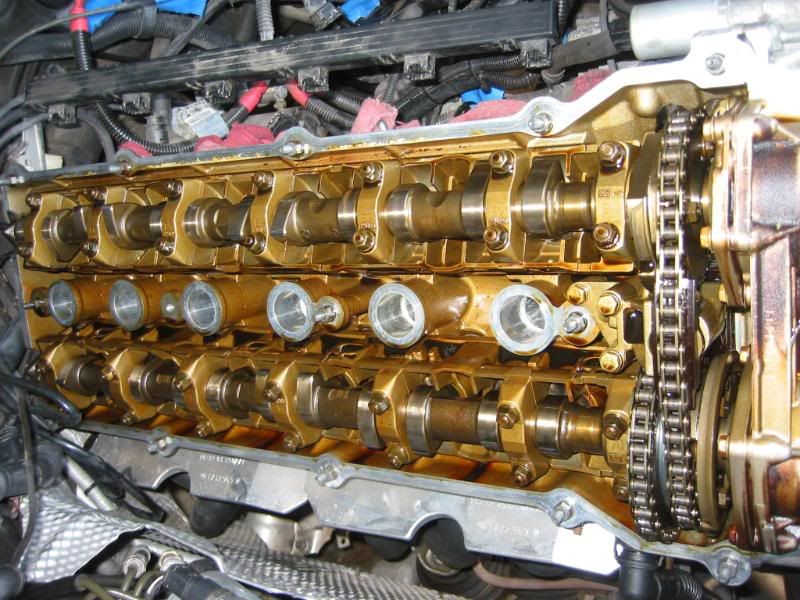
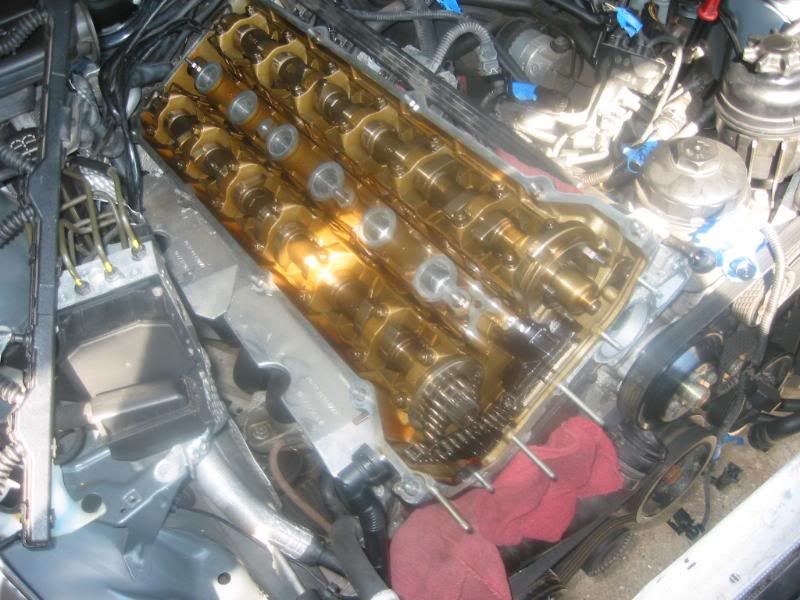
Valve cover off. Not looking bad at all after 156,000 miles.
Vanos removed. New upgraded seals going in from http://www.beisansystems.com/index.html.
watch out for easter eggsThey are added & retrofitted to posts.
Last edited by Jackcat559; 09-26-2010 at 09:52 PM.
Member
Excellent!
When do you think the head will be done?
Are you going to replace the rings?
Did you use any special tools to remove the head?
Also, what exactly are doing to the intake manifold?
Is the E46 M3 intake better?
Thanks!
Jason
Looking for an E39 belly pan , passenger front inner fender liner
Crazy Cracker
BMW CCA Member
I've got a concourse event to prep for this coming up weekend, so the actual head removal may drag. The bulk is done.
A local BMWCCA chapter supporter, RRT, recommended a machine shop that frequents BMW work. Great reputation at a great $$$$.
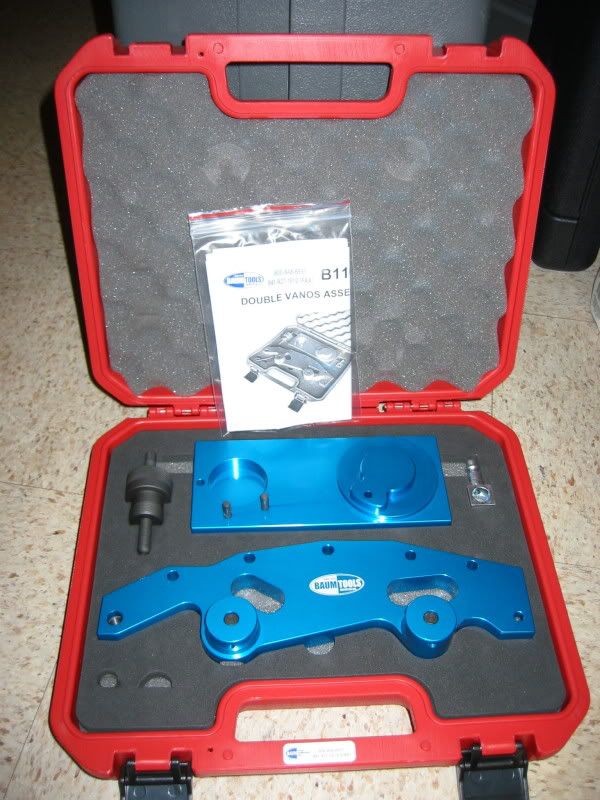
I'm not touching the bottom end at all. Maybe down the line when Mega Millions pans out. The only special tools for removal are the TDC pin, secondary timing chain pin, and spec torx socket. Did pick up special timing tools (and any other special tools) from http://www.baumtools.com/ for timing when it all goes back together.
As far as the intake. It's getting cleaned, new cold weather oil separator, throttle body, vacuum hoses.. You know re-built. No e46 M intake in the mix. Too much trouble and work. A neat idea though. I wonder what kind of gains could be made, and if they would be worth the aggravation. Hmmmm...
The vanos timing tools for the M52TU, M54 & M56 are available to rent. Send a PM if interested.
Rental Terms:
I require a 100% deposit on the tools ($450 from http://stores.ebay.com/EL-PASO-TOOL-...TOOLS?_rdc=1); $50 rental and shipping charges will be deducted, and the balance returned; 30 days for their return in good condition & complete; PayPal only
Kit includes:
cam locking tool
http://cgi.ebay.com/ebaymotors/Cam-A...motiveQ5fTools
double vanos kit
http://cgi.ebay.com/ebaymotors/BMW-V...motiveQ5fTools
Double vanos jig
Looking to start rentals again November 1, 2010
Last edited by Jackcat559; 10-19-2010 at 12:03 AM.
Member
Is that to lock the cams? ^^^^ WOW!
Where did you find all the special tools, beside Baum Tools?
Did you use the NGK iridium spark plugs?
Thanks!
Jason
Looking for an E39 belly pan , passenger front inner fender liner
Status Quo!
Good luck man. That job is cake if you have the right tools and tons of sanity.
Another FP5241 Creation
Parting out M54 Engine. Intake and all. Cats avail as well. PM ME!
Crazy Cracker
BMW CCA Member
No just to set the vanos timing. I have the cam locking tool also. The cams have to come off anyway. As long as the cams are braced when removing the sproket bolts the locking tool isn't needed. Good measure to use them though.
The tools came through El Paso Tool http://stores.ebay.com/EL-PASO-TOOL-...O-TOOLS?_rdc=1 . Direct shipped from Baum. There was another place that had them also, but Baum had a better reputation.
The NGk Iridium were one of the recommended replacements. The original Bosh were too hot. Going to switch to something. I have a feeler out there now.
Originally Posted by Gumbi4u

Thanks, it's my 1st time attempting a project of this magnitude. Things move a bit slow. Patience is key.
Last edited by Jackcat559; 07-24-2010 at 10:06 AM. Reason: Automerged Doublepost
Boosted Member
Ahhh, what fun!
Looks good so far.
Good luck!
Garrett
ALPINE WEISS FTW
crazy man... looks fun though none the less...
Member
This is awesome to see!
I would be intimidated doing this, but I felt intimidated doing the vanos seal replacement, but later realized that there was nothing to it...
The main thing that would worry me about this type of project is the cost for the special tools...
Please keep up with the up-dates!
Thanks!
Jason
Looking for an E39 belly pan , passenger front inner fender liner
Crazy Cracker
BMW CCA Member
To tell the truth a local CCA member probably would have lent me the timing tools.
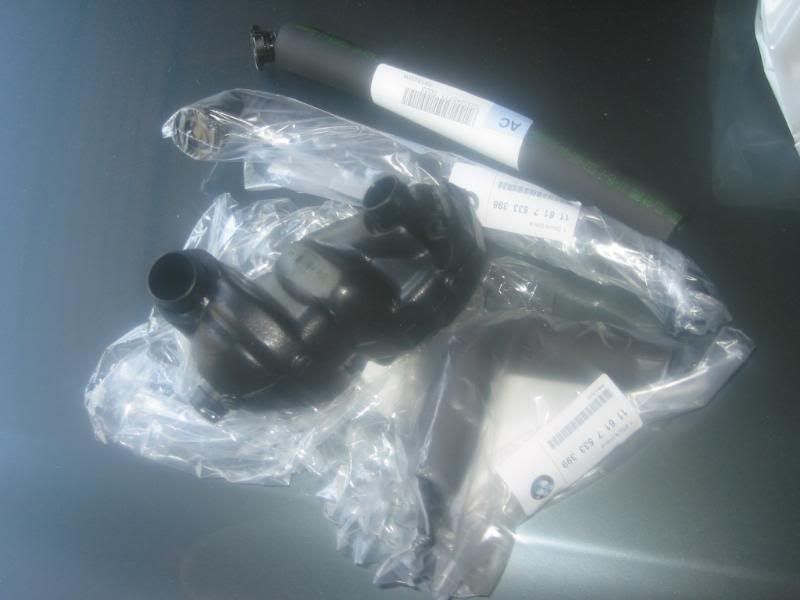
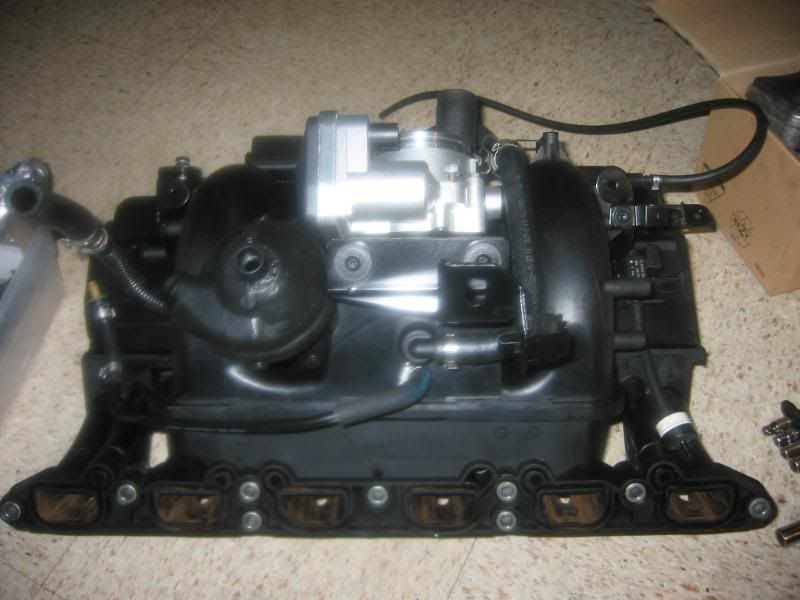
Picked up the winterized oil separator & hoses. They look like the originals, with foam insulation. After removing the intake to get to the seperator I can see why the labor charges are so high. Wonder it most places would put a new manifold gasket on during re-assembly?
Also here are some notes:
1- soak any bolt that needs to be removed from the exhaust for 24hrs in Penetrating oil.
2-The b@$t@rd bolt under the intake manifold holding holding it in place, mounts near the engine mount is 16mm, and is a problem child. The manual recommends accessing the bolt from under the car. An alternate is to take off the trottle body for direct access
3- Remove the little junction box by the throttle body. There are 3-10mm bolts holding this in. I found no reference to it in the manual.
4-Remove the heat shields next to and under the exhaust manifold. This will make life easier.
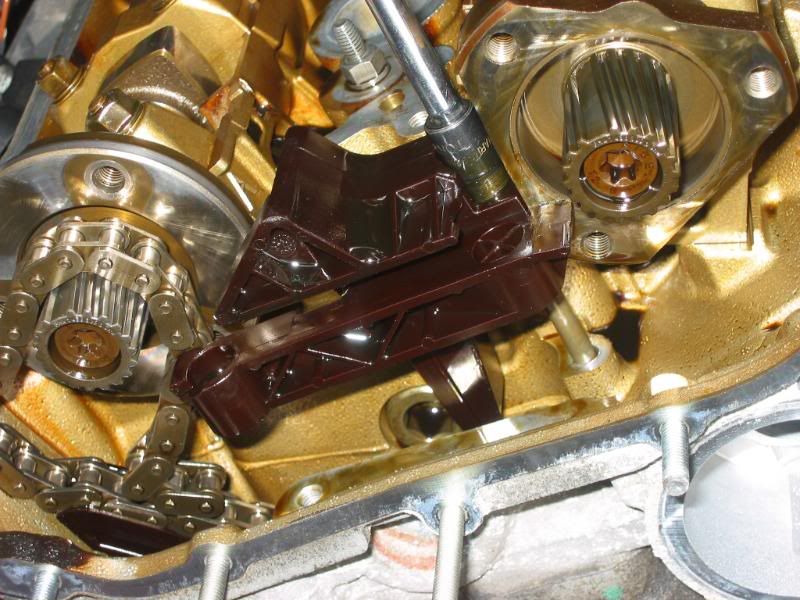
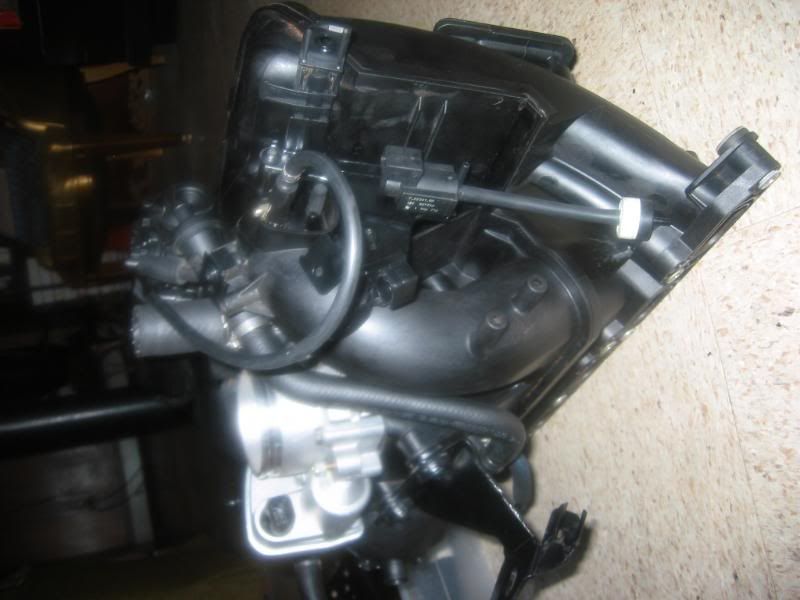
5- Last but not least the TDC pin hole to lock the cam is located under the intake manifold. My arm is pointing to the general area. The light blue thing off to the top right of the pic is the plug.
Here's a better shot & funtion of the TDC pin that is located under the starter. The pic comes from page 13 where the engine is pulled and rebuilt.

Last edited by Jackcat559; 07-24-2010 at 10:11 AM. Reason: Automerged Doublepost
Crazy Cracker
BMW CCA Member
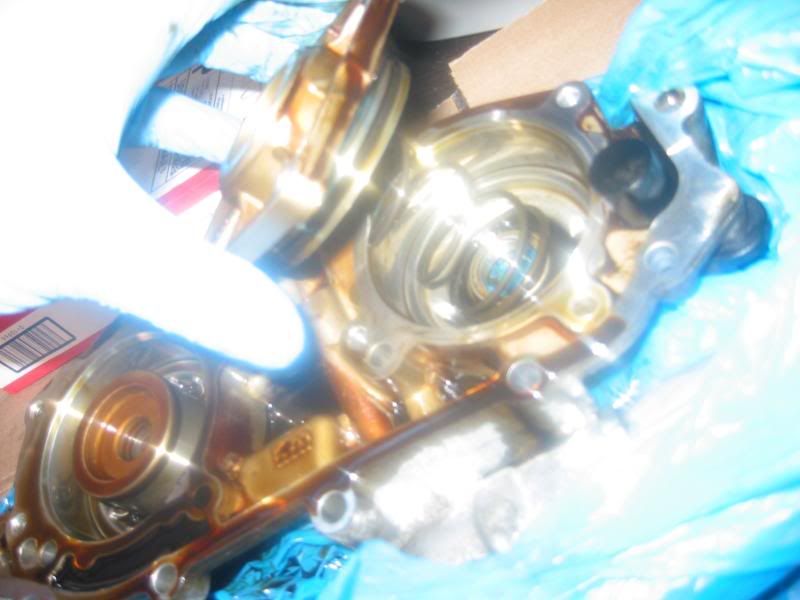
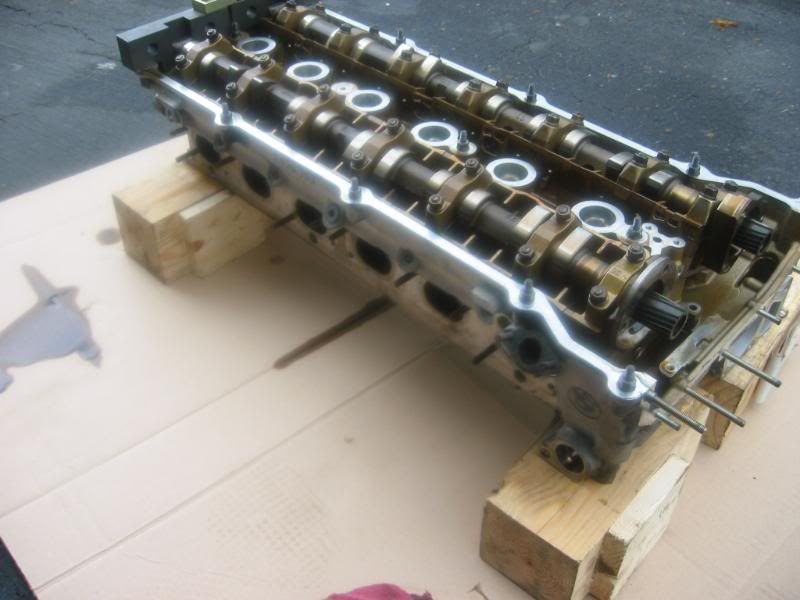
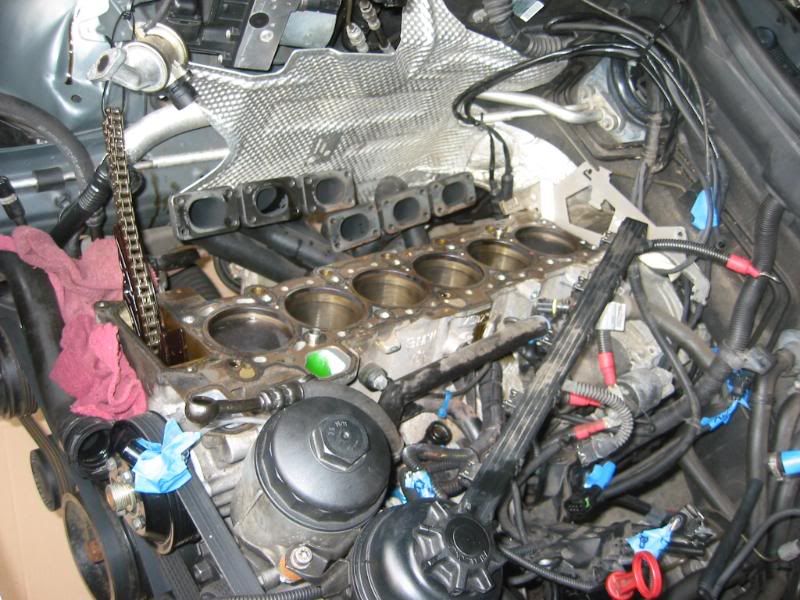
One week later and the head is off. I hope to have at the machine shop on Friday. Found the seal on the oil filter housing leaking.
Removing the secondary timing chain guide.
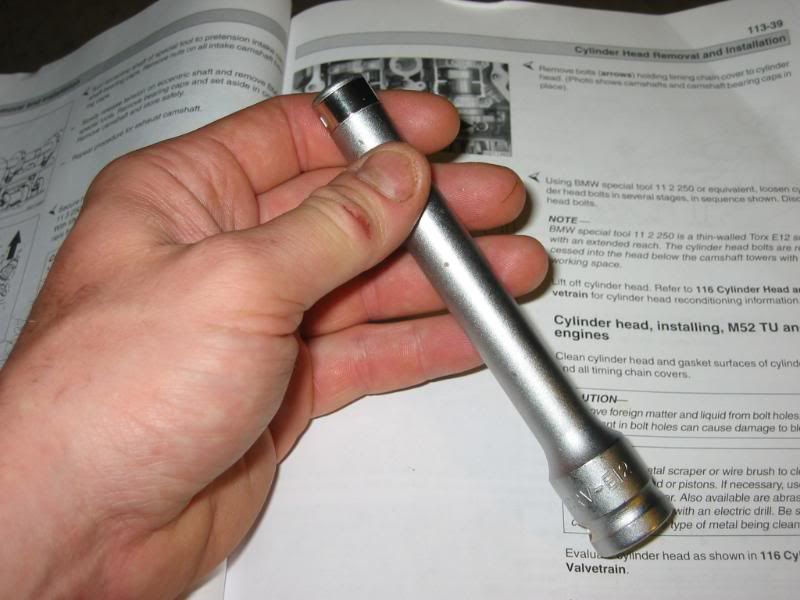
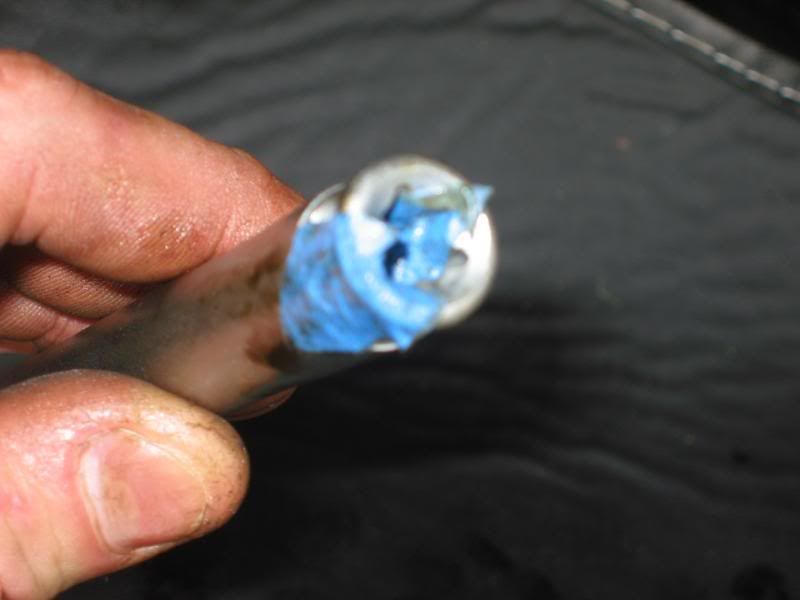
The famed e12 socket to remove the head bolts.
There was a little spring loaded ball in the socket that broke shortly after starting. Used some tape to force enough tension on the bolts, so they could be removed.
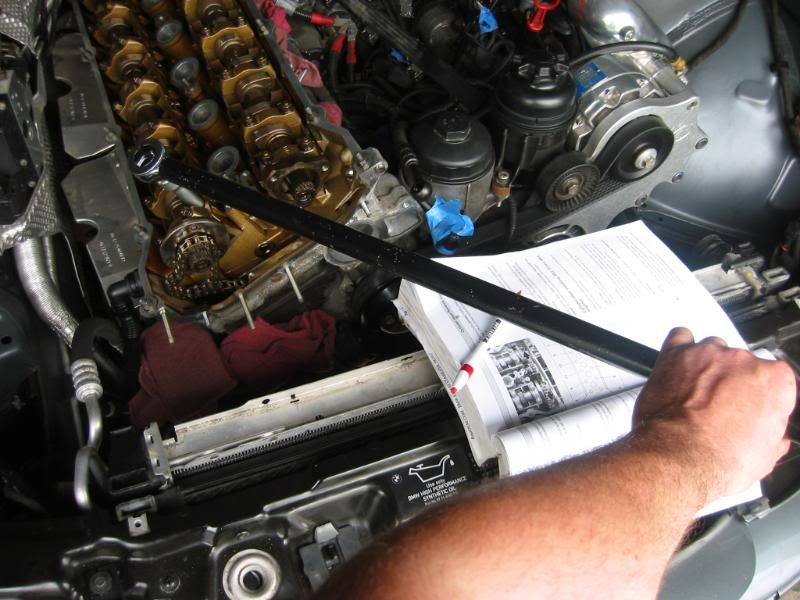
Four stages of removing the head bolts in sequence. Not one broke, thank the lord all mighty. I used all of that brealer bar (old pipe over socket wrench) the break the bolts loose. Could have used an extra foot in length.
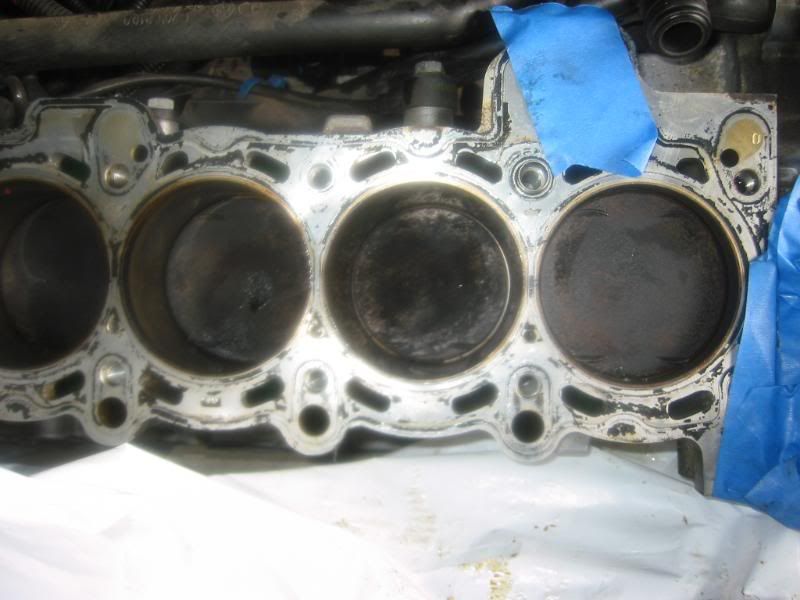
And it's off.
Note the tension kept on the timing chain on the left. Hopefully this will prevent it from falling off the crank if that's even possible. Better safe than sorry.
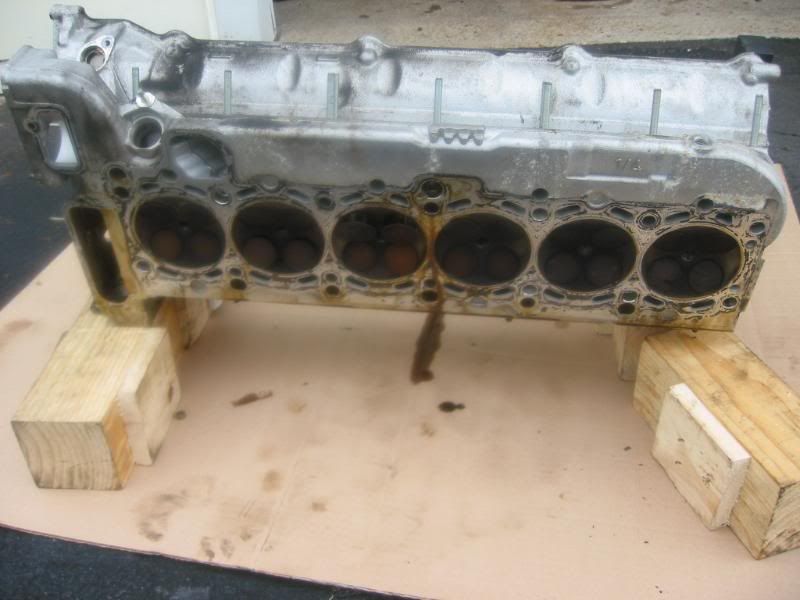
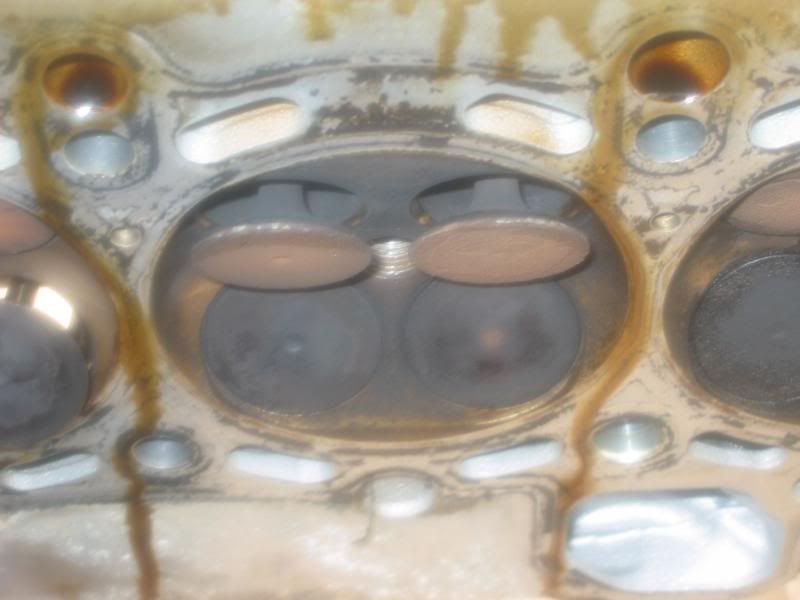
Got a funny feeling the valves were the cause of the low compression numbers.
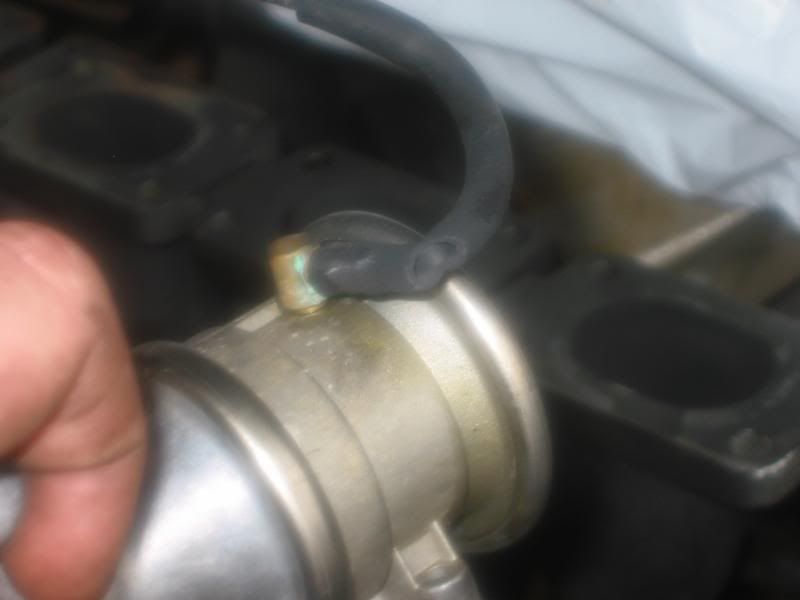
Bad vacum hose. All are getting replaced.
Last edited by Jackcat559; 05-04-2009 at 06:15 PM.
Member
Clean those cylinder walls up well before starting back together--- --clean the piston tops and then clean the walls up to the point that when you drag a clean paper towel down the side no dirt shows---amazing what a little debrie in the wrong place will do---do that one thing and the rings will last for a long long time--my 2 cents
Member
WOW!
Those valves look crazy!
Best of luck!
Looking for an E39 belly pan , passenger front inner fender liner
Crazy Cracker
BMW CCA Member
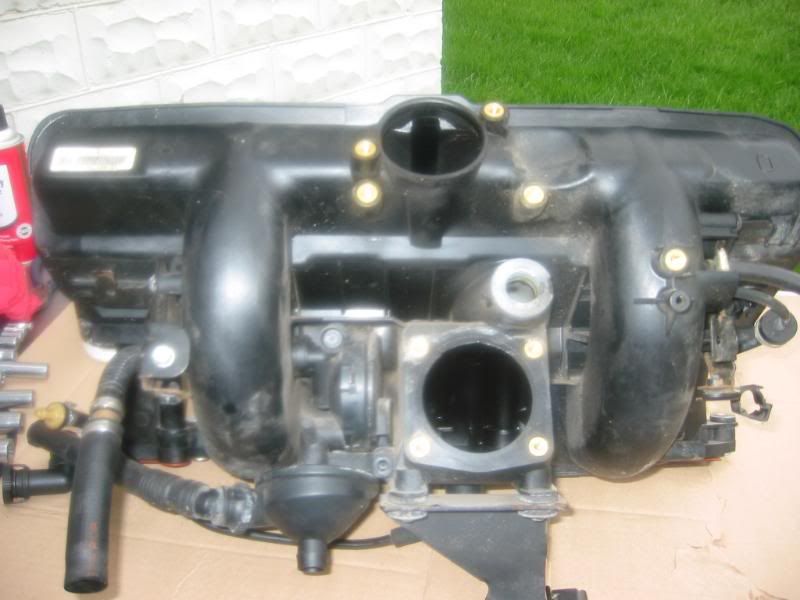
All of it is getting cleaned. The whole thing is dirty, dirty, dirty. Pistons, intake, under the intake, rusty brakets....
Re-built the intake tonight. Sooooooo dirty. Sand inparticular.
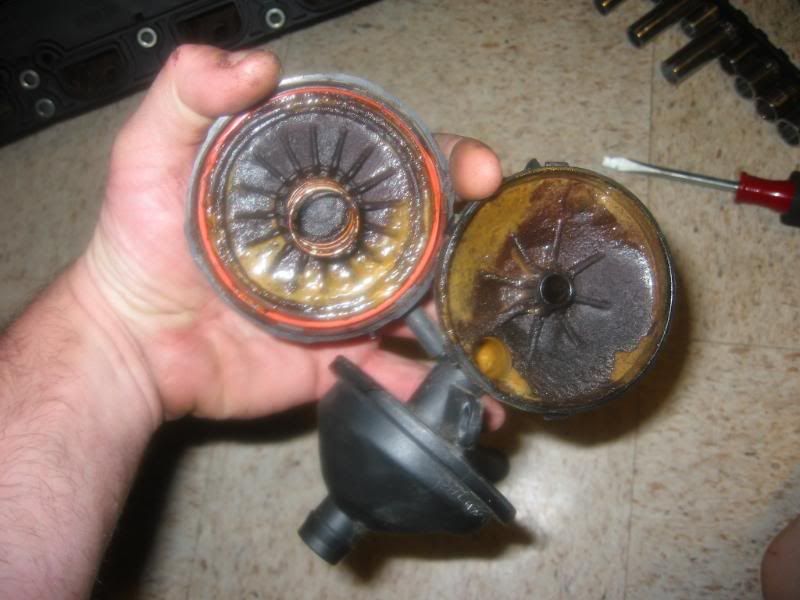
Didn't get a pic, but the oil separator was gone. Frothy, milky oil in the air return side. Read also this oil separator failure can lead to premature valve cover gasket failure.
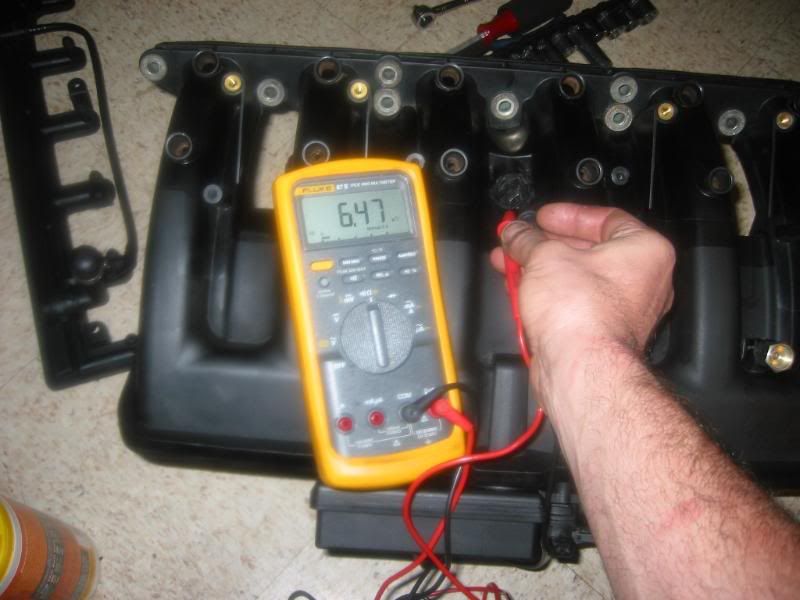
Testing Ohm values from the Bentley manual. The values decrease as the temp rises. It was a bit chilly in the basement last night. Everything has been cleaned, degreased, and repainted.
Last edited by Jackcat559; 05-03-2009 at 08:06 AM.
Member
Are you cleaning the pistons and the valves your self, or taking it somewhere to be done?
How do you clean the intake manifold?
Is it easy to replace the gasket on the intake manifold?
Thanks!
Jason
Looking for an E39 belly pan , passenger front inner fender liner
Member
Keep us in the loop---your right on track with it all--wish I hads me one of those shiney things to hook up----I noticed above the head gasket was coming apart in layers--was that right--with the valves and that gasket--looks like you jumped in at the right time--you'll have another 150k miles to go now---
Question--on your intake--where does the hose from the purge valve hook up
on the intake that is--Keep up the good work and pics
Crazy Cracker
BMW CCA Member
The head is going to a local machine shop that was recommended by a BMWCCA supporter with a great reputation.
Anything dealing with the block I'll do myself. Unsure as of right now what will be used to clean these inner components. Didn't plan on this. Oh well, she'll be running better when she's back together, Hopefully
Used CRC throttle body & intake cleaner. I could have taken it to the machine shop to have them clean it, but I got a bit antsy last night.
It takes a bit of time to get it off. Remove the fuel rail, myriad of connectors & clips, 16mm bolt under the manifold, the bolts, junction box....
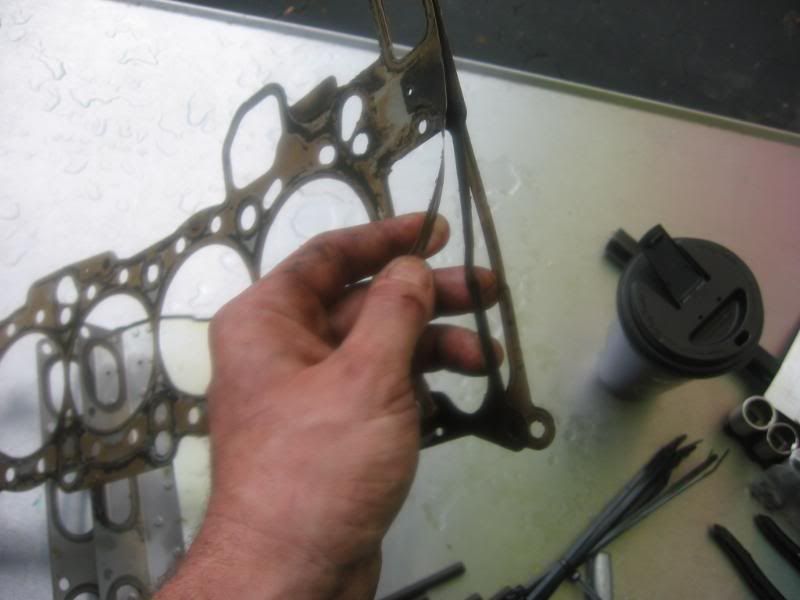
There was some leakage through or around the gasket. I pulled it apart out of curiosity.
Does look like it could have been catastrophic if it hadn't been addressed sooner. Would have done this project sooner, but research, time, tools & parts slowed it down. I really wanted to do it properly. Not a shoemaker job.
Very curious to see if there are any power gains when all is said and done.
What purge valve are you referring to?
(oOO)\(lll)°(lll)/(OOo)
BMW CCA Member
what kind of exhaust headers are those?
Alida:
Born: Friday, 9th January 1998
Arktissilber Metallic on Schwarz 528i/5
Claudia:
Born: Friday, 2nd May 2003
Sterlinggrau Metallic on Schwarz 540i/6
Crazy Cracker
BMW CCA Member
SuperSprint with a Jet-Hot 2000 coating. The coating is tough as nails and doesn't flake. Not too purty tough.
(oOO)\(lll)°(lll)/(OOo)
BMW CCA Member
How much was it to get them coated? did you also get the insides ceramic coated?
did you install them yourself? how hard are headers to do?
Last edited by ganesht; 05-03-2009 at 08:48 AM.
Alida:
Born: Friday, 9th January 1998
Arktissilber Metallic on Schwarz 528i/5
Claudia:
Born: Friday, 2nd May 2003
Sterlinggrau Metallic on Schwarz 540i/6
Member
The vacuum line from the purge valve leads down to the lower area under the intake mounting bracket--from looking at your pic above it seems so anyway---just to the other side is the vacuum hose that comes from the jet sucking valve that controls the vacuum to your brake booster--the vac line from the purge valve is the only piece that I haven't replaced a vacuum hose as of yet--couldn't figure how or where it hooked up--your pic may have helped me though---
Question--how much boost can your s-charger develop---was wondering if you used a thicker head gasket--say of dead soft copper --there by lowering compression in the cylinders--you could raise the boost and develop more power---there are a number of companies that make head gaskets like that for that very purpose.
Last edited by Poolman; 05-03-2009 at 08:49 AM.
Crazy Cracker
BMW CCA Member
About 3 1/2 years ago it ran $200 to have them coated. They were done inside and out, and I don't think there is a option to omit the inner coating.
I'll snap a few more pics for you.
Tuning is the key. As of right now the stock style gaskets are going in. If the machine shop decks the head there is an alternative thicker gasket available to compensate for the material removed.
I may have a local shop tweak the S/C pulley, injectors and tuning next year. First things first though.
Member
Thanks for the answers--gotta admit I have a thousand questions and all---I've pondered about taking the intake off of mine just to freshen up everything--
I noticed that you were checking the ohmage of the temp sensor--you were getting about 6.4 ohms--I just checked mine in about 60 degree weather and it was 5 ohms
I wonder if that is in range of what it should be--
Crazy Cracker
BMW CCA Member
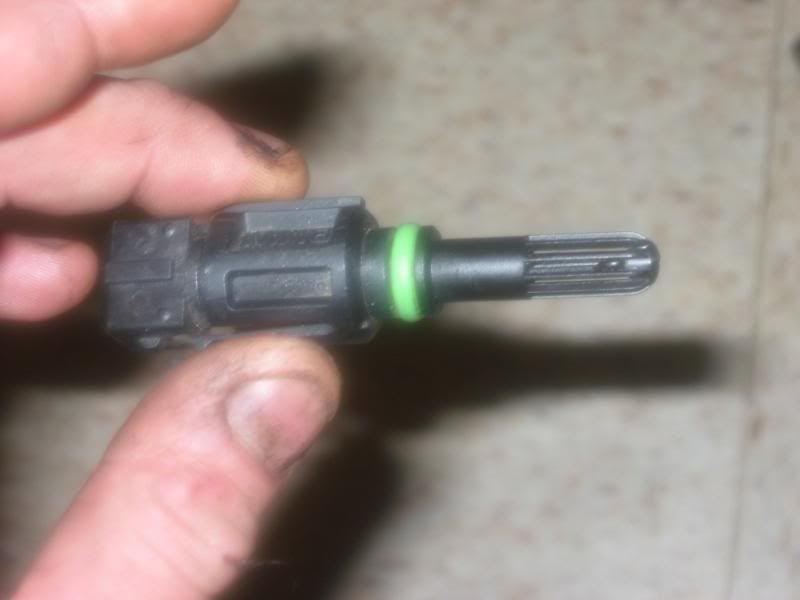
At 6.4 kohm my nuts should have been frozen over. The spec is 2.2-2.7 kohm at room temp (68).
It's an $11 part. Looks to be a standard thermocouple.
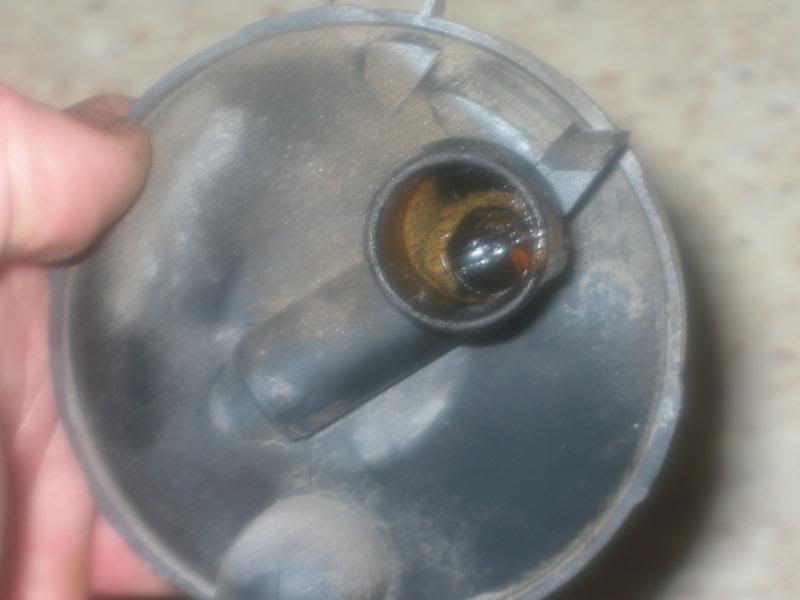
Ewwww, nastiness inside the upper oil separator.
Poolman Here's those pics. Do they help?
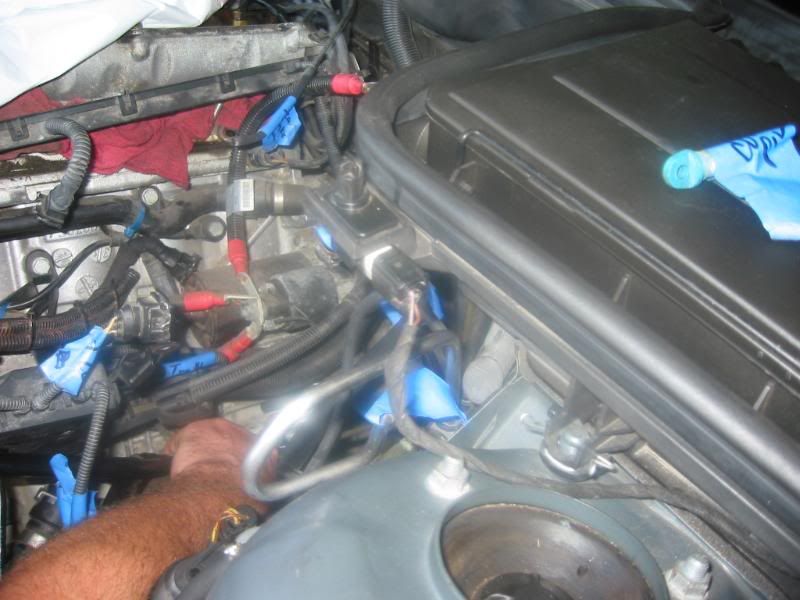
Clamp these vacum hoses now, before the manifold goes back on. Trust me on this!!!!
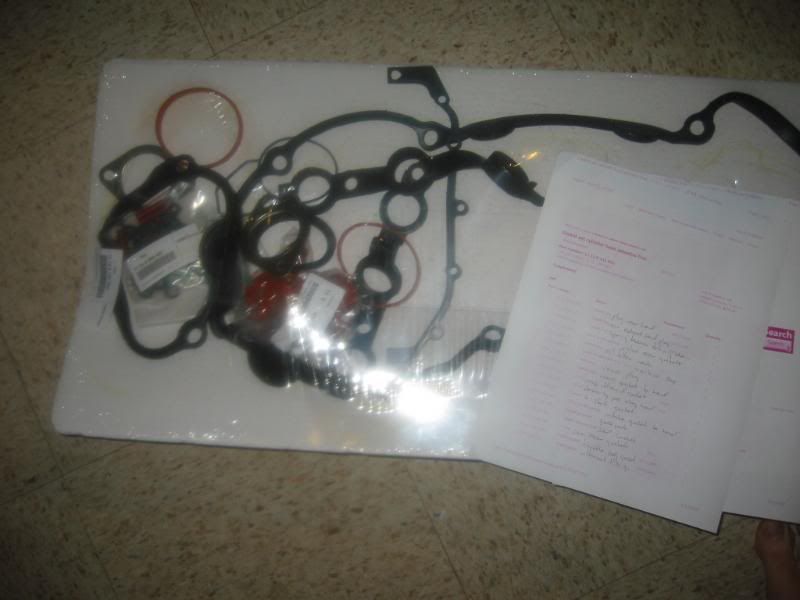
Ahh almost forgot. The top end gasket kit. Part numbers & part locations provided by http://bmwfans.info/parts/catalog/ It has ALL the gaskets needed (vanos, fuel injector, valve cover... ) to complete the job except the head and exhaust gaskets. The head gasket comes in a 2 thicknesses. Ask the machine shop which one to use. This is determined by how much they had to deck the head
Last edited by Jackcat559; 07-24-2010 at 10:16 AM.
(oOO)\(lll)°(lll)/(OOo)
BMW CCA Member
i was told that you should never just coat the outside alone, that if you only get it coated to coat the inside, since the heat from the exhaust will be reflected off the coating and cause the metal to heat up too much, and cause premature failure...
this is why i was told to take of my manifold heat blanket and get it coated instead, anyone want to comment on the validity of this?
Alida:
Born: Friday, 9th January 1998
Arktissilber Metallic on Schwarz 528i/5
Claudia:
Born: Friday, 2nd May 2003
Sterlinggrau Metallic on Schwarz 540i/6
 Posting Permissions


 Reply With Quote


Bookmarks