Cruise control actuator FIXED!
Does your cruise control turn on (green light) but not engage?? Or does it engage for a few seconds and then turn off or accelerate for no reason and not let the green light come back on until you restart the car?
Mine did all of these things over time and finally I tackled the problem. A long time ago I saw a post somewhere about the actuator so I started there.
It was indeed a mechanical problem. A 25 cent plastic gear piece that killed the whole thing. A few broken teeth prevents the gears from meshing so it can't hold the throttle cable position.
Time, 30-60 min.
Remove the engine cover to access throttle cables.
Remove the right throttle cable clip by squeezing the clip together and push through the metal plate, then slide out the cable end to let it slacken. Use the adjustment screw on the cable to loosen the cable to the slackest position. This will allow maximum adjustment to tighten after you reconnect because the cable will be a tad shorter due to what you are about to do.
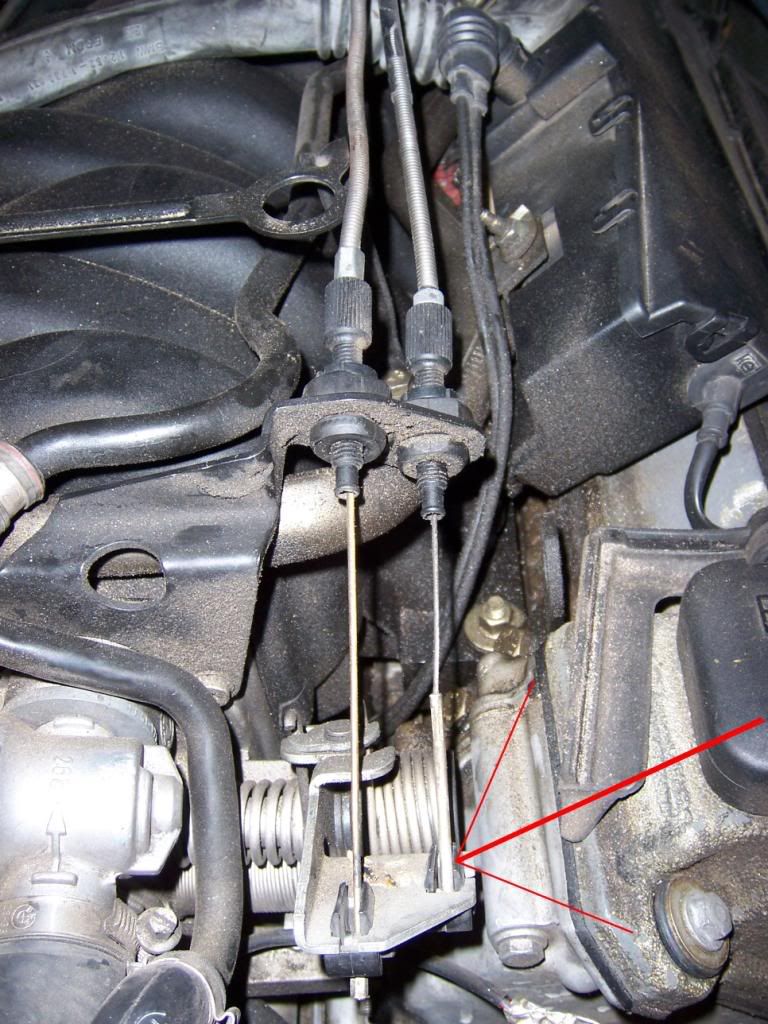
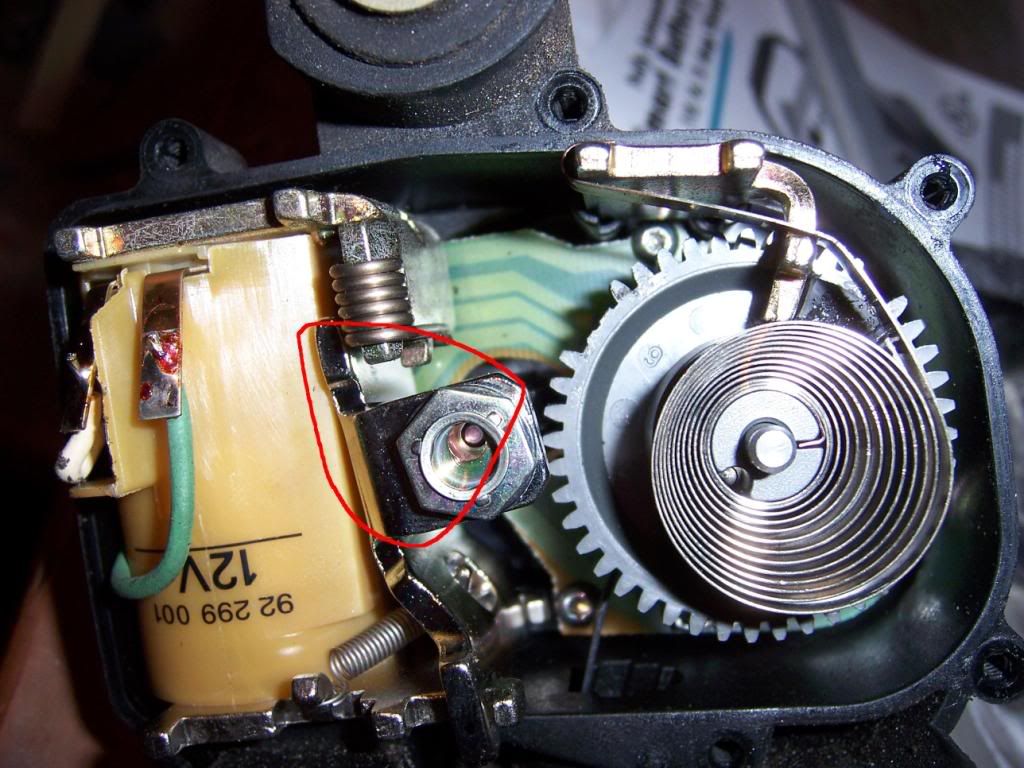
Now go to the cruise actuator

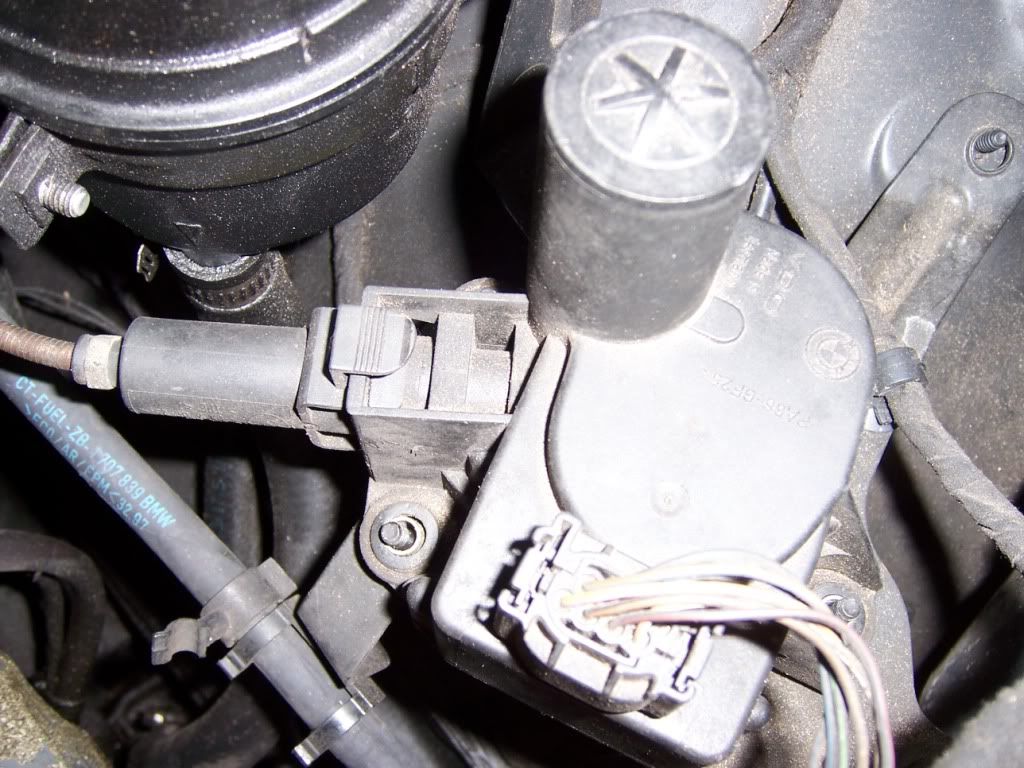
squeeze the clip holding the cable jacket to the unit and slide back until you can access the cable. You will see the other end you just unhooked begin to slacken. Once you can get to the cable, slide the end out of the guide and set aside. Remove the few nuts holding the unit to the mount bracket with a socket. Remove wiring harness.
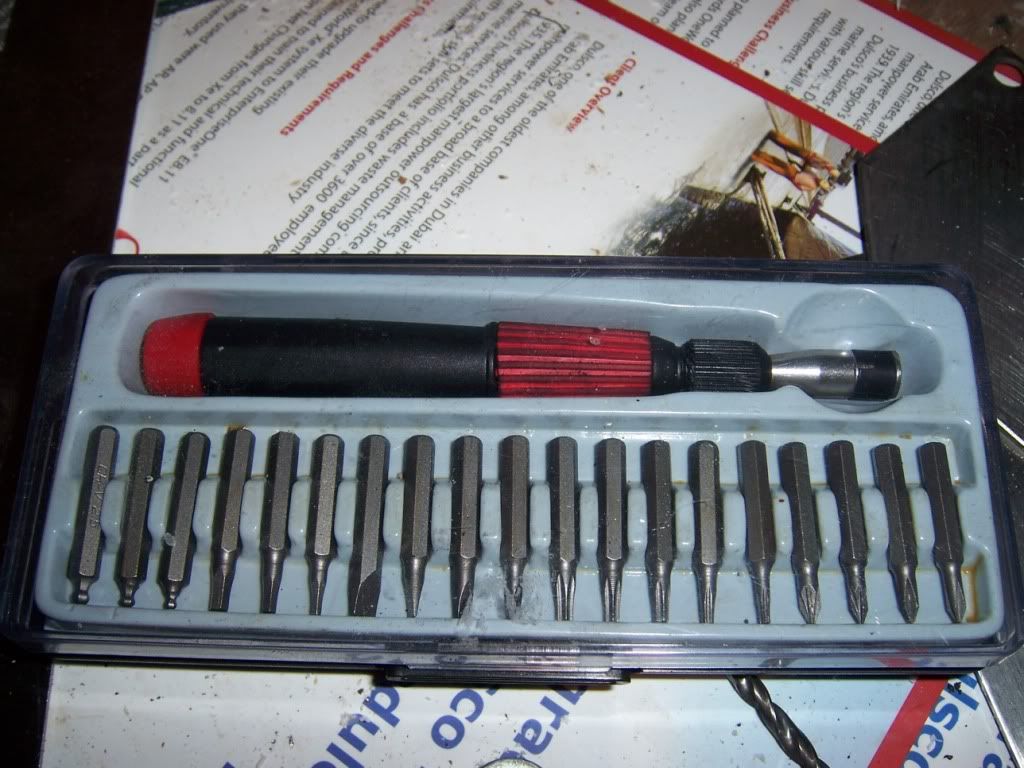
After removal, you will need a SMALL torx set. I already had a small electronics driver set from a PC store or Radio Shack. I think it is a t9 bit it says.
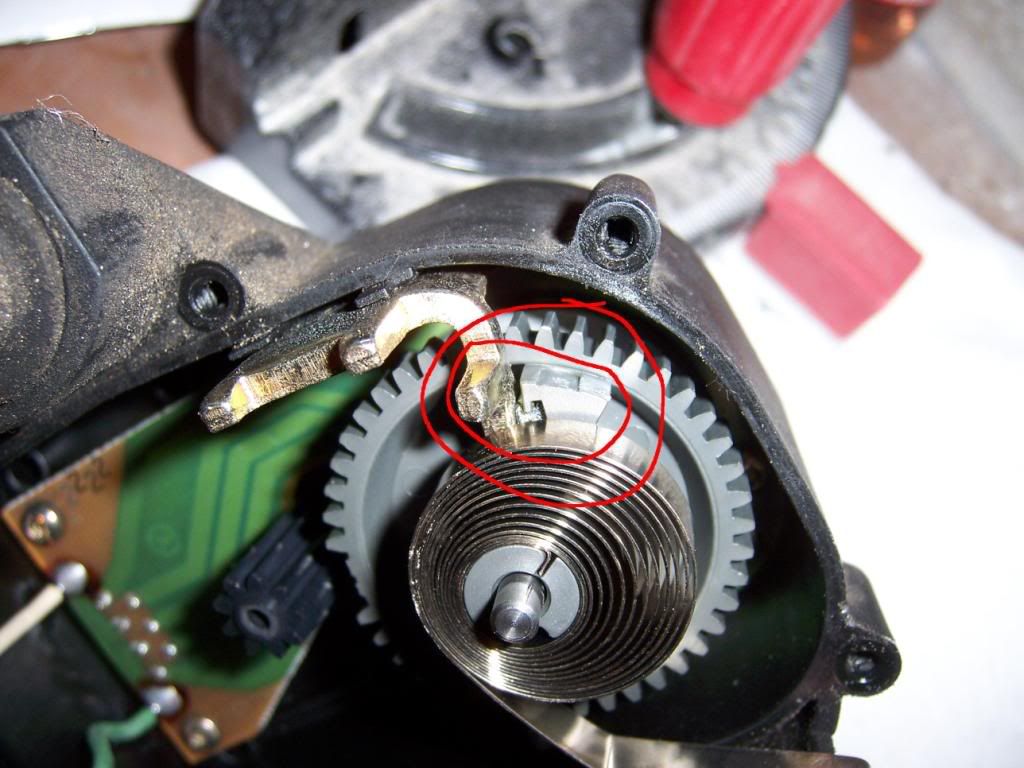
On the underside of the unit unscrew the several torx screws and pry apart gently with a small blade. Take apart with the shallow side of the cover UP. CAREFULLY pull the electronic "thing" out. It will swing out like a hinge with the wires holding it in. BE CAREFUL to notice how it fits with the small black sprocket and the metal pin down the center. If you drop it, the metal pin goes with the slot side down.
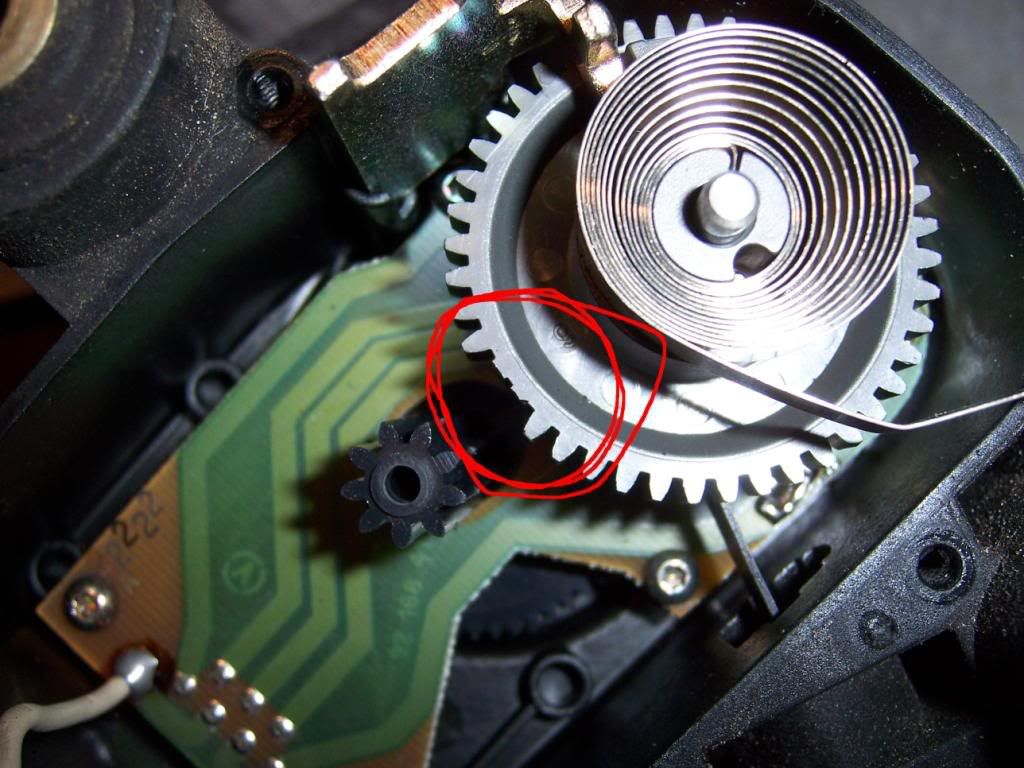
You will see the culprit. There were a couple broken teeth at the initial position of the large gear. You may find or hear them rattling in the unit. Now, the goal is to reset the initial position of the large gear where there are teeth. It is spring loaded so it is tricky. Here you will see the opriginal stop position.
So I figures I would make something to insert in between the current stop against the metal bracket and the gear to make it stop a couple teeth sooner. I had a rubber stopper laying around so I carved a block from that and decided to glue it in place. You will need to move the spring catch GENTLY out of the way. I curled it tighter 1/2 turn and hooked on bottom end of housing. This also makes it smaller and easier to get around.
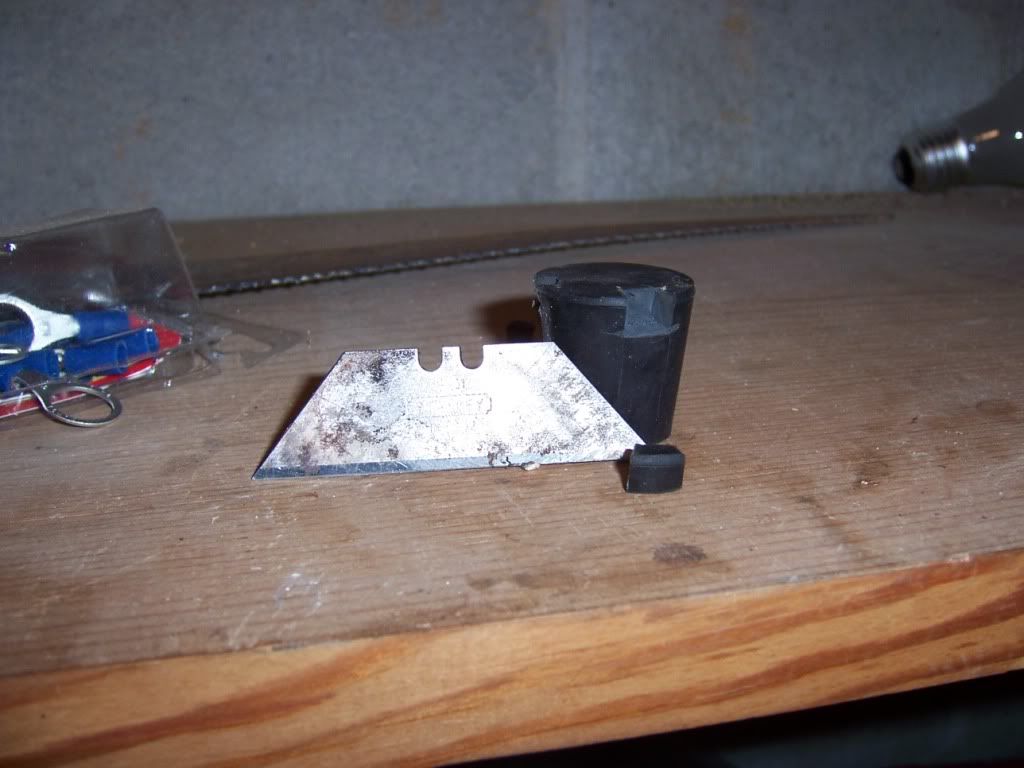
I used RTV but you can decide what material and adhesive you have to use. Maybe pvc and super glue?
I used a toothpick to place the block in the gap with adhesive and now you will see the teeth moved so that the black drive gear will have teeth to engage.
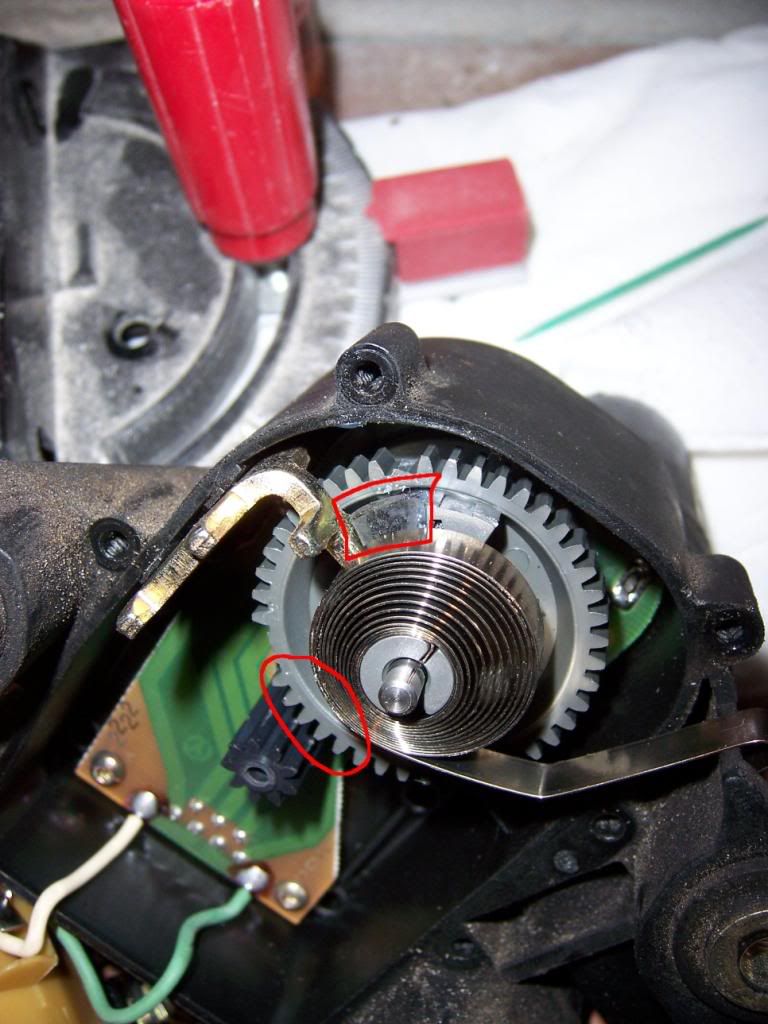
And the wheel moves this way so after engaged, there will be room to advance. How far it will take to go all the way around, I don't know, but at highway speed and rpms, I'm guessing there will be enough room. If you turn the wheel and see how the cable moves you will get the idea. It doesn't take much movement on the throttle plates to get decent rpms up to hwy cruise level.

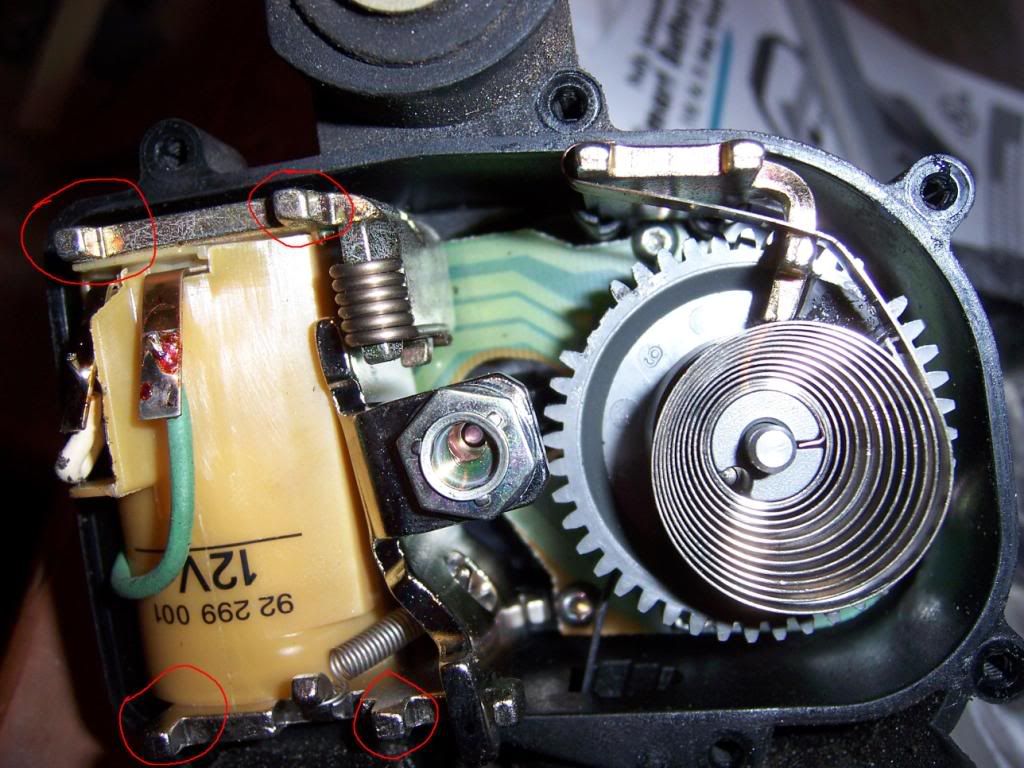
Now you want to position the black drive gear in it's hole with the metal pin inside. Then you want to swing the electronic module back over and squeeze it back into place. The tolerance is small. Note the 4 metal corners that fit snuggly into the seating circles on BOTH sides of the plastic covers. Don't forget to put the spring back in the original position.
After you think it is seated solidly, make sure this switch plate moves freely to the right to solidly engage the drive wheel against your fresh teeth of the large gear when activated.
Now put the cover back on. If it does not close tightly on it's own, you probably did not seat the electronic module and drive gear properly. Put it all back together. Be gentle if your adhesive is not dry and maybe wait a bit to try it to make sure.
LAST step. You may need to adjust the tightness of the cable with the screw adjustment at the throttle end to make it snug again. Button it up and try it!
1998 (9/97 production date) 540i 6 Speed Sport / black on black / shadow trim / debadged / black-out grill / Carbon fiber roundels / 80w Yellow Fogs / 2.81 non- lsd diff. / 17" BBS Sport Style 19 wheels/ 245 all around tires / modified CDV / Stage I Dinan software / 5w30 synthetic/ 244k miles and counting
E65 2007 Alpina B7: Black on Black, Supercharged autobahn eater, 500hp/515trq, 245/295 tires, 141k miles with major systems rebuilt/replaced!

 Member
Originally Posted by racerx0911


 Posting Permissions


 Reply With Quote


Bookmarks