
 Chopstick Master

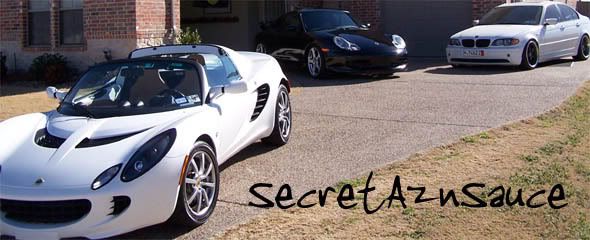
Okay guys, I just bought this 92 318 with 100k on it for only $2900.00. It had bad bearings and a leaky a/c. I fixed the a/c leak for $100 and the bearings for $65.00 a side. FAG Bearing from O'reilly's. Now the things you will need to get this job done fast and right!! Descrition for now, pics later. THIS IS ONLY WHAT I DID AND IT WORKED FOR ME. TRY AT YOUR OWN RISK!!!
Tools:
Loaned from AutoZone: Heavy Duty Slide hammer
Slide hammer flange
Bearing Puller (explain later)
Things every home mechanic should have:
Dremel with 2 cutoff blades
3-inch washer
Your normal manly tools either air
or manual
2 jacks, jack stands
( always helps )
Procedure:
To start I used all air tools but hand tools will work, just a bear!
Raise car and support VERY IMPORTANT!!!
Pull off wheel
Remove hex nut holding rotor
Remove Caliber (tie it up to something)
Remove Axle Nut 30mm if memory serves
Air Tools if you have(hand tools if you don't)
Remove your sway bar bolts (13mm)
DO NOT REMOVE THE WHOLE THING!!!!
Support the trailing arm with 2nd jack
Use 18mm wrench/socket remove shock lower bolt
Using long extension and I forgot what size socket,
Remove bolts holding in axle to diff.
Raise 2nd jack up all the way (compressing spring ) and
remove axle, it will slide down towards right, this is the
reason from loosening the sway bar. lower the trailing
arm to about 13" off ground.
Attach Slide Hammer flange securely to HUB with lugs
Attach Slide Hammer to Flange
Slide the @&#&@ out of the hammer being careful not
to hit the NADS!!
When the flange comes off, you'll be like oh sh$t
but thats ok, use what ever tools u have (i used flat
head screw driver) to pull the inner
and outer rings ( with bearings ) out.
Now you will have what believe is called a "racer" ring still
inside the hub. Also remove the "C" Clamp/Ring Whatever
Bust out the BMW special tool.
I bought mines at Lowes. I am sure Home Depot has
them too. Be careful, BMW is very smart and renamed
tool and called it a DREMELand priced it for
$39.95. Now, using the dremel and a cutting blade,
****CAREFULLY**** cut the ring in half. careful not to
cut into the hub!!! The ring then just pops out because
the pressure on the hub is released.
Now
Slide the new bearing into the hub. Using the bearing
puller. Attach it backwards; we are not using it to
pull the bearing out but rather pushing it in. Add the
biggo washer to the inside of the hub and using ur
wrench and thighten the puller, this will slide(press) the
bearing in. Or you can whack the bearing into the hub.
BE CAREFUL not to hit the rings or the bearings! I
would suggest a block of wood or something.
Check you work!!!
Make sure the bearings still rolls freely, Make sure you
DIDN't break anything else in the process.
Attach " C " ring /clamp thingy
Now cut the bearing ring that is stuck to your hub in the same manner as before. be careful not to cut into the hub itself.
Reattach hub to arm.
Align hub into bearing and tap it in slowly. Make sure it
is not cocked! Attach slide hammer on flange and
slide sway, once again, watch out for the NADS. Once
is on part ways. reattach your drive axle nuts and all.
You maybe wondering why I didn't hammer the hub all
the way in? Simple you don't want to damage the
bearings, so less force is better. We will use the nut
from the axle to "pull" the hub in the rest of the way.
Impact wrench would be great here, otherwise, bring
out the breaker bar. Once you start tightening the axle
nut you will notice the hub sliding back into place.
Inspect you brakes:
Right now would be the perfect time to do your brakes
if need be.
Reinstall everything:
Put that shock bolt back on, reattached sway bar bolts.
Put that brake disk thingy back on the caliber. Don't
forget that hex bolt. But if you lost it, like I did, i didn't
sweat it. Its mainly to align the wholes to the lugs. Put
the wheels on.
Eyeball everything:
Give everything a once over!!!!
Extra Parts:
Other that Bearing parts you trashed! Better not be
any, especially big bolts!!
:
workplace. return autozone tools to get your $$$
back.
***NOW I WROTE THIS WHILE I WAS BORED AS HECK AT WORK. IF I LEFT SOMETHING OUT I WILL UPDATE. IF I CALLED SOMETHING ITS NOT, PLEASE LET ME KNOW. I AM NOT HERE TO SHOWOFF OR PROVE ANYONE WRONG, I DID A LOT OF READING ON THE BOARD BEFORE I DID MY WORK, AND DIDN'T FIND MUCH WRITE UP. HOPEFULLY THIS HELPS. ***
Last edited by SecretAznSauce; 05-13-2003 at 10:32 PM.
Member
Wow, it takes me an hour just to read thatThanks
Awaiting Email Verification
Nice work man. Thanks for sharing
Facetious
hey man, if you get the pics...or even if you never come up with them...if you'd like your write-up to be on the DIY Library (see my sig), then email it to me and I'll put it on
Good job
Ordered: '14 BMW M4
Current: '08 Suzuki GSXR 1000; '08 HD Street Bob
Previous: '06 BMW 330Ci; '06 Mercedes CLK-350; '04 Acura TL A-Spec; '95 BMW 318ti
Member
no pics?
Member
What size bolts hold the axle to the rear Diff, they look like Torx heads, anyone know what size they are?
Thanks
Mark
The Dude abides
Member
It's an E12 external torx.
Thanks a million for the write up S.A.M. I don't even have a manual, I just printed this out and busted out the tools. Saved me a ton-o-cash
My big hang-ups were when the bearing pulled apart trying to get it out and when I pushed it back in the first time I tried pounding it in- this blew the bearing apart so on the next try I used a piece of all thread and my impact driver to draw the bearing into the trailing arm. I did the same thing to get the hub into the bearing. Big point- don't push or pull in the center of the bearing and expect it to stay together! Tip, freezing the bearing and the hub before installing them helped alot. And lots of heat for getting things apart.
Sorry I didn't take pictures, I was in a hurry to get my car back on the road.
Last edited by markcm; 05-29-2004 at 02:03 AM.
Chopstick Master
Originally Posted by markcm
So it worked???? wow thats great, happy I could help out another member
Member
I just bought a 92', took to the BMW for overall testing, found something wrong with the right bearing (this causes the a sound like an extra engine running on th e back of your car right?? But it only happend when your car is moving about 20mph?). Then I brought back to where I bought the car (a small dealer), I got it fix...for $350 (dang))))...Now, the same sound is coming from the left bearing. Would it be the same problem but on the left bearing?? I swear I will fix this myself..., because I don't have any "$350" to get to the dealer this time. I have some questions though?? Where can I find the parts for this project? And Do I need some heavy tools?? Thanks for the info...$$$$$ saved!!!!!!!!!!!!
Chopstick Master
part is about 60 bucks at any parts store. if theres an autozone where you live, just ask forthe parts i listed above
Member
I'm doing this, well trying... Do you guys know if there are pictures for this process?
Thanks!
Ambition before adhesion
no try to the same thing on m roadster and kill yourself. thank god i dont own semi trailing arms suspension.
(im doing one of these for buddy on his roadster and it is a huge pain in the ass.)
Member
So my brother and I were ready to install the new rear bearing today and well, things did not turn out as planned. We hammered the bearing in the "knuckle" without any problems, we used this BEARING RACE kit I bought at a local tool store for 35 bucks just like this one:
http://cgi.ebay.com/ebaymotors/ws/eB...ayphotohosting.
We could of used the outer cylindrical shell of the old bearing but I did not know that until I did some research online, oh well.
The problem came when it was time to install the hub. We started banging it in
like crazy and the inner part of the bearing popped out the back when the hub was almost all the way in. We took the hub back out and the other half of the bearing (outter race) was stuck in the hub! Of course we were a bit upset because we knew the bearing was problably a total loss. We now needed to take the racer off the hub and we used a heating torch (like we did the old one) and we ended up melting part of the hub, so the hub is now toast too
I guess we somehow missed this part of SecretAznMan4u write up:
"Reattach hub to arm.
Align hub into bearing and tap it in slowly. Make sure it
is not cocked! Attach slide hammer on flange and
slide sway, once again, watch out for the NADS. Once
is on part ways. reattach your drive axle nuts and all.
You maybe wondering why I didn't hammer the hub all
the way in? Simple you don't want to damage the
bearings, so less force is better. We will use the nut
from the axle to "pull" the hub in the rest of the way.
Impact wrench would be great here, otherwise, bring
out the breaker bar. Once you start tightening the axle
nut you will notice the hub sliding back into place. "
Moral of the story: Beer and rear bearing installs don't mix.
We are not giving up by any means, I already reordered the bearing and the hub. I will atleast take pictures of stuff from this point on to help any fellow members looking to try this.
Rock on Do it Yourselfers!
Not a Detailer Anymore.
So where are the pics 5 1/2 months later?
Member
Senior Member
Link doesn't work =\. Anyone have a link with pics to replace this bearing? I want to do it but cant understand half of the words in the DIY...
<- RIP
License Revoked
Such an awesome writeup. It was done before I had my right rear bearing changed, and I probably woulda done the job myself if I read it sooner...
E30 M3 Fanatic
wtf this is old
Senior Member
Can someone post pics please? I would SUPER greatly appreciate it, because I dunno what alot of the parts he was talking about are heh. My mechanic charges alot do this kinda thing, and I much rather just pay 52 bucks and do it myself.
Member
Sorry, I'll repost the pics when get home tonight...
Senior Member
Awesome, how would you rate the difficulty of this project also, from 1-10. My mechanic said it would take him about 2 hours to replace, so thats 216 bucks without the part cost of 52, thats why I would much rather do it myself heh. I'm just not super experienced.
Y U No Have e30?
Yeah, me too!
I have aixelsid (you figure it out...)
Member
Link should be up now:
http://www.paragonwest.com:8090/bmw_bearing/index.htm
I would rate this a 6-7. Make sure you use an impact puller from Auto Zone (free rental) to take the hub out. Also, to avoid messing up the new bearing when you are banging in the new one (if you choose not to take the entire control arm to a machine shop and have them press it in) make sure you apply pressure from the back by pressing in the drive shaft inward as the new bearing is being banged in. You will need someone else to help you do this. One bangs the baering in, the other applies the pressure.
In all honesty, it would of been significantly easier and safer to have the machine shop press it in. Sorry, I did not have my camera when we removed the hub with the impact puller but it is relatively easy.
Good luck!
Senior Member
W...ow... I do not think I can do this =\. (#)$@^%# there goes another like 250 bucks for the mechanic huh =P.
Member
Is that a condition that does not allow you to correctly spell words backwards?
[
Turner Perf Chip/Fan Delete/Sparco Strut Tower Brace/X-Brace/JTD Underpanel
Zimmerman X-D Rotors/Axxis Ultimate Pads/Solid Caliper Guide Bolt Bushings
UUC EVO3/DSSR SSK/3.15 LSD/Cosmos Racing CAI V2/ASC Delete
96+ M3 LCA/LCAB M3 RTAB and GC Shims
BMW OEM Alarm/Woodgrain Delete/Blizzaks baby!/16x7 BMW Style 30 Sport wheels
 Posting Permissions


 Reply With Quote


Bookmarks