
 Member
All,
Since picking up the touring last year this project has been on the list off things to fix. I first tried contacting a couple companies about making a replacement bushing but nothing every materialized so I bit the bullet and installed a new assembly. For others who have the same problem I hope this helps. Overall, the job wasn't too difficult and took about 4 hours, including cleaning.
"The Problem"
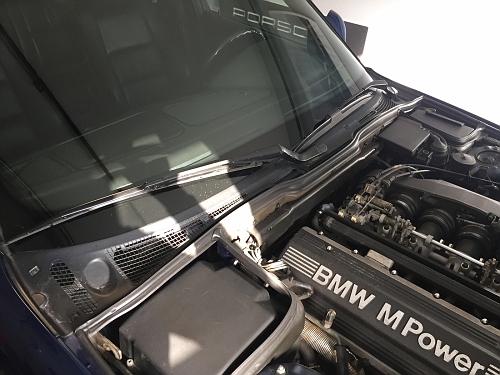
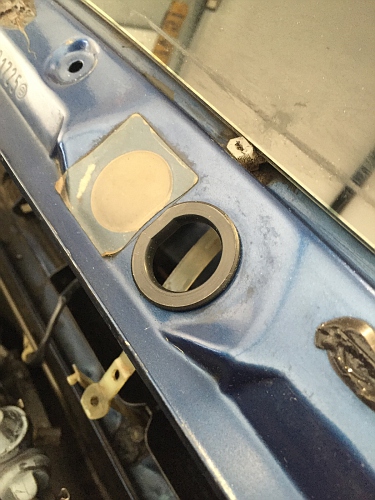
On my car it was the passenger wiper arm was rubbing against the hood.
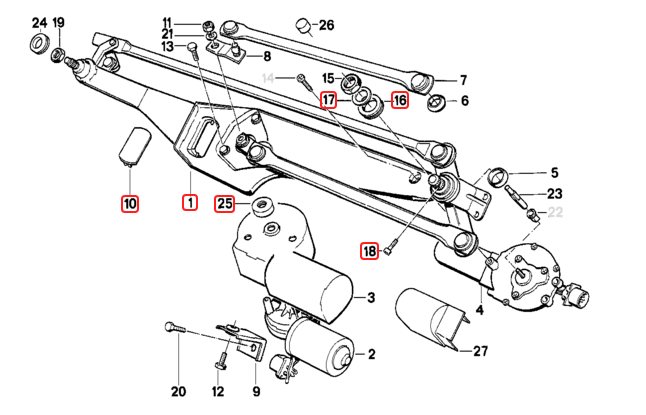
Parts List:
#1 - 61 61 1 388 264 8-Rod Assy 535
#17 - 61 61 1 374 255 Washer (QTY 2)
#25 - 61 61 1 389 528 Covering Cap
#18 - 61 61 1 388 264 8- Fillister Head
#16 - 61 61 1 374 257 Damper Rings (Qty 2)
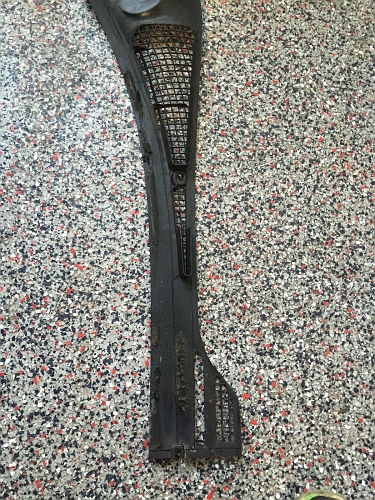
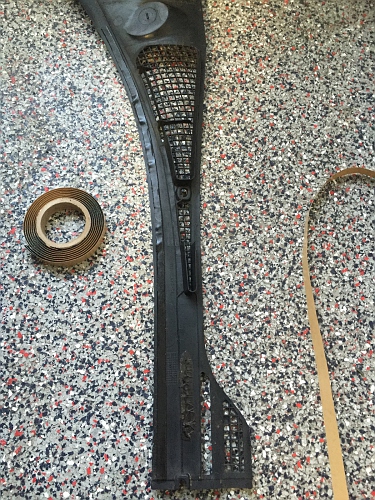
#10 - 61 61 1 Wiper Linkage Cover
NP - 61 61 1 384 978 Passenger Wiper Arm Right
NP - 51 71 1 928 946 Expanding Rivet (Hold lower windshield trim)
Other Helpful Threads:
Cataclysm's Write Up
Scooti / Bimmerick E34 Faulty Copper Bushing in Wiper Linkage!
Removal Process:
Step 1: Remove the wipers. I find a small screwdriver which fits between the shaft and clinch bolt works best on the drivers side.
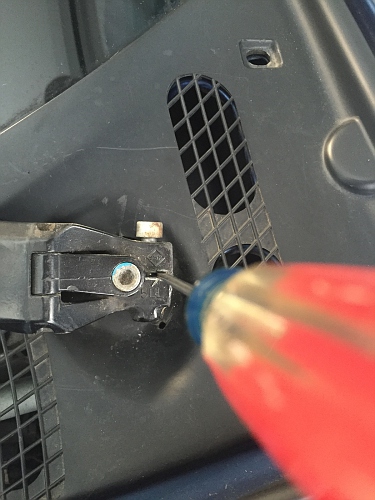
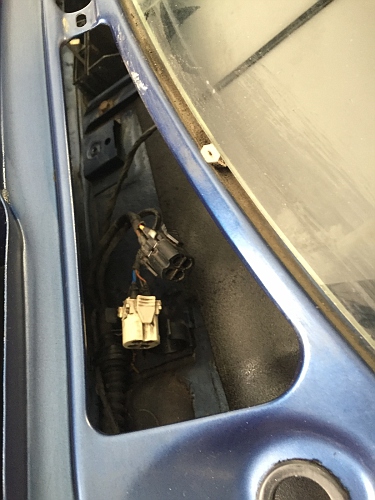
Step 2: Remove the lower windshield trim be releasing all the small clips with a pick.
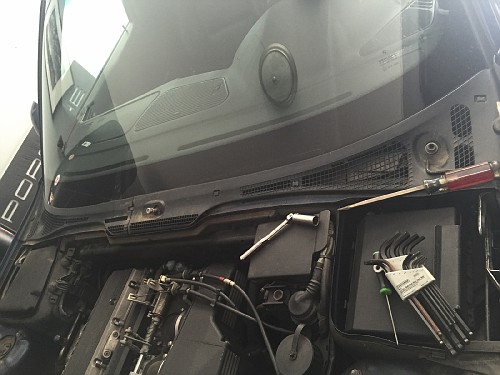
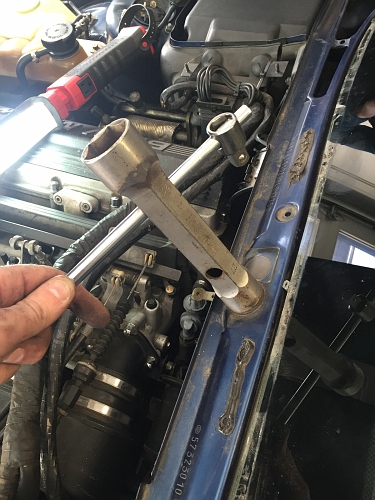
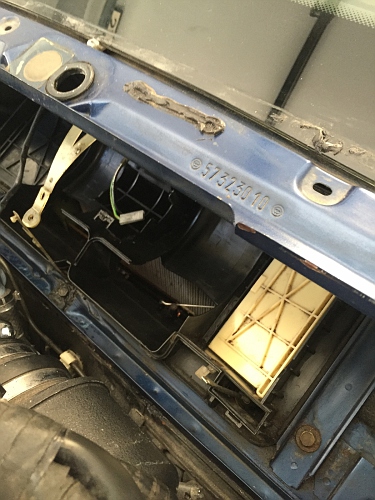
Step 3: Remove the access plate on the firewall. This means you need to disconnect and loosen the wiring harness which goes behind the engine. You will need 10mm & 7mm sockets. For two of the bolts I prefer 7mm & 10mm ratcheting wrenches given the low clearance. Also, I would suggest having a magnet handy to catch the small screws on the bottom.
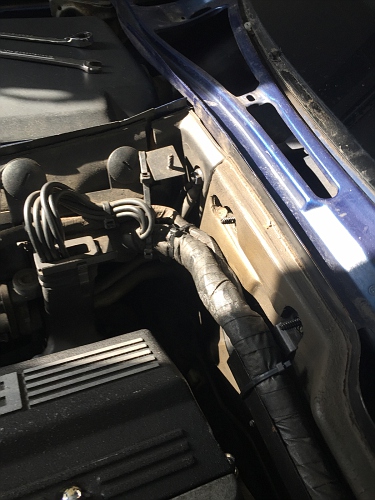
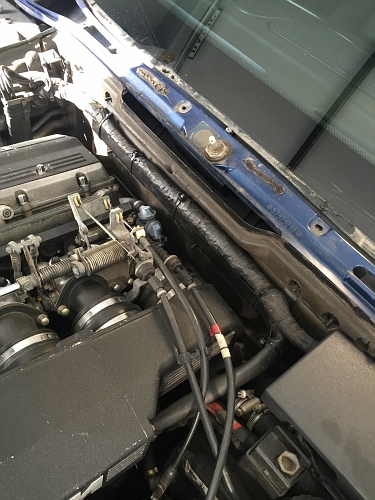
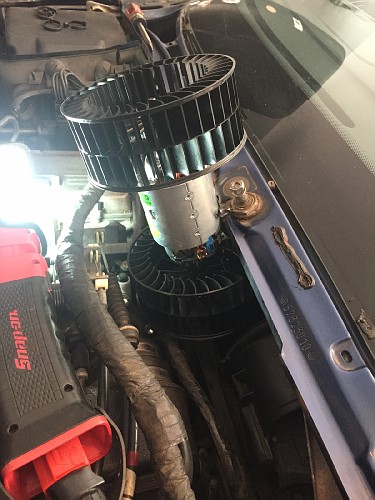
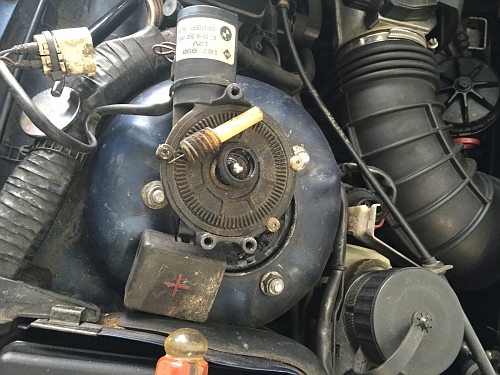
Step 4: Remove the top of the blower unit to gain access to blower motor. Careful not to loose the small springs clips which secure the lid.
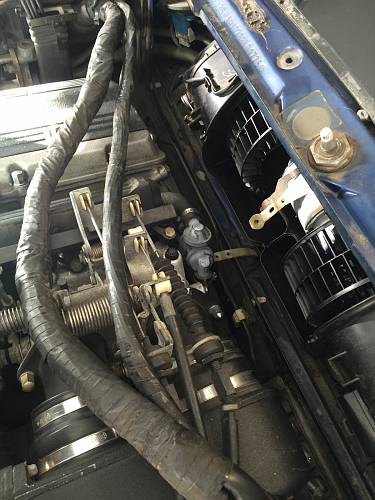
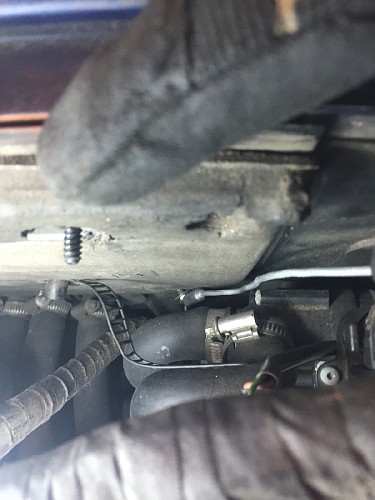
Step 5: Loosen & remove the 10mm nut which holds the PVC check valve in place. You will need this check valve free in order to remove the blower motor.
Step 6: Carefully remove blower motor. I like to take the passenger side first and then pivot the assembly to remove the drivers side. It will take a lot of a bit of force but the blower will come out without damage.
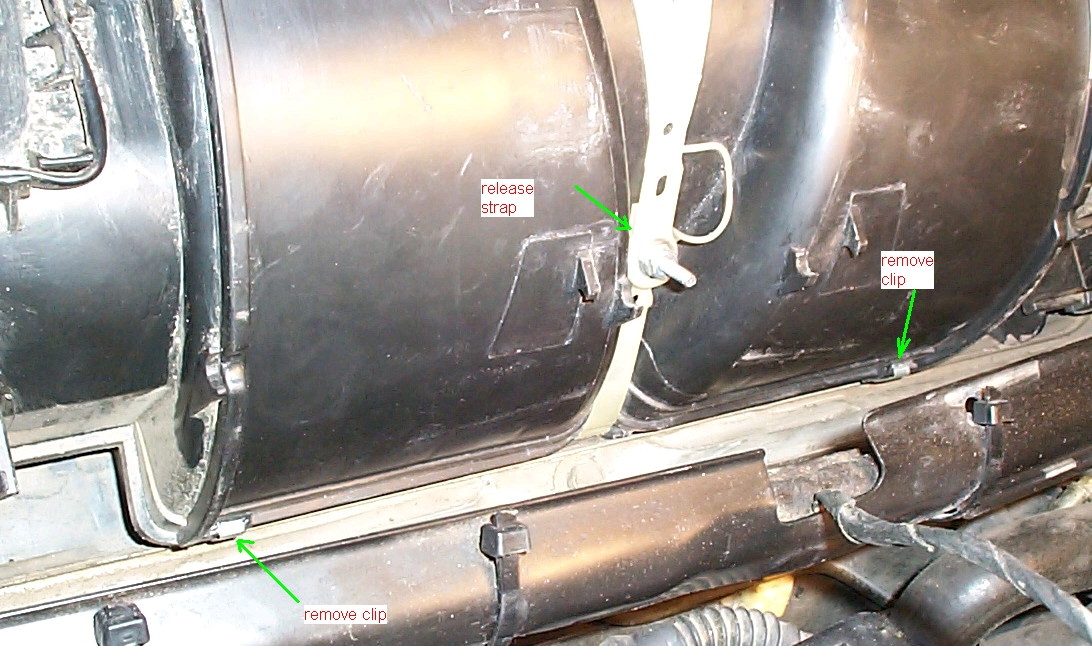
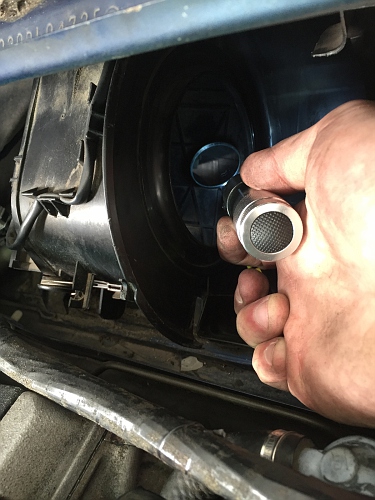
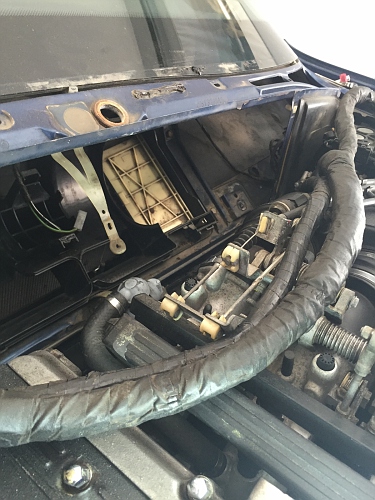
Step 7: Next remove the two clips hidden inside the rear of the blower box which release the back of the top cover. At this point you will need to remove the plastic cover on the front right of the blower housing & disconnect the linkage as well. Also, disconnect the temp sensor on the passenger side of the housing.
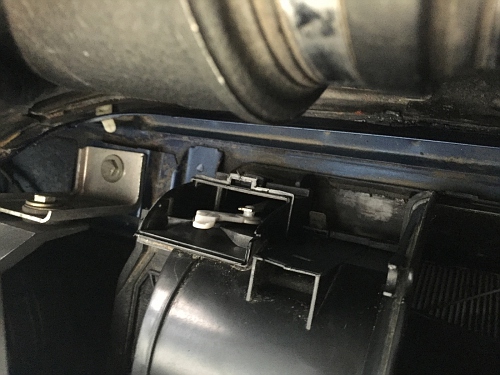
*These are clips in the rear; shown with the top removed here
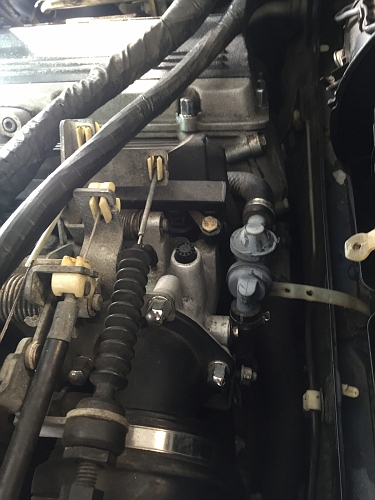
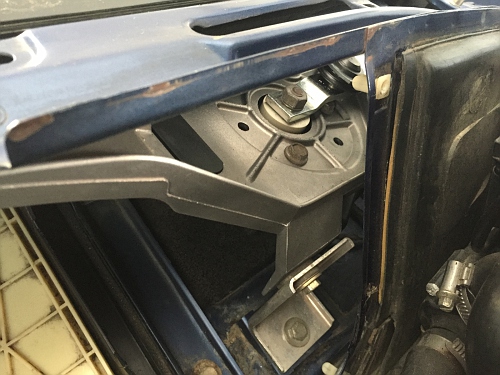
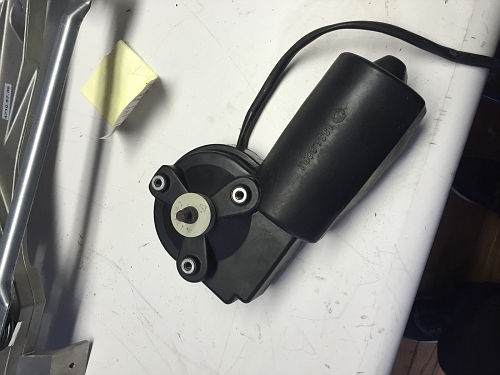
Step 8: With the top cover removed now is the time to loosen the wiper assembly. To remove the arm shaft nut you will need a 27mm. The lower mounting bolts are 10mm; remove both the body mount and wiper assembly bolts. (New Assembly shown)
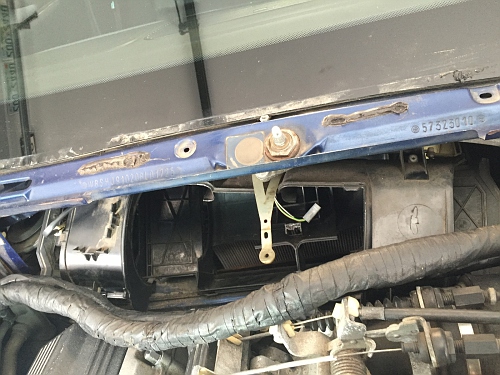
Step 9: With everything removed you should be able to slide the assembly towards the passenger side and remove from the car.
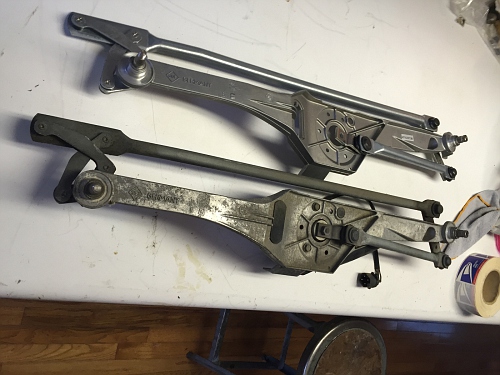
Step 10: Congrats! You are half way there. [Old Assembly vs. New]
Step 11: Disassemble the removed unit and swap the motor into the new unit. (10mm socket is needed to remove the motor)
Step 12: Installation of the new assembly is the reverse of removal. However, I would suggest taking 1hr to clean out the area. 20+ years will create a lot of accumulated grime. During cleaning I found a few fun parts...
The plastic screw was actually the missing part of my AKS system...which I reinstalled & now is working great.
Step 12 Con't: Clean Clean Clean
Step 13: Replace the rubber gaskets which seat around the wiper assembly shafts
Step 14: I would recommend installing new butyl sealant tape on the lower plastic.
Step 14 con't: If your hardware is worn / brittle I would also recommend replacing them with new parts.
Step 15: Enjoy!
Member
I did this job recently. It was pricey but very satisfying afterwards. My wipers were sloppy and the wiper pressure control wasn't working. Sure enough, the linkage was loose. And the AKS motor was in pieces underneath. I replaced the linkage and both motors with new items. After doing this, and setting the wiper angle properly, I have smooth wipers in all conditions that never touch the hood. This is one of the few jobs that is easier on a V8 than on a 6-cylinder car due to the clearance at the back of the engine. Be careful when you're wiggling the linkage out - don't want to scratch the paint around the holes. It can be done without damaging anything.
This is a good time to paint the cowl covers with black trim paint. Or just replace them. They're probably sun-faded.
Last edited by shogun; 02-23-2016 at 07:59 AM.
 Posting Permissions


Bookmarks